Prism Launcher
Before attempting to update your client-side modpacks through Prism, make sure your client-side installation isn't running
Updating a modpack through Prism
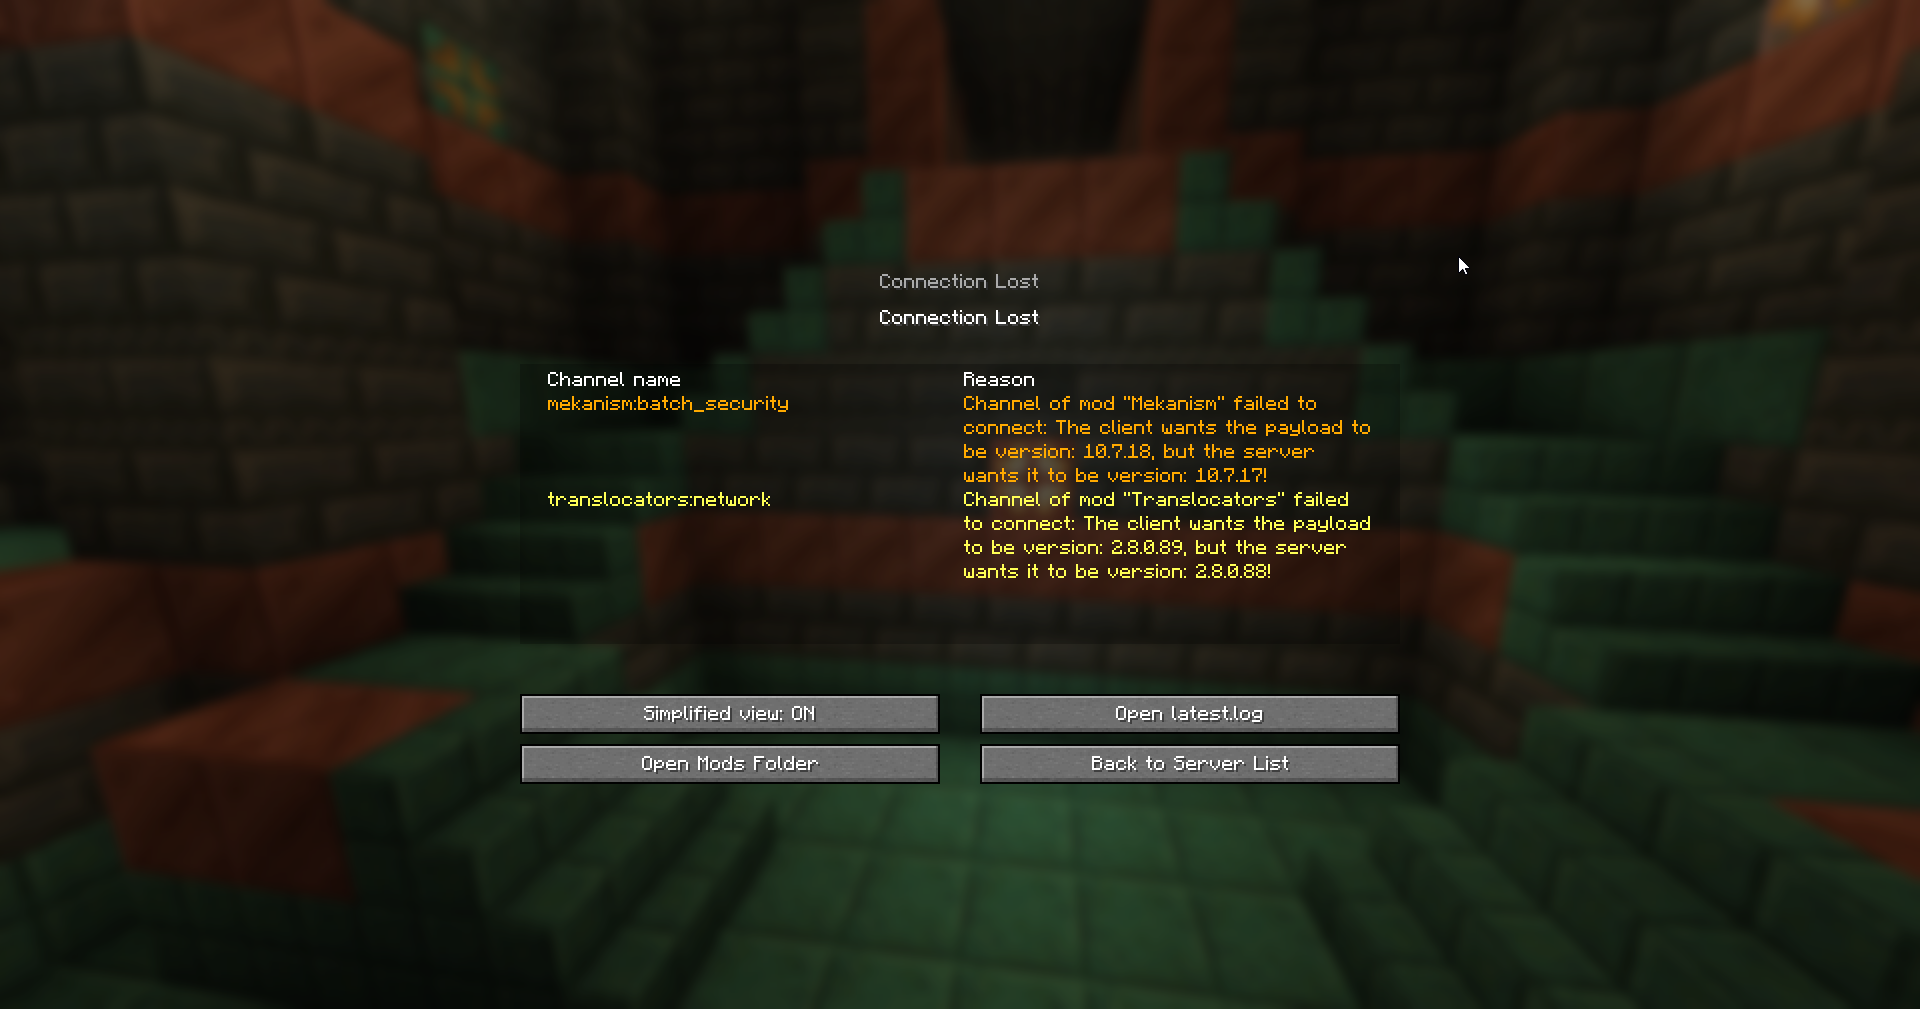
If you have recently updated your server's modpack, you will need to update your client-side mod pack to the same version. If you don't, you will be unable to connect to your server, getting a mod version mismatch error, similar to what you see below.
To rectify this, start by opening the Prism launcher, then:
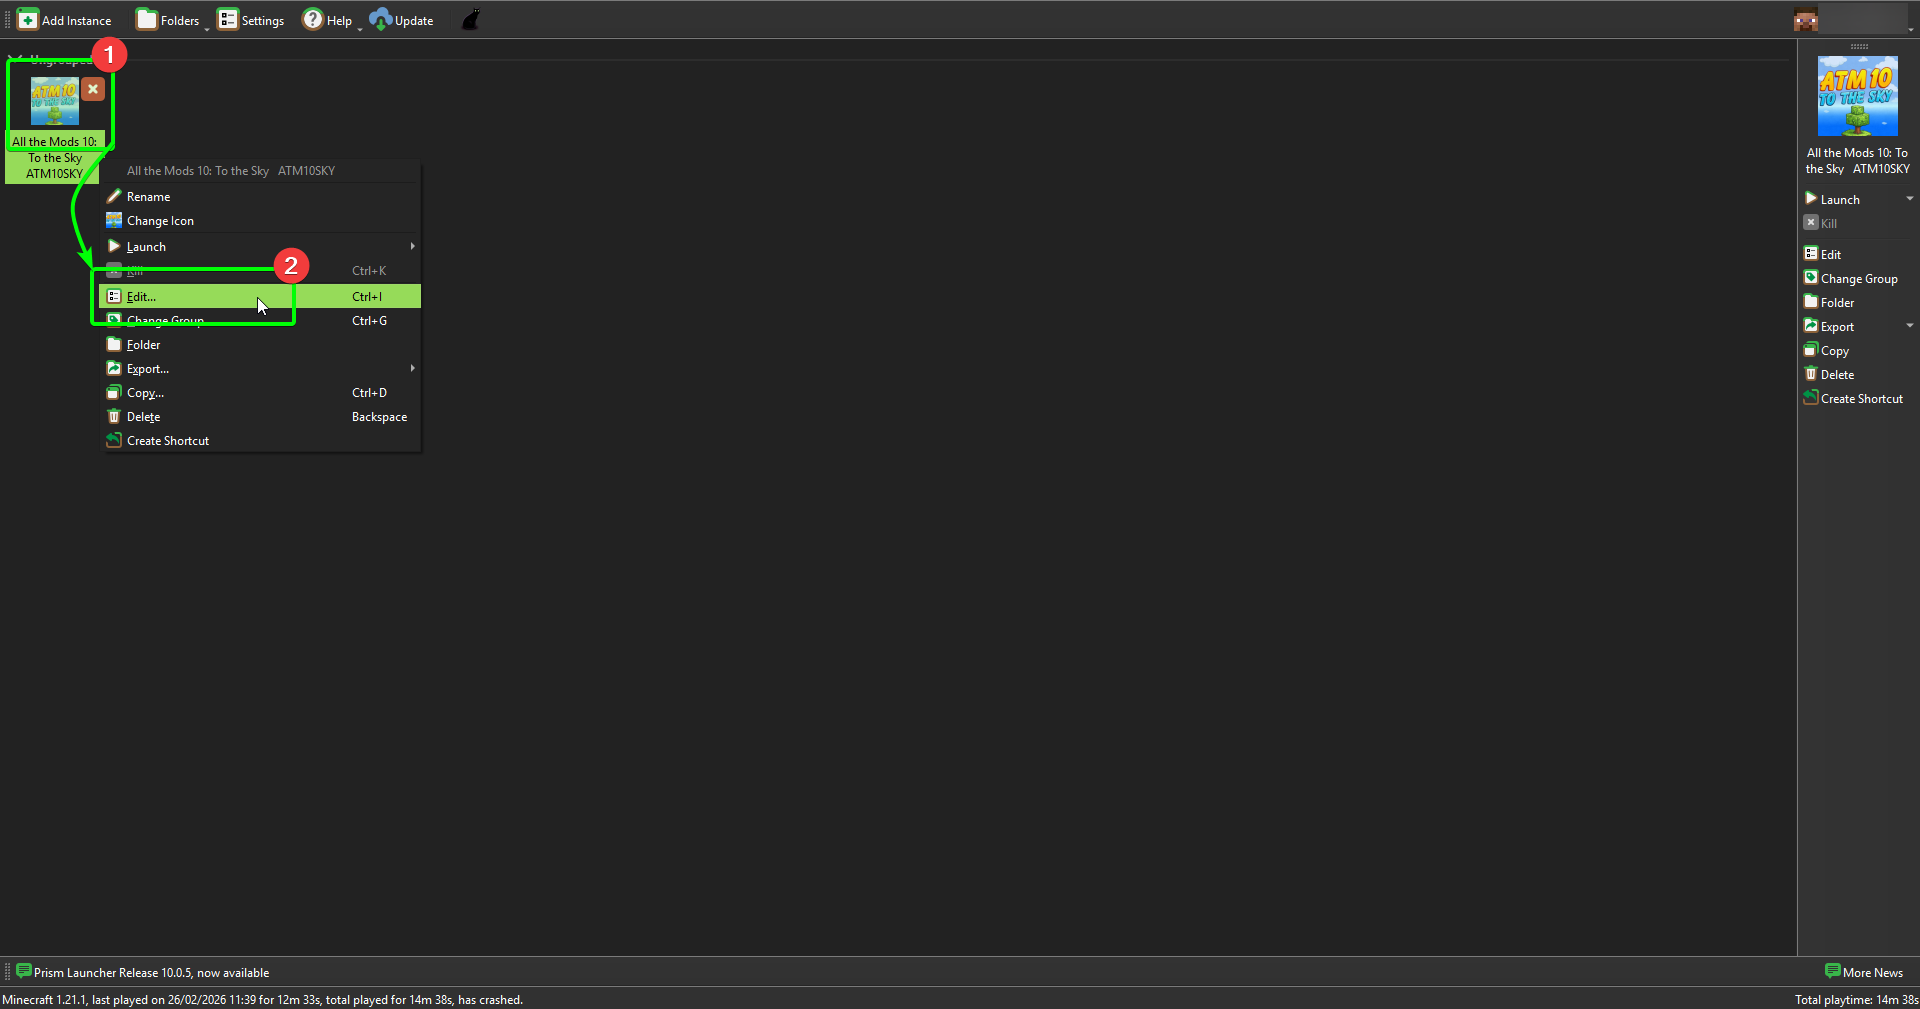
- Locate the instance you wish to update, and right-click it.
- Select
Editfrom the menu to open the settings window for this instance.
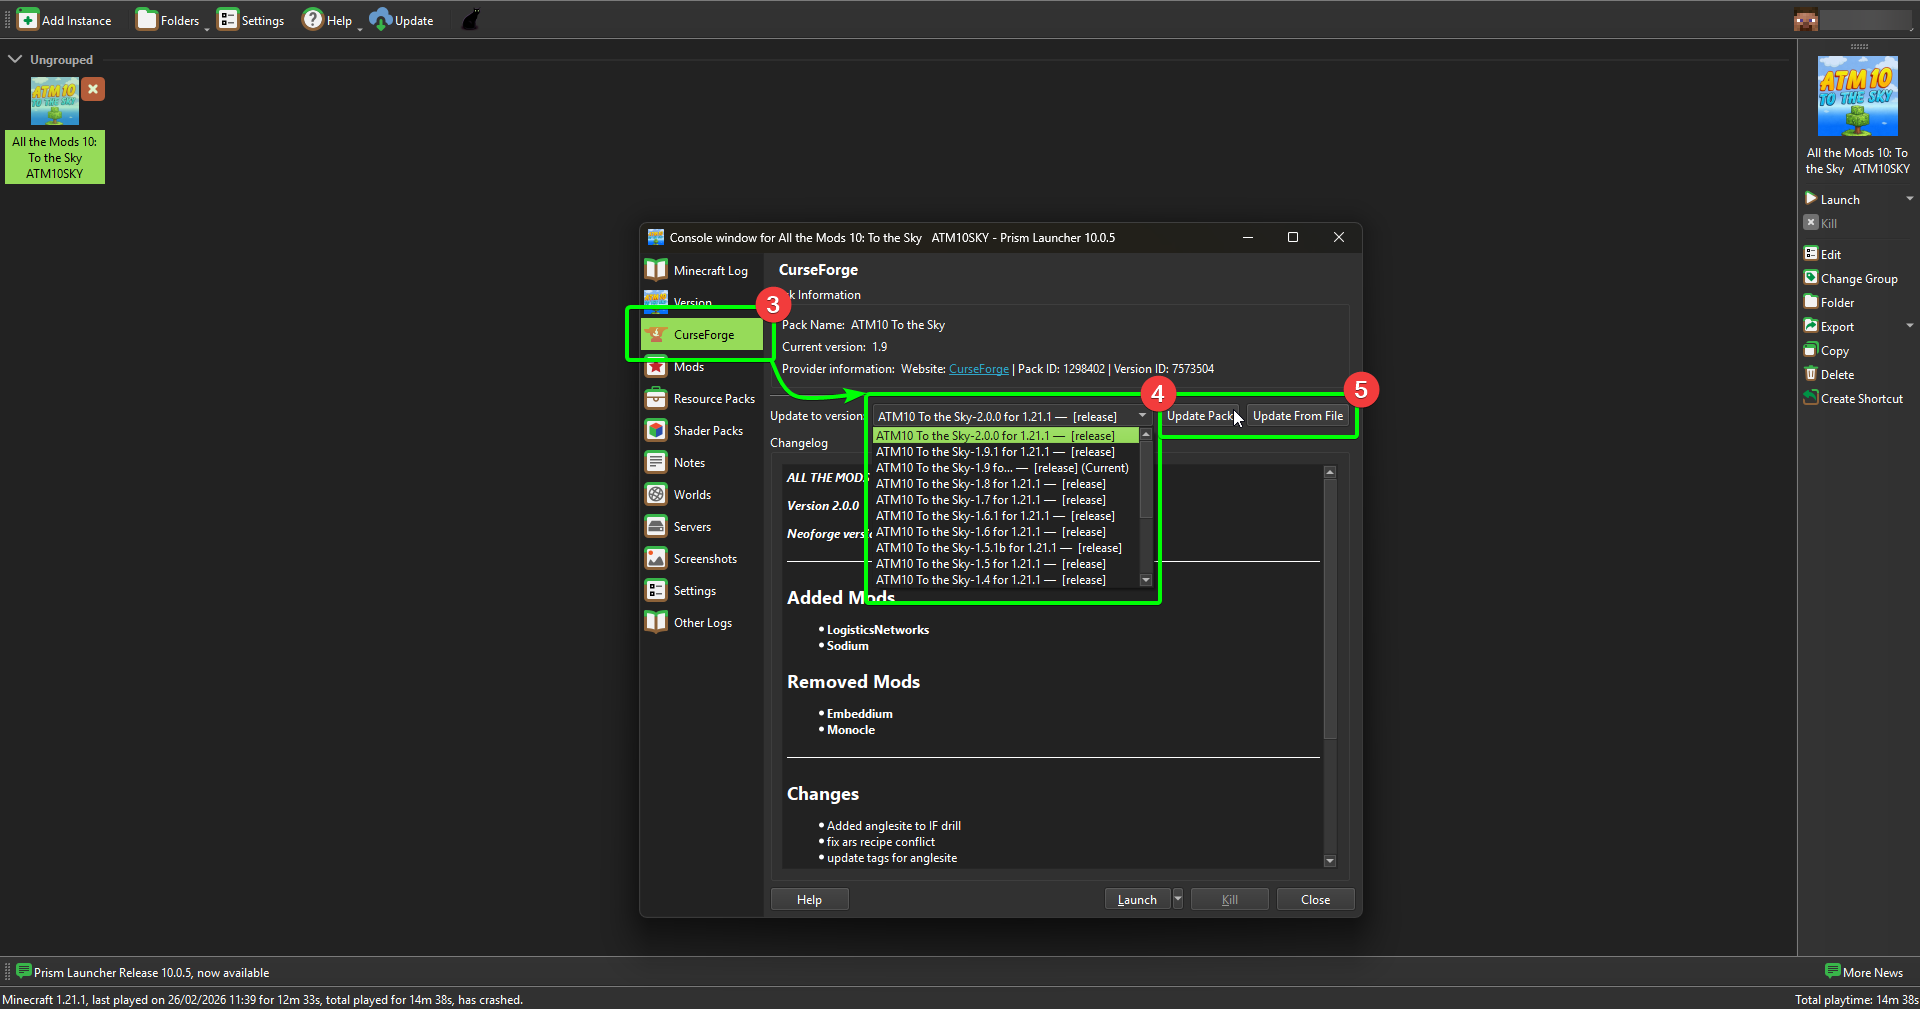
- In the window, select
CurseForge. - Open the
Update to versiondropdown menu, and select the version that matches your server's installation. On the CreeperPanel, you can find this by selecting your instance - your version will be displayed under your server's name. - Select
Update Pack. If you have manually downloaded the.ZIPto your client, selectUpdate from Fileand follow the instructions.
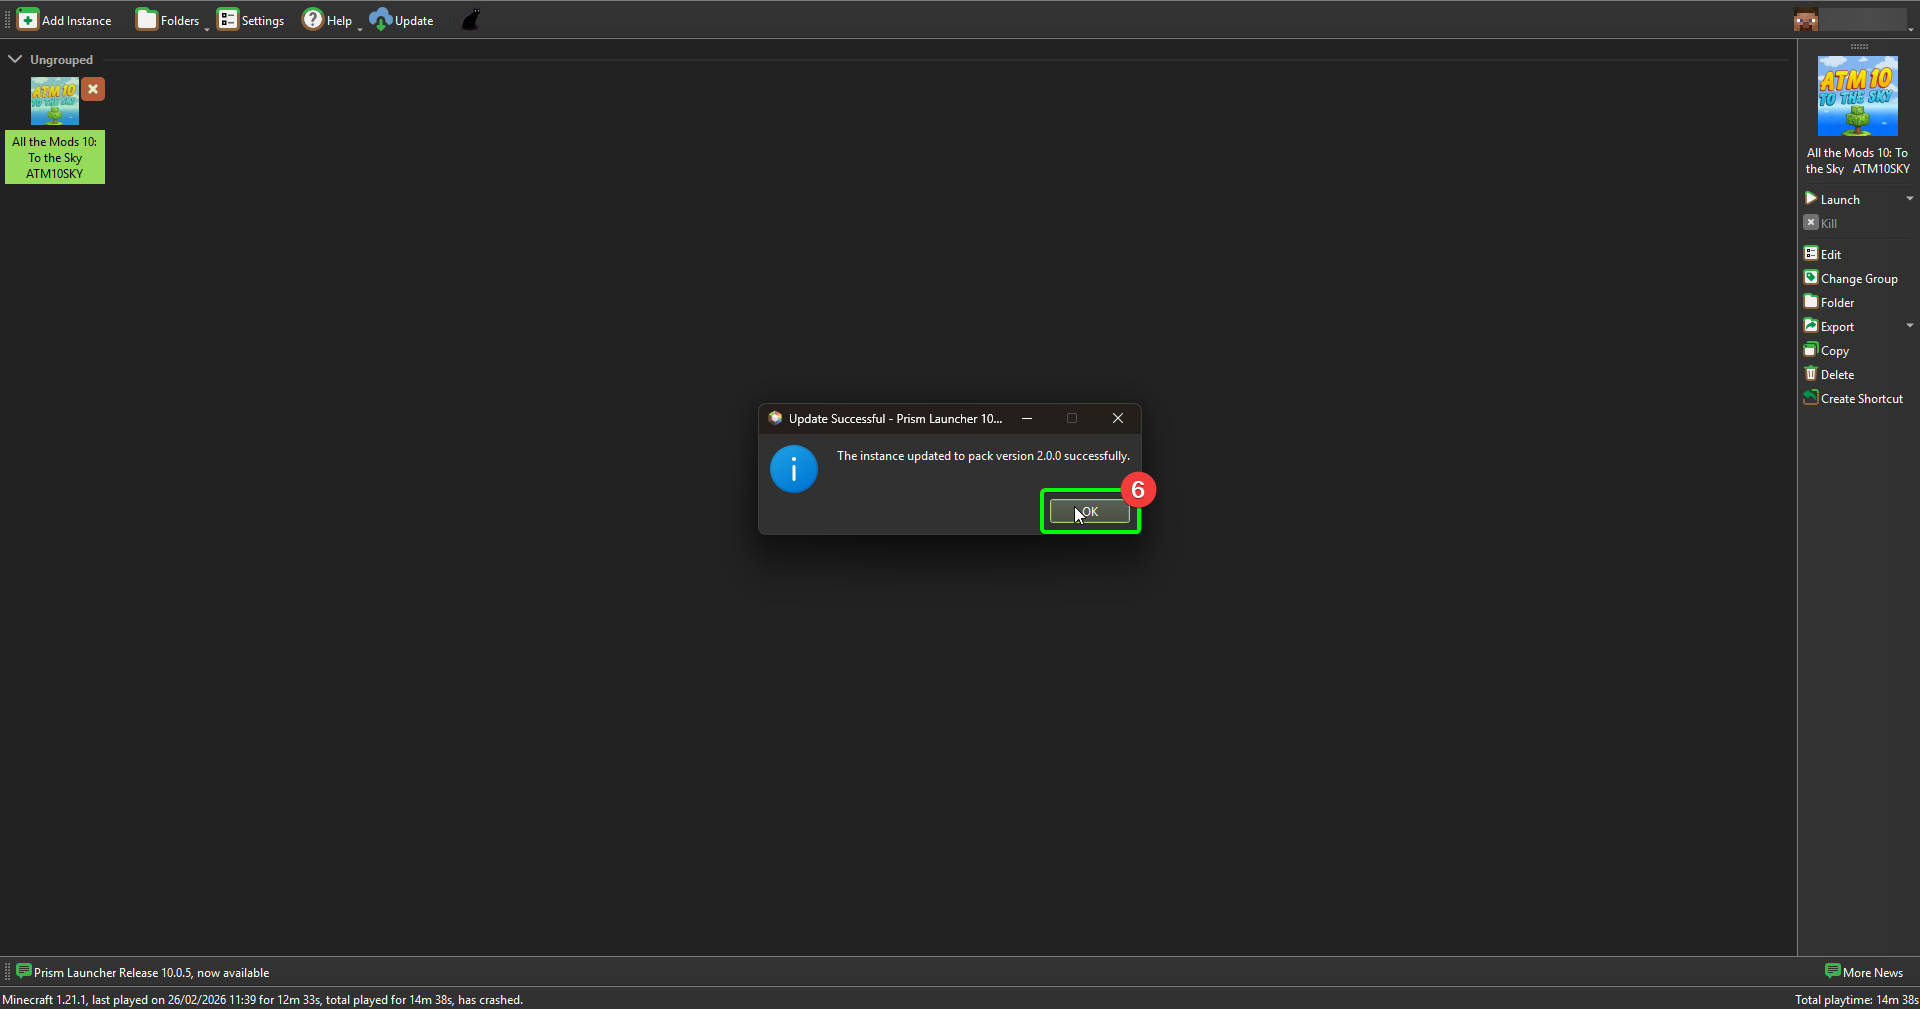
- The Prism launcher will inform you when the update is complete. Some modpacks may require you to download certain mods manually - the launcher will inform you which mods fall into this category.
That's it! You should now be able to connect to your server without issues. Remember, any time you update your server's mod pack, you will also need to update your client-side installation!
Retrieving Logs from Prism
On the rare occasion you need support with your service, you may be requested by our Support staff to upload your client-side logs. You'll need to configure some settings in Prism before you're able to upload them; this part of the guide will cover how to configure these settings, as well as show you how to upload your logs.
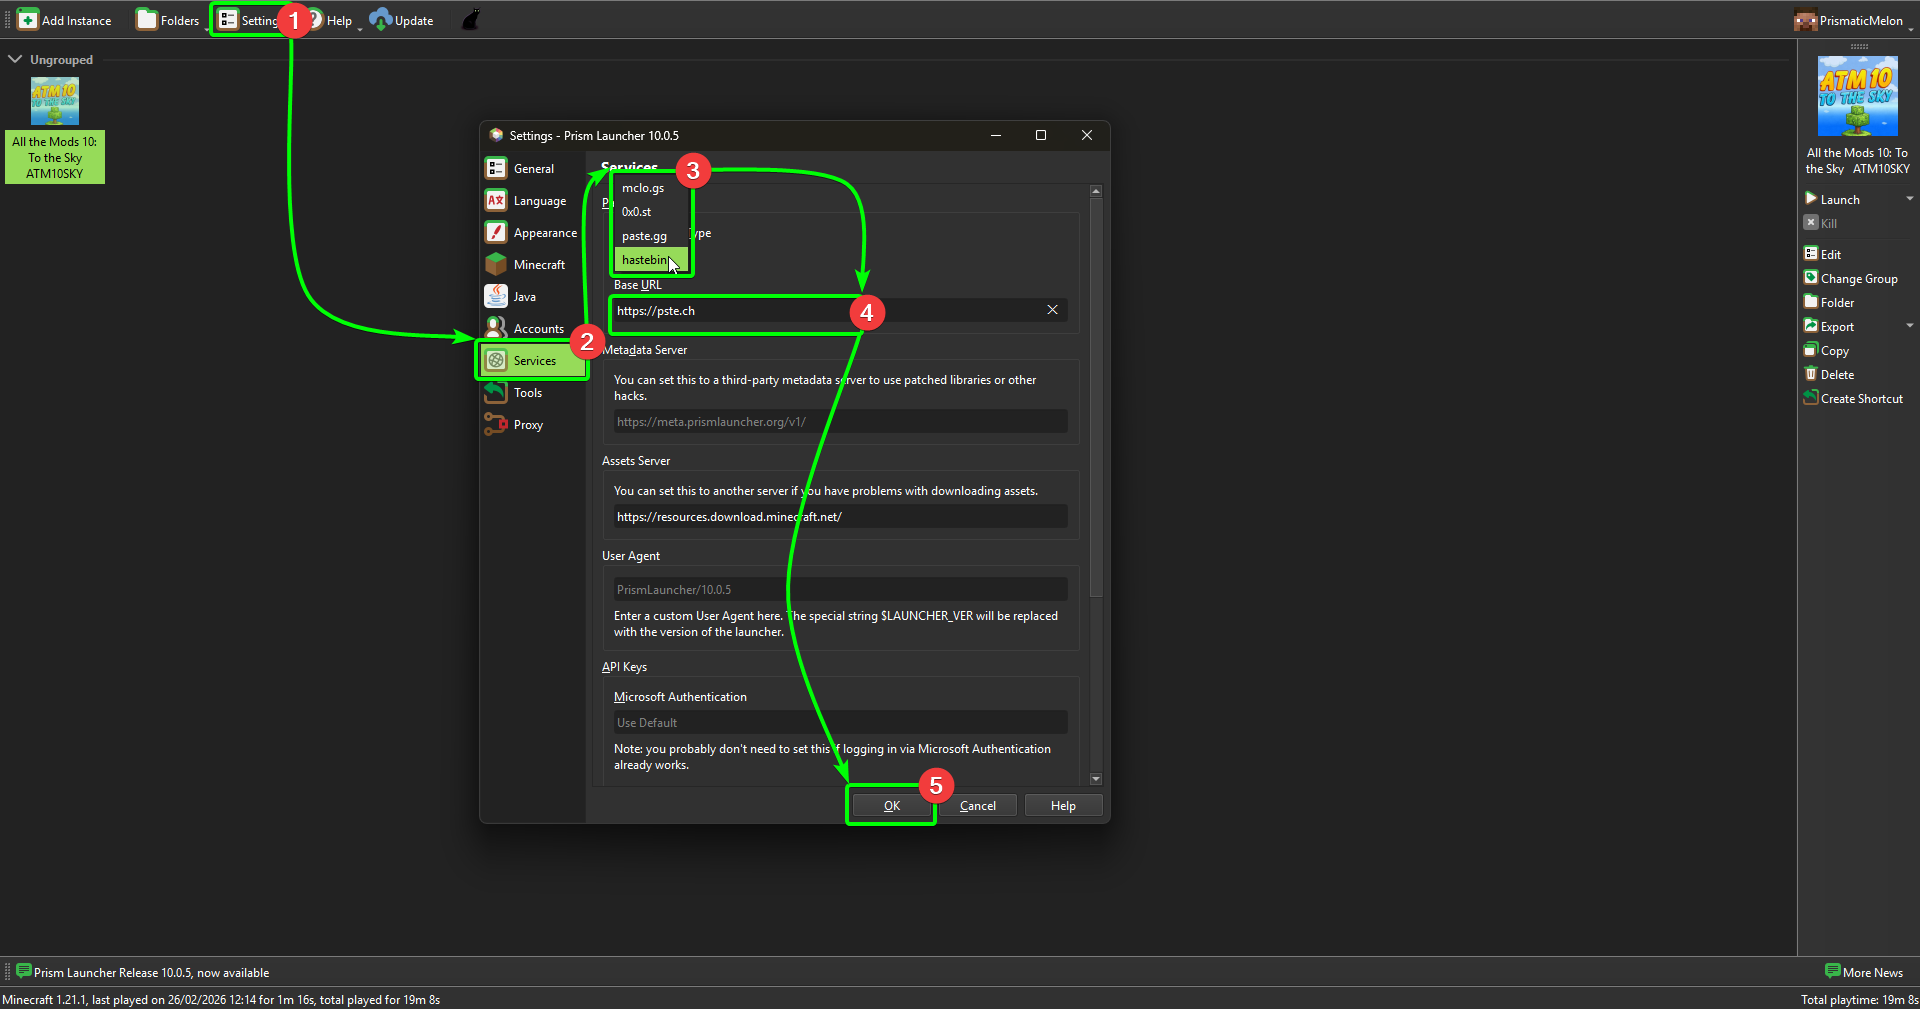
Configuring your Export Settings
To start configuring your settings;
- Select
Settingsin the top menu. This will open a separate window. - Select
Servicesfrom the sidebar. - Open the drop-down menu under
Paste Service Type, and selecthastebin. - In the
Base URLfield, enterhttps://pste.ch - Select
OKto save your configurations.
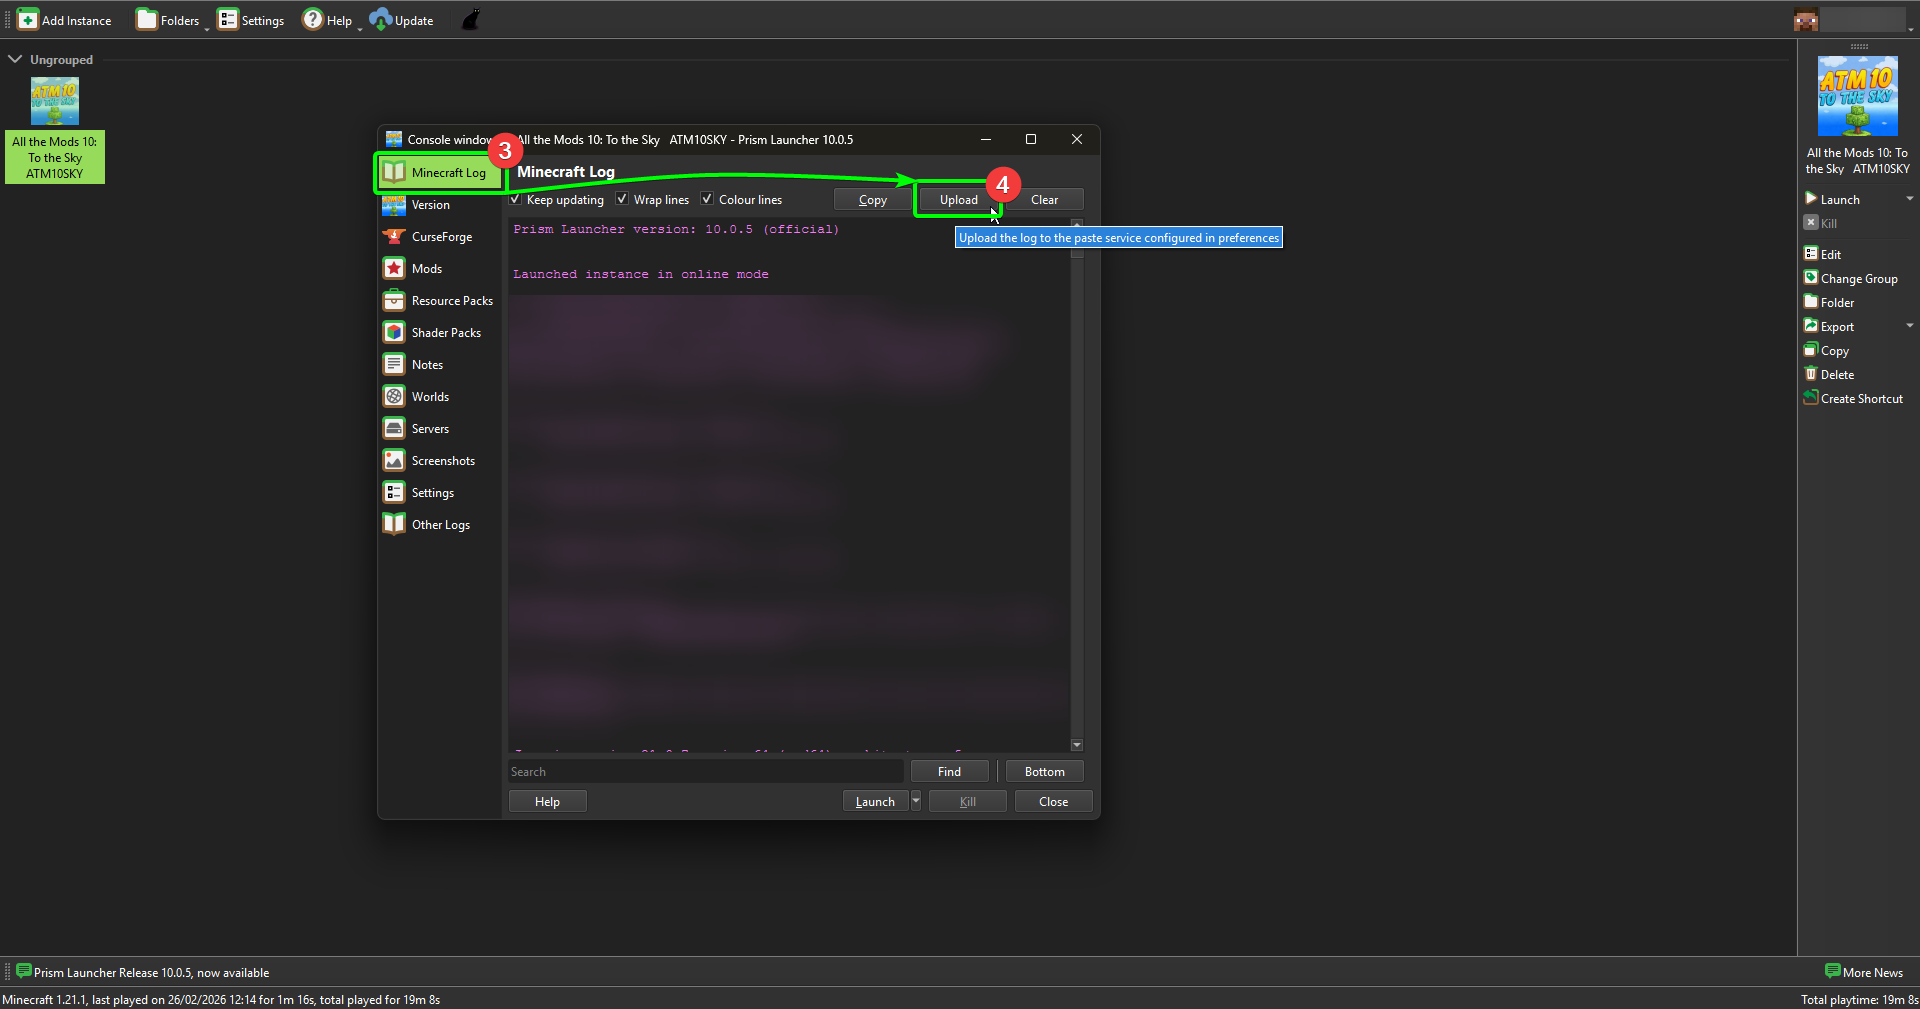
Exporting your Prism Logs
Awesome - you're ready to export your client-side logs! Head back to the main Prism window, then;
- Right-click the instance you're using, then
- Select
Editfrom the menu.

- Select
Minecraftfrom the sidebar, if it isn't already. You should see your most recent log displayed in the window. - Select
Upload.
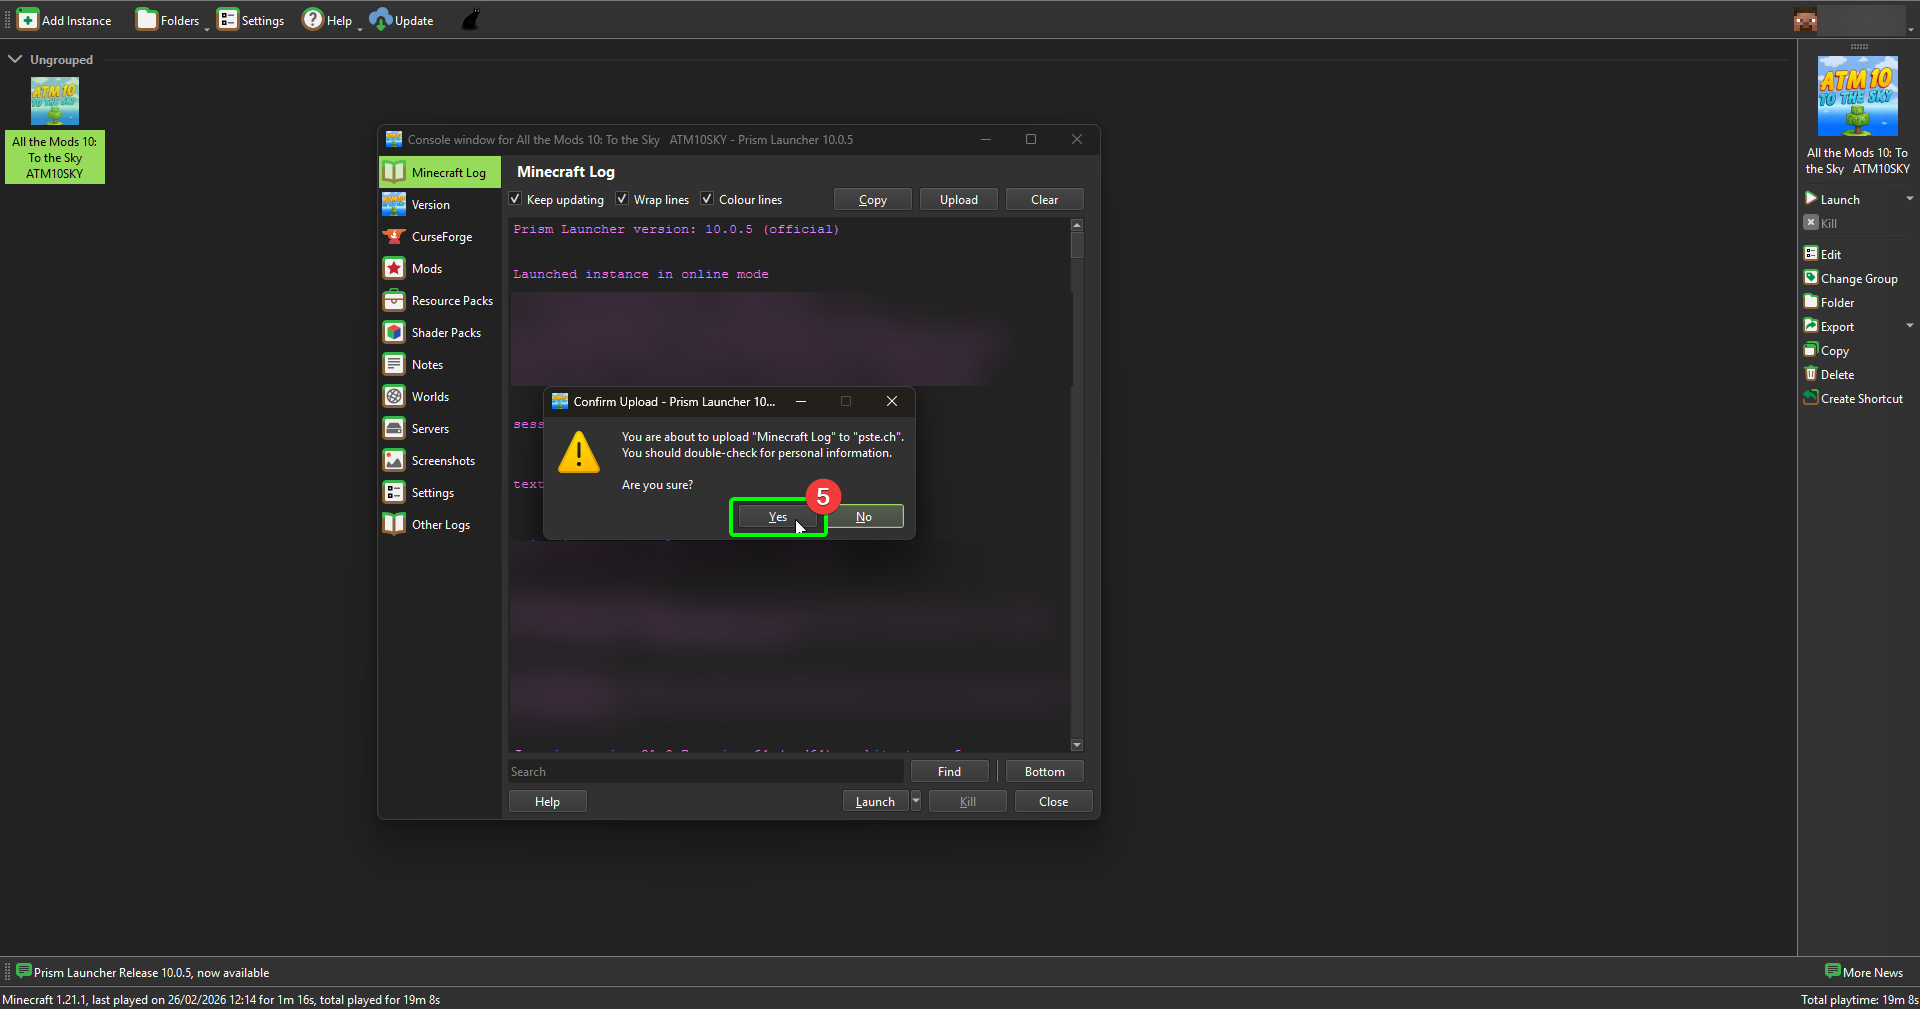
- Prism will ask you to confirm your upload. Select
Yes.
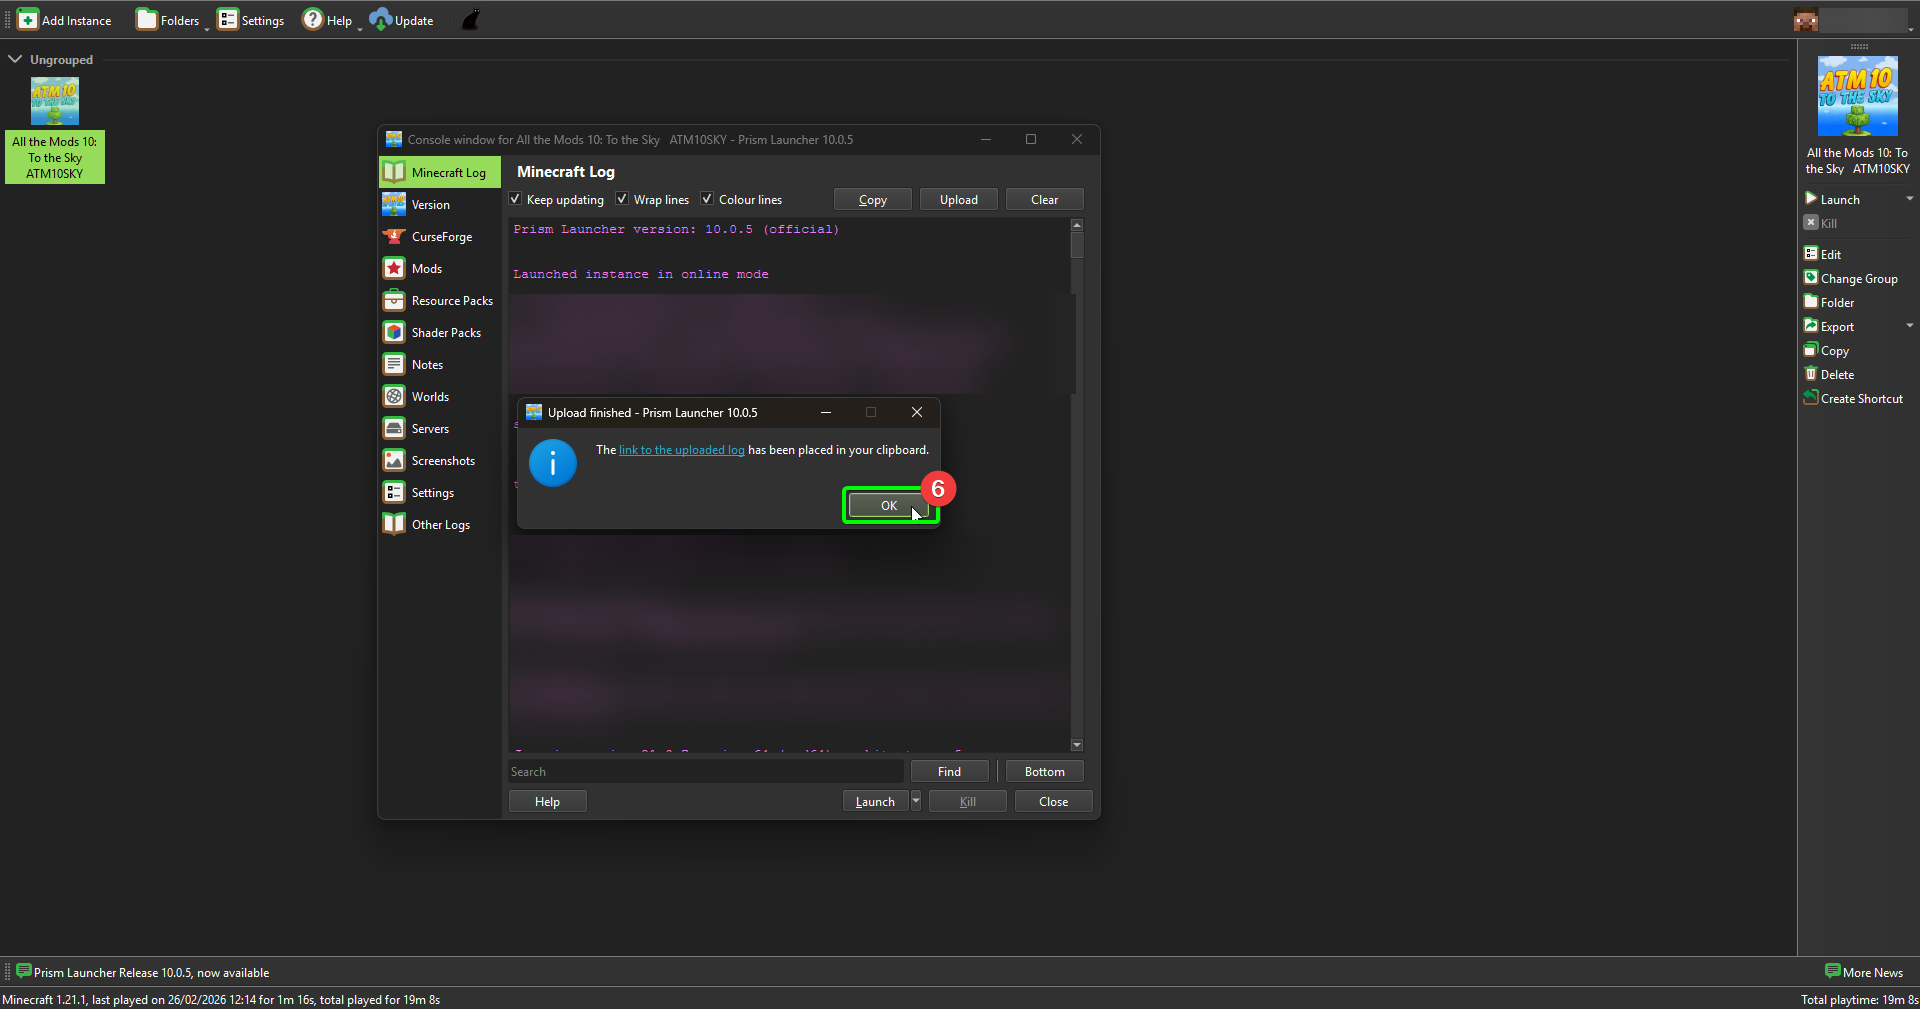
- Prism will inform you when the upload is complete, and will copy the URL directly to your clipboard. Select
OKto close the window.
- To confirm the link is working, open a new browser window or tab, and click on the address bar.
- Paste your link, and hit enter.
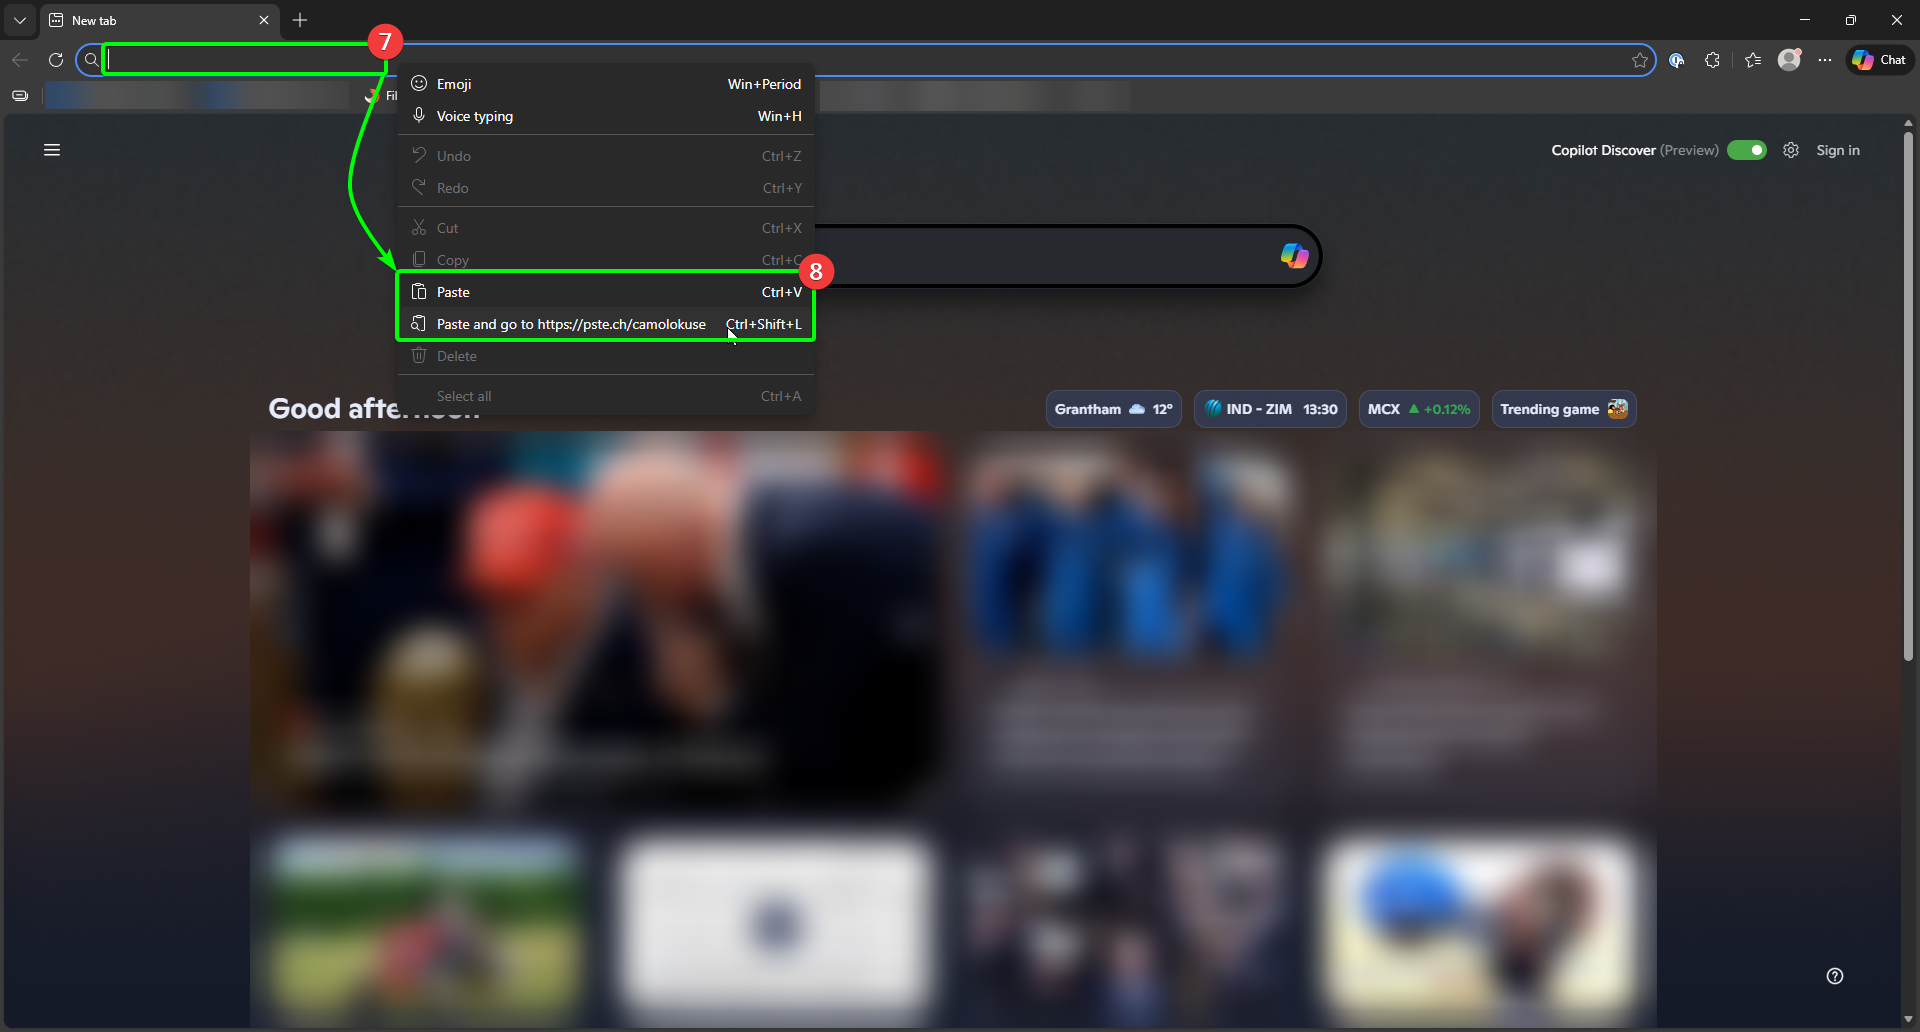
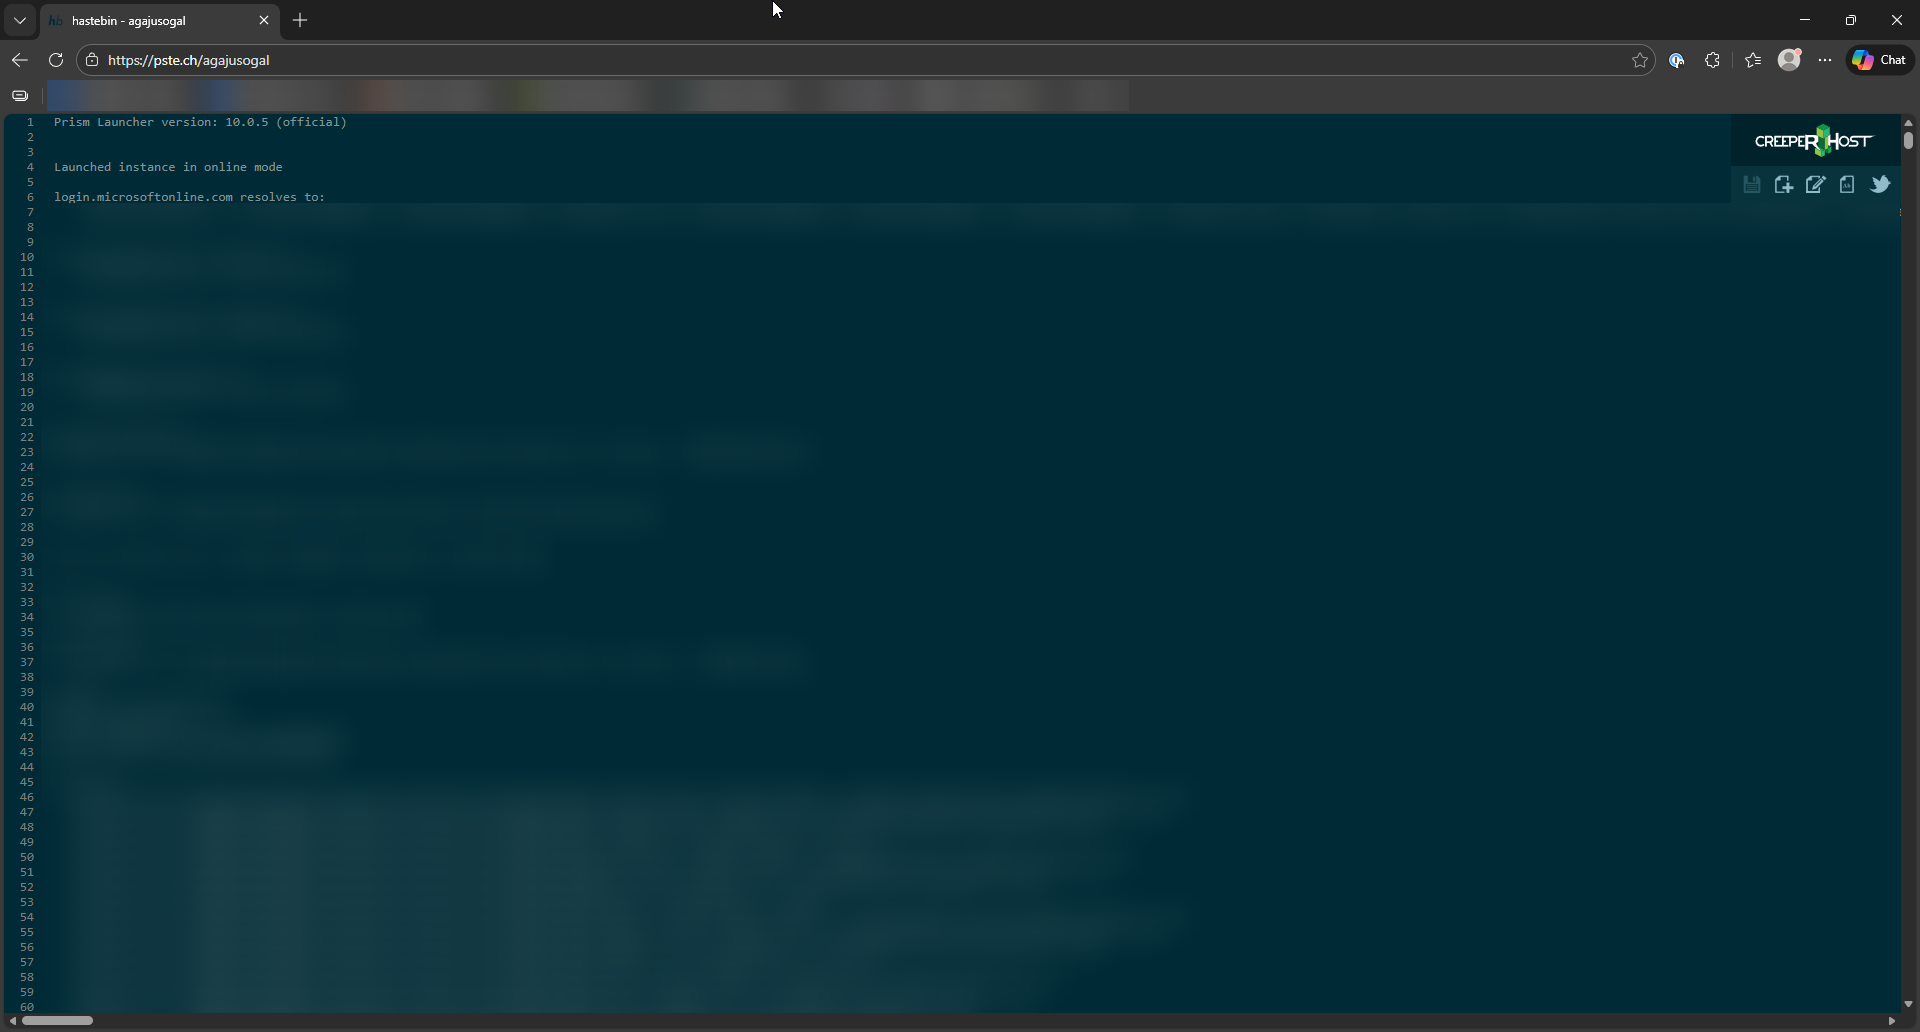
You should now see your exported log in your browser.
That's it - you now know how to export your logs for others to view them!