Creating a new Minecraft server
Start with the Minecraft version or modpack your group wants to play. Everyone should use the matching version on their own computer.
Create your instance
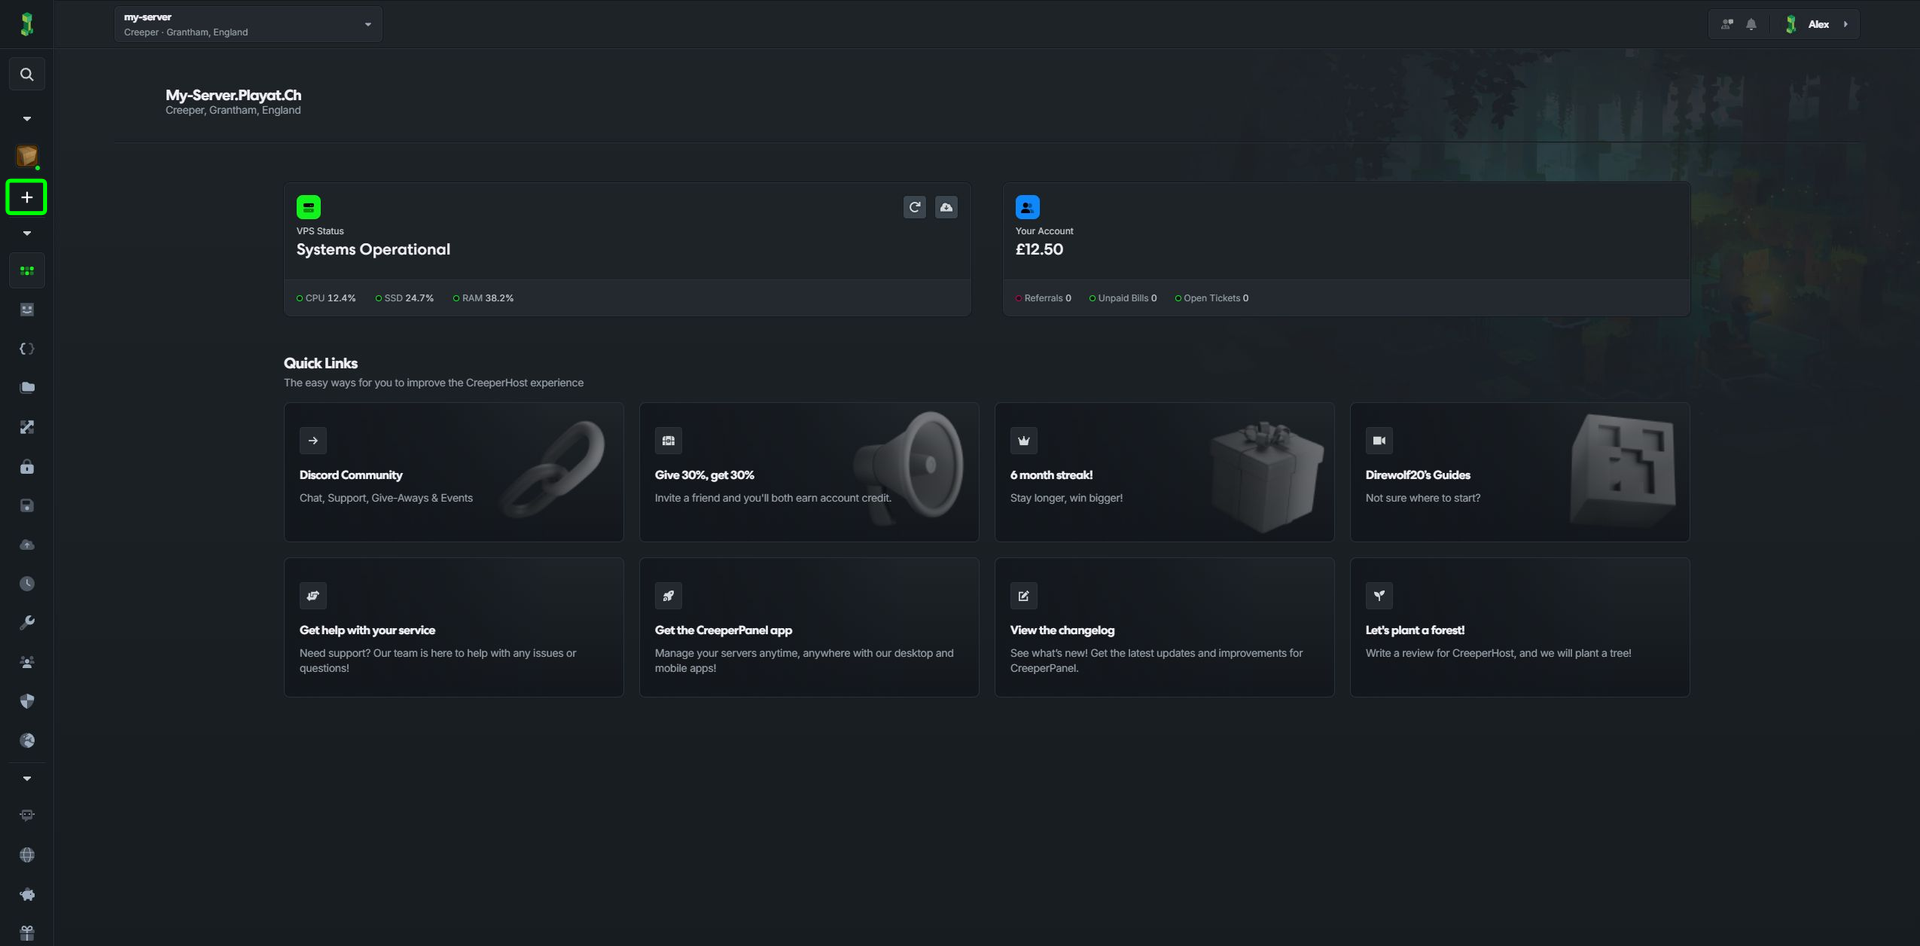
- Select Add More in CreeperPanel's sidebar. In compact navigation, use the + button.
- Choose Minecraft Java, give the instance a name and select Create.


Choose what to install
Your new instance opens Versions & Modpacks. There are two tabs:
- Modpacks lets you browse packs or search by name. Narrow the results by Minecraft Version, Tag and Loader. More Filters includes the source, availability and release channel.
- Minecraft Versions is for Vanilla, server software and mod loaders. Choose the Minecraft version and Server Software / Loader you want.
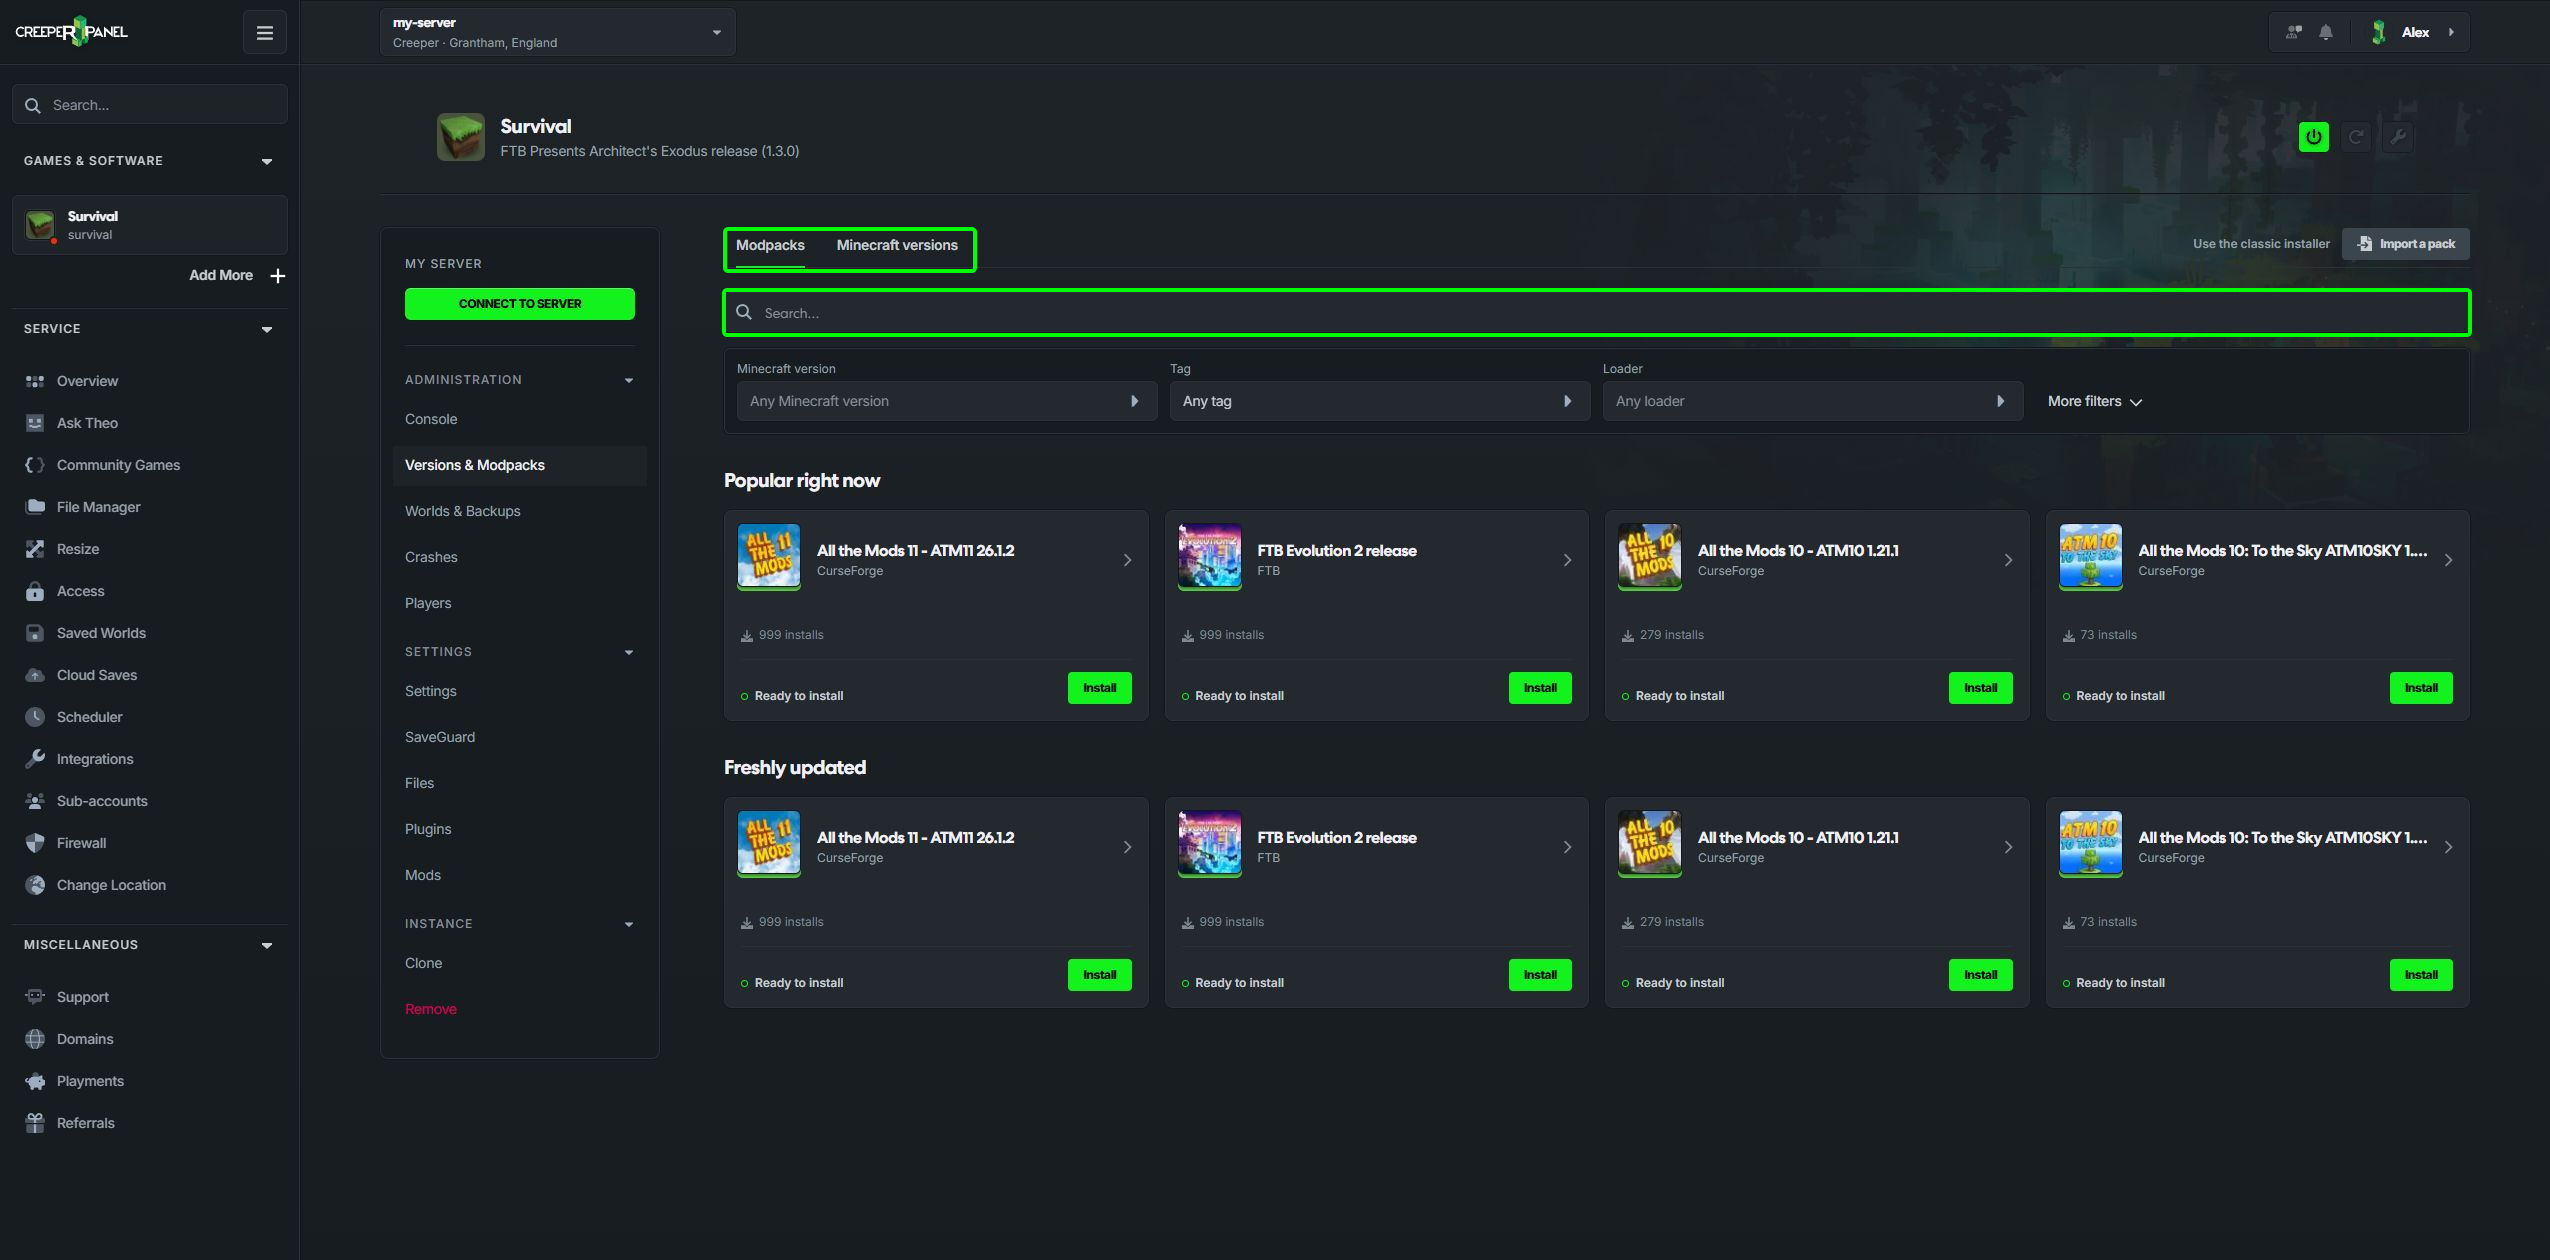
Select a card to open its details. Check the Minecraft version, loader and memory information, then find the build you want in Versions and select Ready to install beside it. The Install button at the bottom uses the suggested version. You can filter the build list or load more versions.
Read the confirmation and any resource warning before continuing. A large pack needs enough memory and disk space to run well. Wait for installation to finish, then start the server and check the Console before joining.
If you cannot find a build
Try clearing filters or selecting another release channel. Some packs offer a request to make them available; follow the prompt and check back later. If a provider could not be checked, use Retry. A failed lookup does not necessarily mean the pack is unavailable.
Use the Classic Installer remains available at the top of the page. For your own shared pack, choose Import a Pack and follow the CurseForge or Modrinth guide.