Uploading your Single Player save to your Windrose server
Before uploading your single player world, make sure you switch your instance OFF to prevent data loss/ corruption.
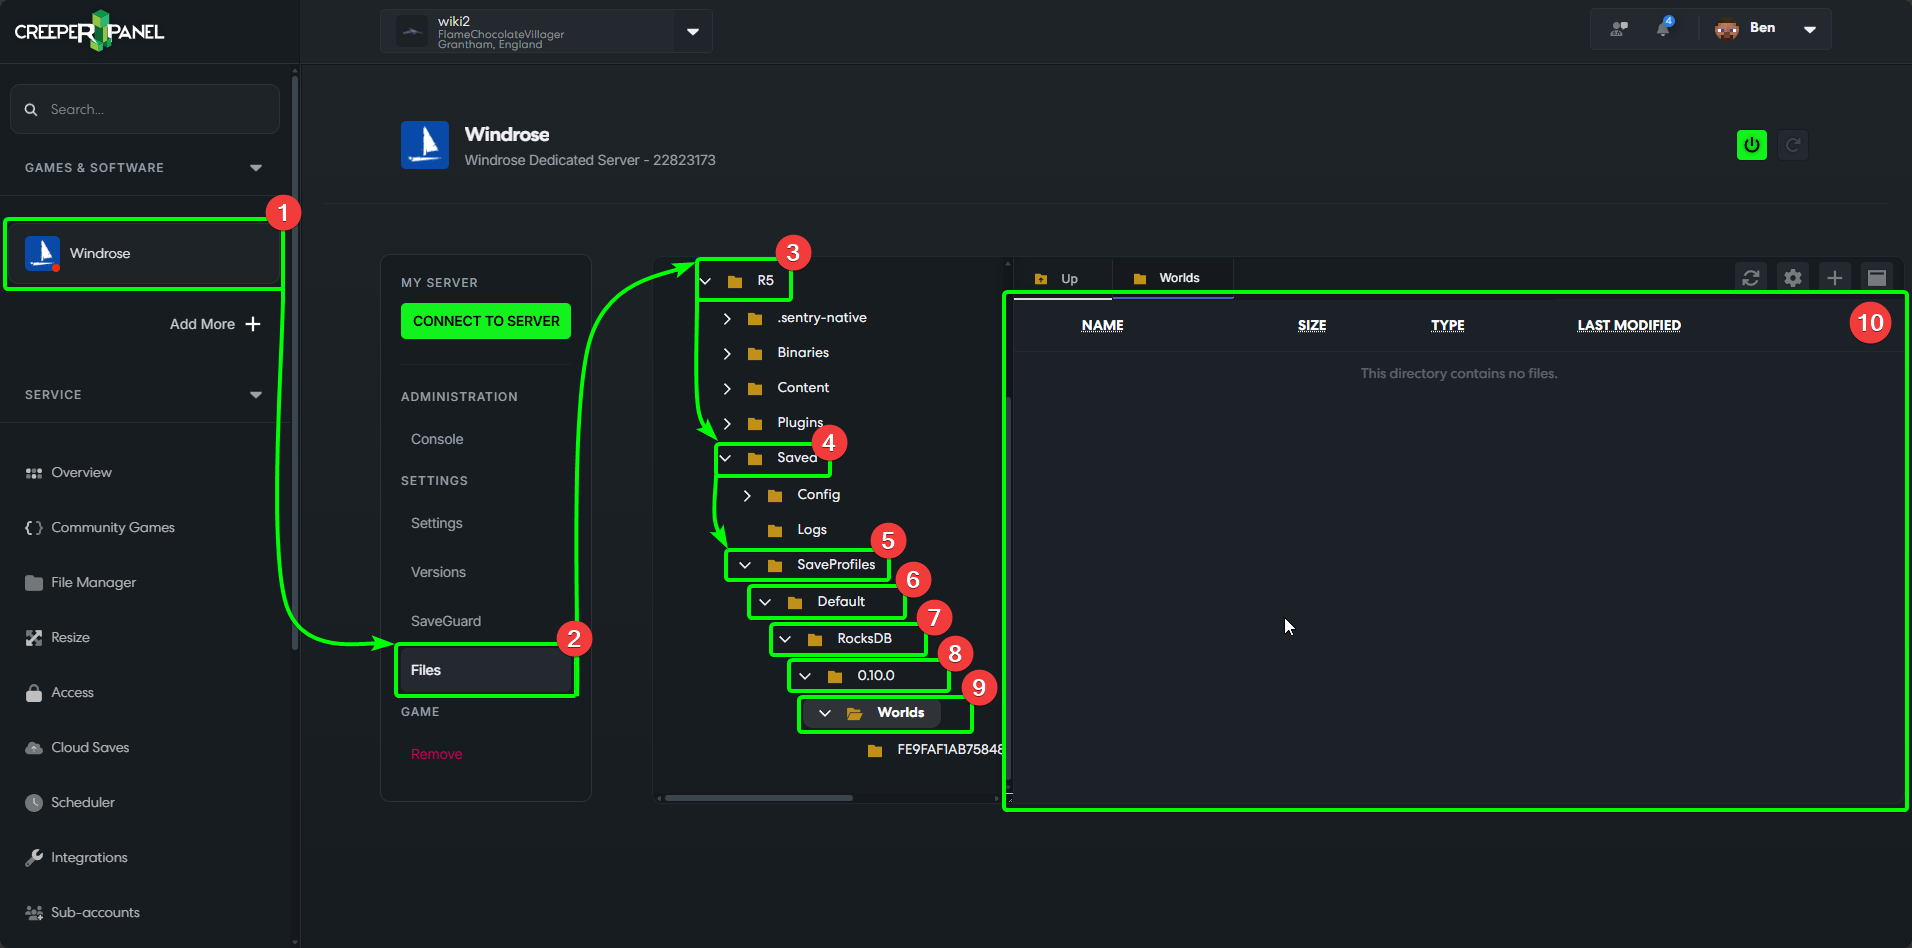
This guide will take you through uploading your single-player world save to your Windrose server. To get started, we'll prepare the Panel for uploading our file. First:
- Select Windrose under
Games & Softwareon the CreeperPanel. - Next, select
Files, found underSettingsin the instance's sub-menu. - Navigate through the directories as follows:
R5 SavedSaveProfilesDefaultRocksDBVersion number- this folder is subject to change dependent on the game's version: this example uses 0.10.0.Worlds- You should now see an empty directory in the main window of the File Manager.
Next, you'll need to locate your local save you wish to upload. Press Win+R, and enter %LOCALAPPDATA%\R5\Saved\SaveProfiles. Open your Steam or Epic ID folder, then RocksDB > 0.10.0 > Worlds. You should now see your local world saves.
Now we need to prepare the world to upload to the Panel - it must be in .ZIP format, else you won't be able to upload it to the Panel.
- Right-click the world you wish to upload, then,
- Select
Compress to, then .ZIP File.
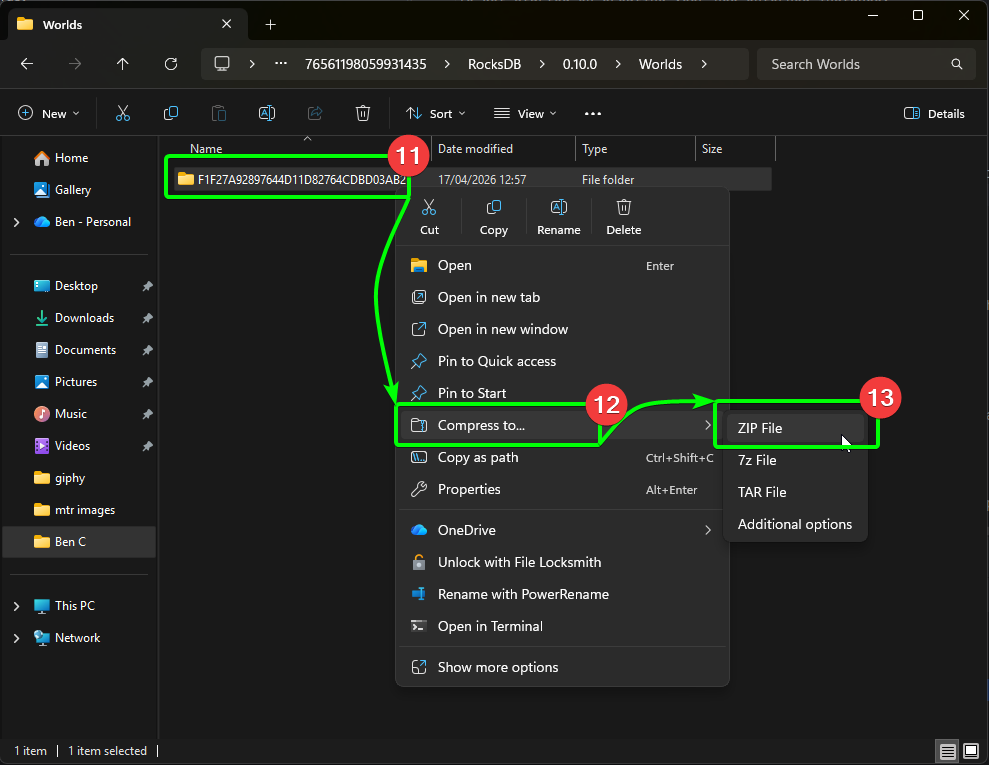
- Select your newly created
.ZIParchive, and then, - Drag-and-drop it into the open directory on the CreeperPanel.

- Right-click the uploaded file in the CreeperPanel, then
- Select
Extract.
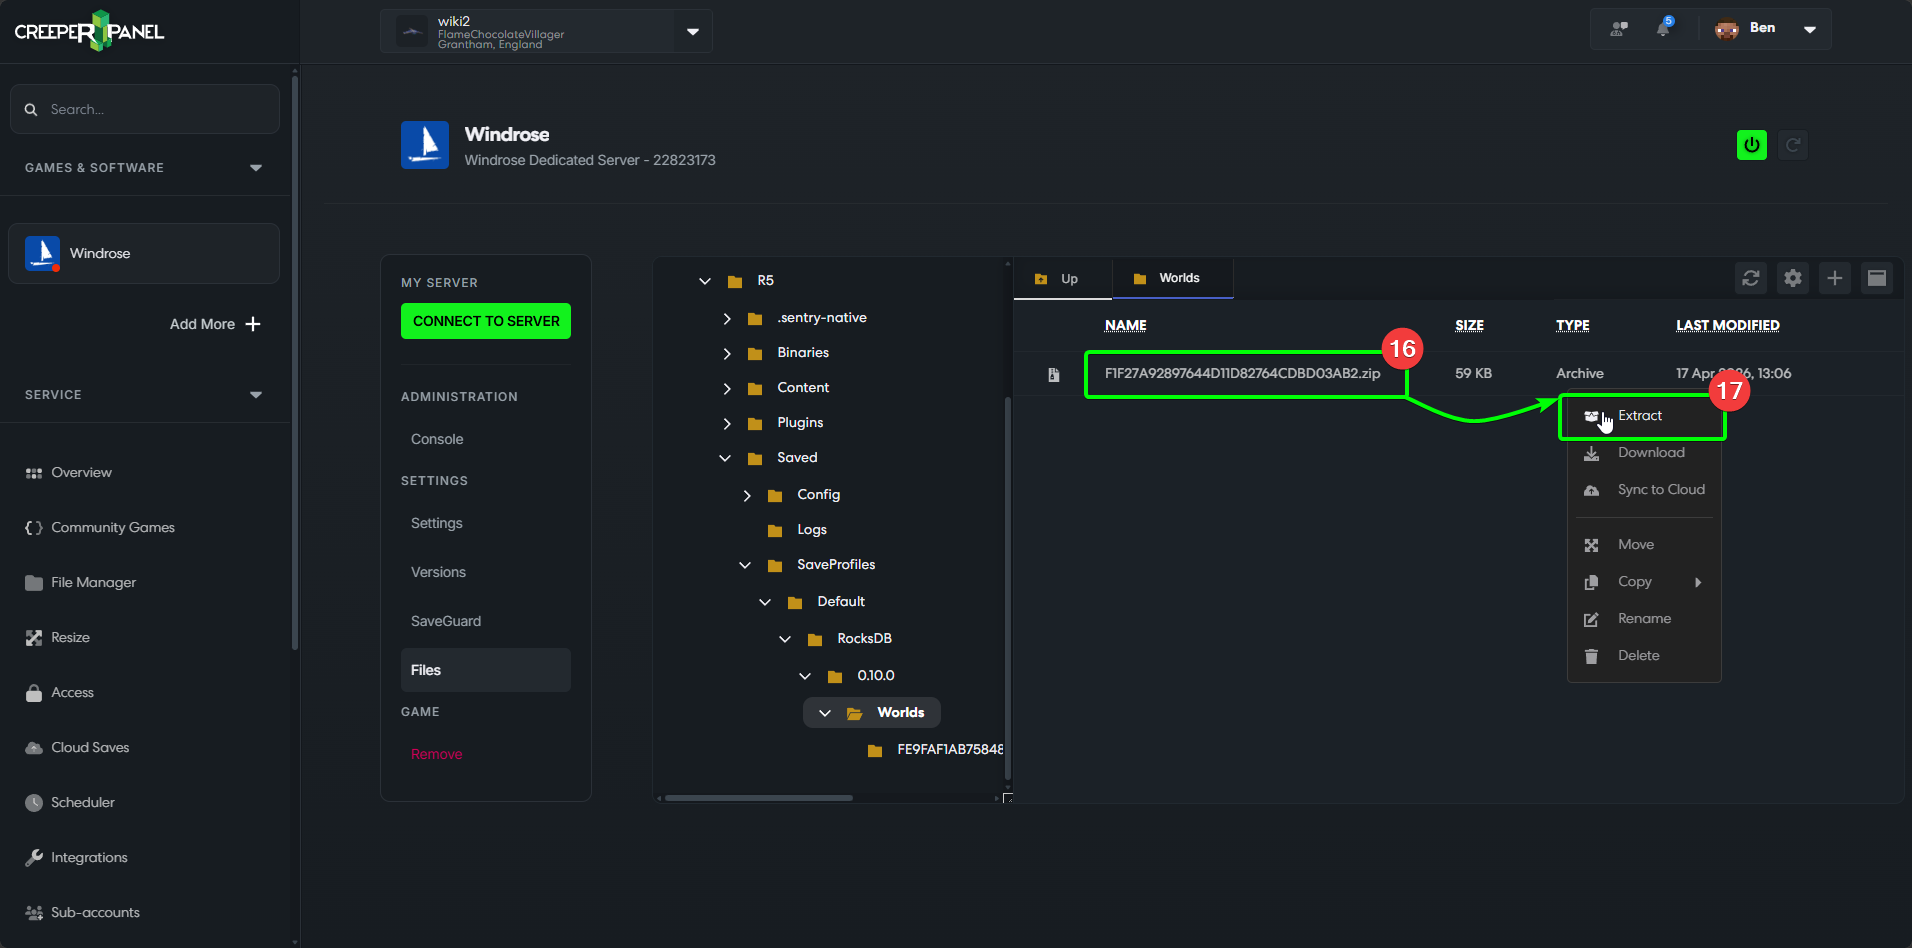
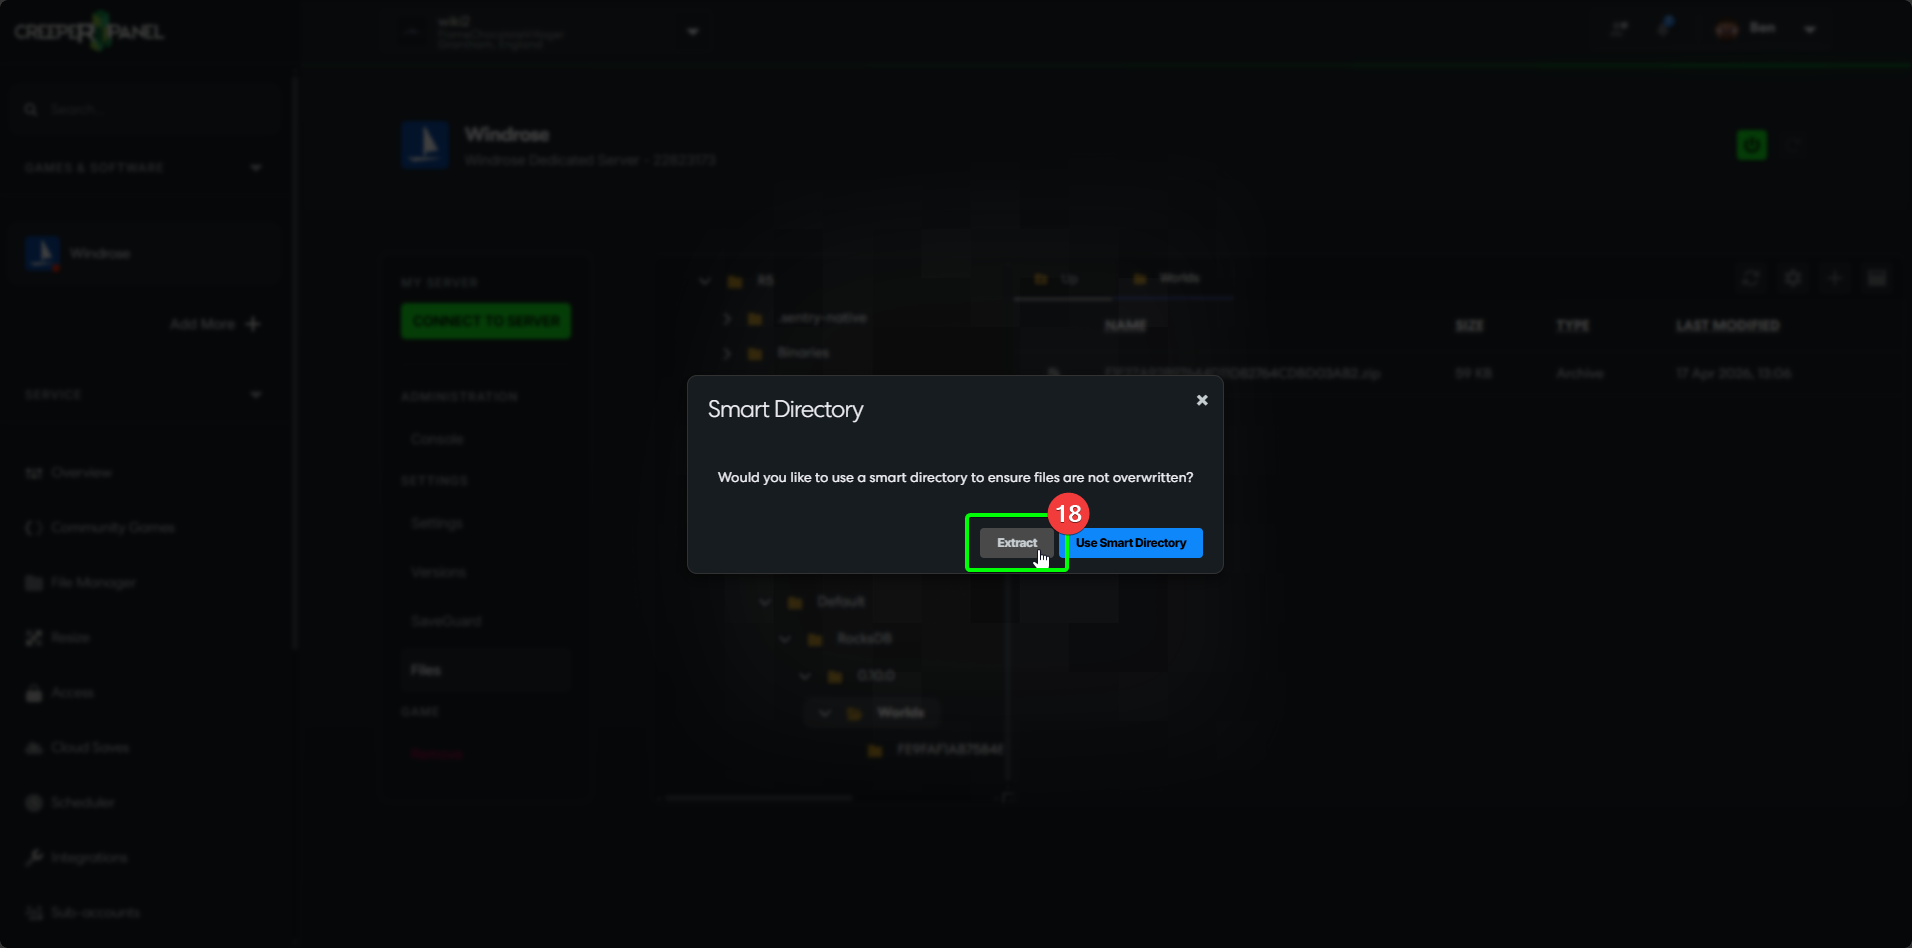
- Select
Extractin the pop-up window. This will extract the files to a new directory inside theWorldsfolder.
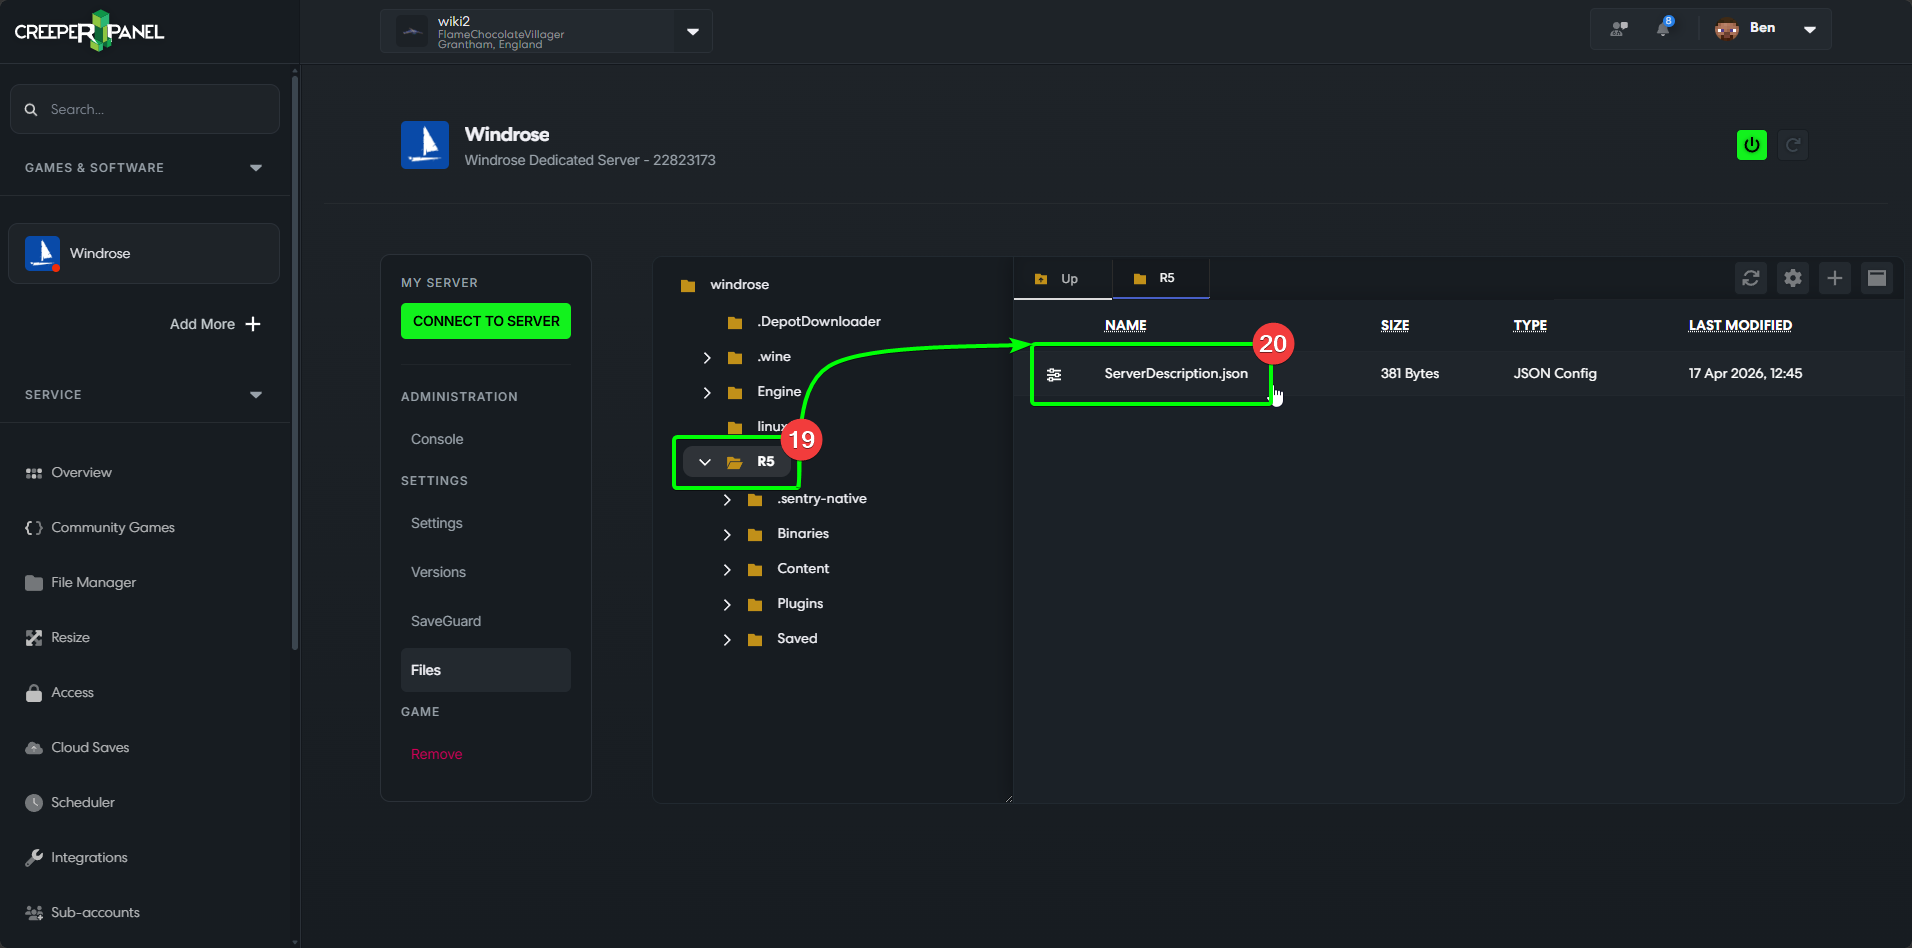
Now we need to instruct Windrose to load your uploaded world. In the File Manager;
- Navigate back to the
R5directory. - Inside you will see a file called
ServerDescription.json- double-click to edit the file.
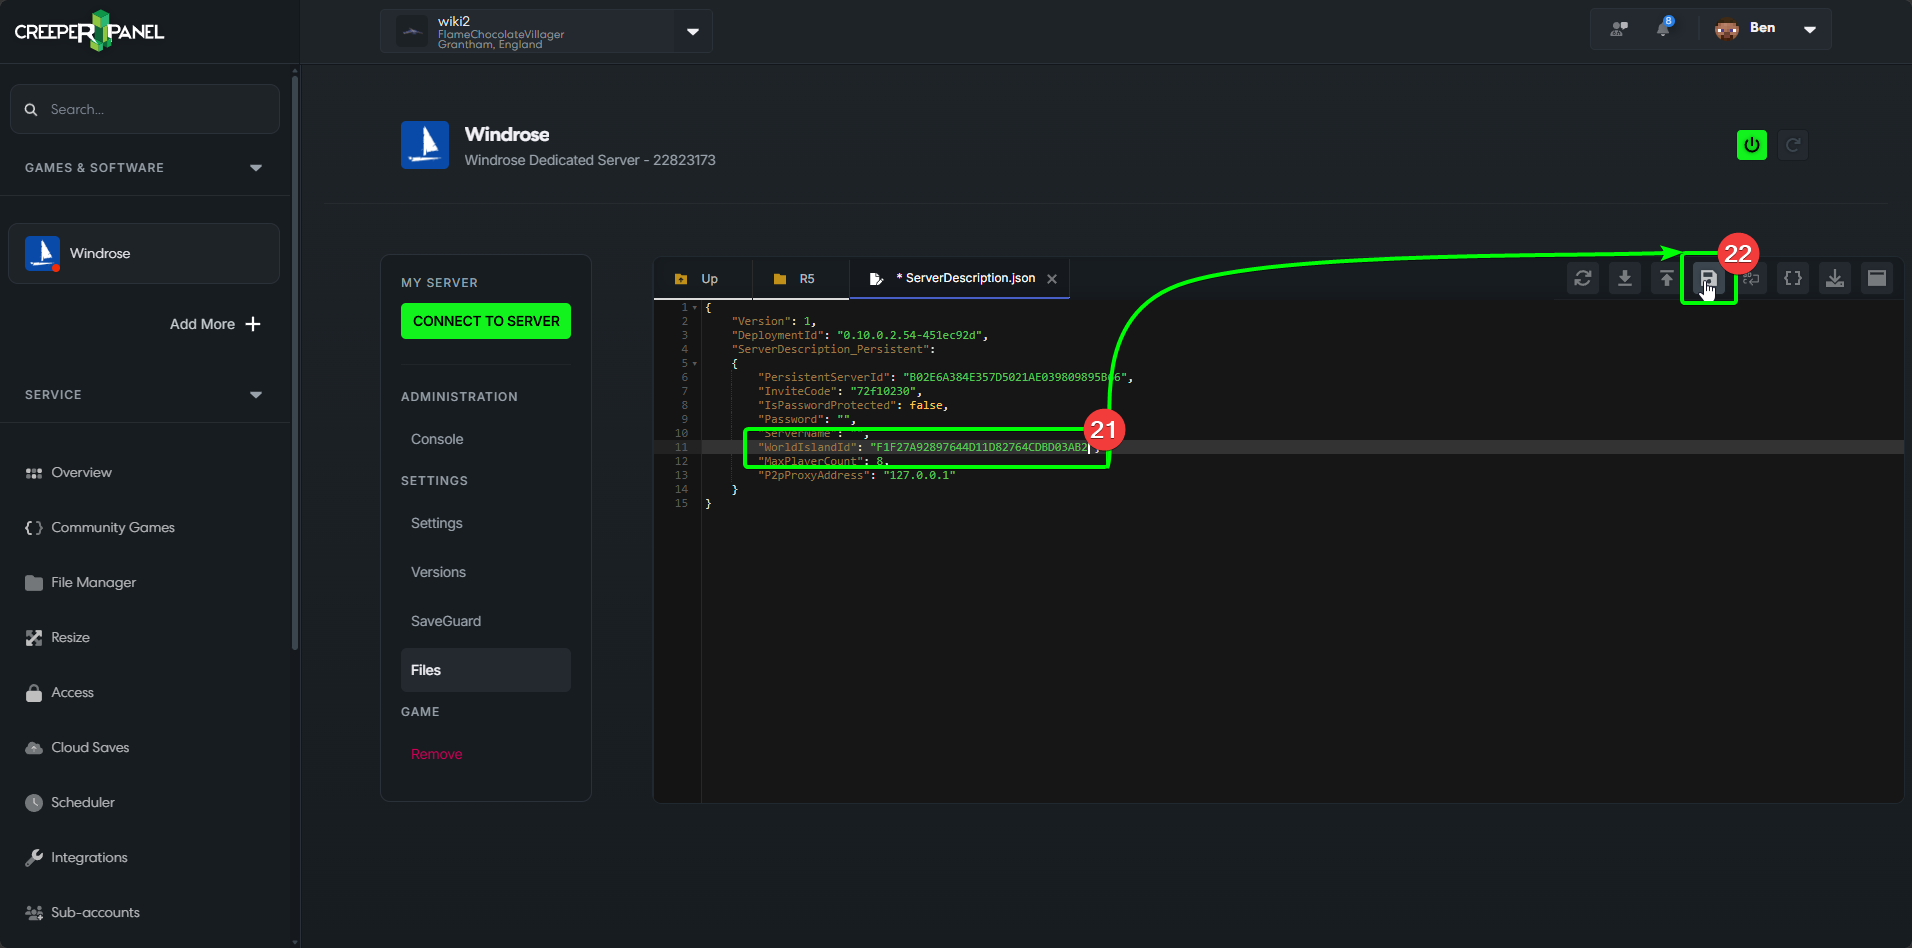
- Locate the
WorldIslandIDline, and replace the existing value with the exact same name as the world you have just uploaded. - When you have correctly entered the world ID, select the
Savebutton in the top right of the File Manager window to save your changes.
That's it - you should load into your uploaded world the next time you start and join your server!