Configuring Project Zomboid's Settings
info
Before making any changes to your game's settings, make sure that your Project Zomboid instance is switched OFF
To find your settings, head to the CreeperPanel. From there:
- Select your
Project Zomboidinstance from the side-bar - Select
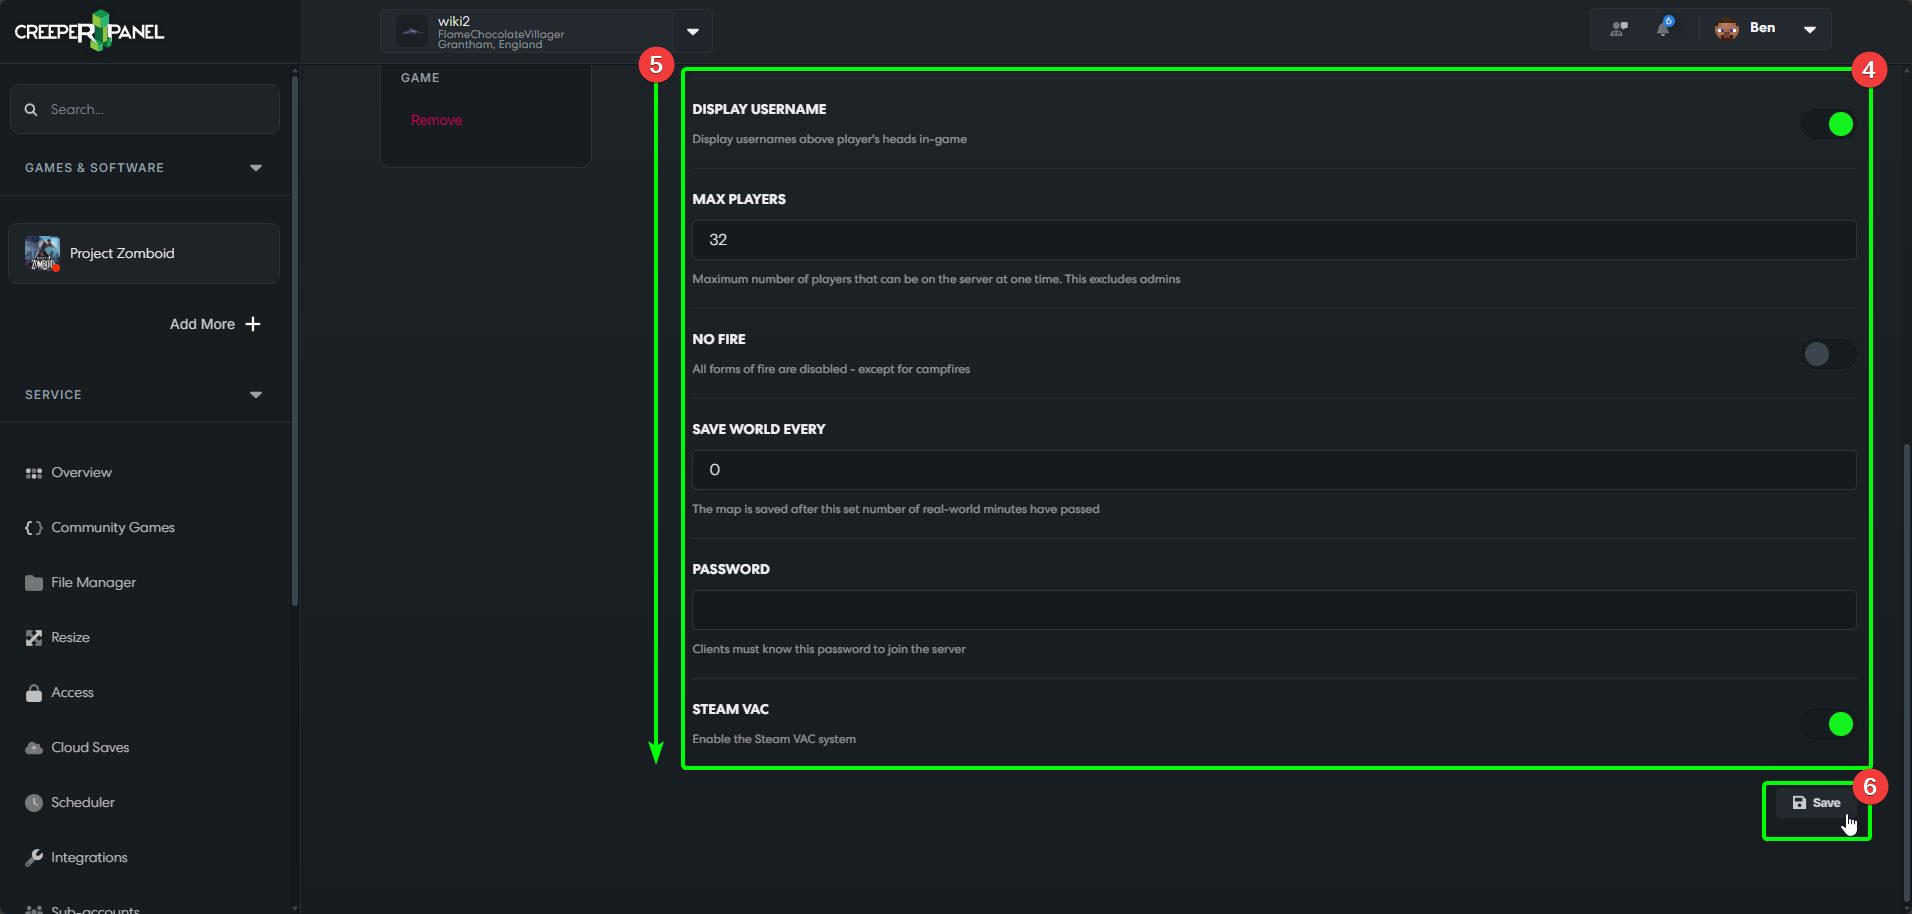
Settings, found underSettingsin the sub-menu. Now we're on the settings page for Project Zomboid. - Here you can select which settings menu you wish to open - by default, the Panel will open the
Generaltab. - All available settings on the current tab are visible under the settings options.
- You may need to scroll down to view all available settings in a menu.

- At the bottom of each settings page, you will find a
Savebutton - you MUST save any changes you make to your settings before leaving theSettingsmenu.
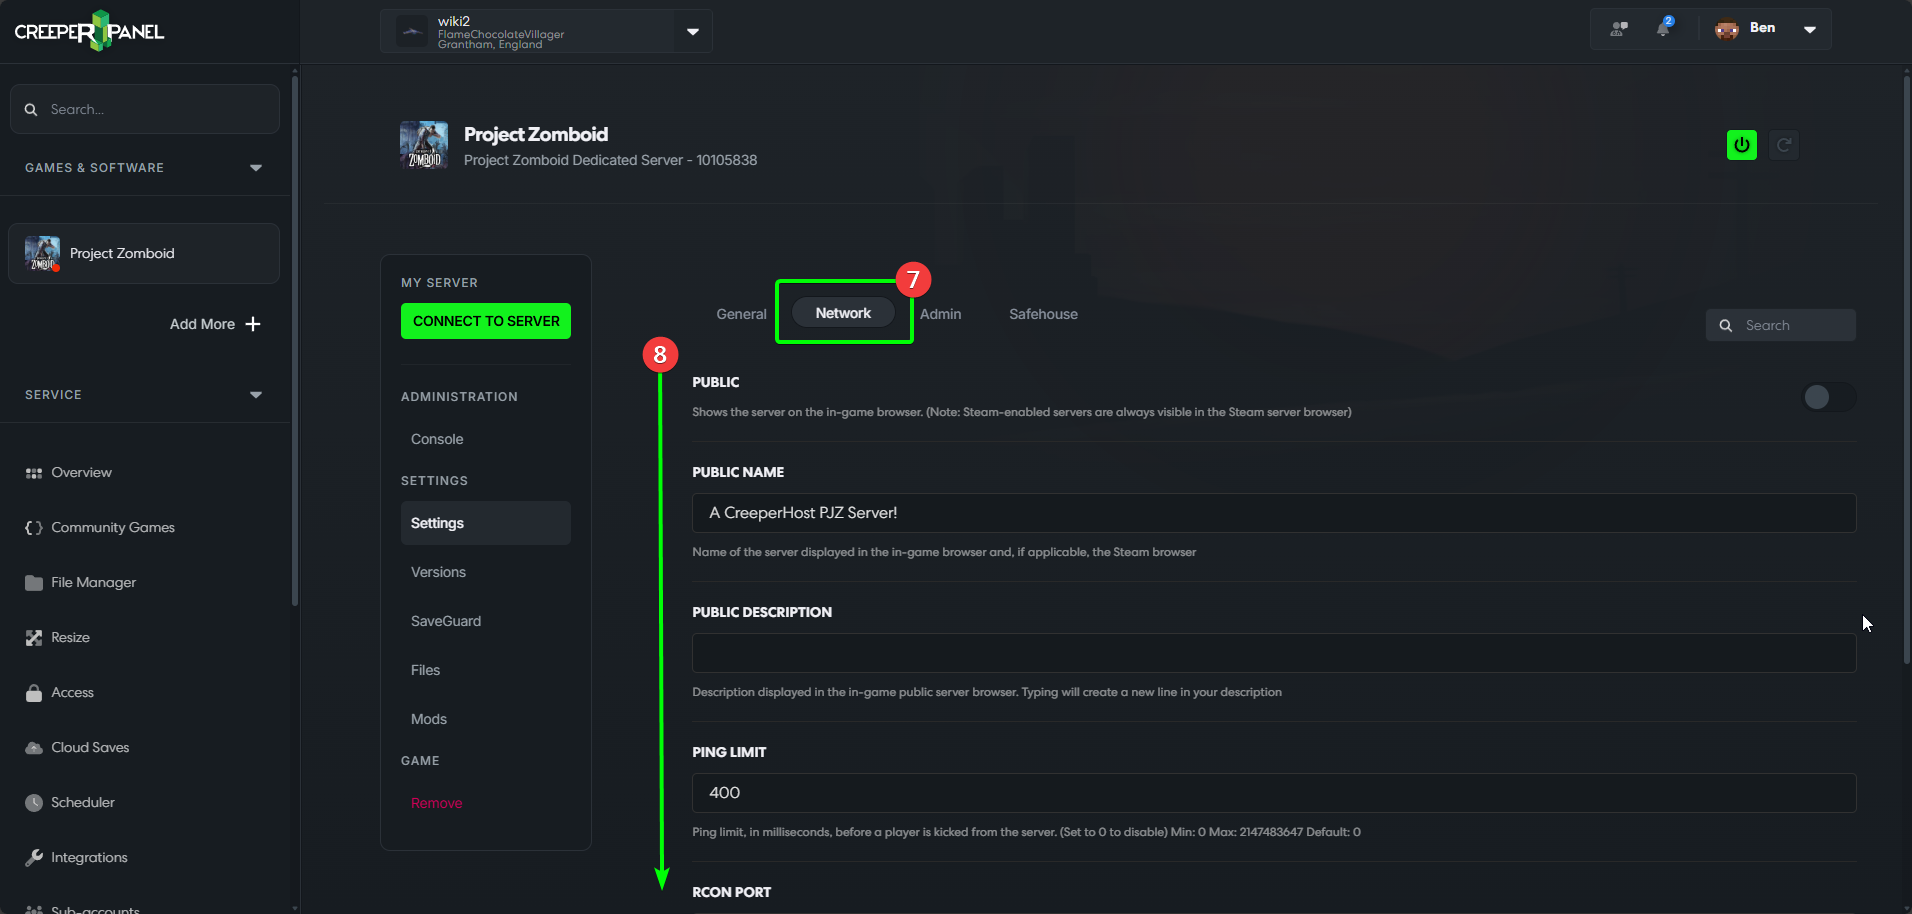
- The
Networktab contains all settings regarding your server's network connectivity - server name, description etc. - Remember to scroll down to see all available settings/ save your changes.
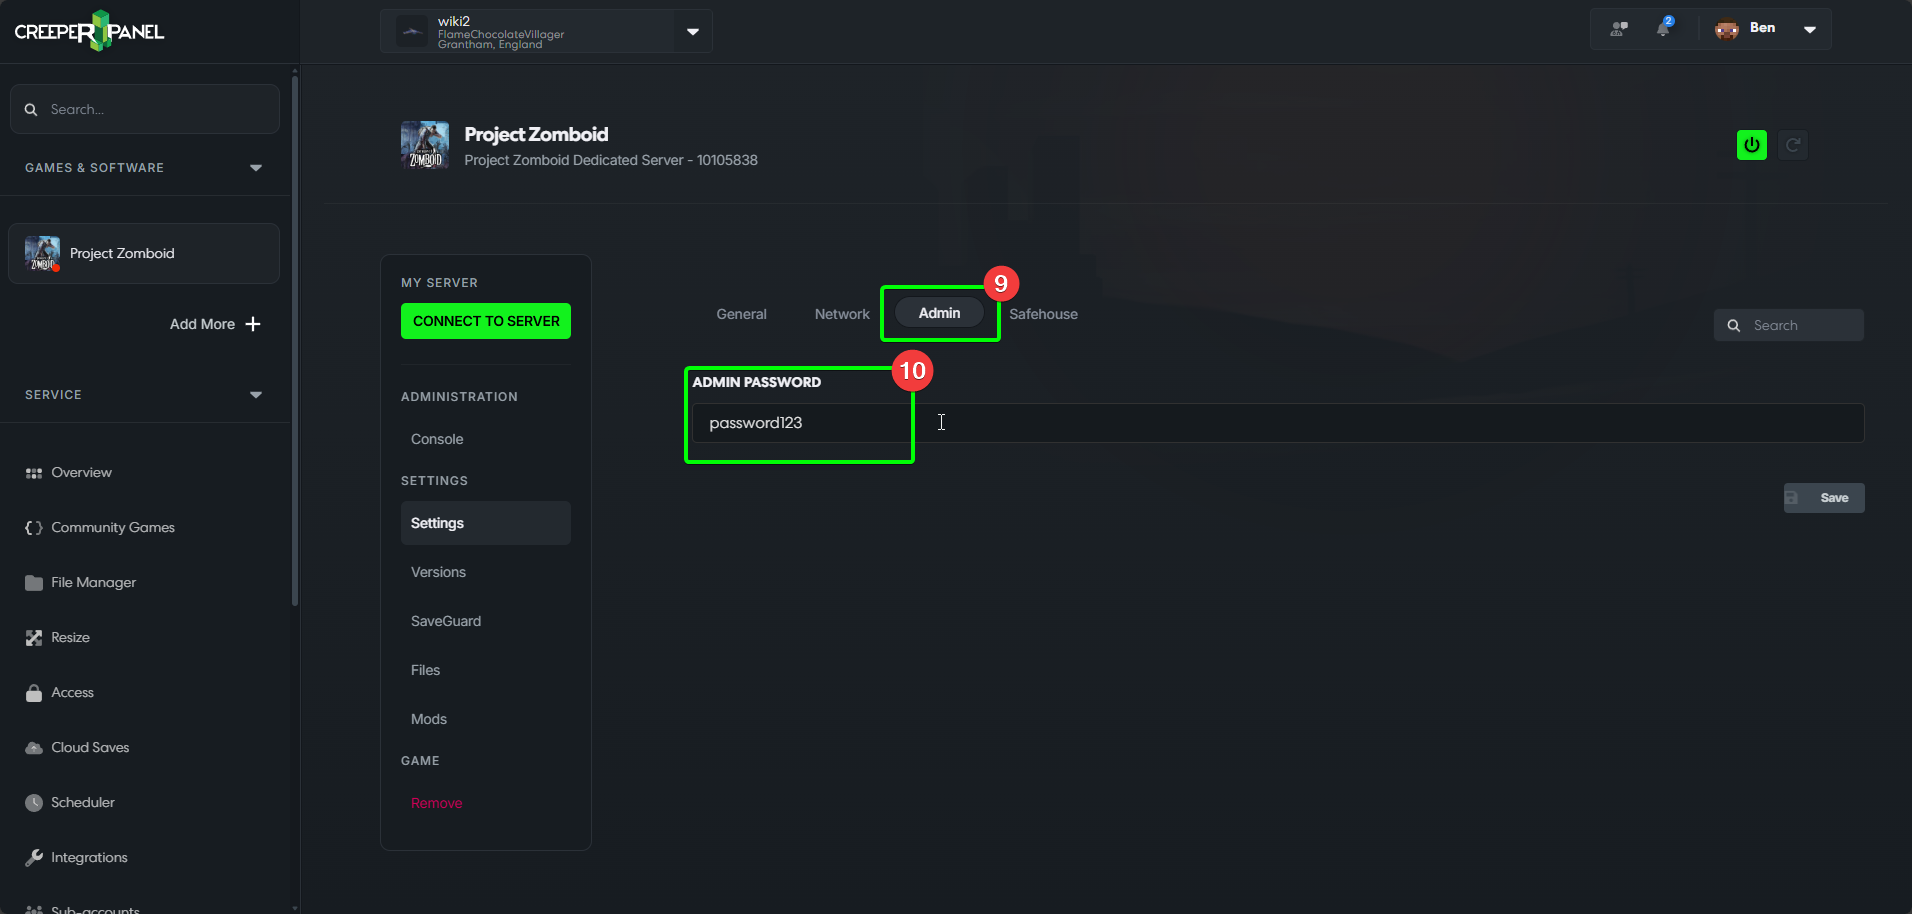
- The
Adminsettings tab. - Here you can set your admin password.
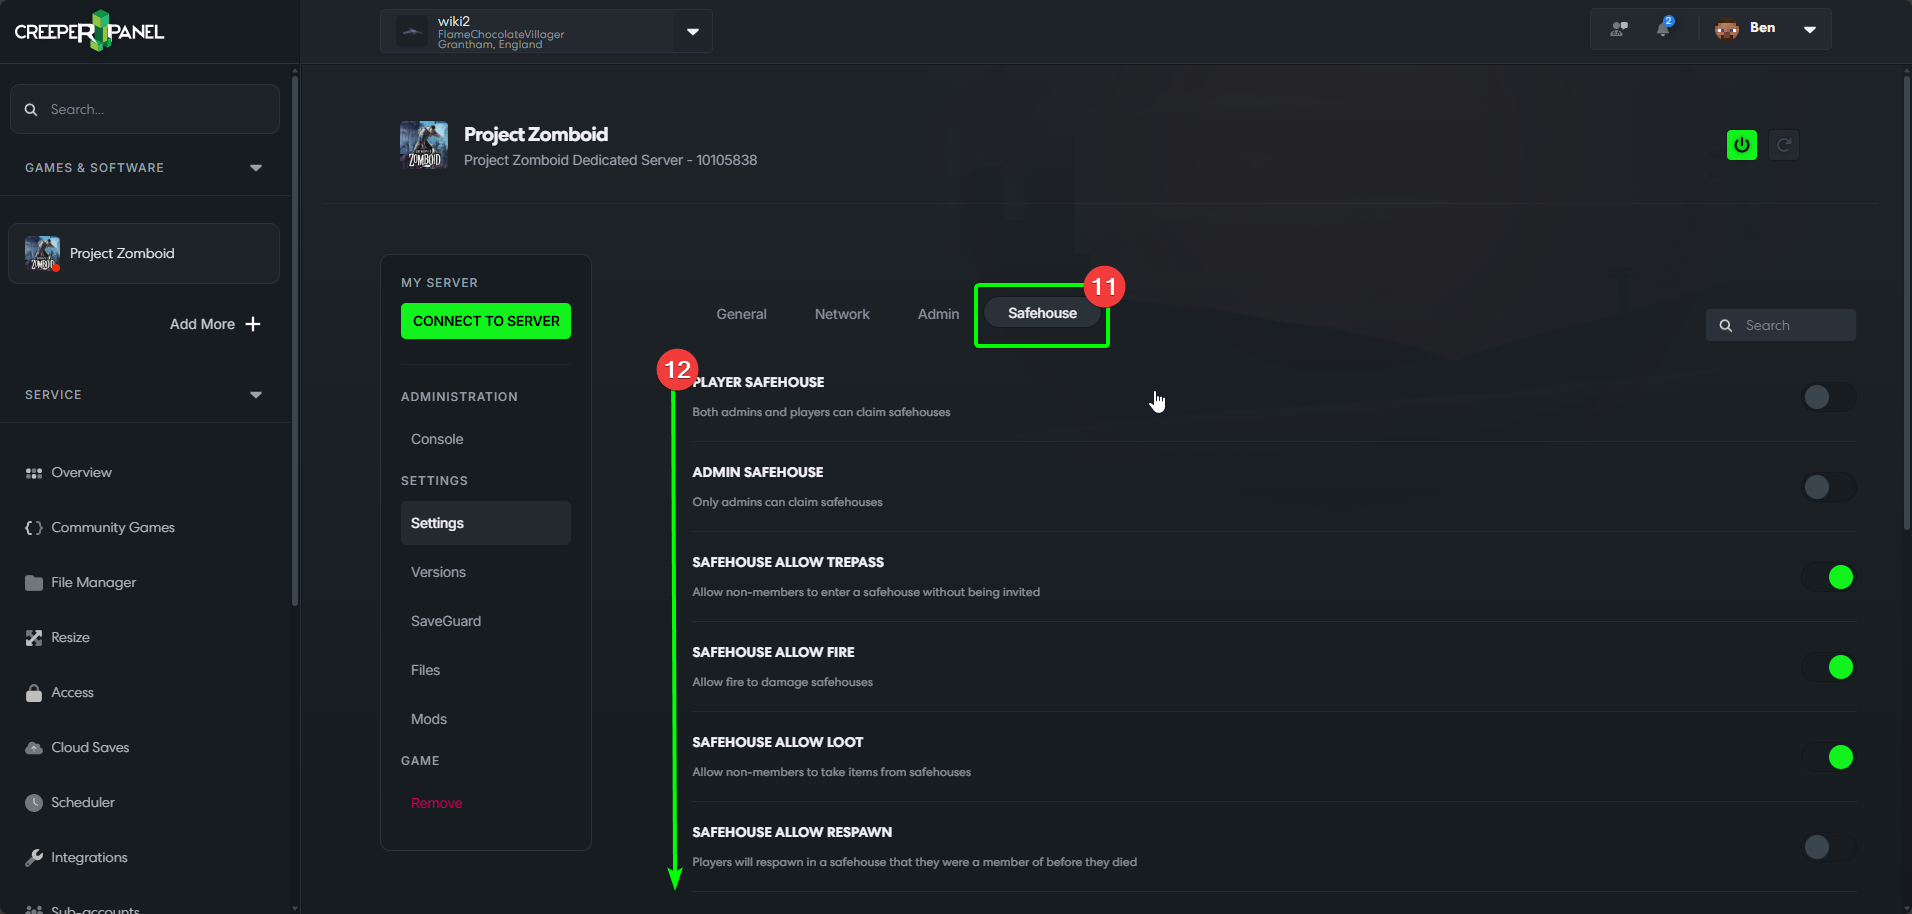
- The
Safehousesettings tab. Here is where you can change all Safehouse relevant settings. - You may need to scroll down to see all available settings.
That's all there is to know about where to find your settings for Project Zomboid! If you notice any options missing, please notify CreeperHost Support, who will rectify it as soon as possible.