Connecting to your Project Zomboid Server
info
Before attempting to connect to your server, please first make sure that your instance is switched ON
Now you've installed and configured your Project Zomboid instance, it's time to get connecting.
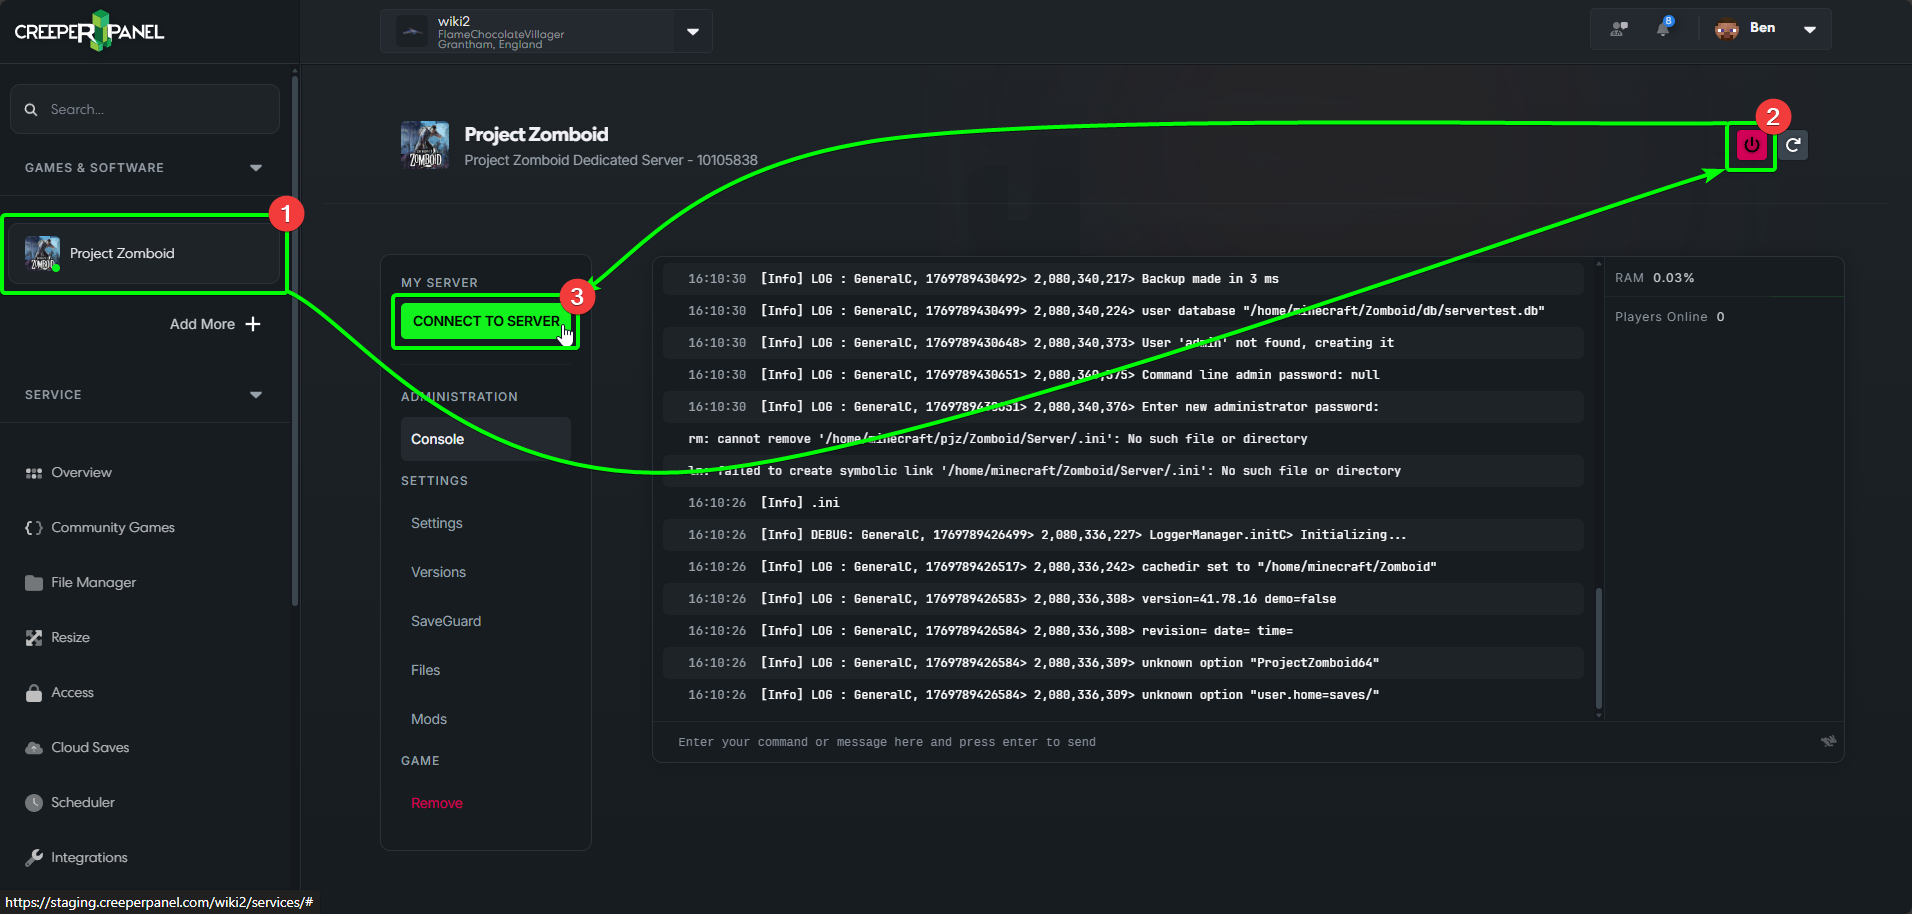
- Head to to your
Project Zomboidinstance on the CreeperPanel. - Make sure your instance is switched ON using the power button in the top right of the Panel.
- Once your server has started, select the green
Connect to Serverbutton.
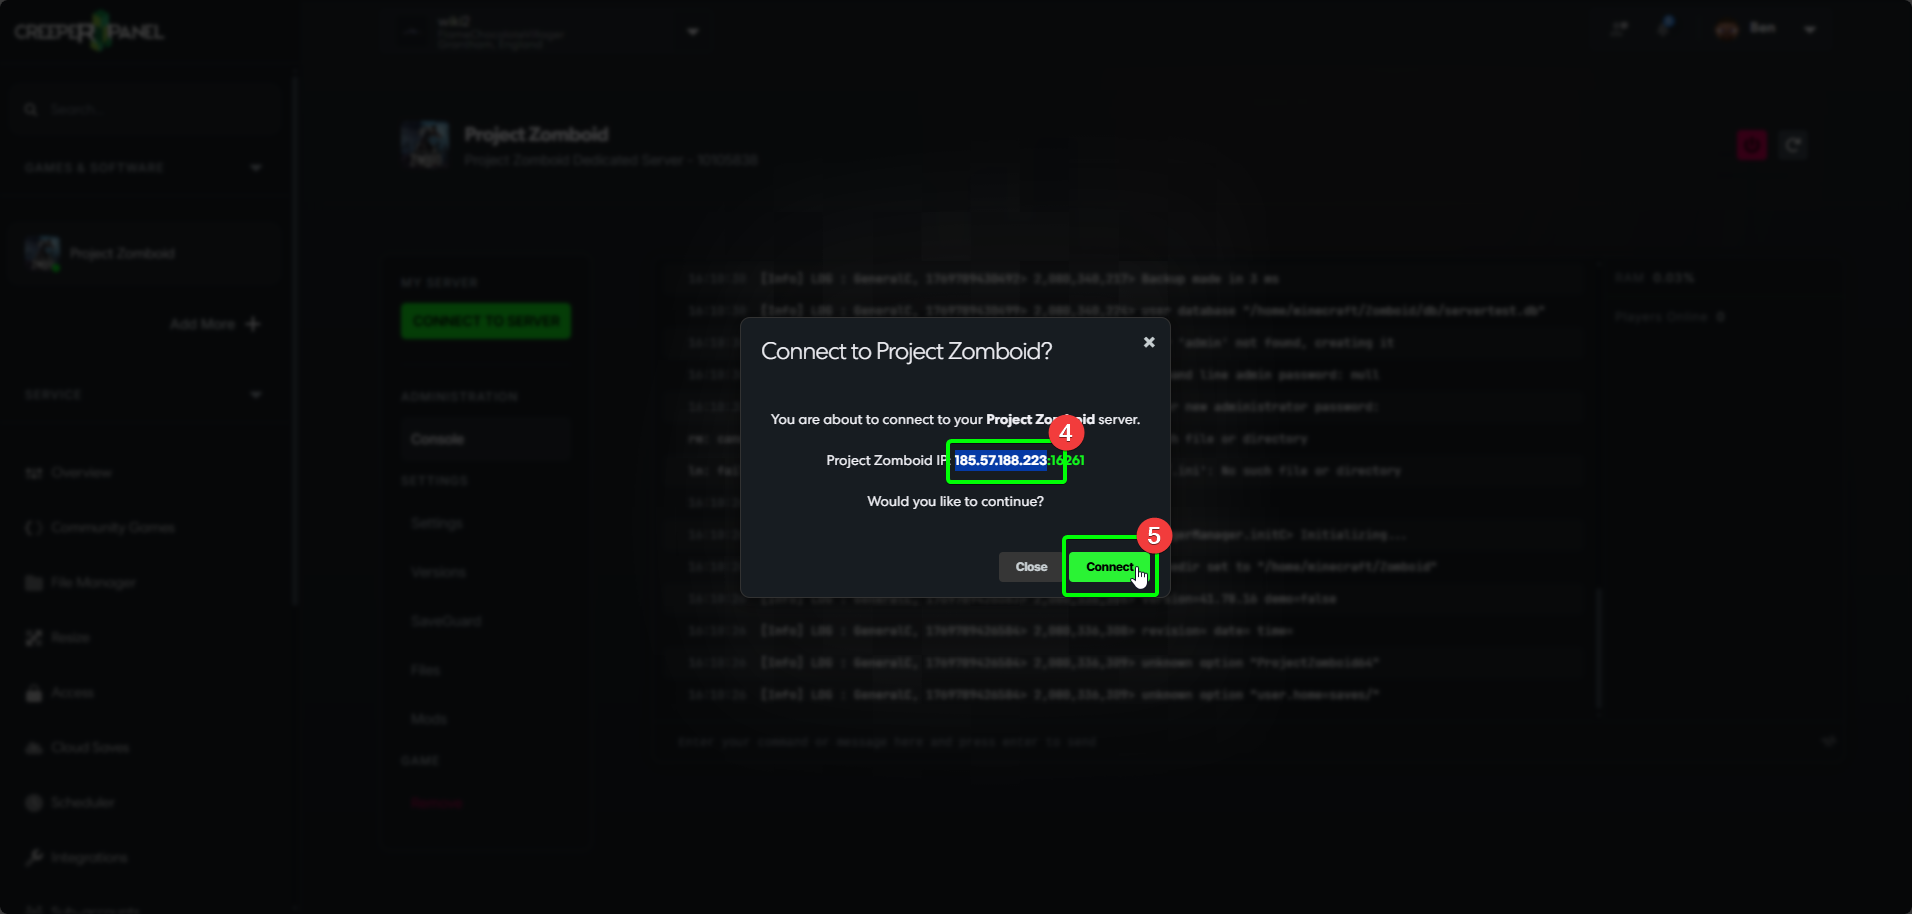
- Copy your server's IP address. You won't need to copy the port number unless you have changed it, as the game will auto-complete the port field using the defult port number.
- Close the window once you have copied the IP.
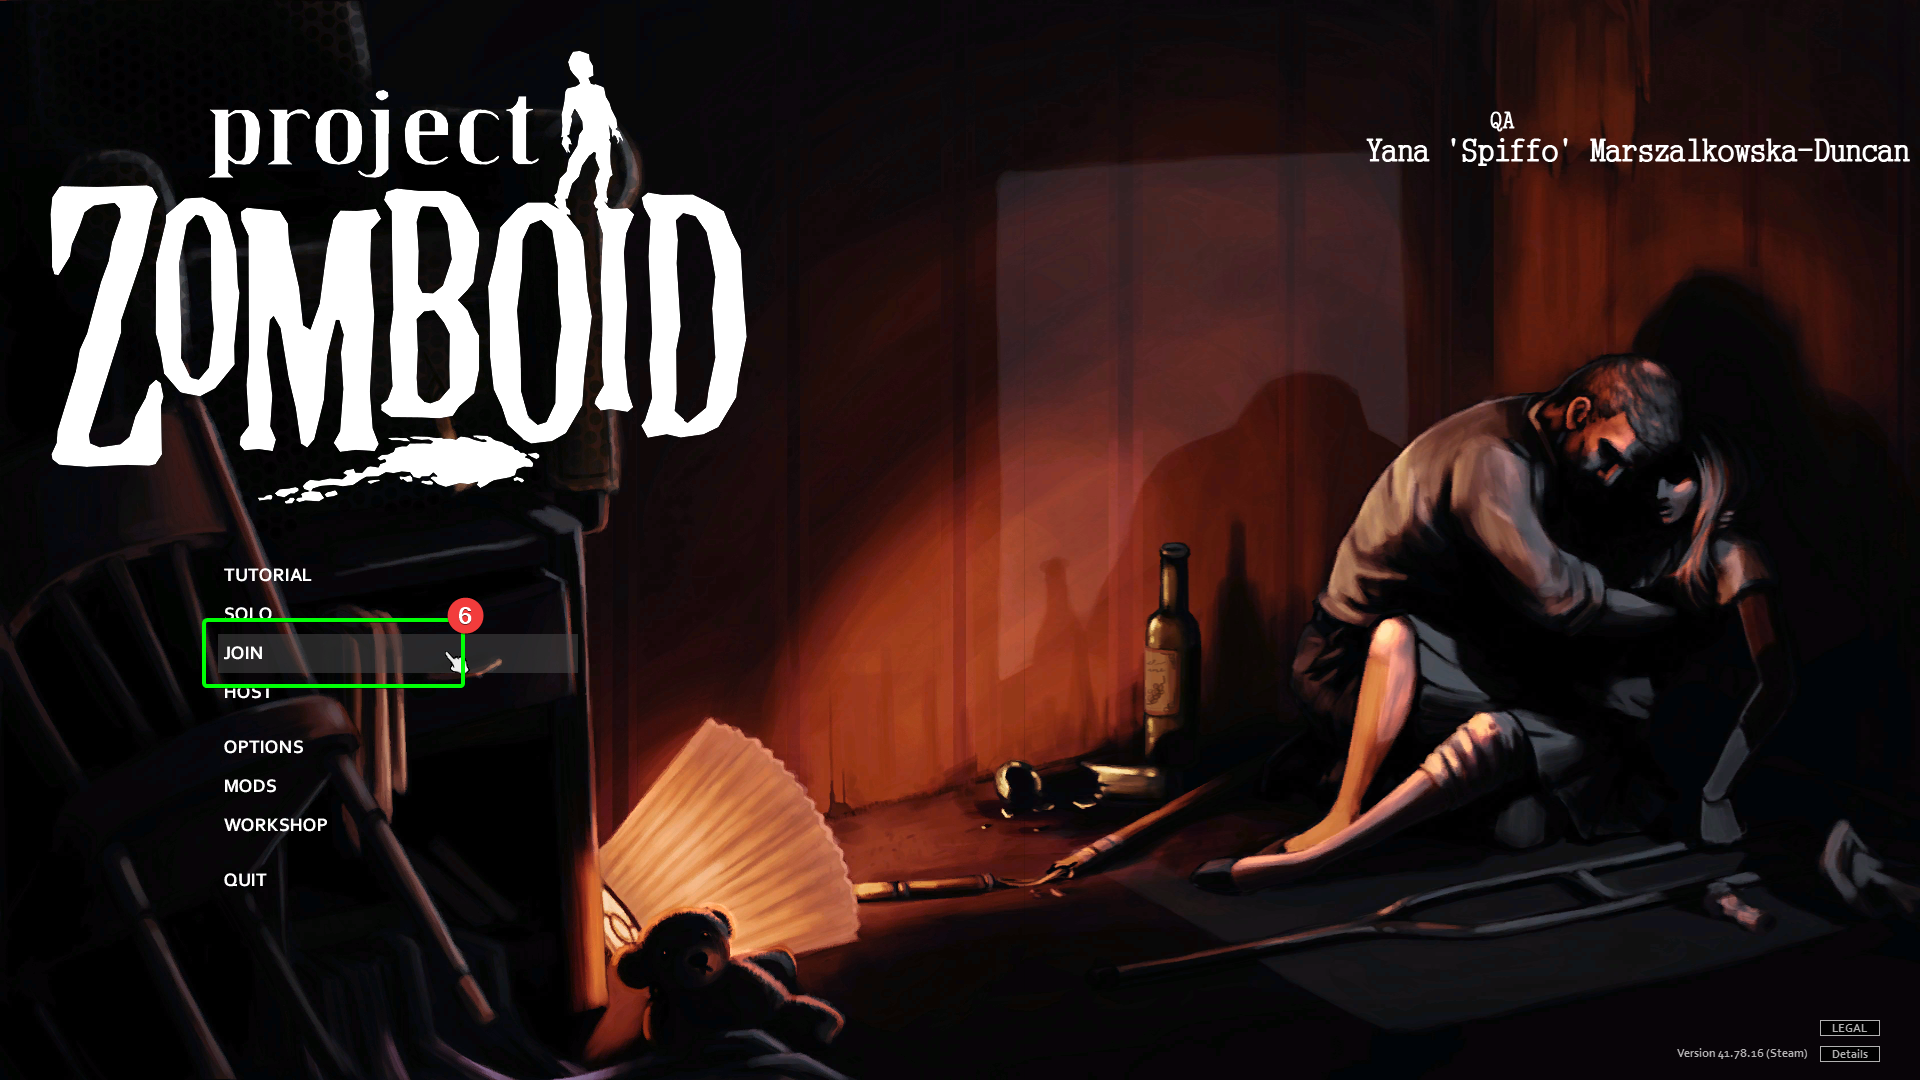
Now, you'll need to head over to your client machine's installation of Project Zomboid.
- Load up Project Zomboid, and select
Joinfrom the main menu.
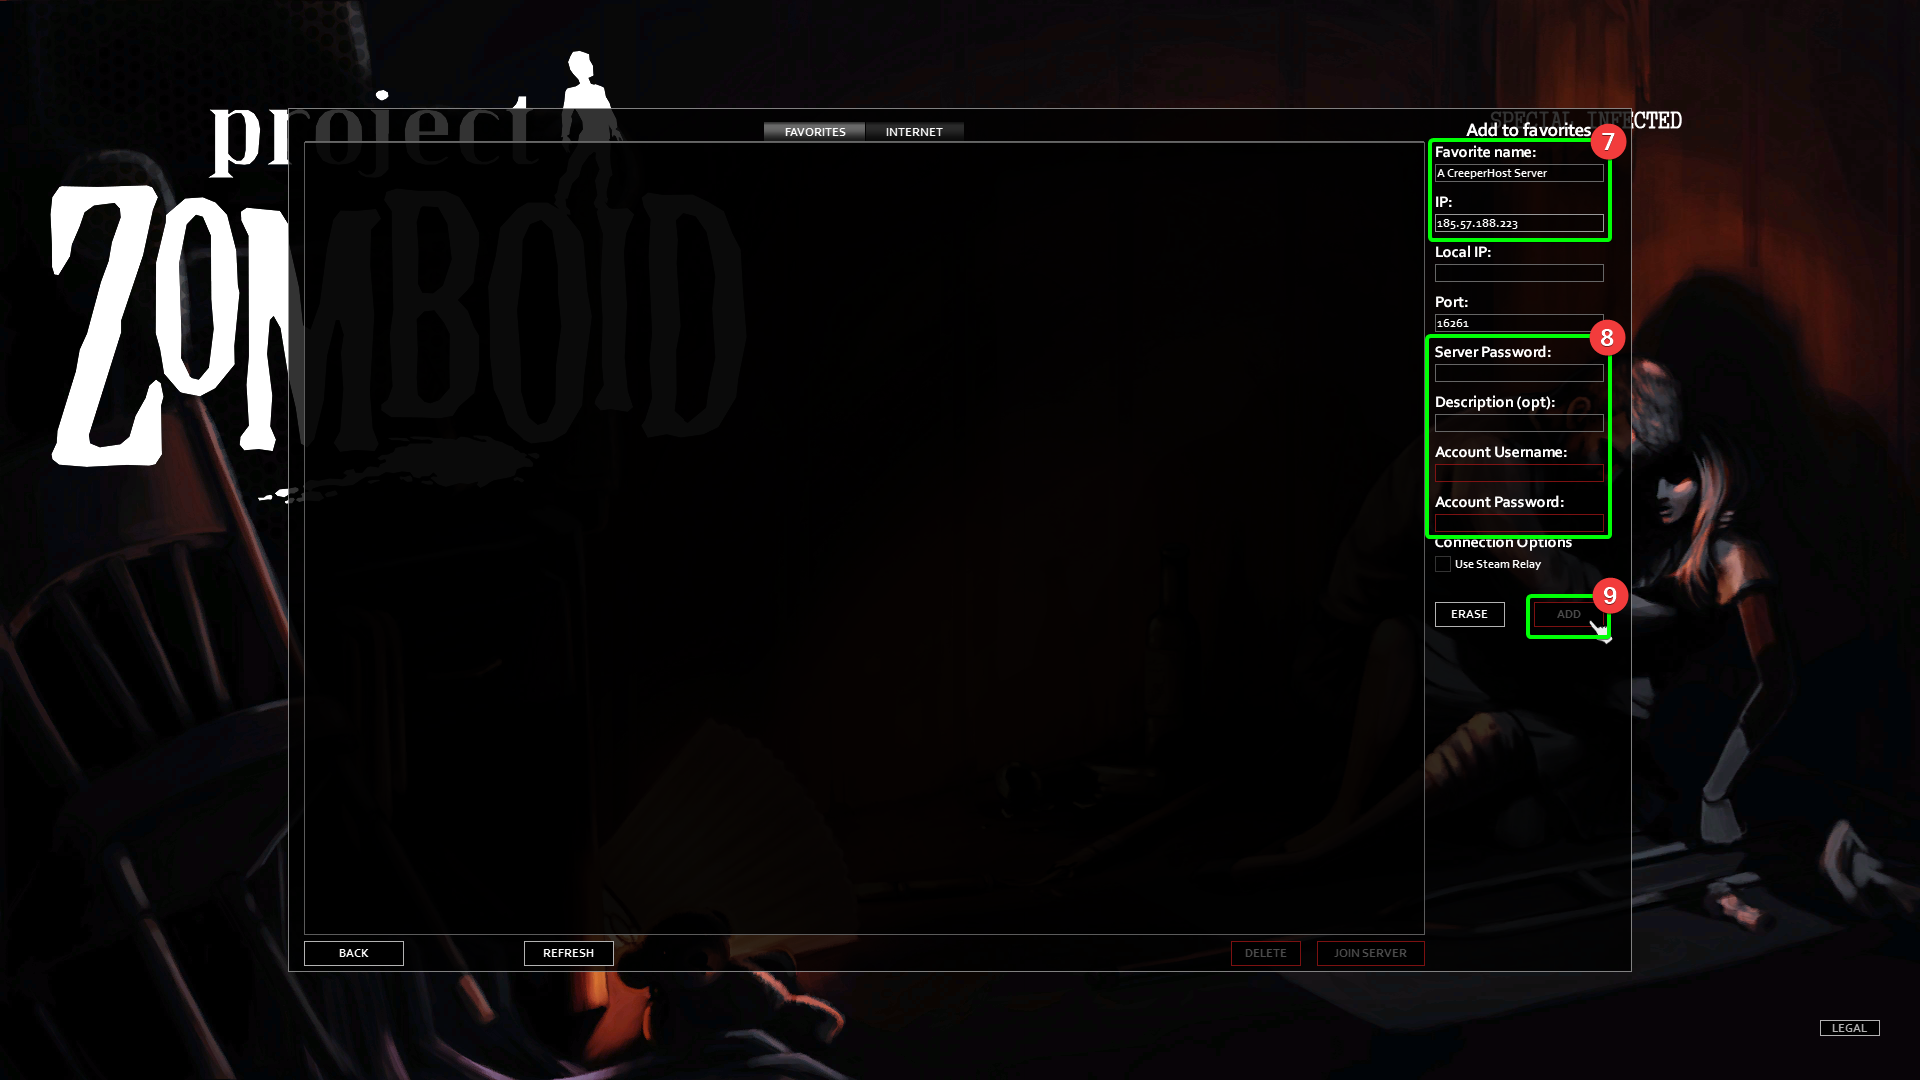
- On the next page, set your server's name (only effects the name in your list), and paste your server's IP into the
IPfield. - Enter your server's password into the
Server Passwordfield, and enter anAccount UsernameandAccount Password(this will create an account with that name and password ONLY for this server - this is just to prevent others from logging in with your username) into their respective fields. Make sure to keep a note of the account name and password. - Select
Add, to add the server to your Favourites list.
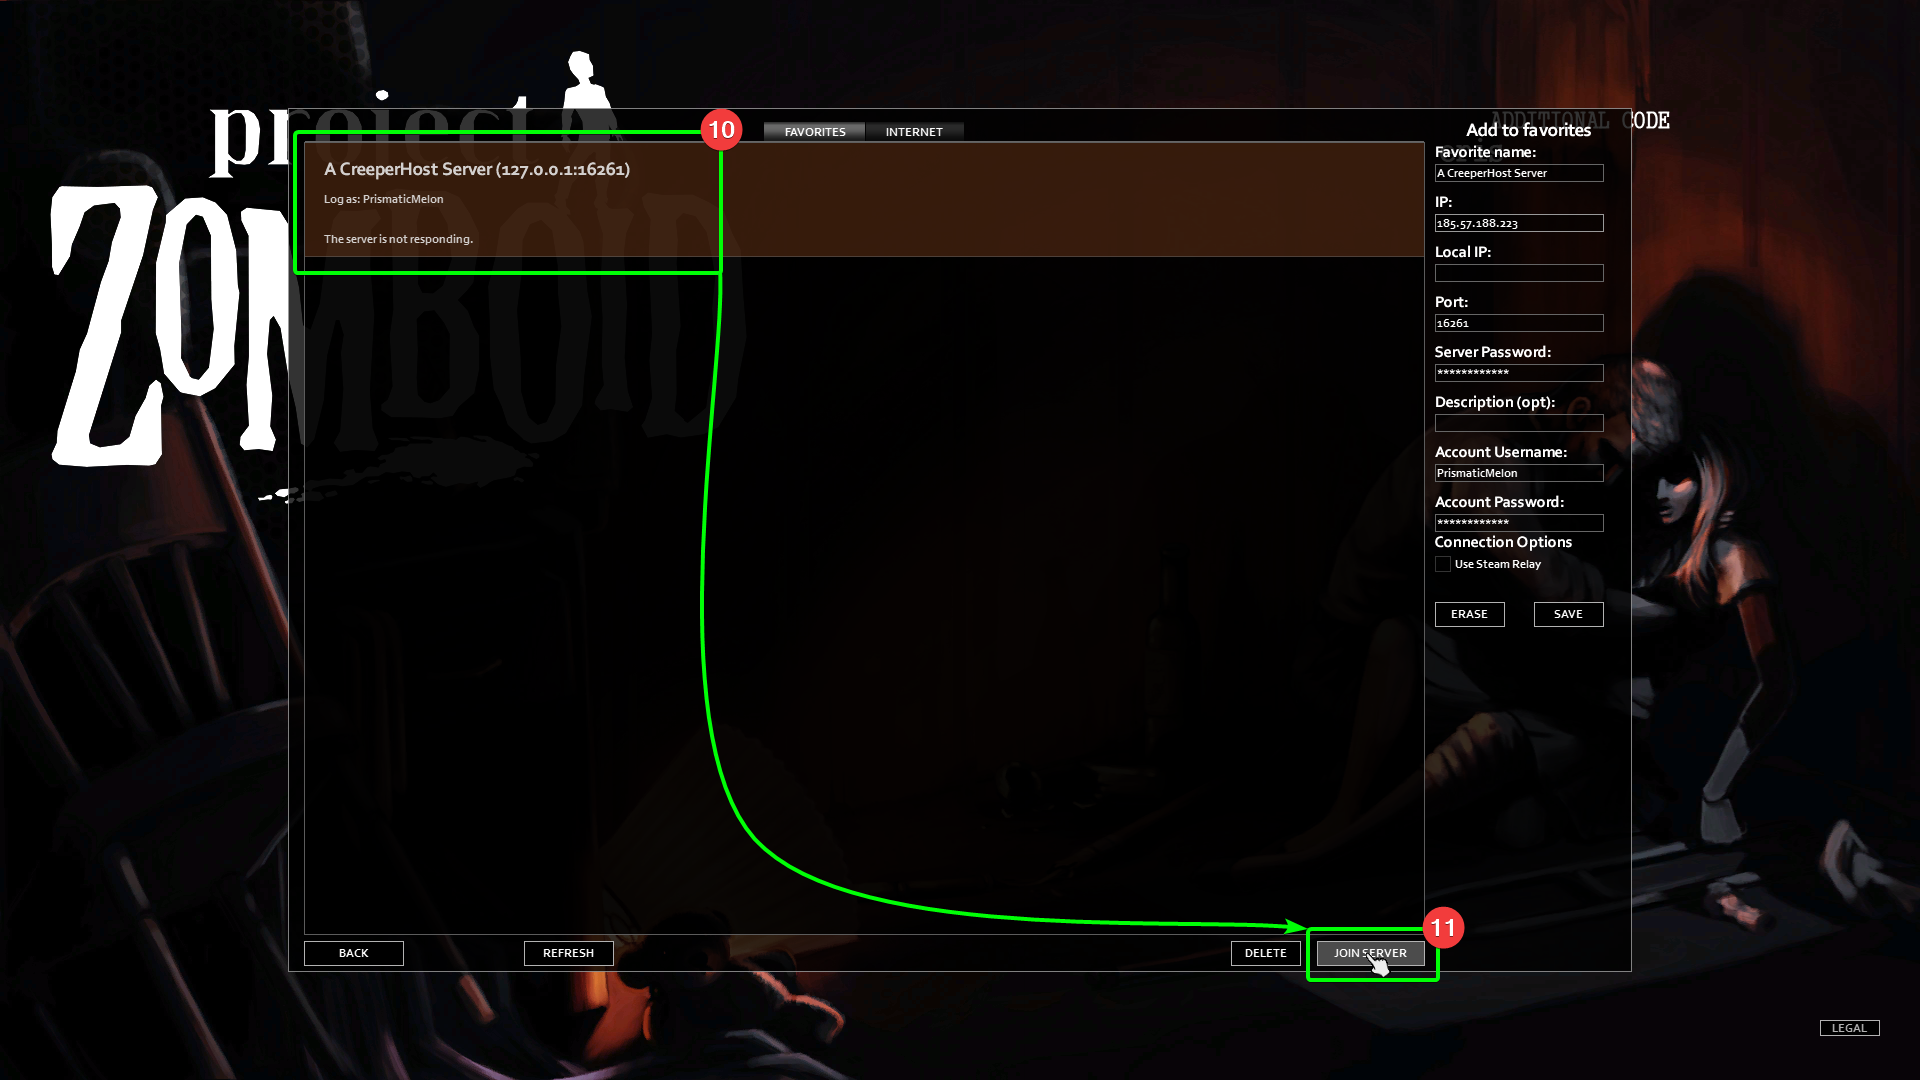
- Your server should now appear in the
Favoritestab - select it, then - Select
Join Serverin the bottom right.
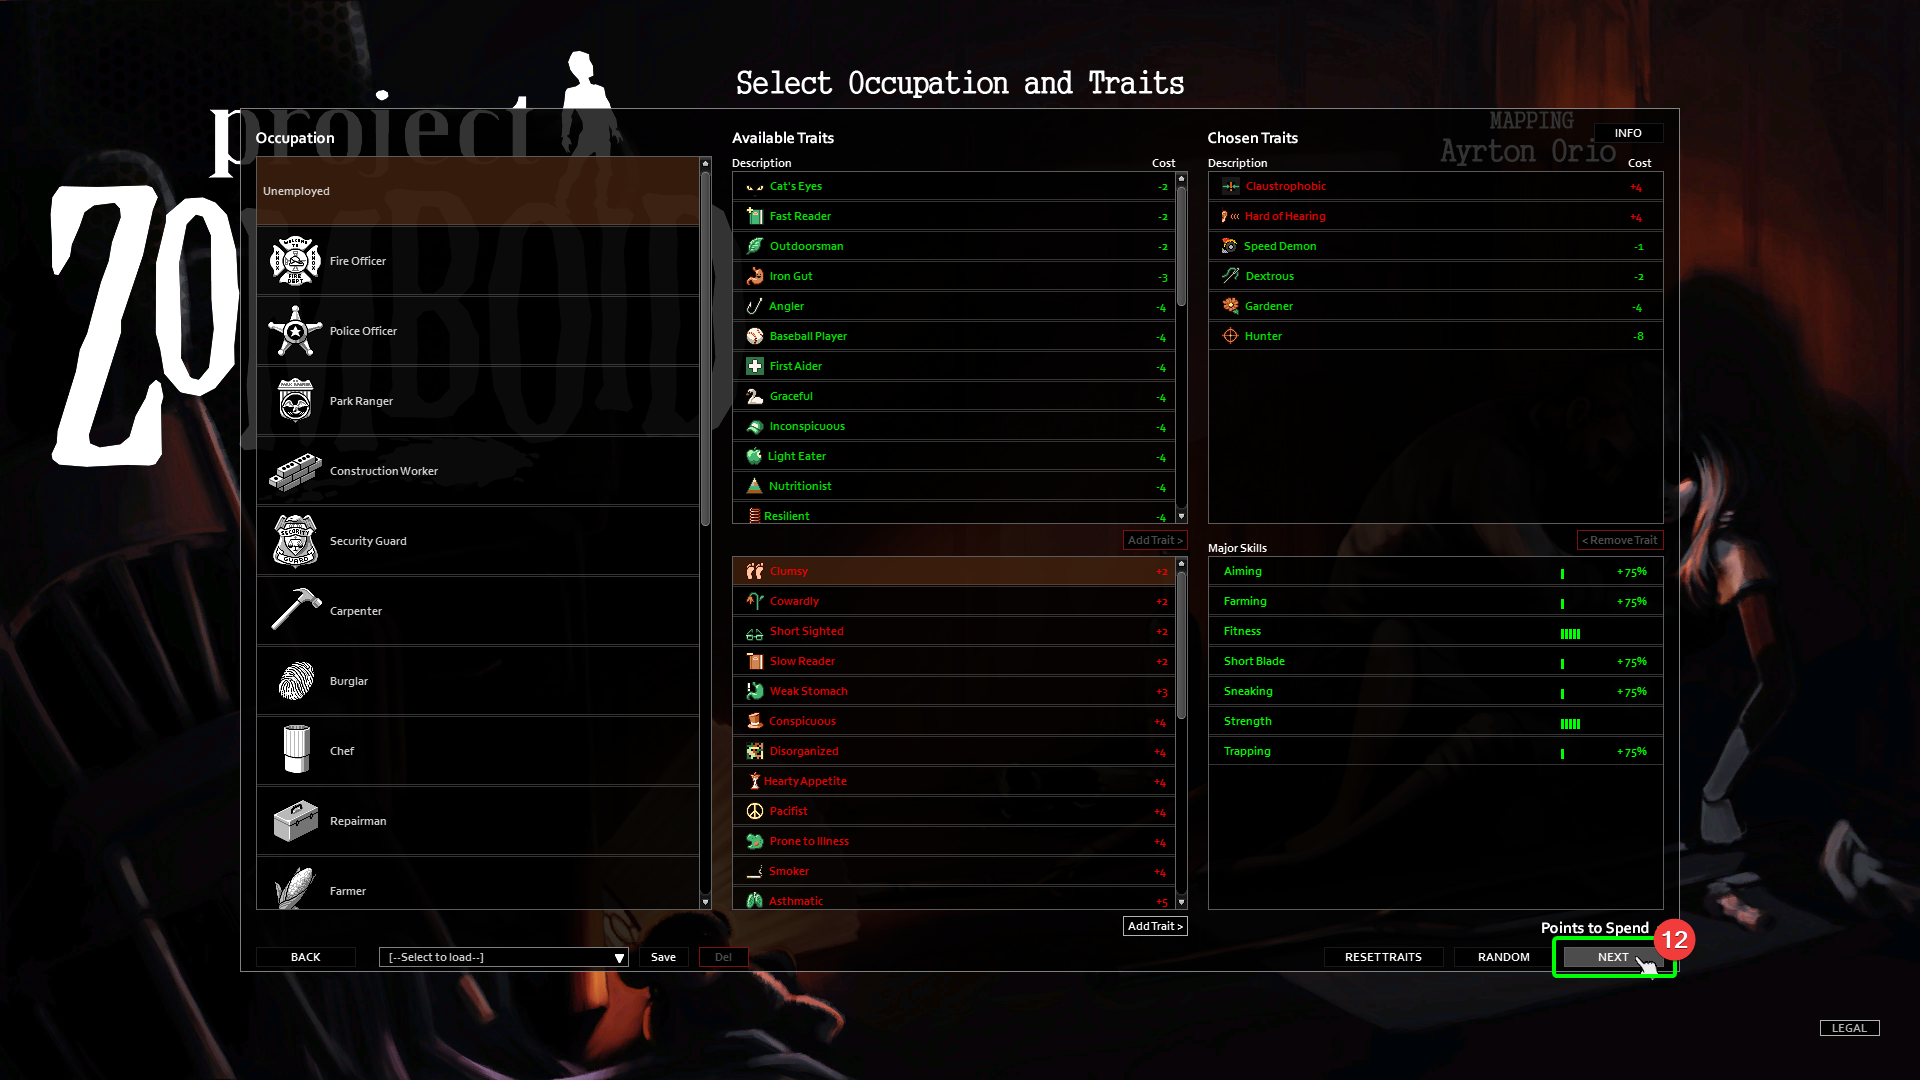
- The only thing left to do is select your occupation and traits! Once you've done that, select
Next, and you should load into your server!