Changing your PixARK server settings
info
Remember to switch your instance OFF before changing any settings to prevent corruption/ data loss.
The CreeperPanel allows you to easily change your settings for PixARK. To get started;
- Select your PixARK instance from the CreeperPanel, then.
- Select
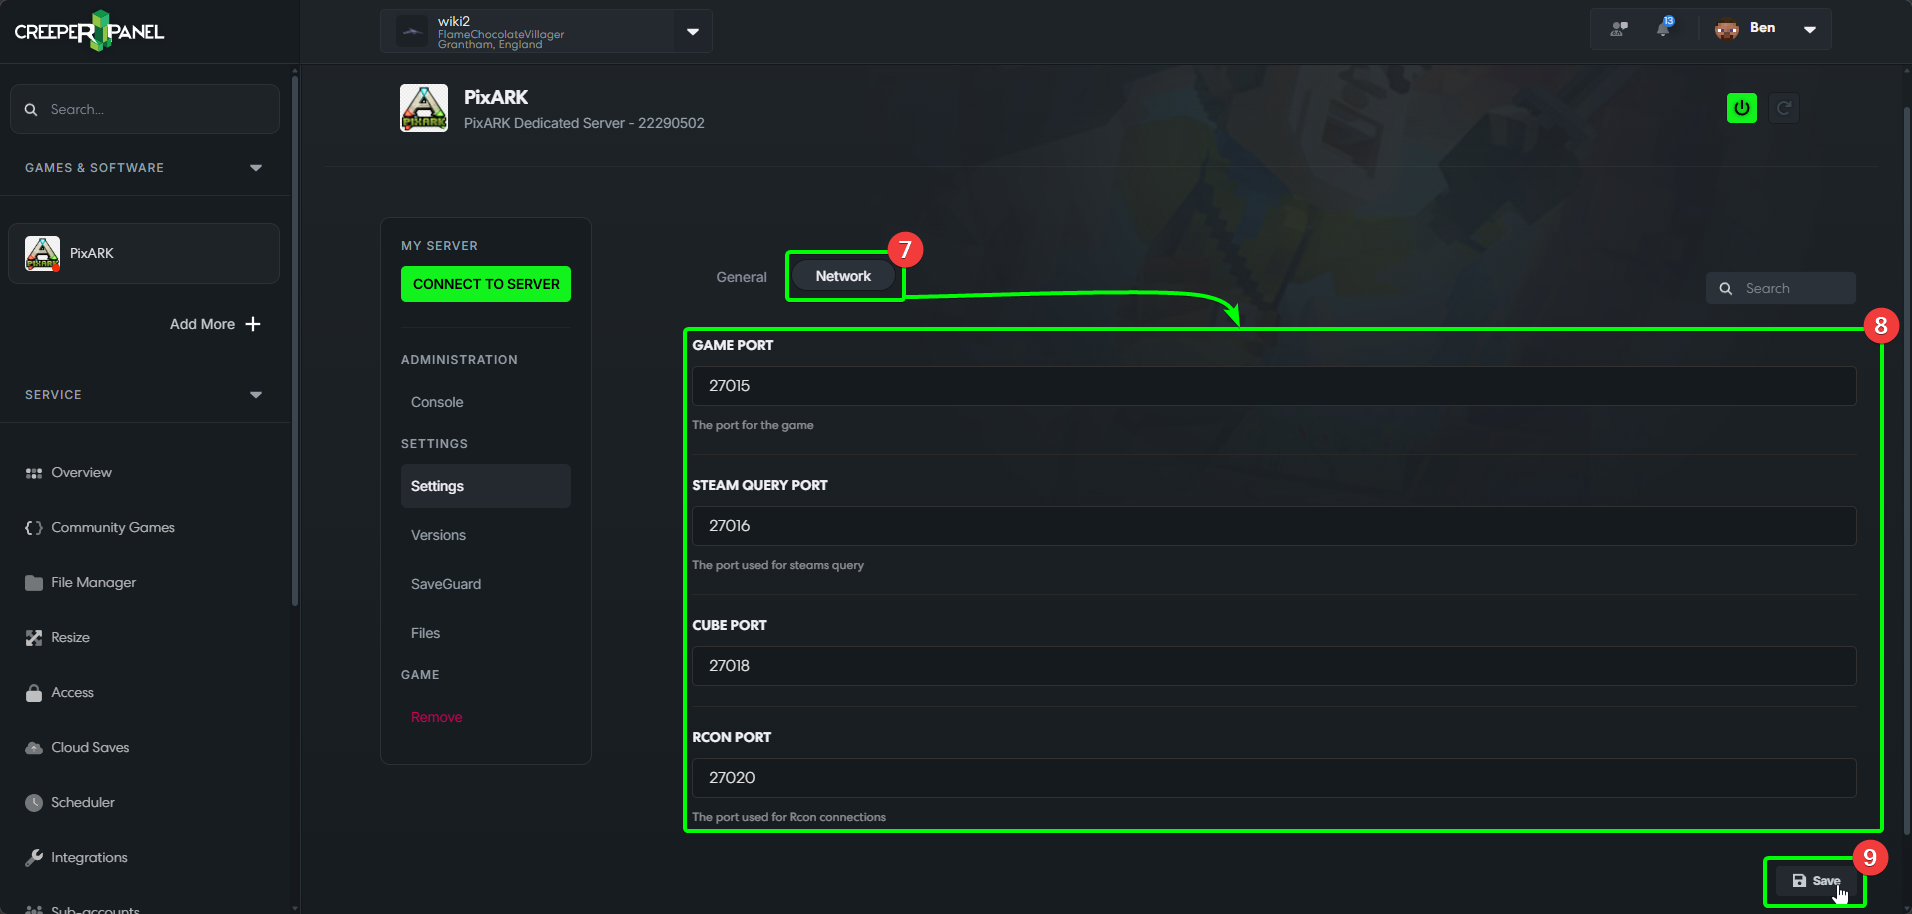
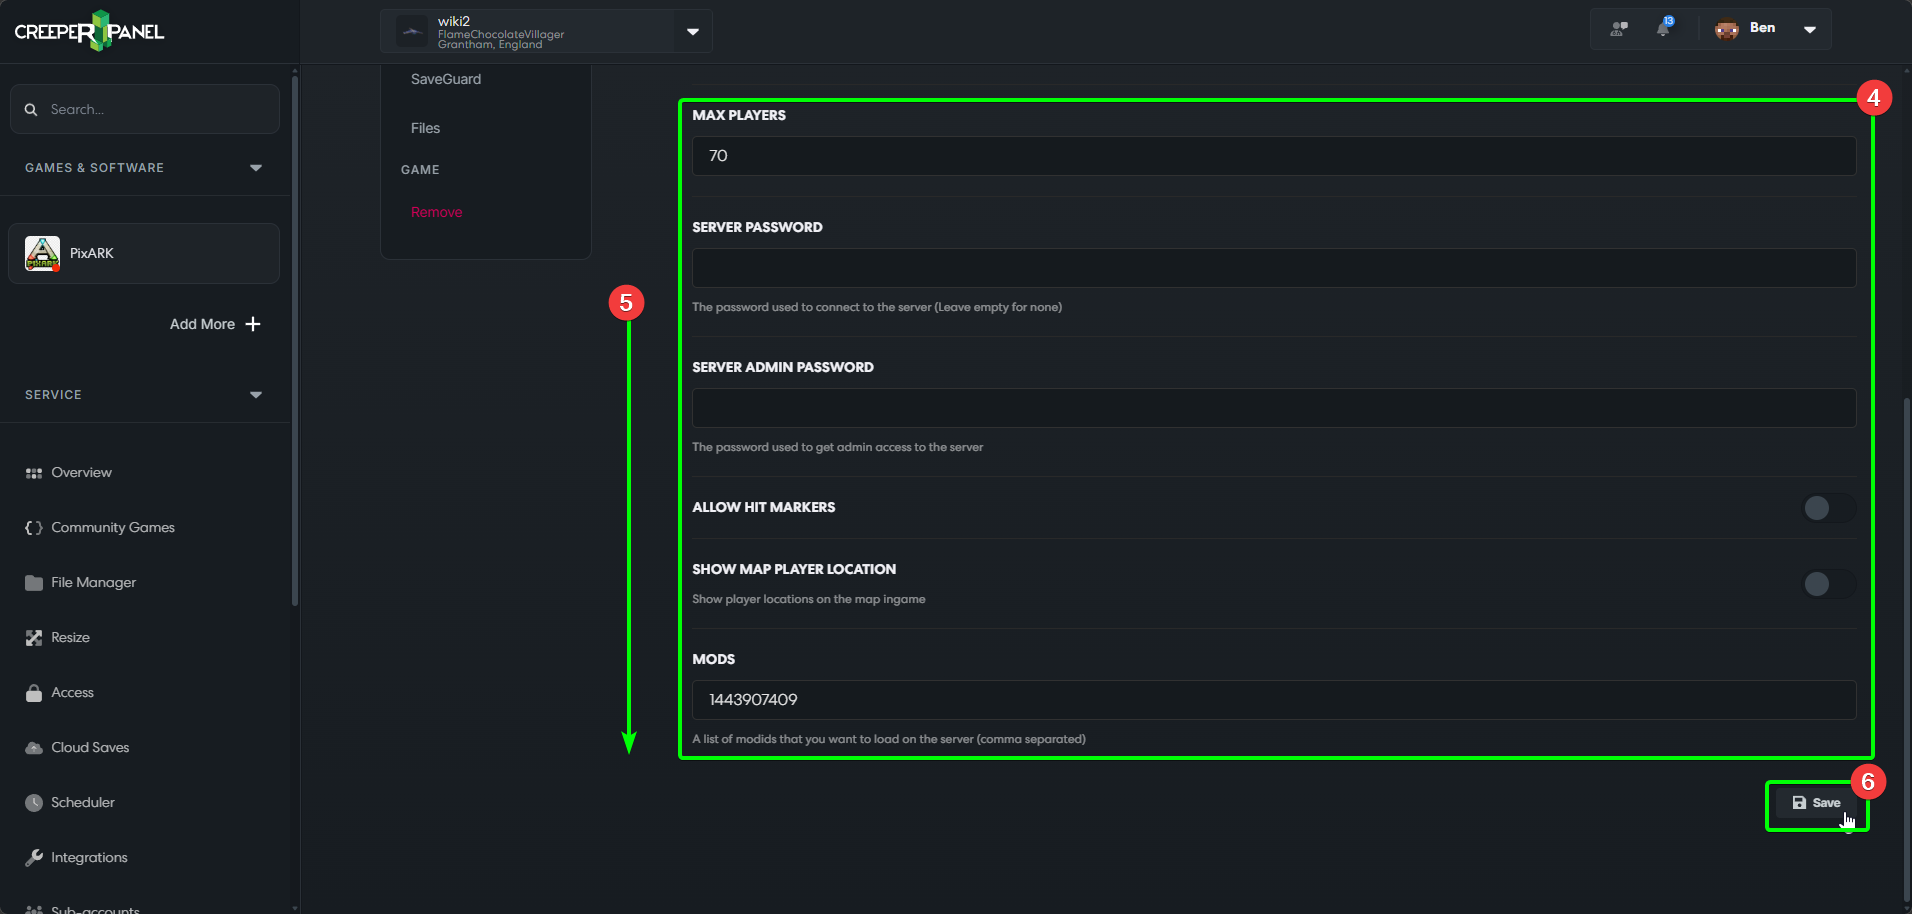
Settings, found underSettingson the game's sub-menu. - Here you can choose between
GeneralorNetwork-Generalis the default view, and covers basic settings like server name, password and the mod loader, whilstNetworkcovers things like ports. - You can see your available settings in the main body of the CreeperPanel
- You may need to scroll down to see the rest of the settings.
- Scrolling to the very bottom will show the
Savebutton - you MUST save any changes you make before navigating away from the settings, otherwise the changes won't take effect.

- Selecting
Networkwill show you the available network-related settings. - You can see your available
Networksettings in the main body of the CreeperPanel - You'll see the
Savebutton at the bottom again - remember to save your changes!