Creating a PixARK instance
You'll find creating a PixARK instance easy using the CreeperPanel. To get started;
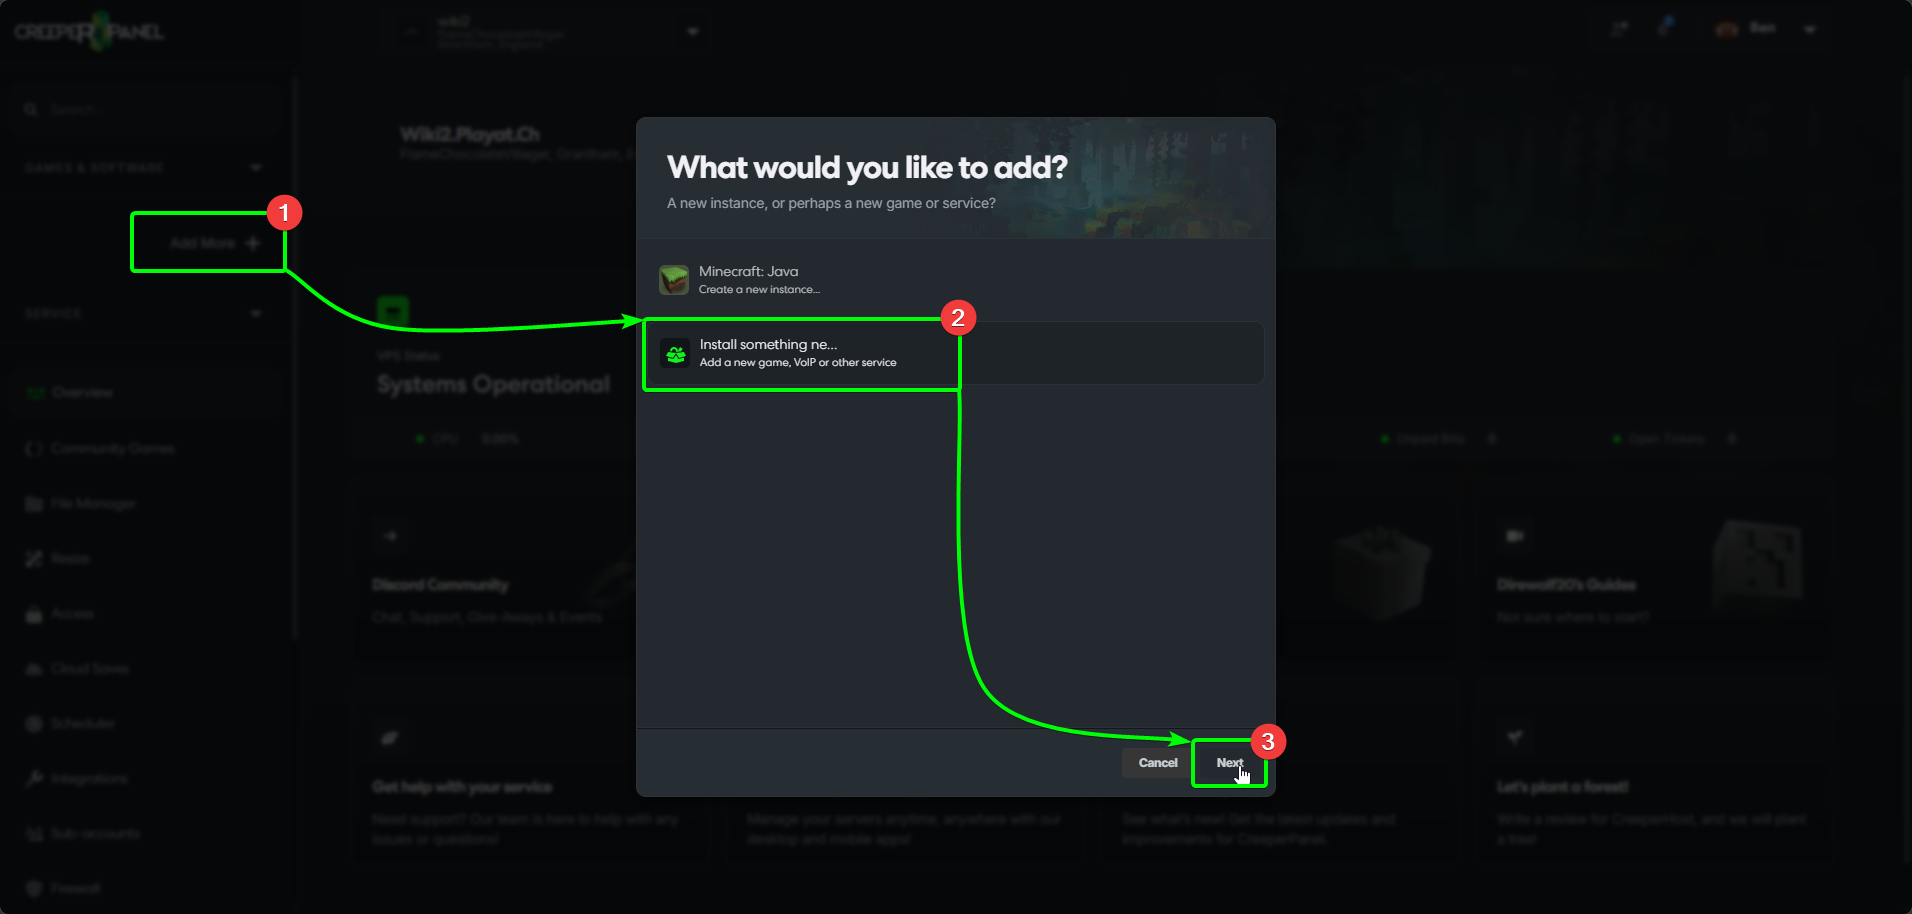
- Select
Add More +from the CreeperPanel's side-bar. - Select
Install something newfrom the menu, then, - Select
Next.
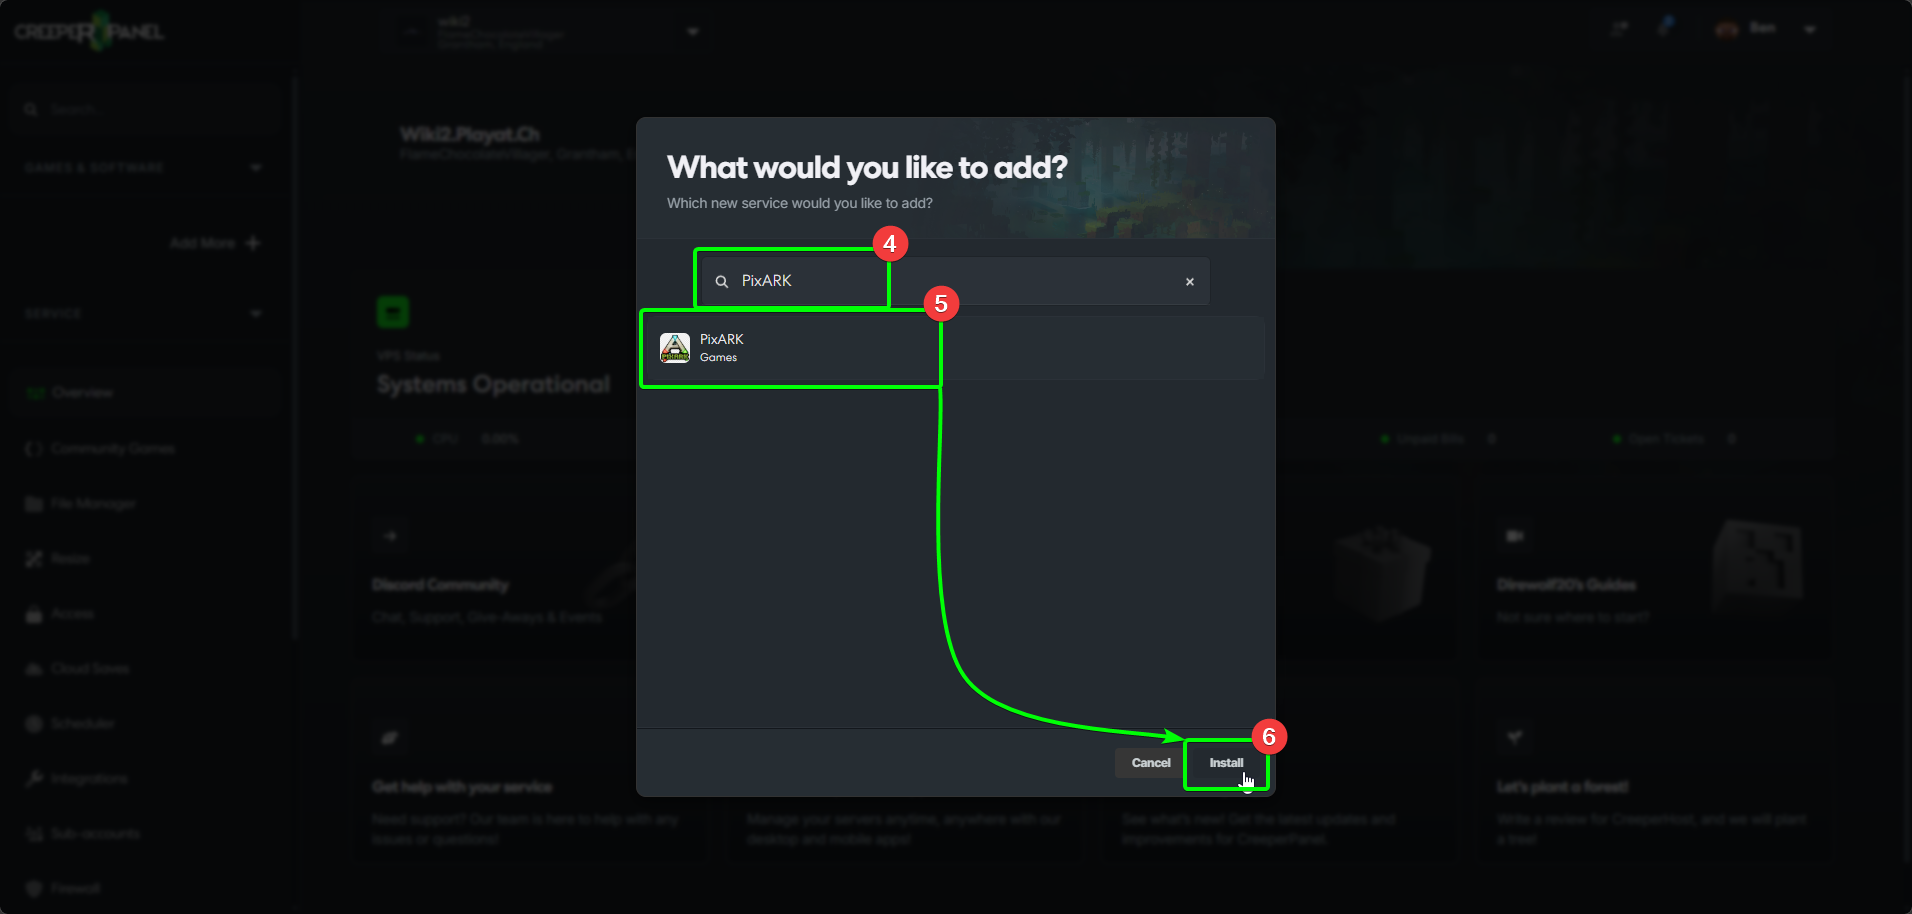
- In the search box, enter
PixARK- the results will auto-populate as you type. - Select
PixARKfrom the list, and then, - Select
Install.
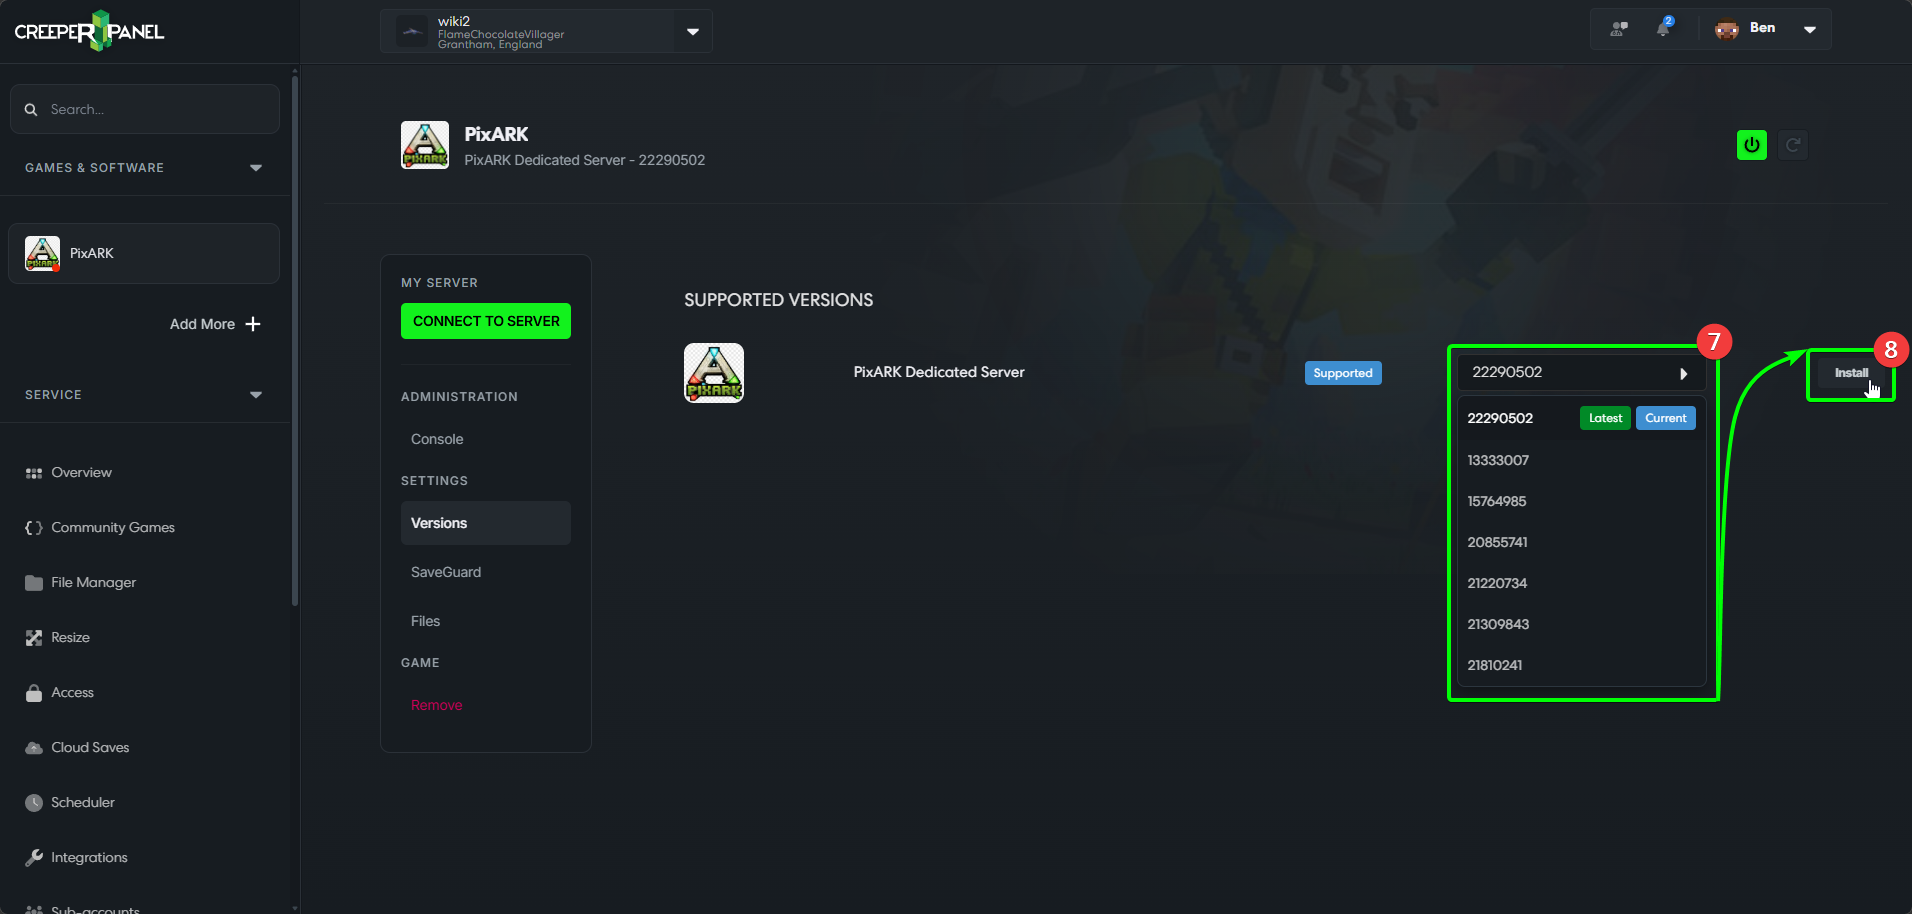
- Select the version you wish to use from the drop-down list, then
- Select
Install.
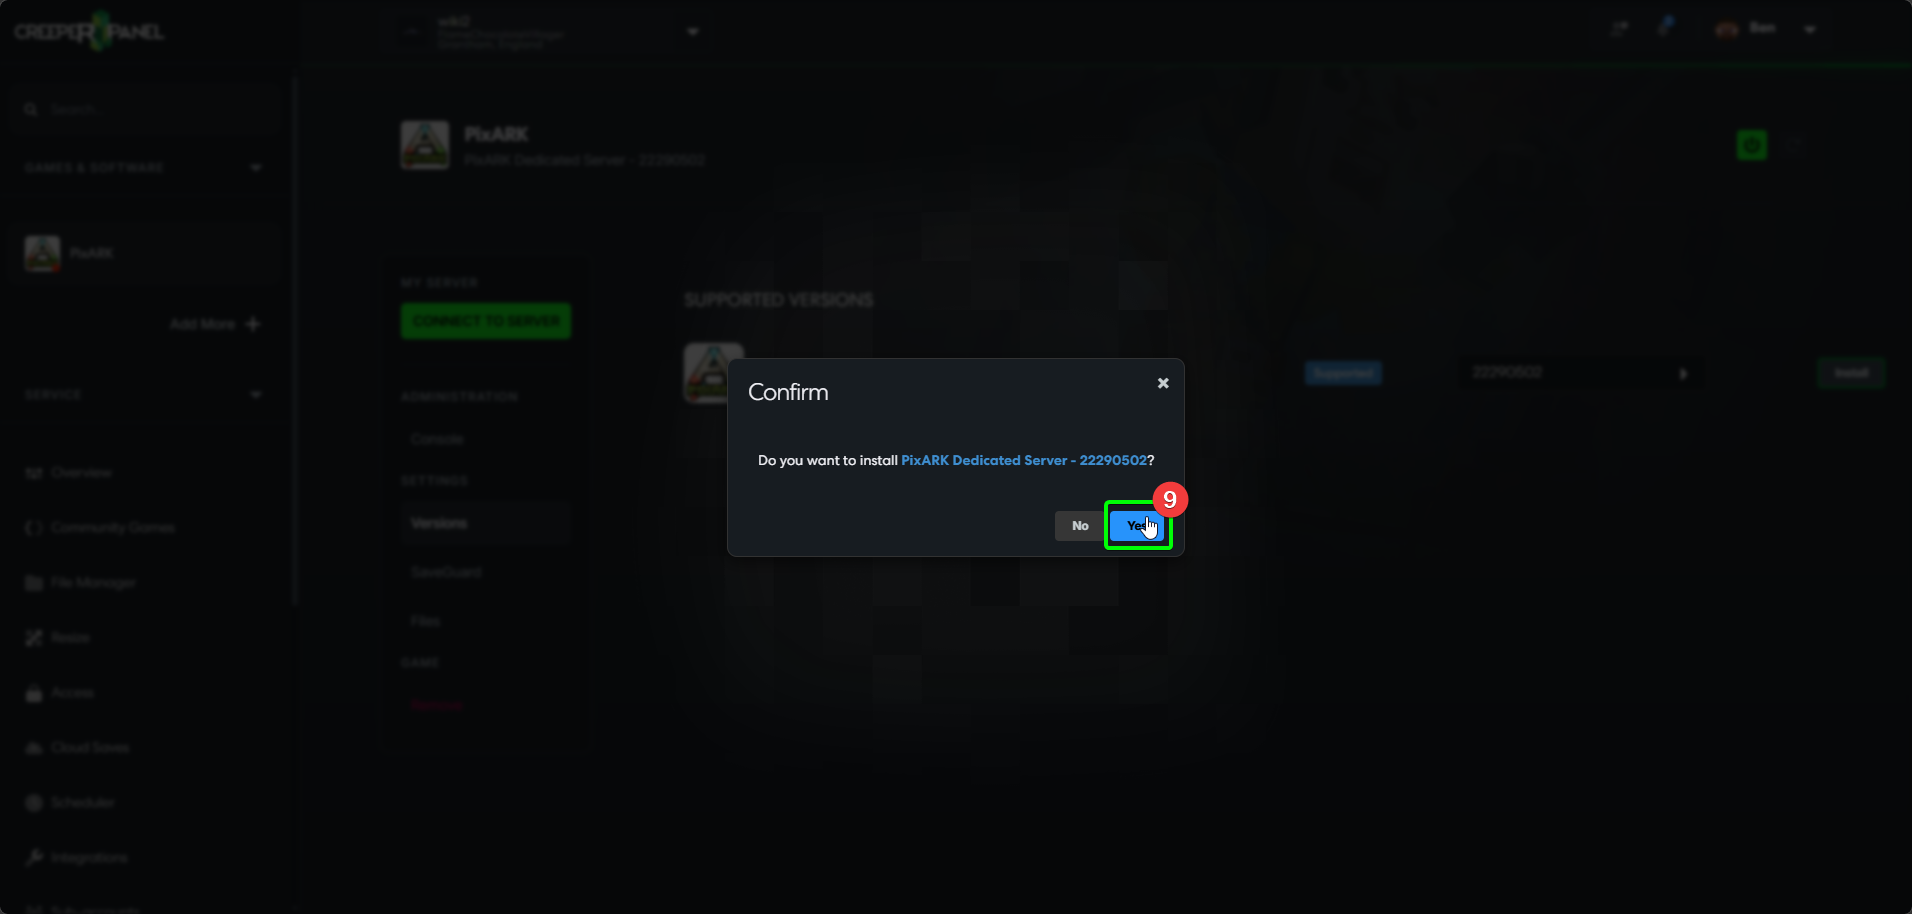
- Select
Yesin the pop-up to confirm the installation.
That's it! The Panel will keep you informed of the status of the installation process. Feel free to familiarise yourself with the Panel whilst you wait for the installation to finish.