Adding mods to your PixARK server
Before making any modifications to your instance's files, ensure it is switched OFF to prevent any data loss/ corruption.
For PixARK, most mods you install will require them to be installed on both your server and client machines, and is most commonly done via the Steam Workshop. You'll need the mods you want to upload to the server to hand, so we need to locate your locally installed mods.
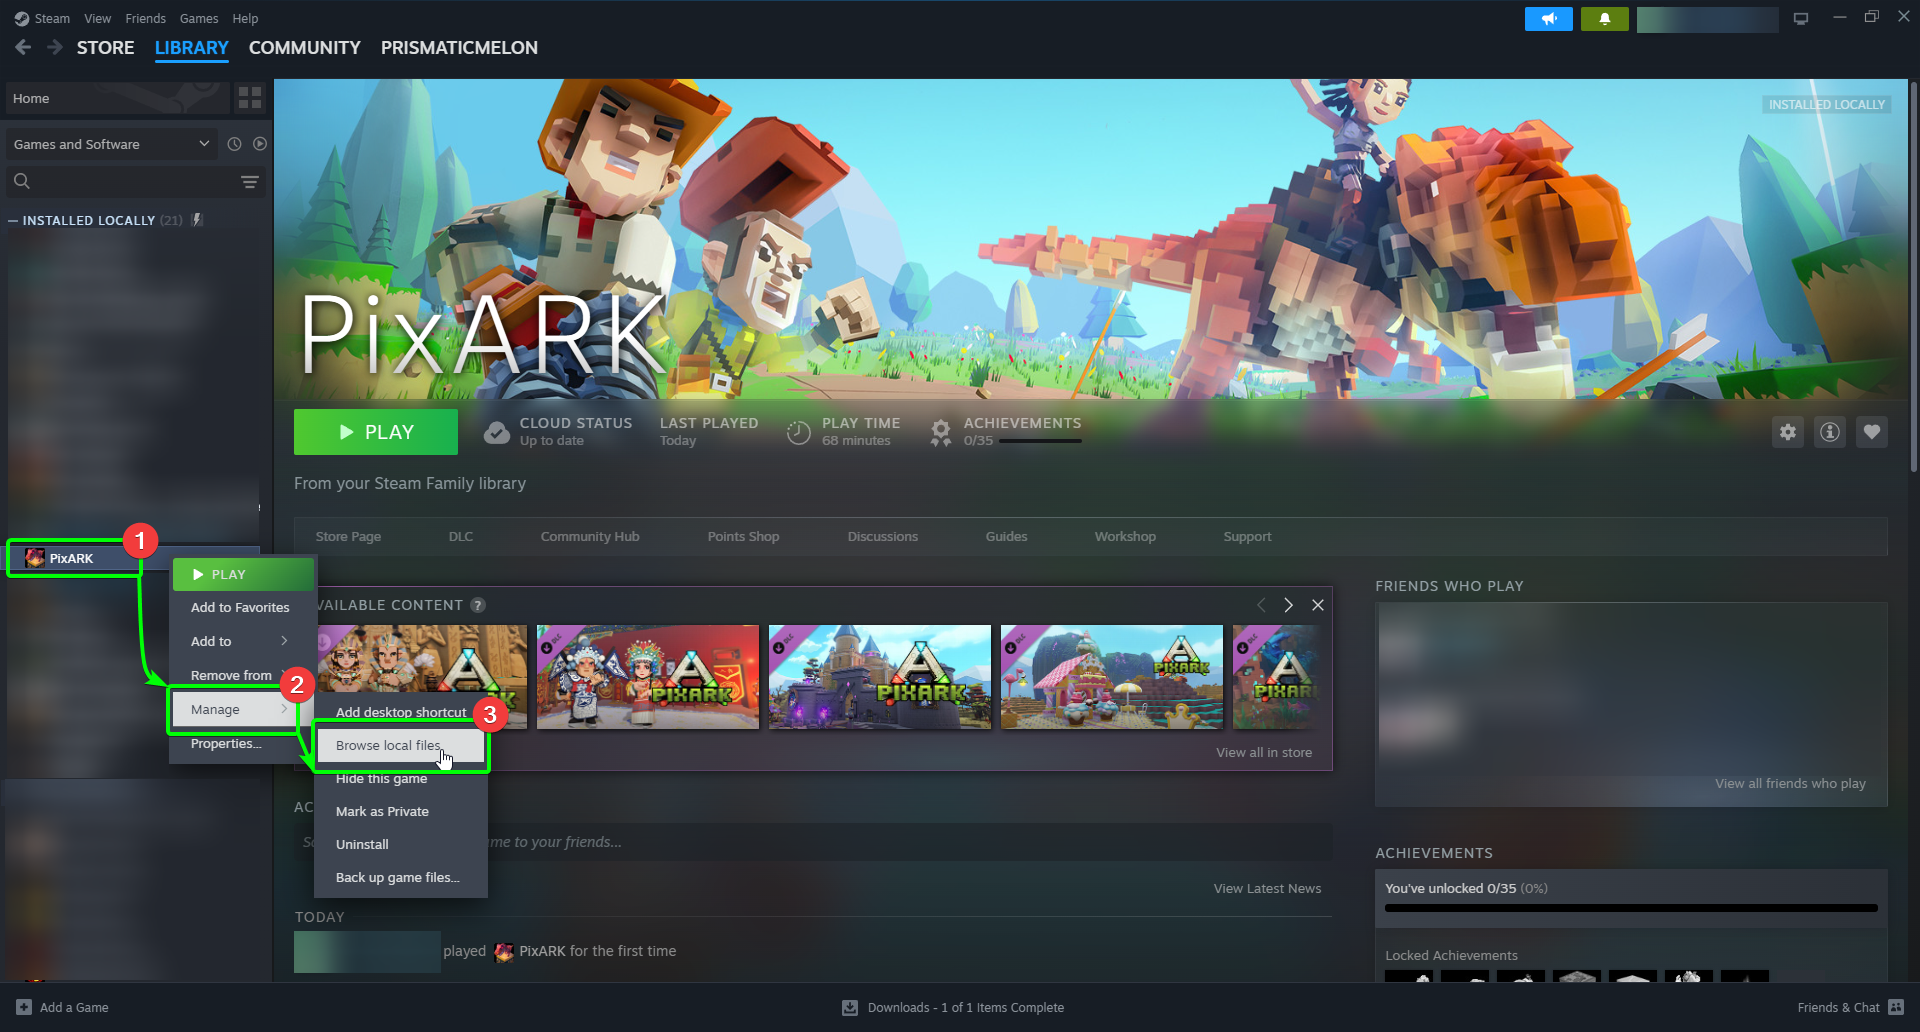
To find them, open Steam on your client machine, then,
- Right-click
PixARK, - Select
Manage, - Then select
Browse local filesto open PixARK's main directory in your file browser.
You'll need to compress the mods into a .ZIP archive before uploading to the Panel, so;
- Select the mods you wish to upload to the CreeperPanel and right-click them, then.
- Select
Compress to..., and - Choose
ZIP fileto compress the chosen mods into a.ziparchive.

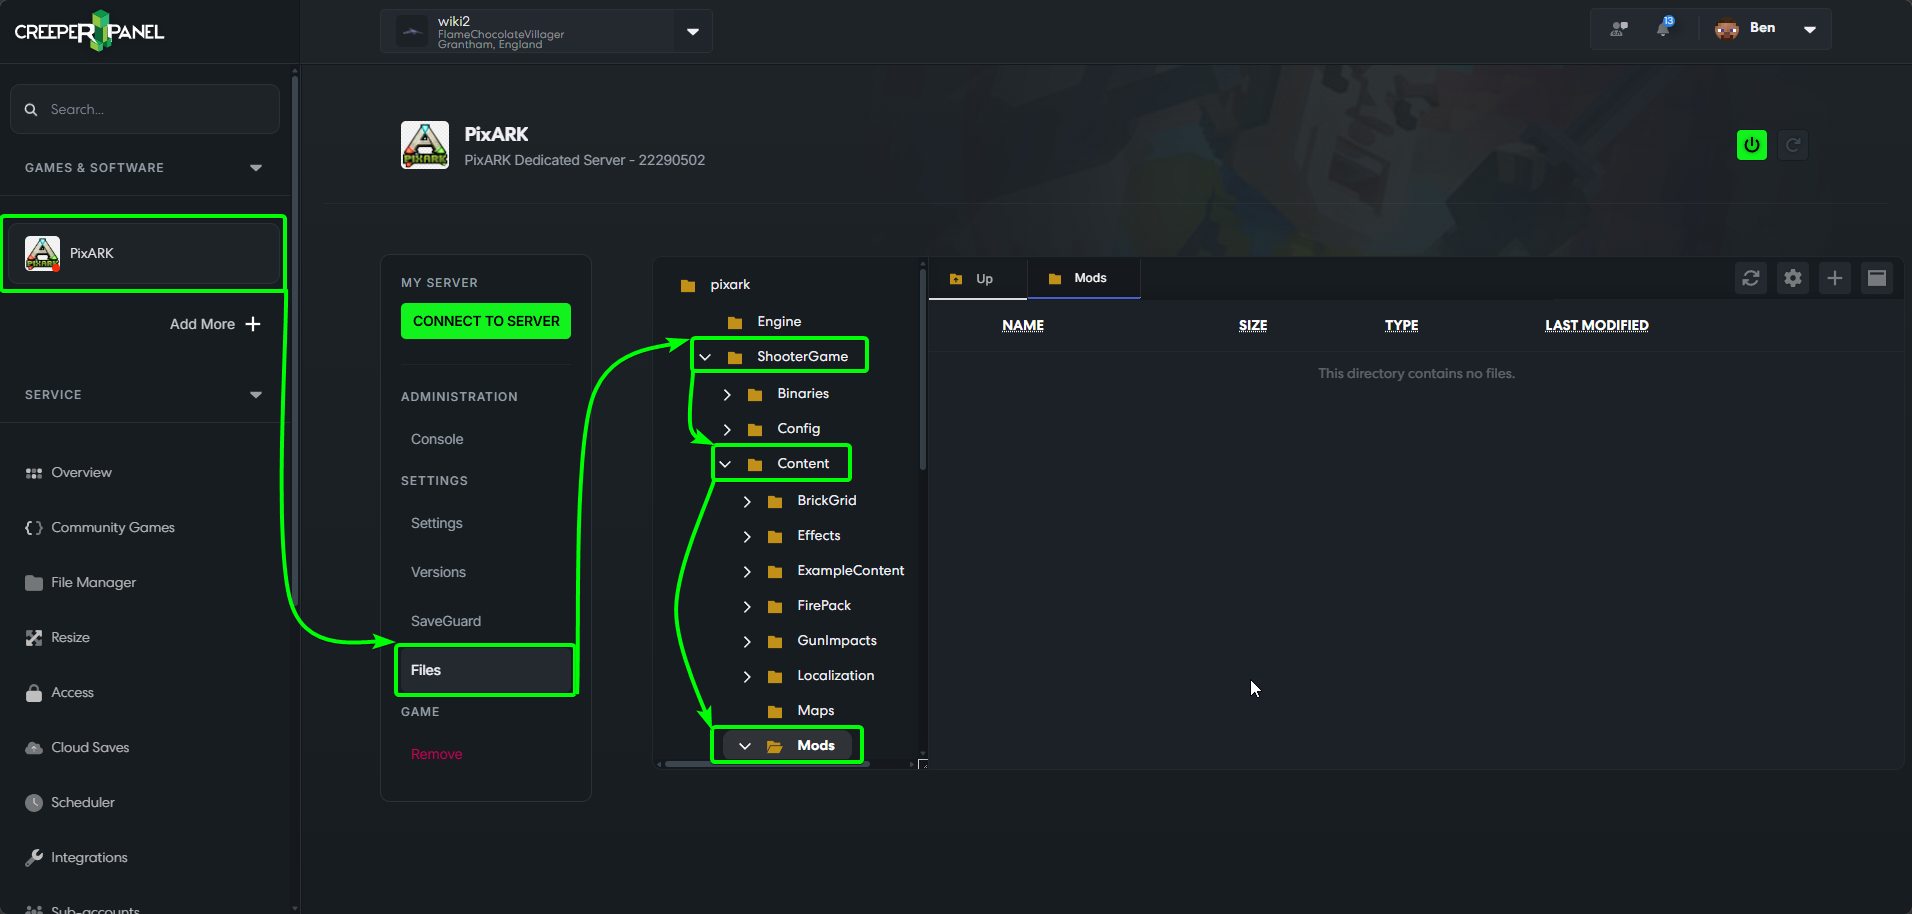
Before uploading the mod archive you've just created, you'll need to locate the Mods folder in your PixARK instance. To find it, select your instance in the Panel, then Files.
Once you're in the file manager, navigate to ShooterGame/ Content/ Mods. This is where you'll upload any mods in the future as well. You can see the steps taken below:
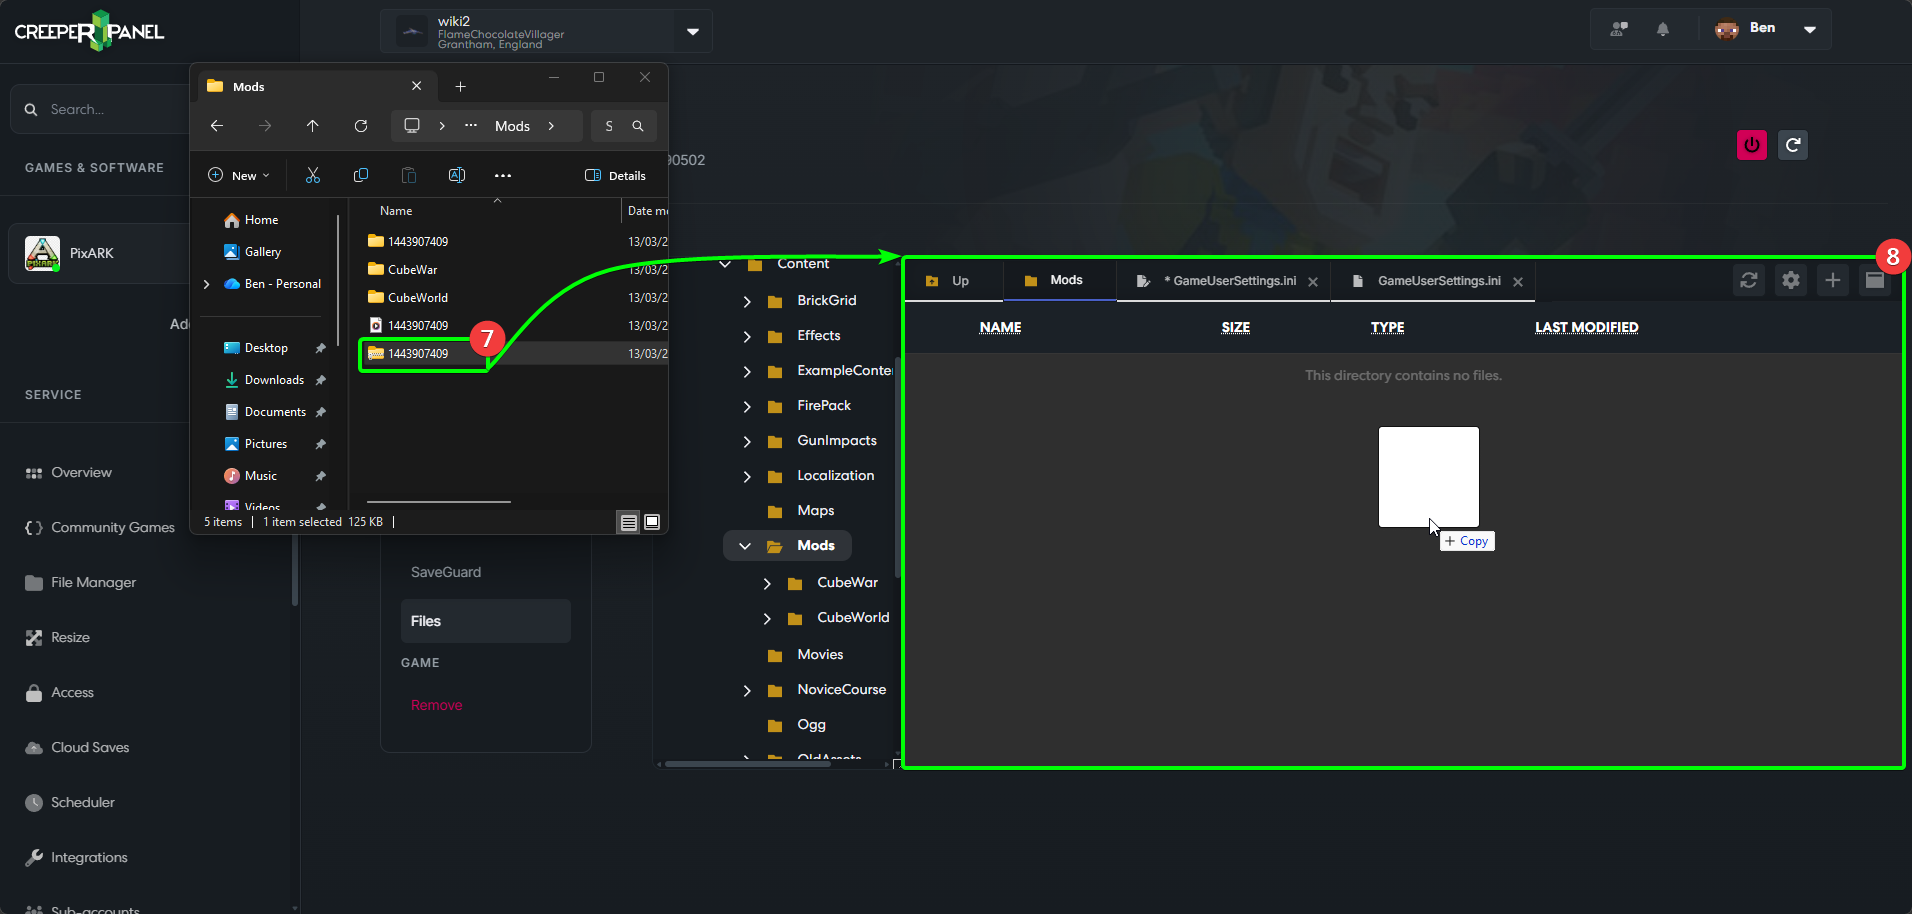
Now you're ready to upload your archive. Place your explorer window over the CreeperPanel so they're both visible, then;
- Select the archive on your client machine, and
- Drag and drop it into the open File Manager window on the Panel.
- You should see the newly-uploaded file on the Panel; right-click it, then
- Select
Extractfrom the menu.
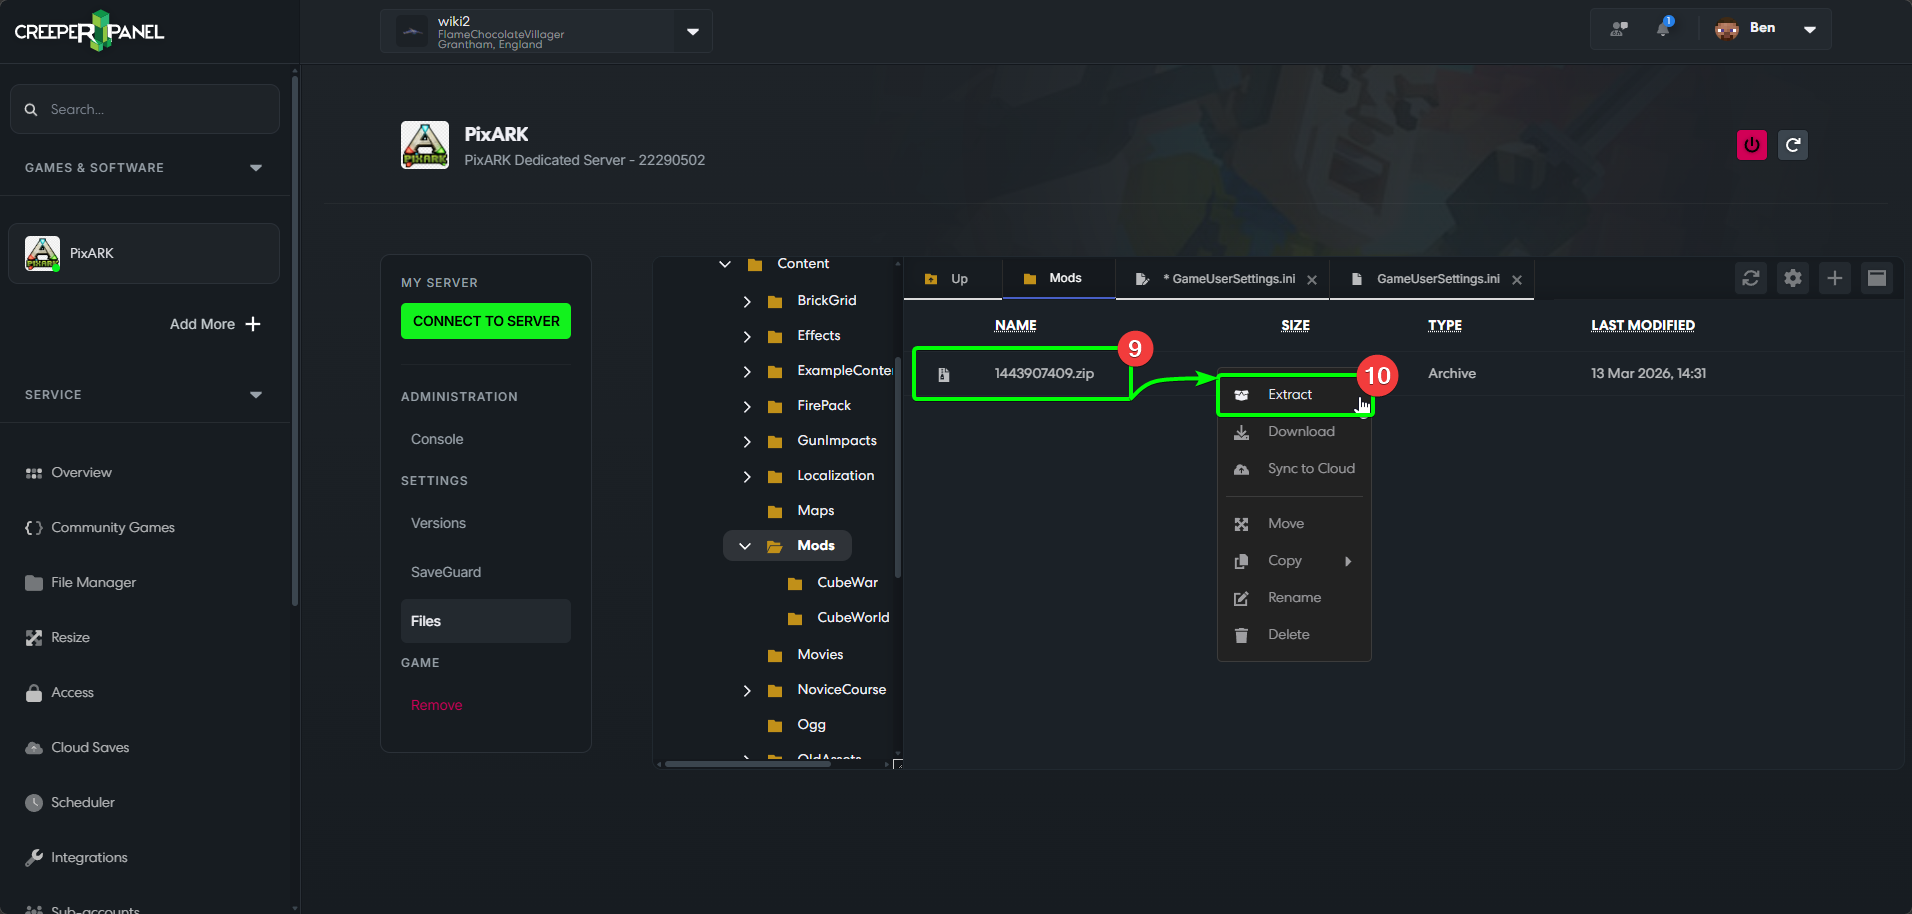
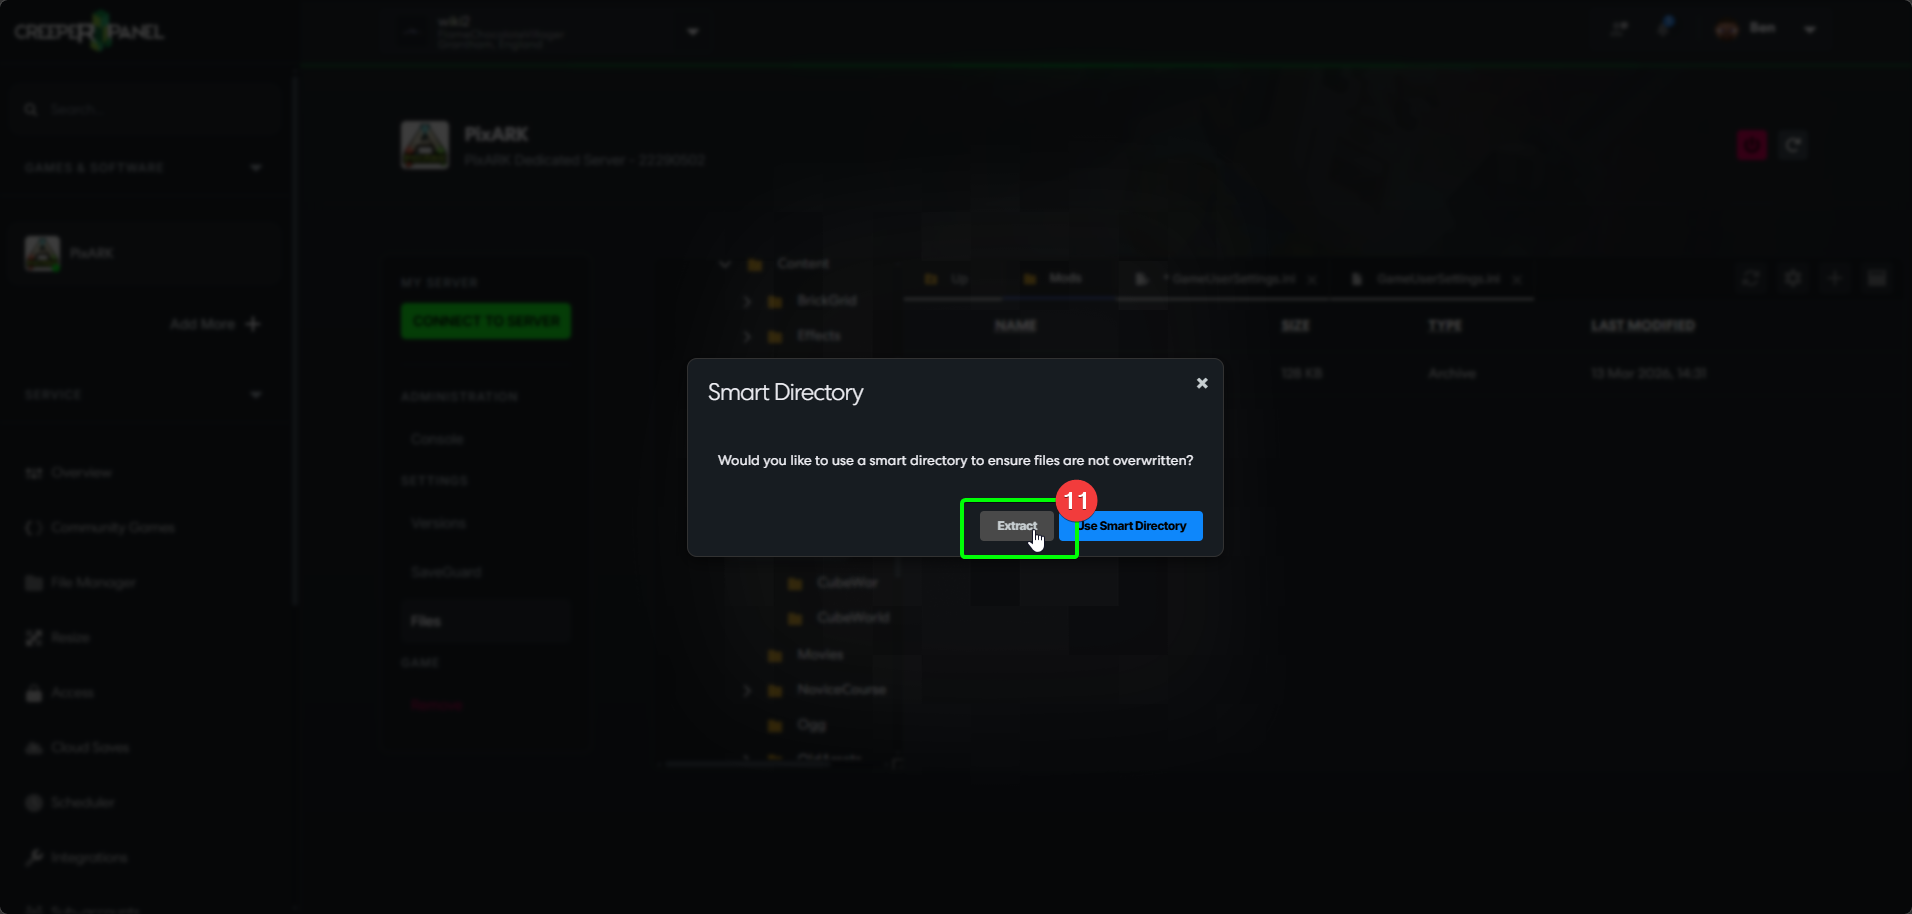
- A pop-up will open, asking you to choose your extraction method - select
Extract.
Now you need to instruct the game to load the mods. To do so:
- Select
PixARKin the Panel's sidebar, then - Select
Settings, found underSettingsin your instance's sub-menu. - Make sure
Generalis selected, then - Scroll down the list until you find the
Modsfield.
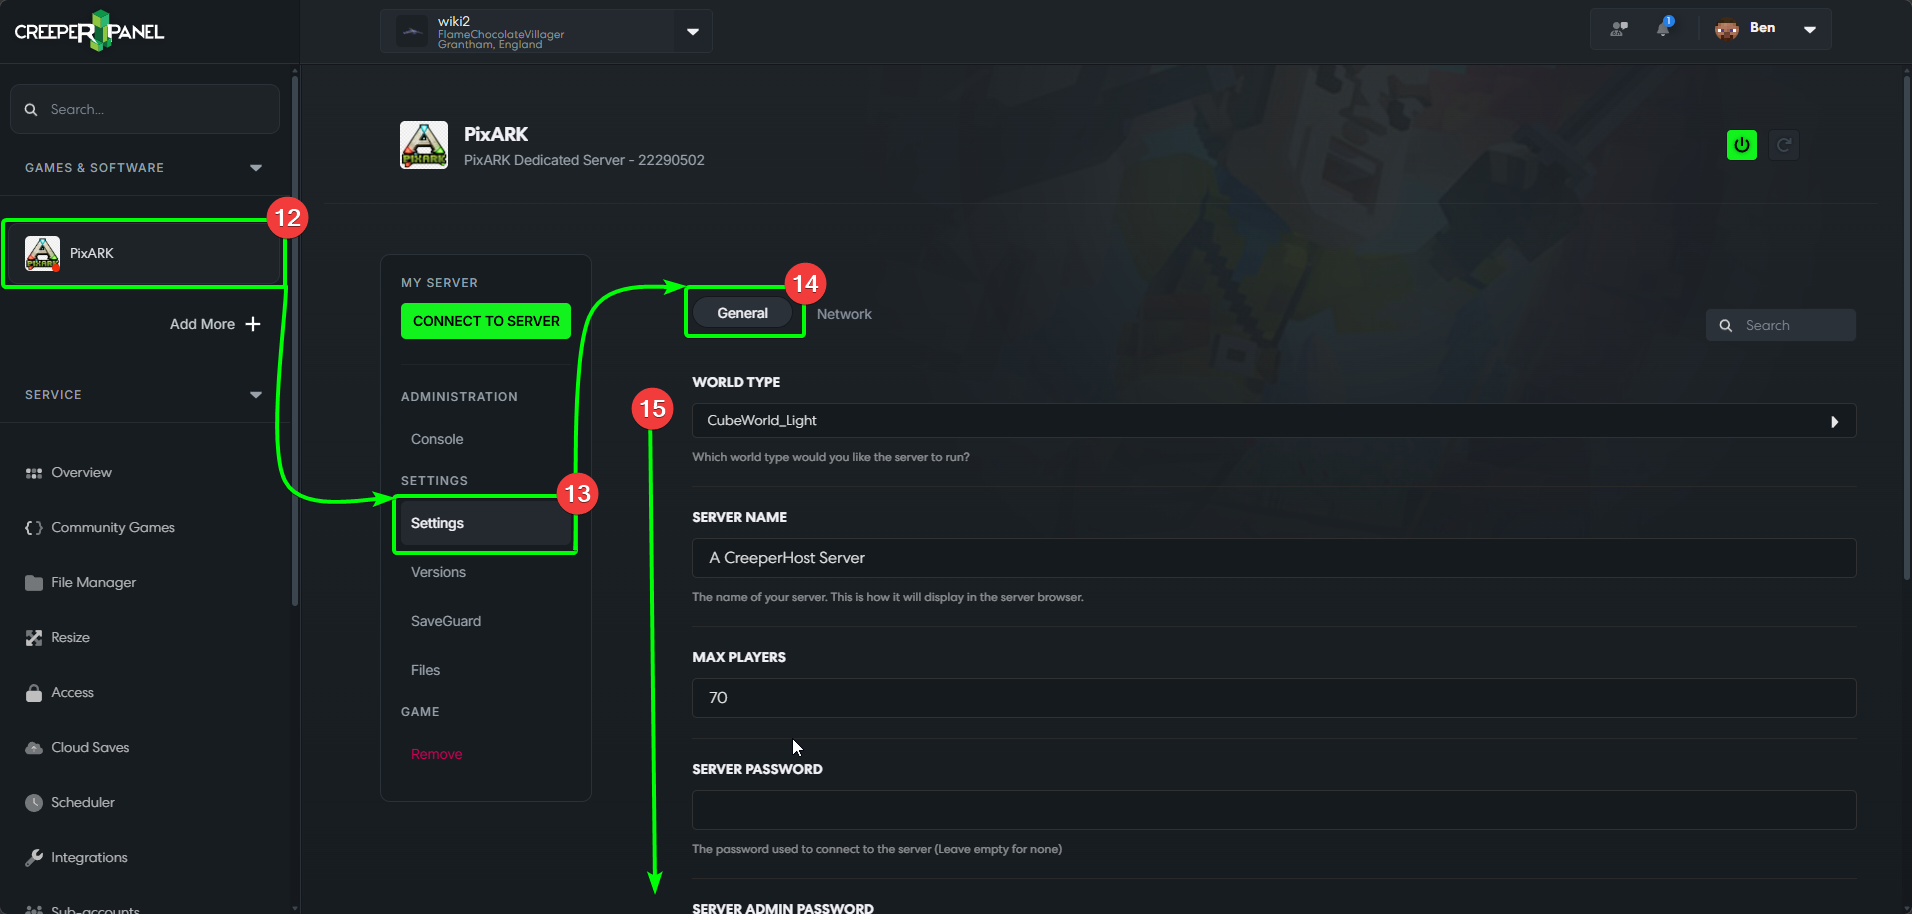
- Once you've found the
Modsfield, you'll need to enter each mod's folder name (usually it's Project ID). If you use more than one mod, you'll need to separate the Project IDs with a comma - so for example a singular mod would read1443907409; more than one mod would read1443907409,0123456789,9876543210. - Select
Saveat the bottom - you must do this, else your mod loading instructions won't persist on startup.