Importing your Minecraft: Bedrock Edition world from your PC
To import your world from your computer, you will first need to export it. This guide will help you through exporting your world from your PC, and uploading it to your server.
Exporting the world
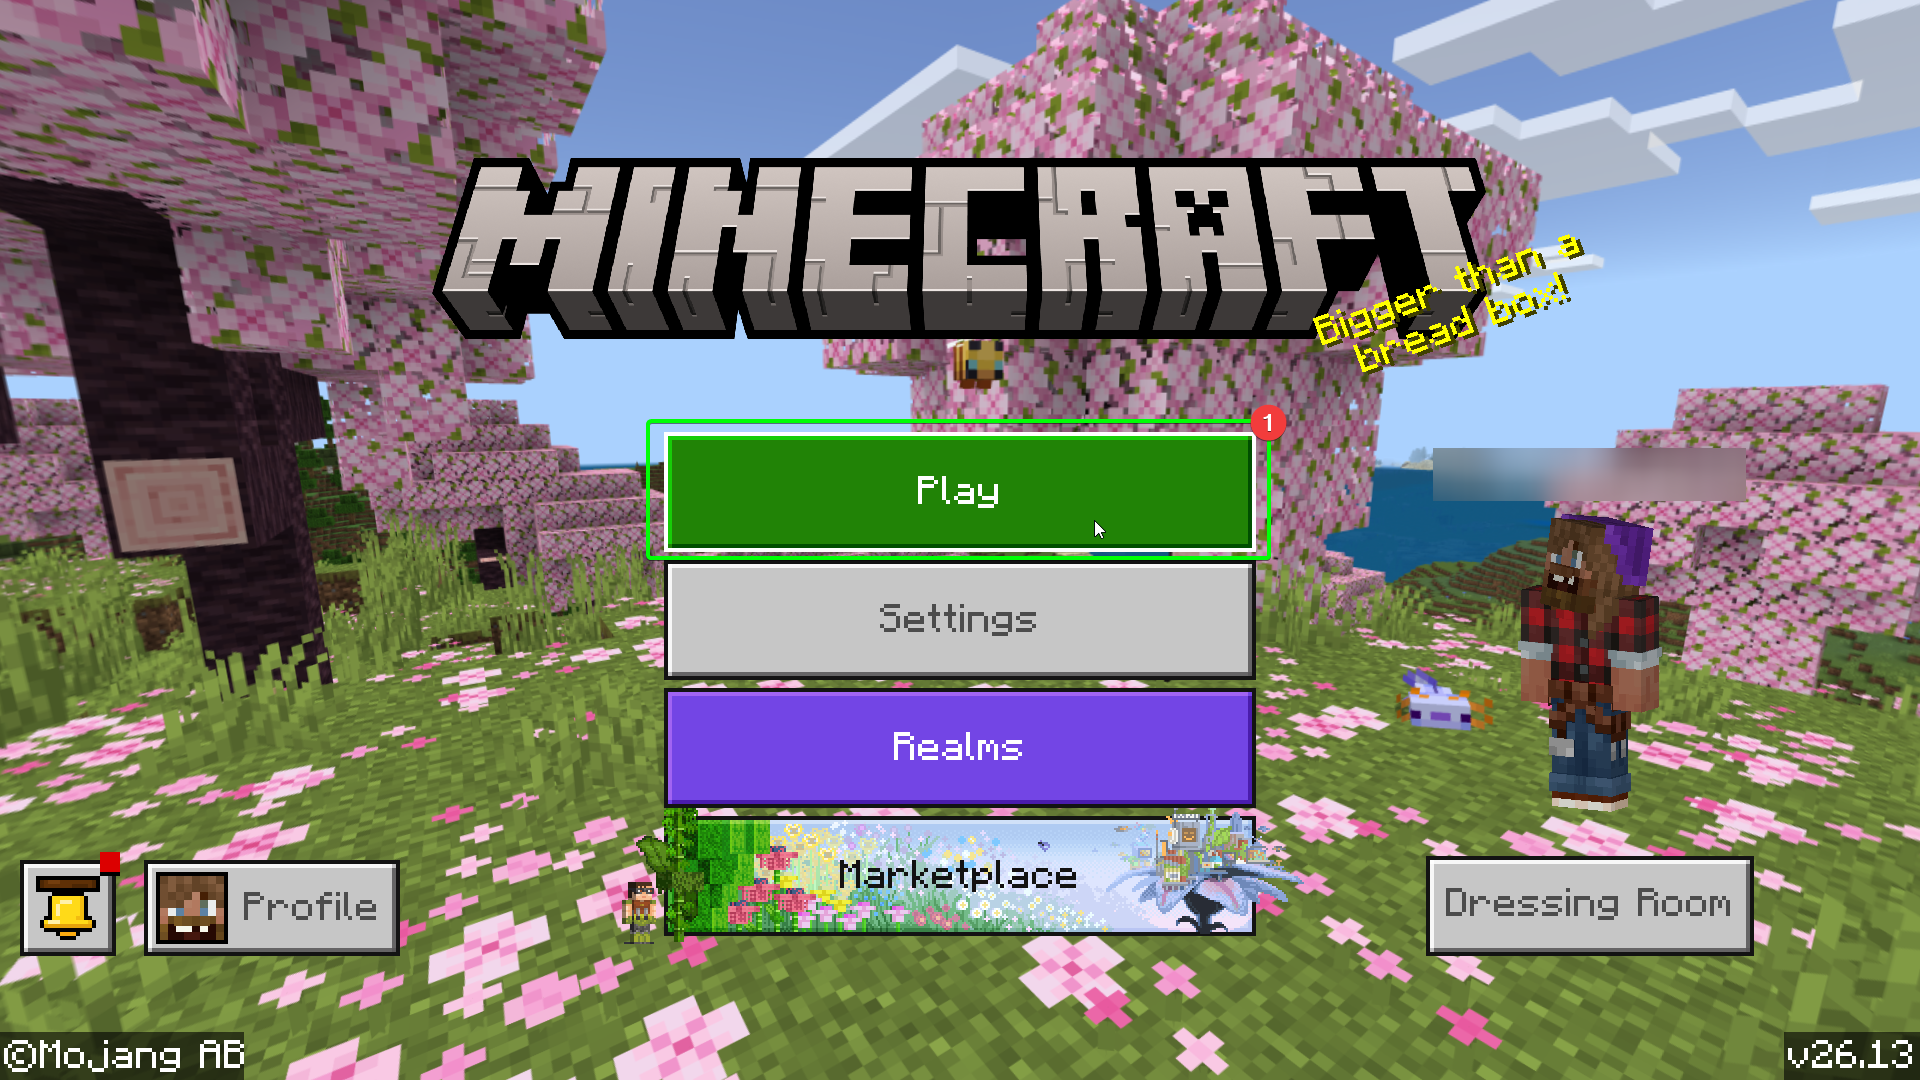
To export your world, launch Minecraft: Bedrock Edition on your PC. At the main menu:
- Select
Play.
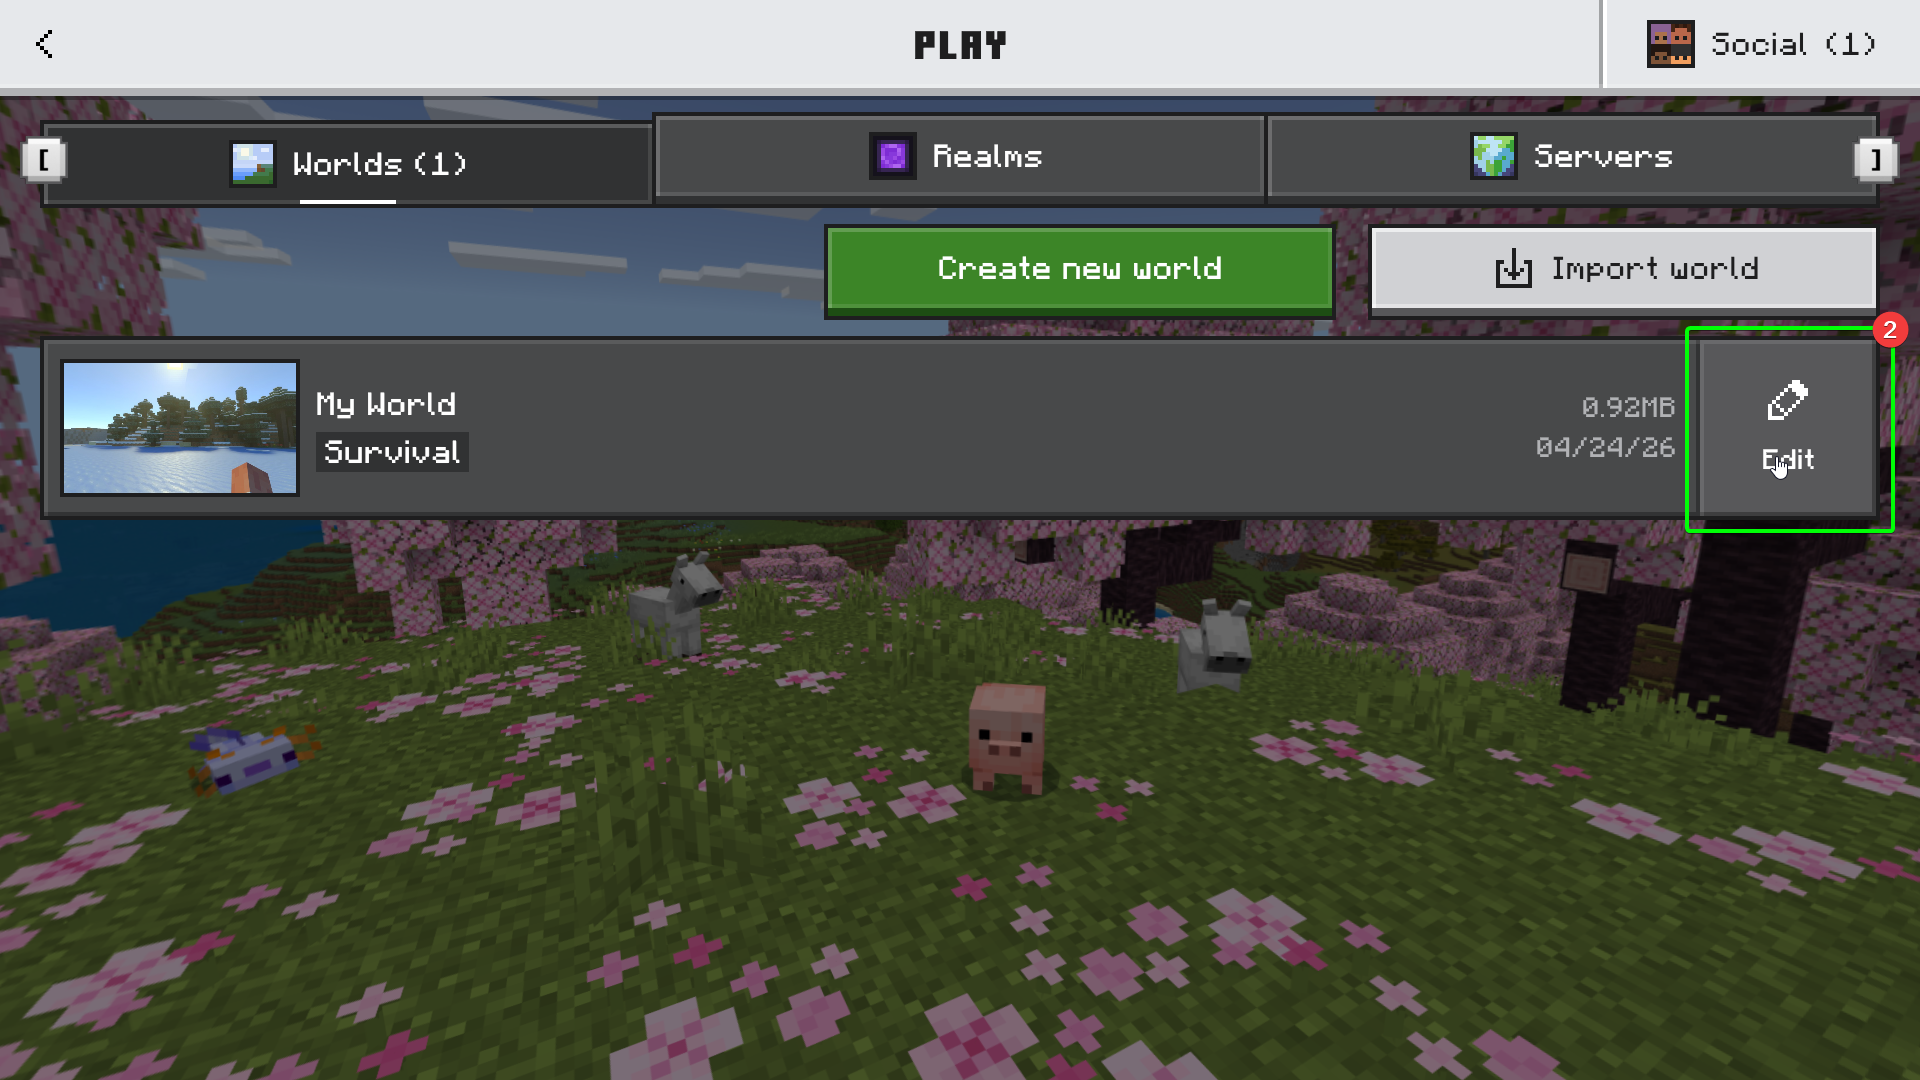
- On the world select screen, click the
Editbutton to view your world settings.
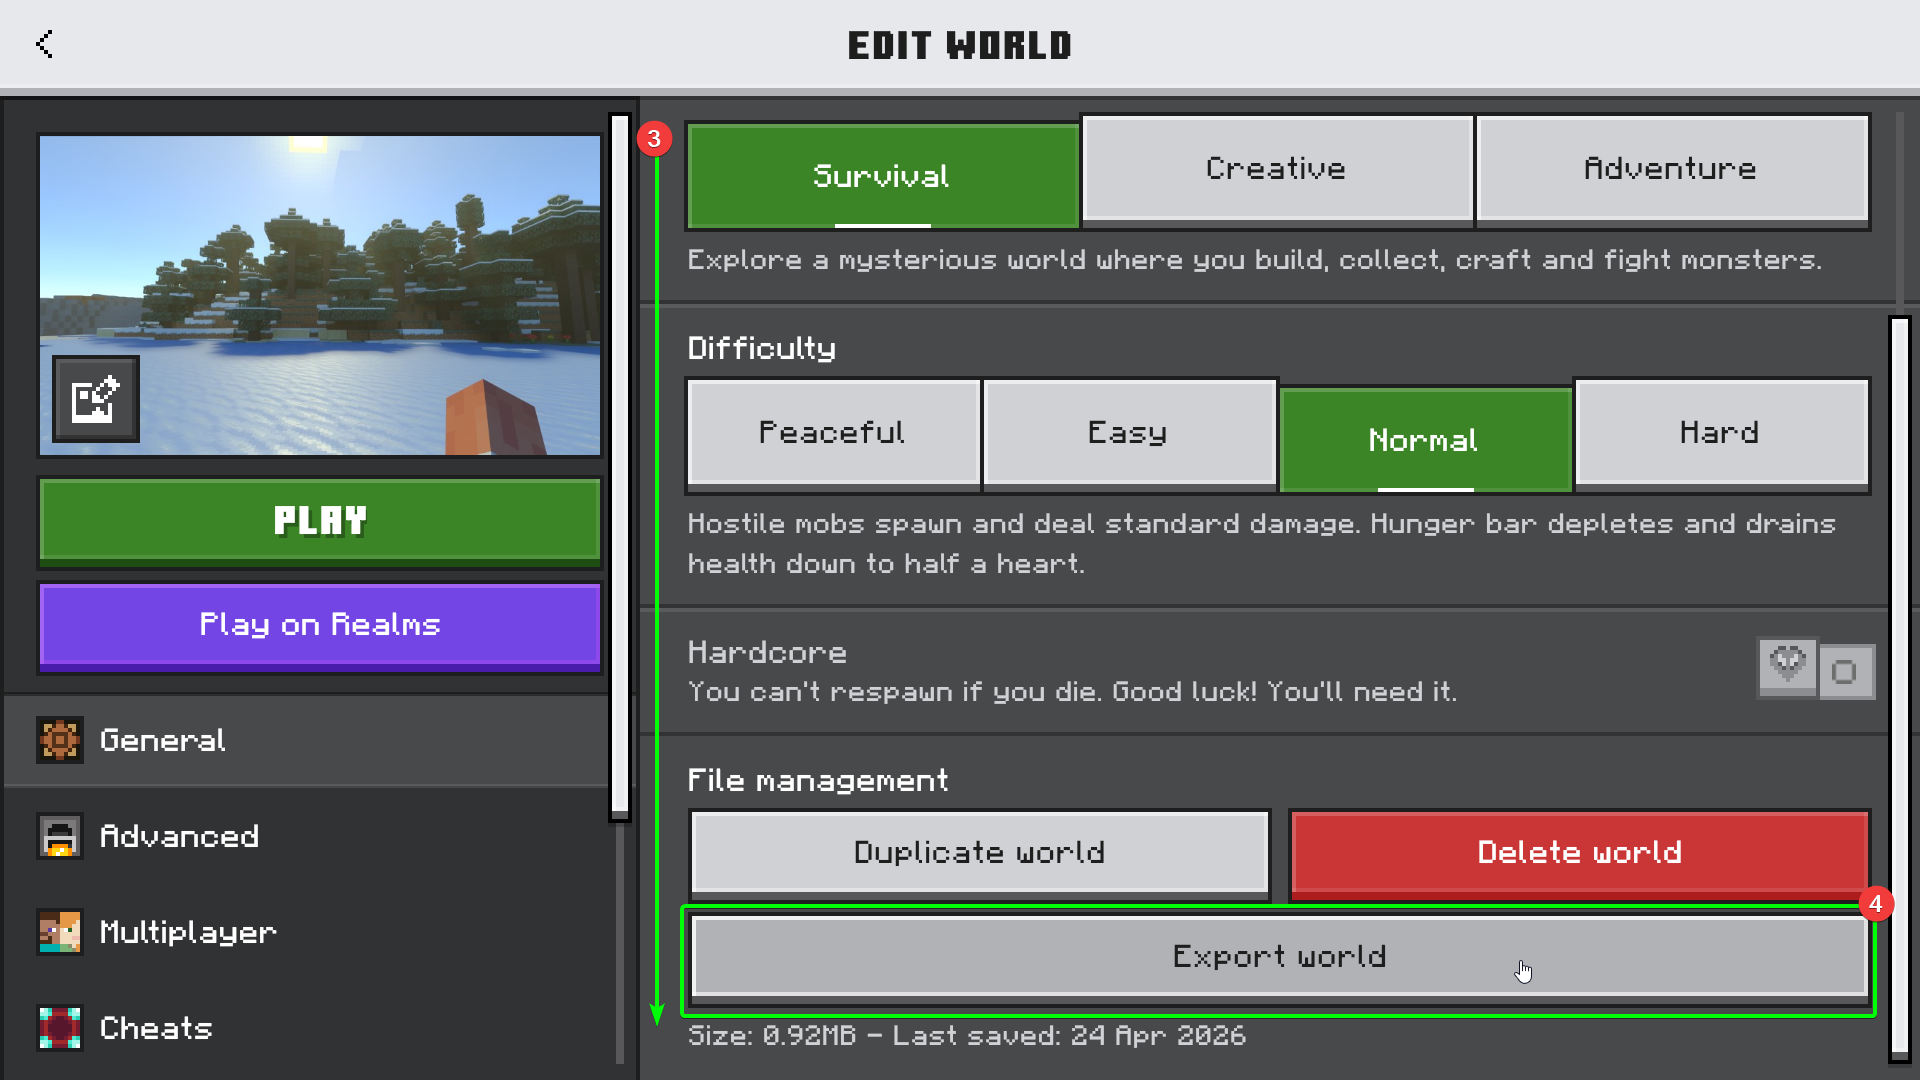
- Scroll down to the bottom of the game settings.
- You should see an
Export Worldbutton. Click the button; this will open an explorer window.
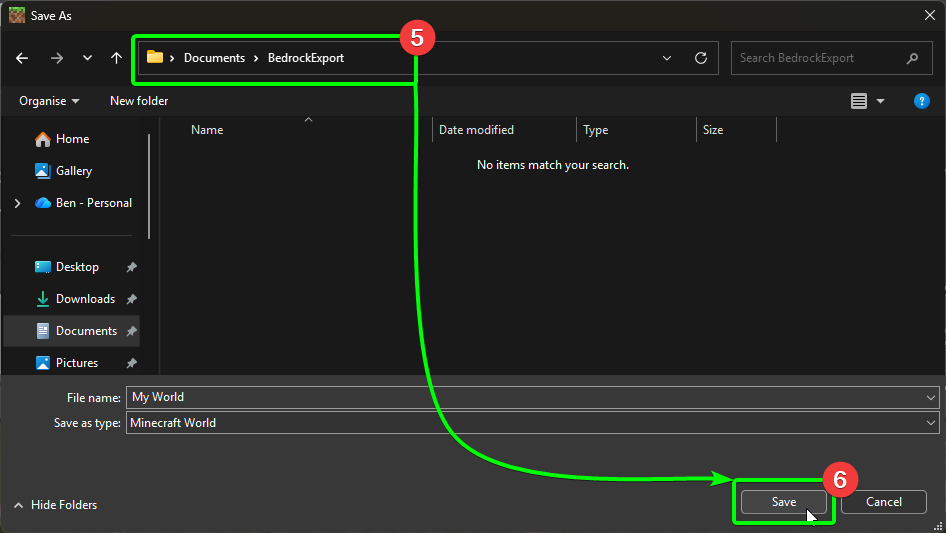
- In the explorer window, choose an easy to find directory.
- Save your exported world into your chosen directory.
Awesome, you've exported your world! Time to upload it to the CreeperPanel!
Uploading the world
Now that you have your exported world ready, log into the CreeperPanel if you haven't already. Next:
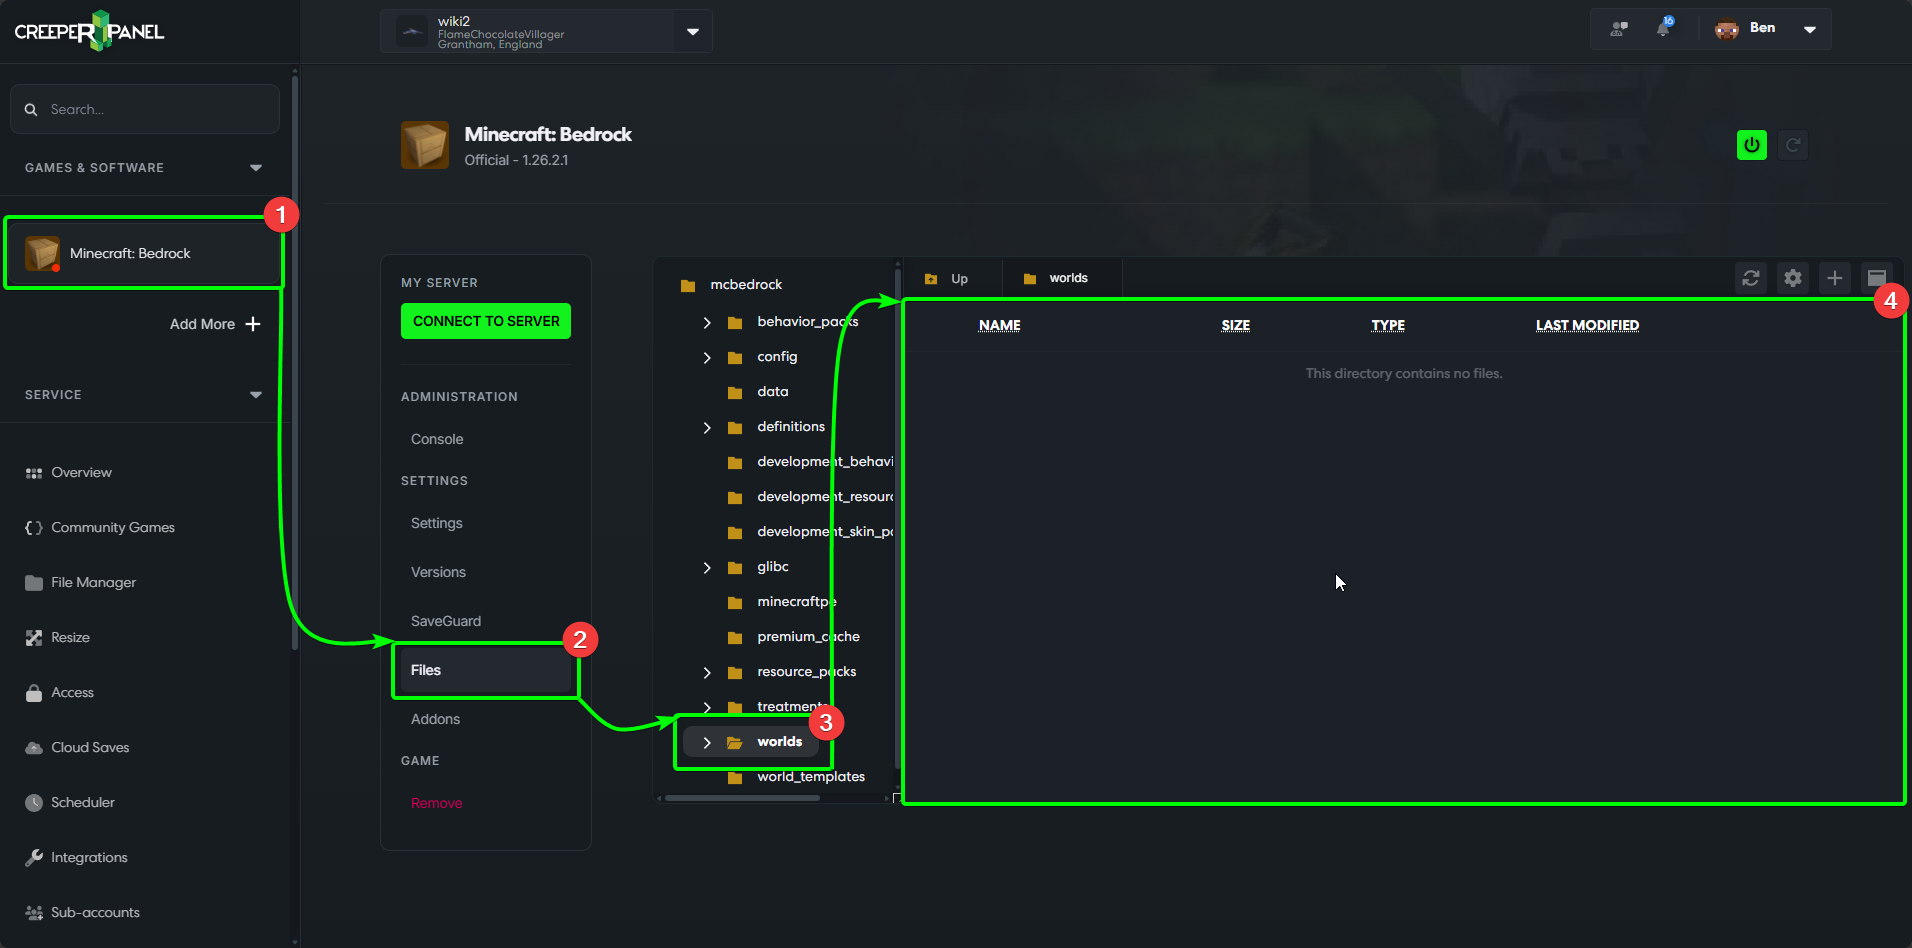
- Select your
Minecraft: Bedrockinstance from yourGames & Softwaretab. - Select
Filesin the instance's sub-menu. - In the directory list, locate the
worldsfolder; click it to open it. - You should see an empty directory. That's where you'll need to upload your exported world.
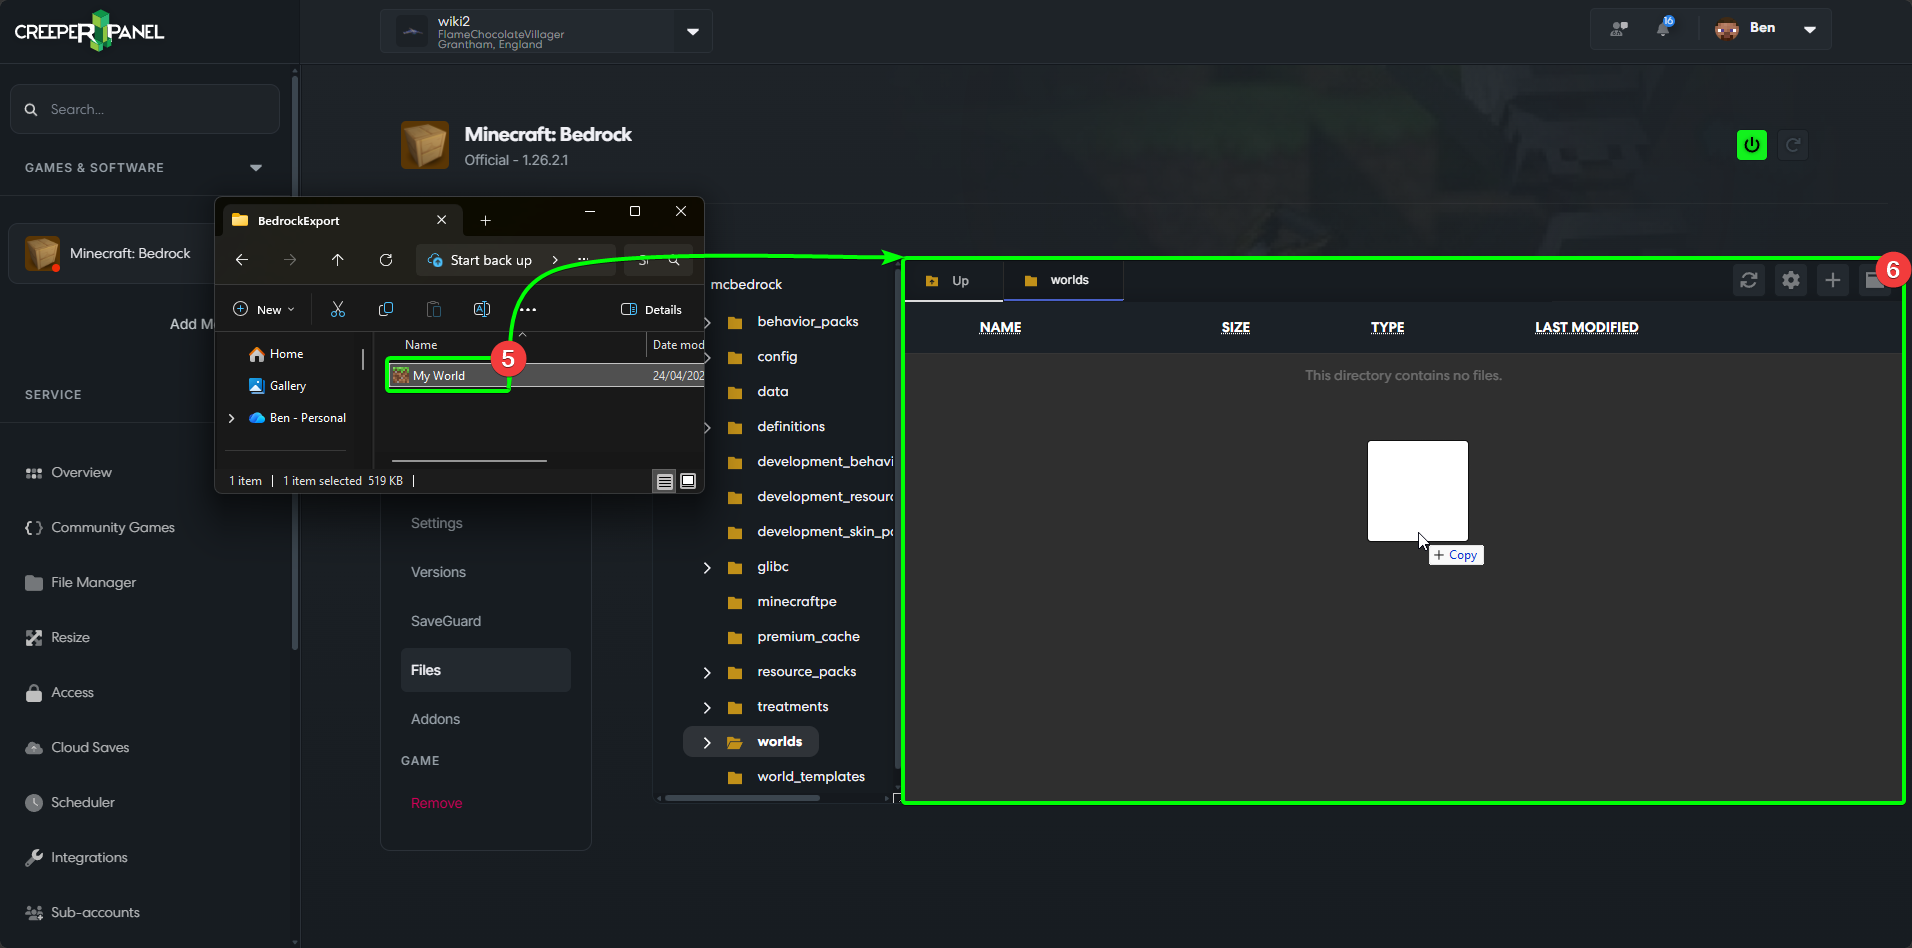
- Open an explorer window, and locate your exported world file. Select the file, then,
- Drag and drop it into the open directory on the CreeperPanel.
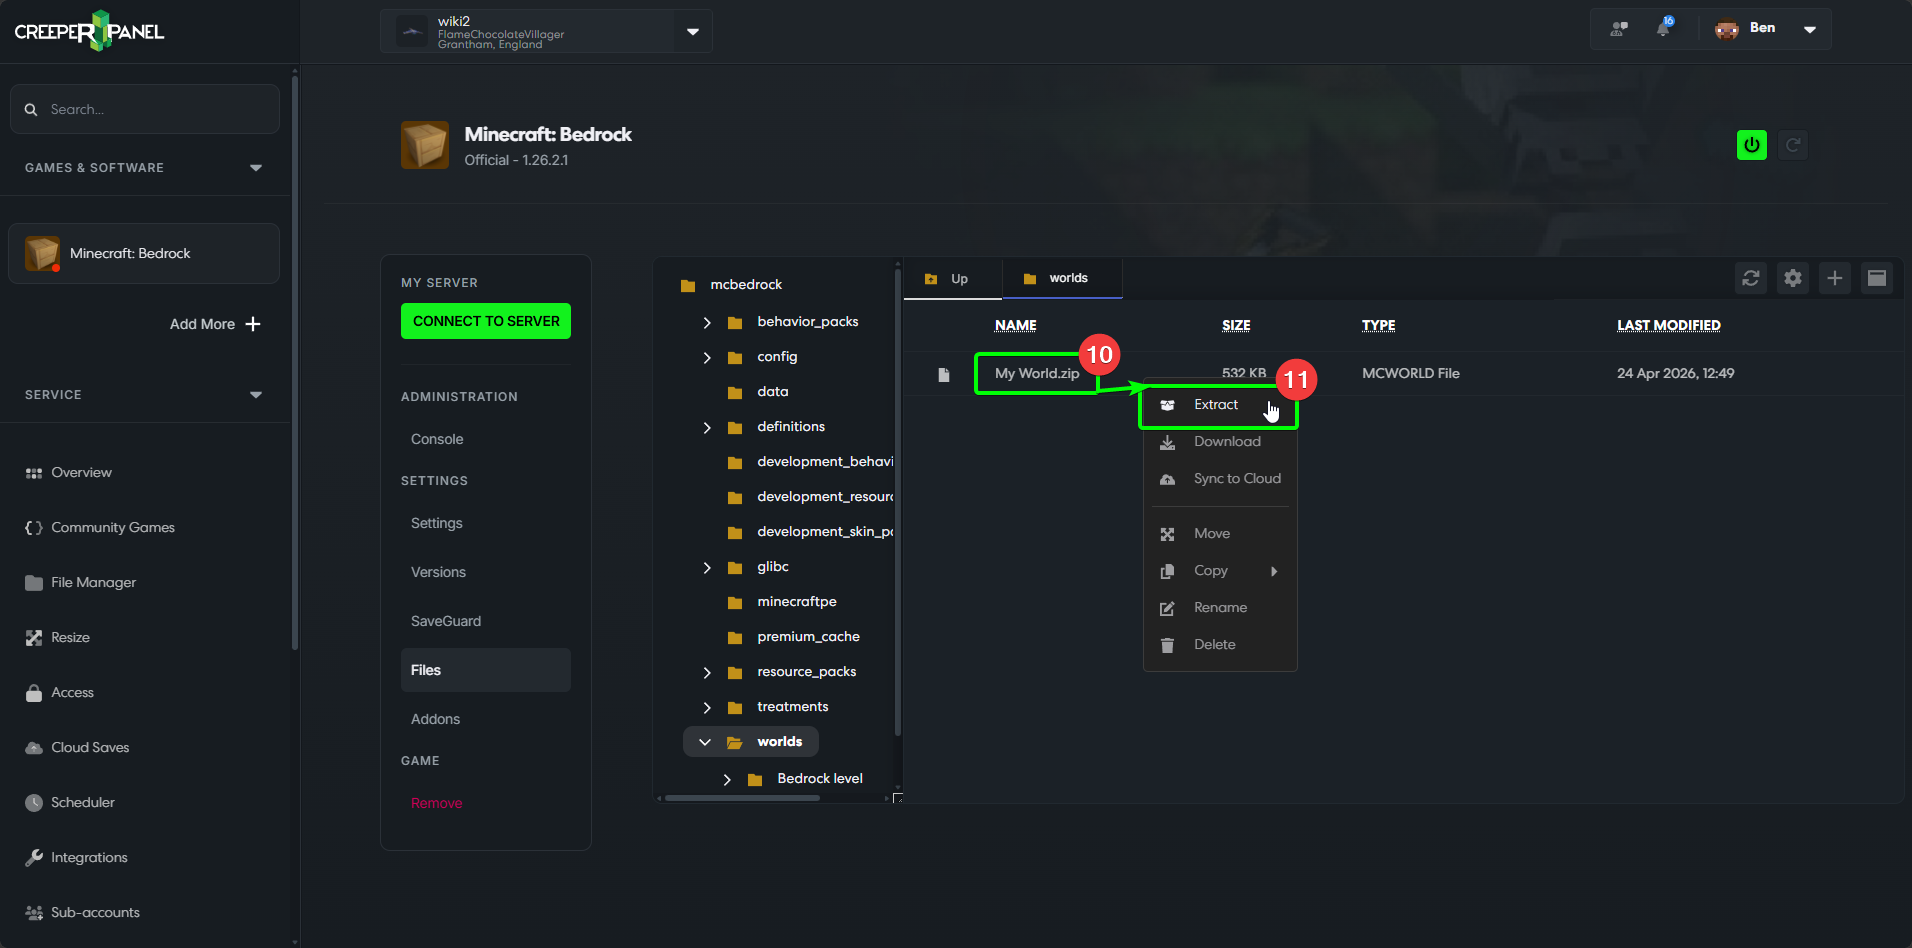
You should now have a file named My World.mcworld (the name may be different if you have renamed your world). You'll need to change it to My World.zip, and extract the new .zip file for Minecraft: Bedrock to load it correctly.
- Right-click the
My World.mcworldfile. - Select
Rename.
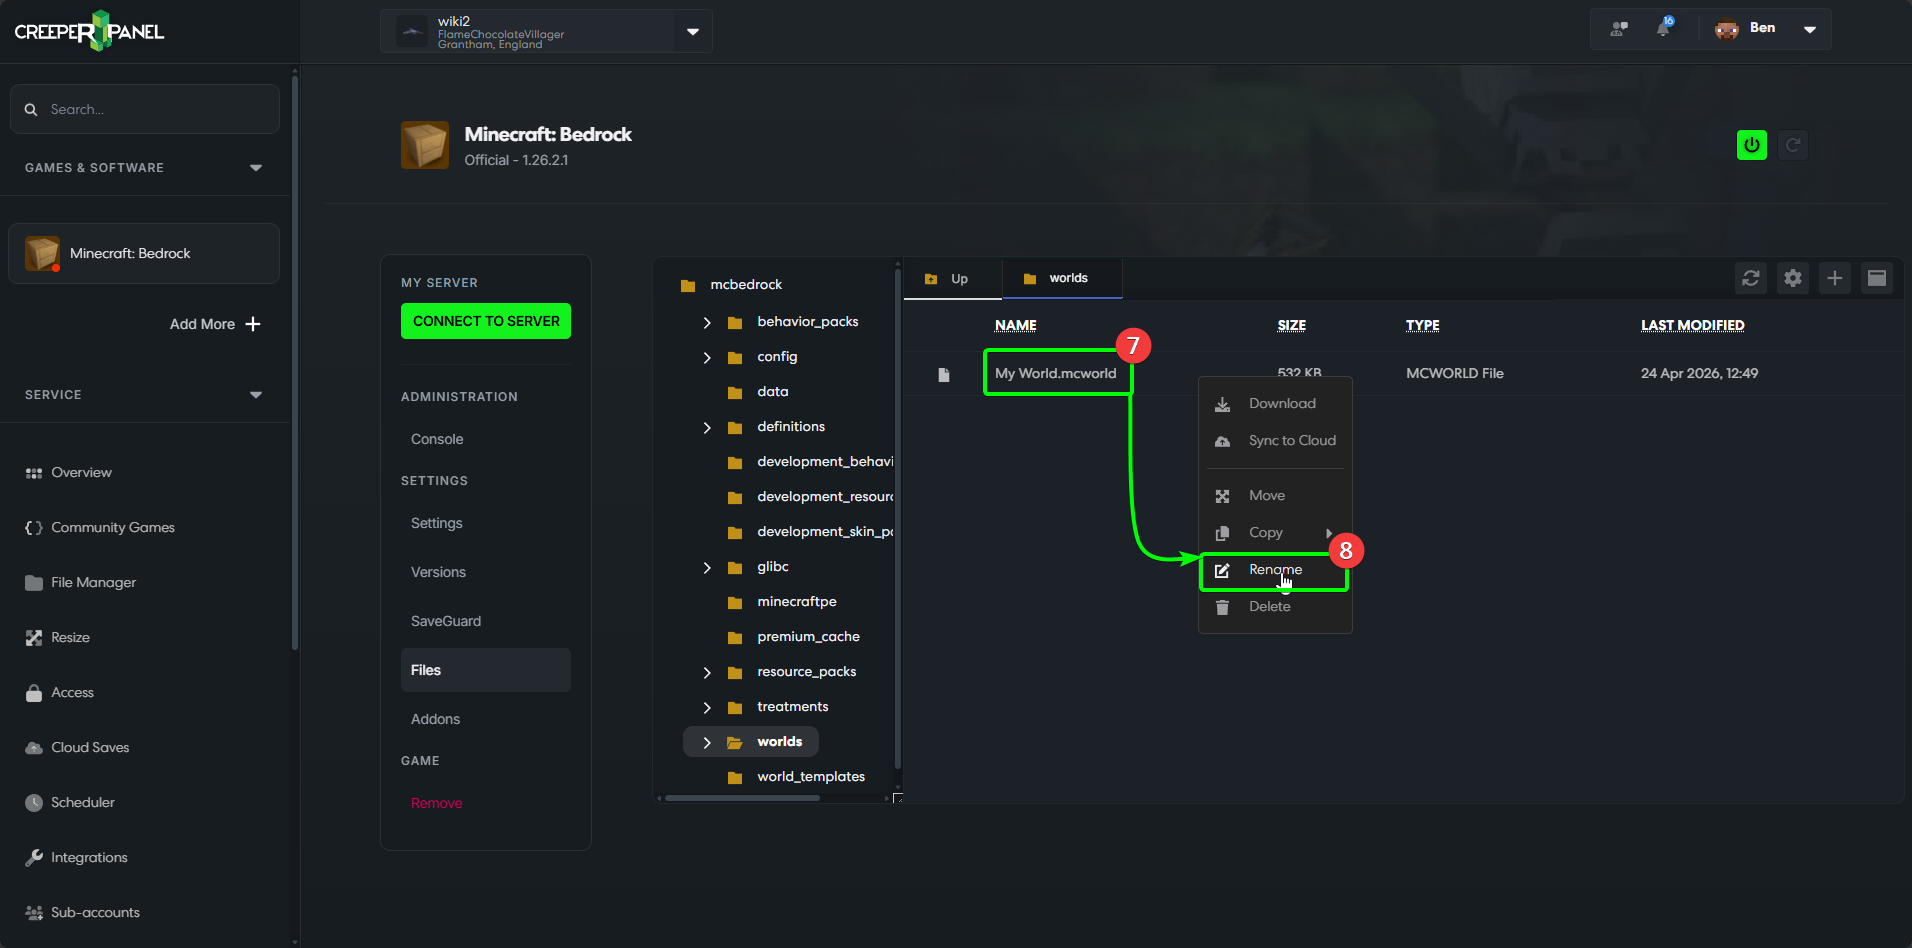
- Change the file extension to
.zip; it should look like the example below. Hit enter when you've changed it.
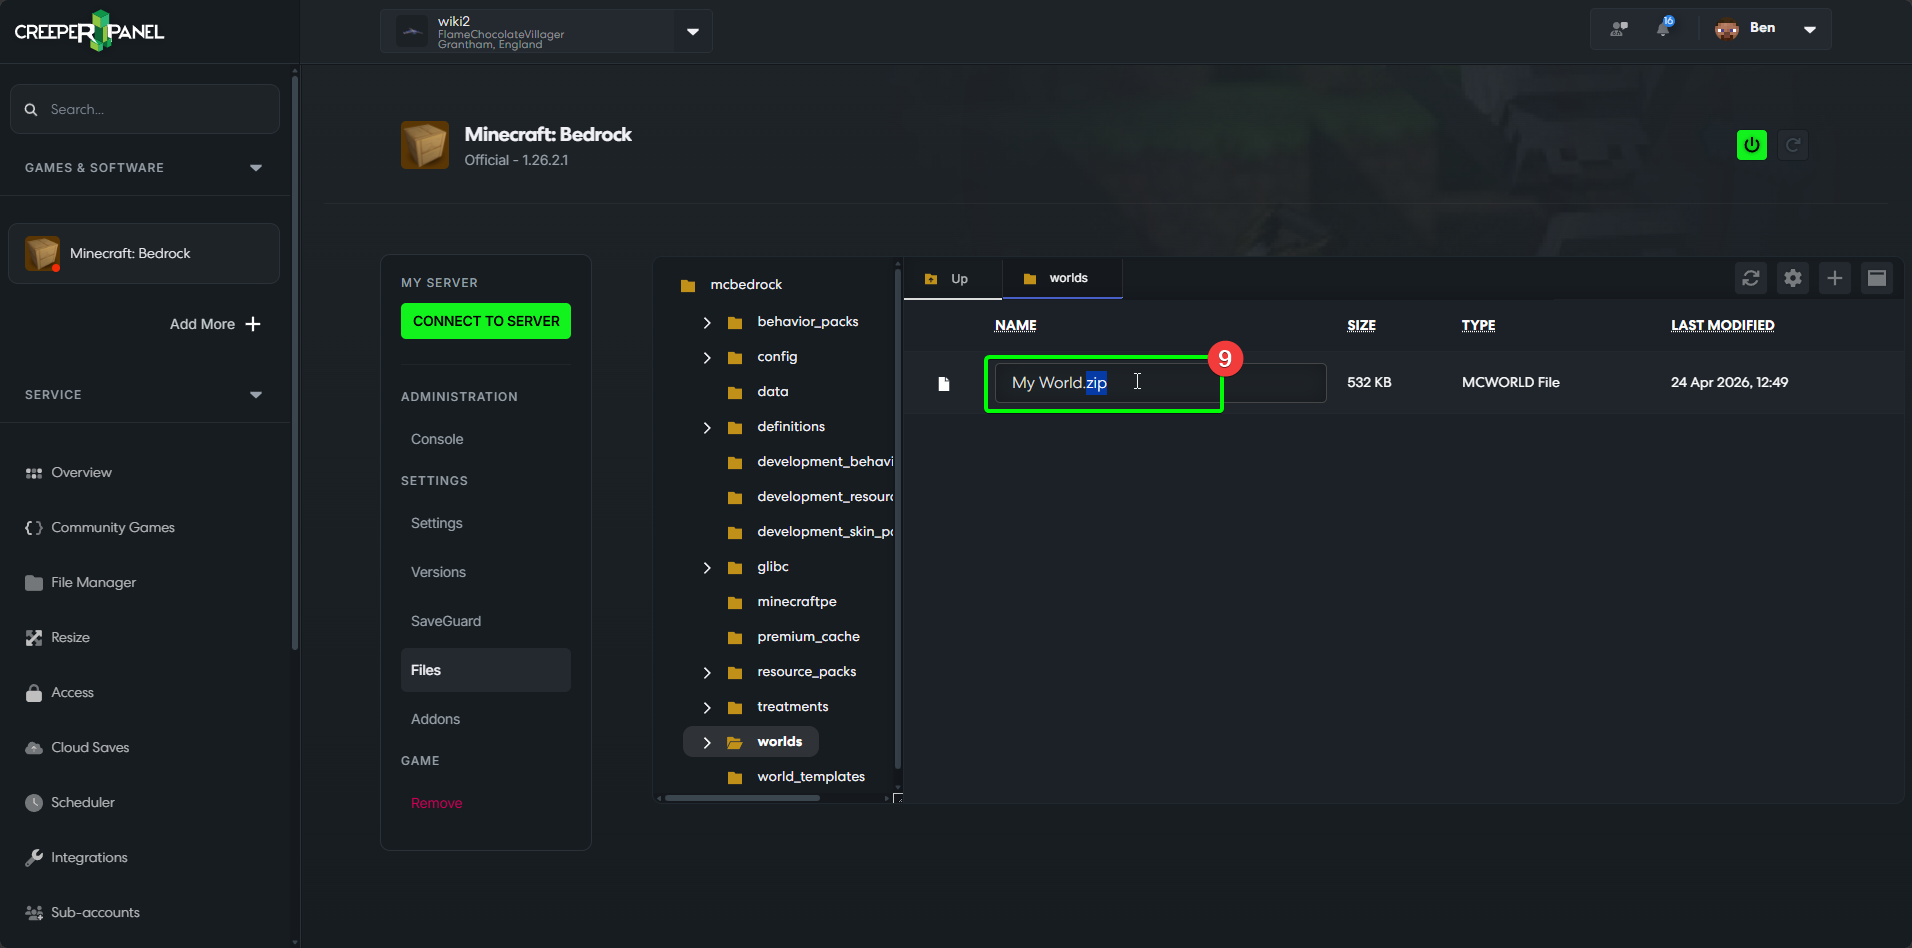
You should now see your file in the CreeperPanel, renamed to My World.zip.
- Right-click the
My World.zipfile. - Select
Extract.
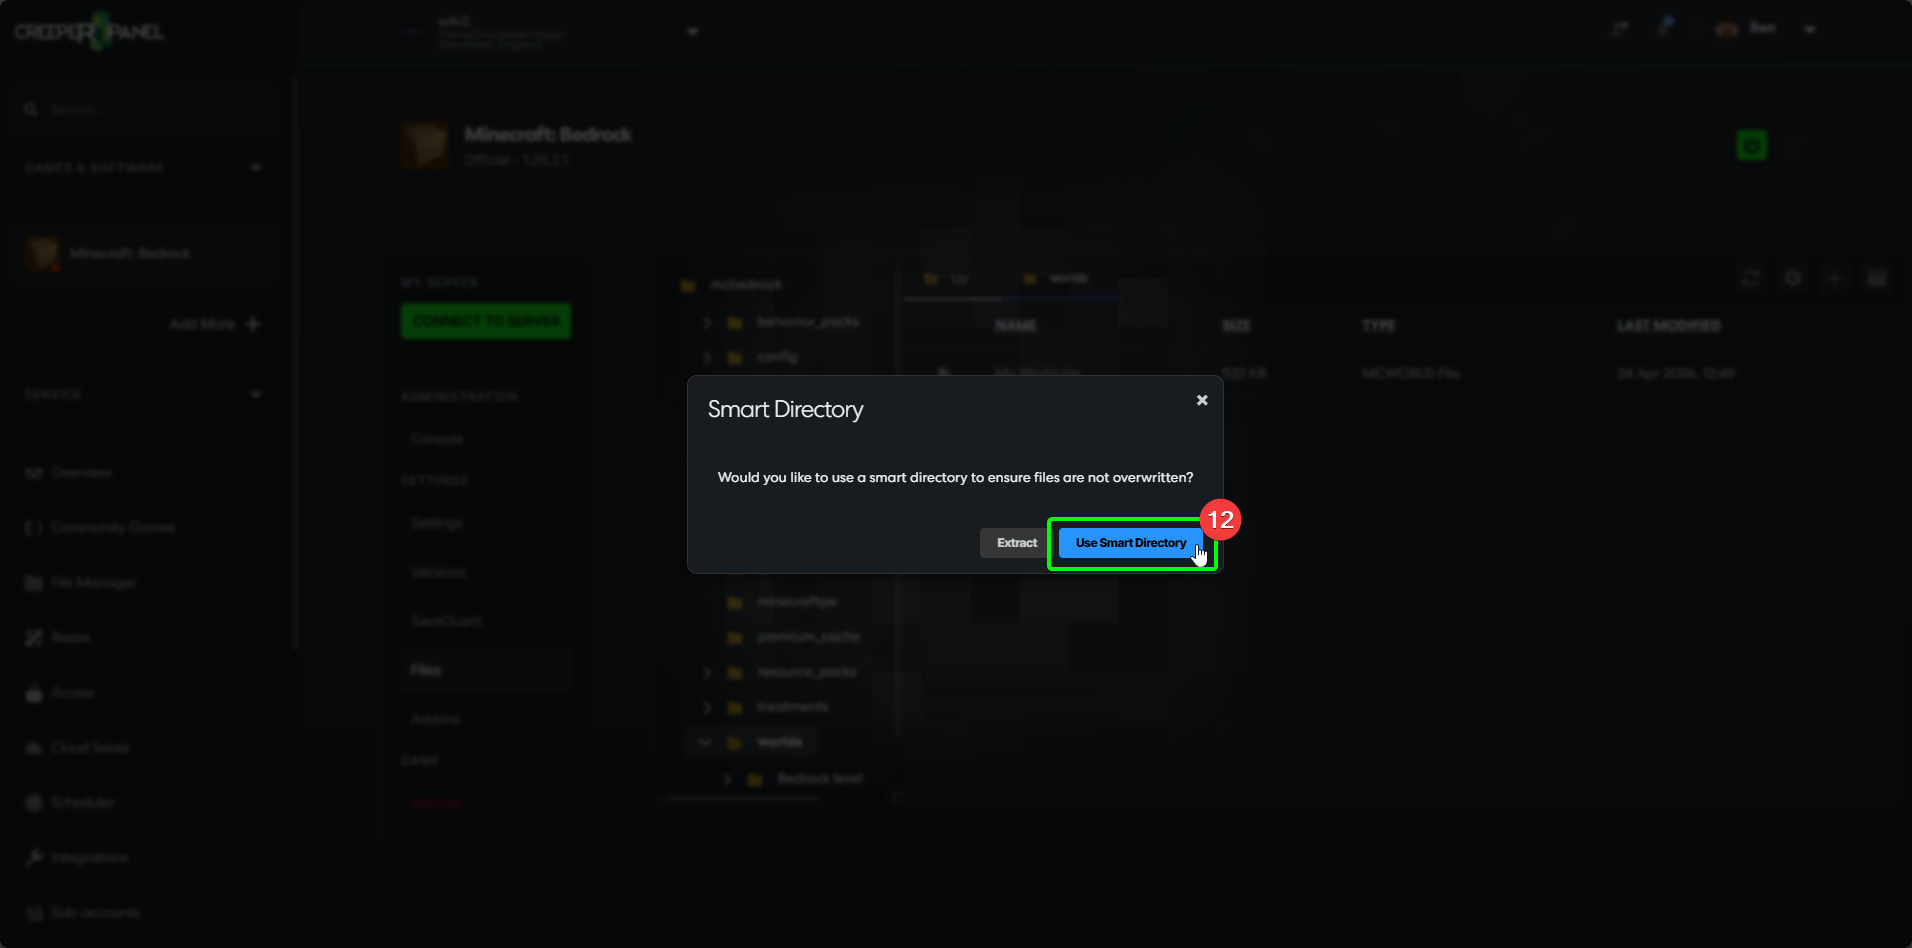
- In the pop-up window, select
Use Smart Directory. You should now see a new folder in theWorldsdirectory named after your world; this will contain your extracted world files.
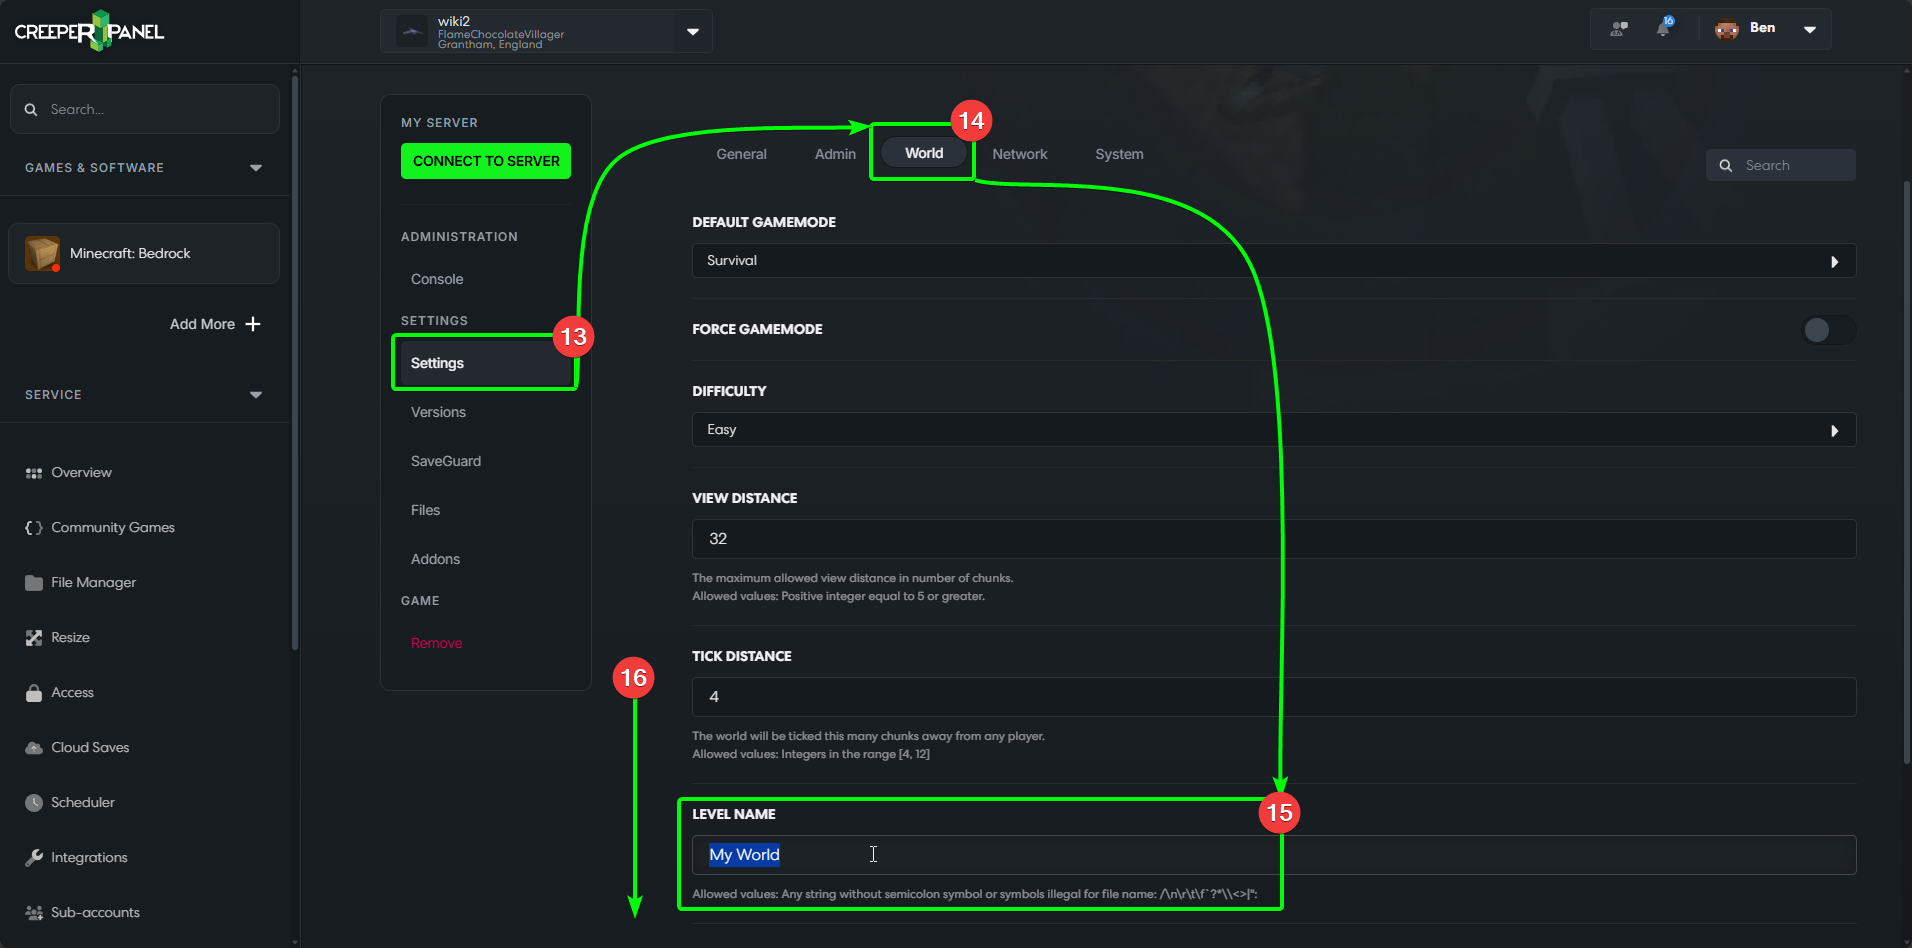
Next, we need to instruct your Minecraft: Bedrock instance to load your uploaded world. From the instance's submenu:
- Select
Settings. - Select the
Worldtab at the top of the page. - You'll see the
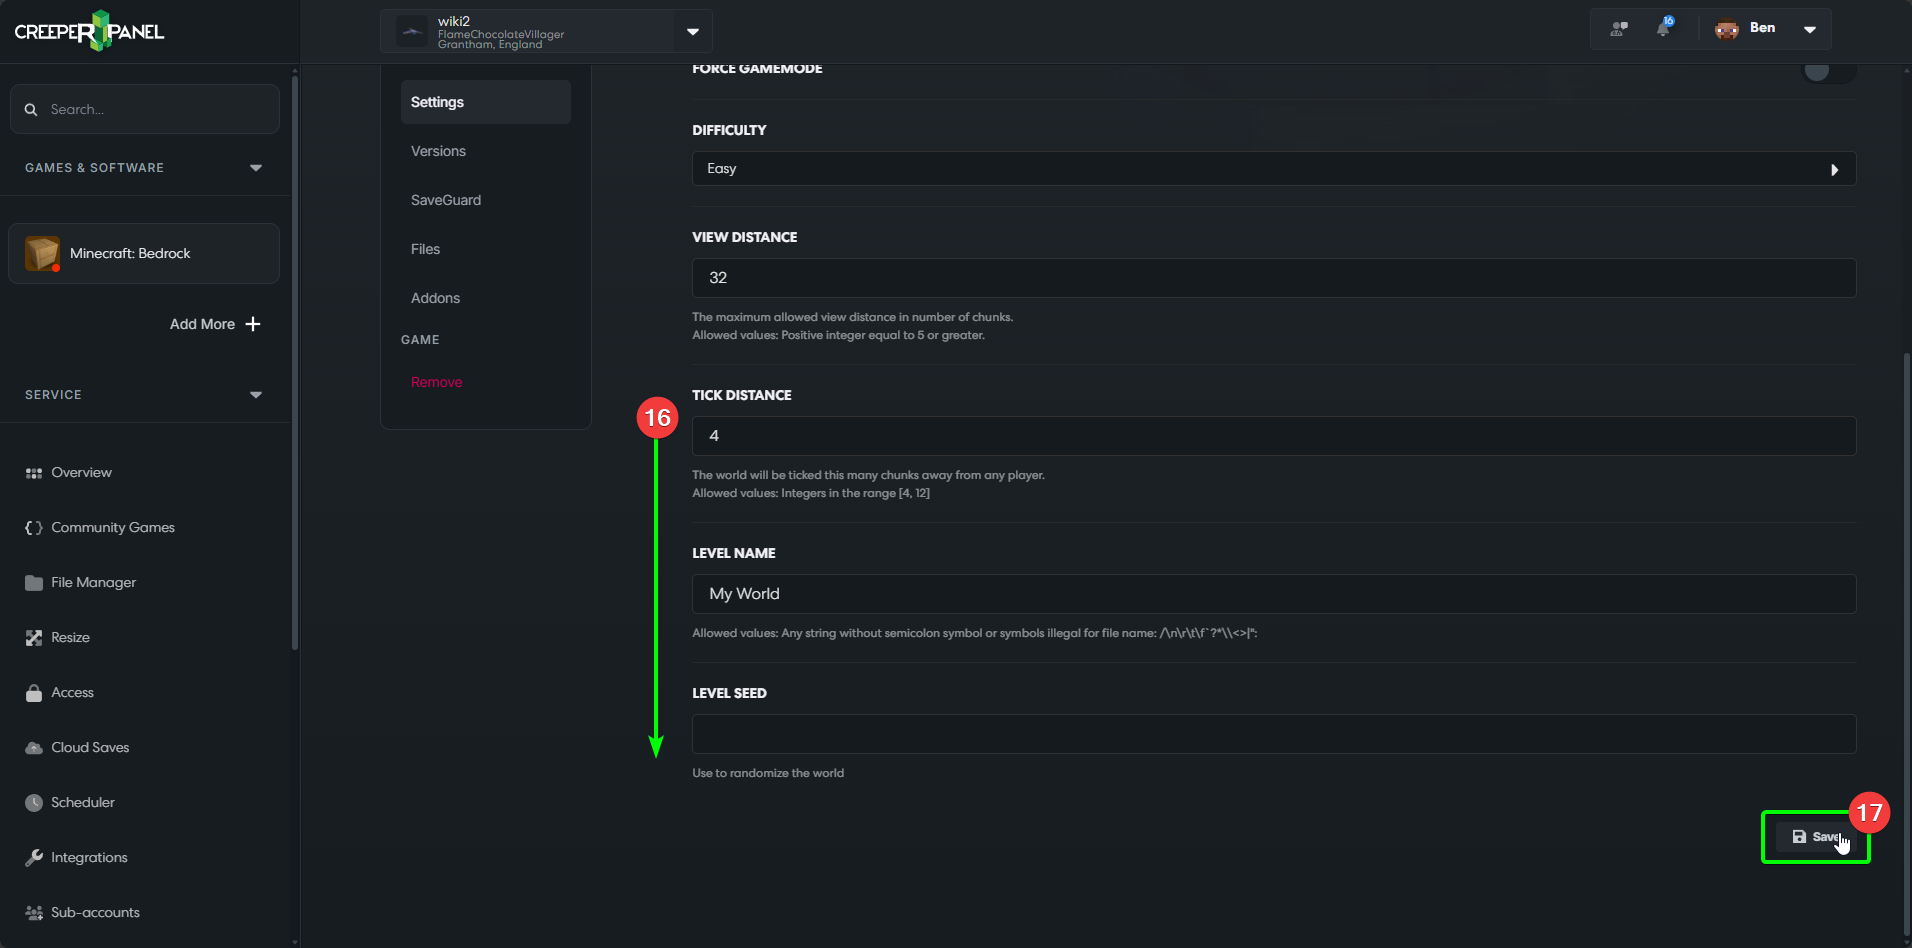
Level Namesetting - change the text to the name of your uploaded world. - Scroll down to the bottom of the page to locate the
Savebutton.
- Select
Saveto save your changes.
That's it - you're now free to start your server!