Connecting to your 7 Days to Die instance
To begin connecting to your 7 Days to Die instance, you'll need your server's IP so you can perform a direct connection. To start:
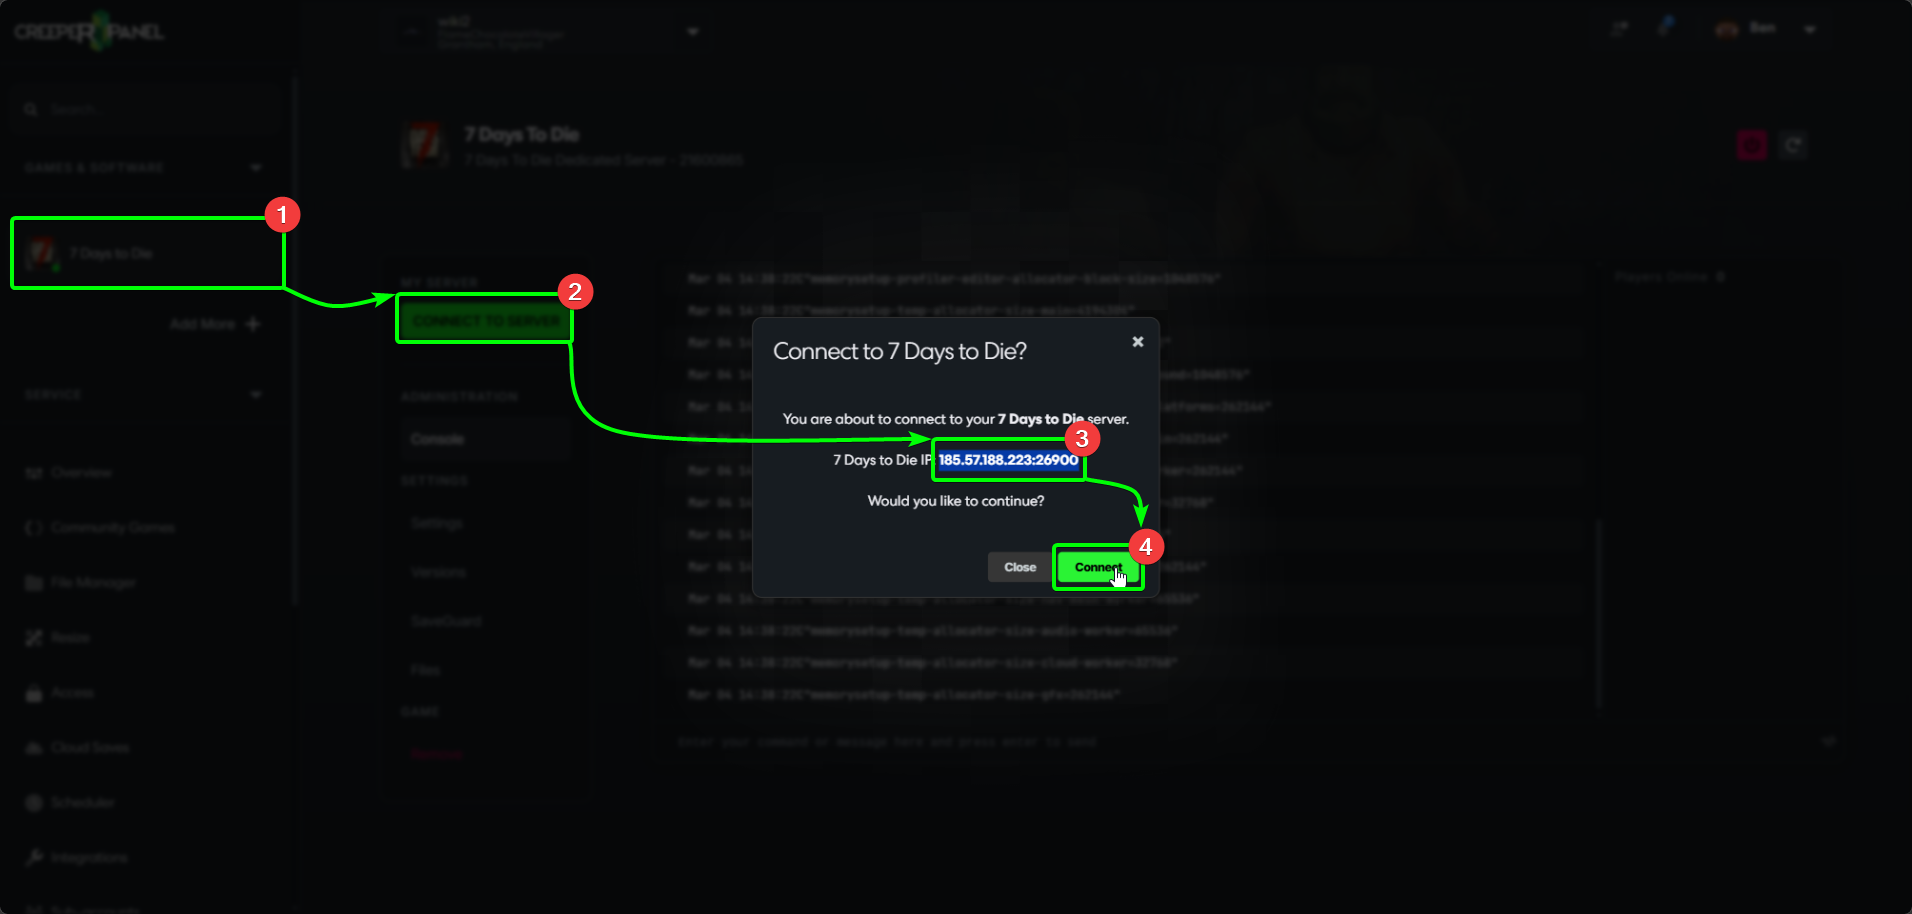
- Select your
7 Days to Dieinstance. - Press the green
Connect to Serverbutton to view the pop-up with your IP and port. - Copy the IP address from the box.
- Choose
CloseorConnectto close the pop-up.
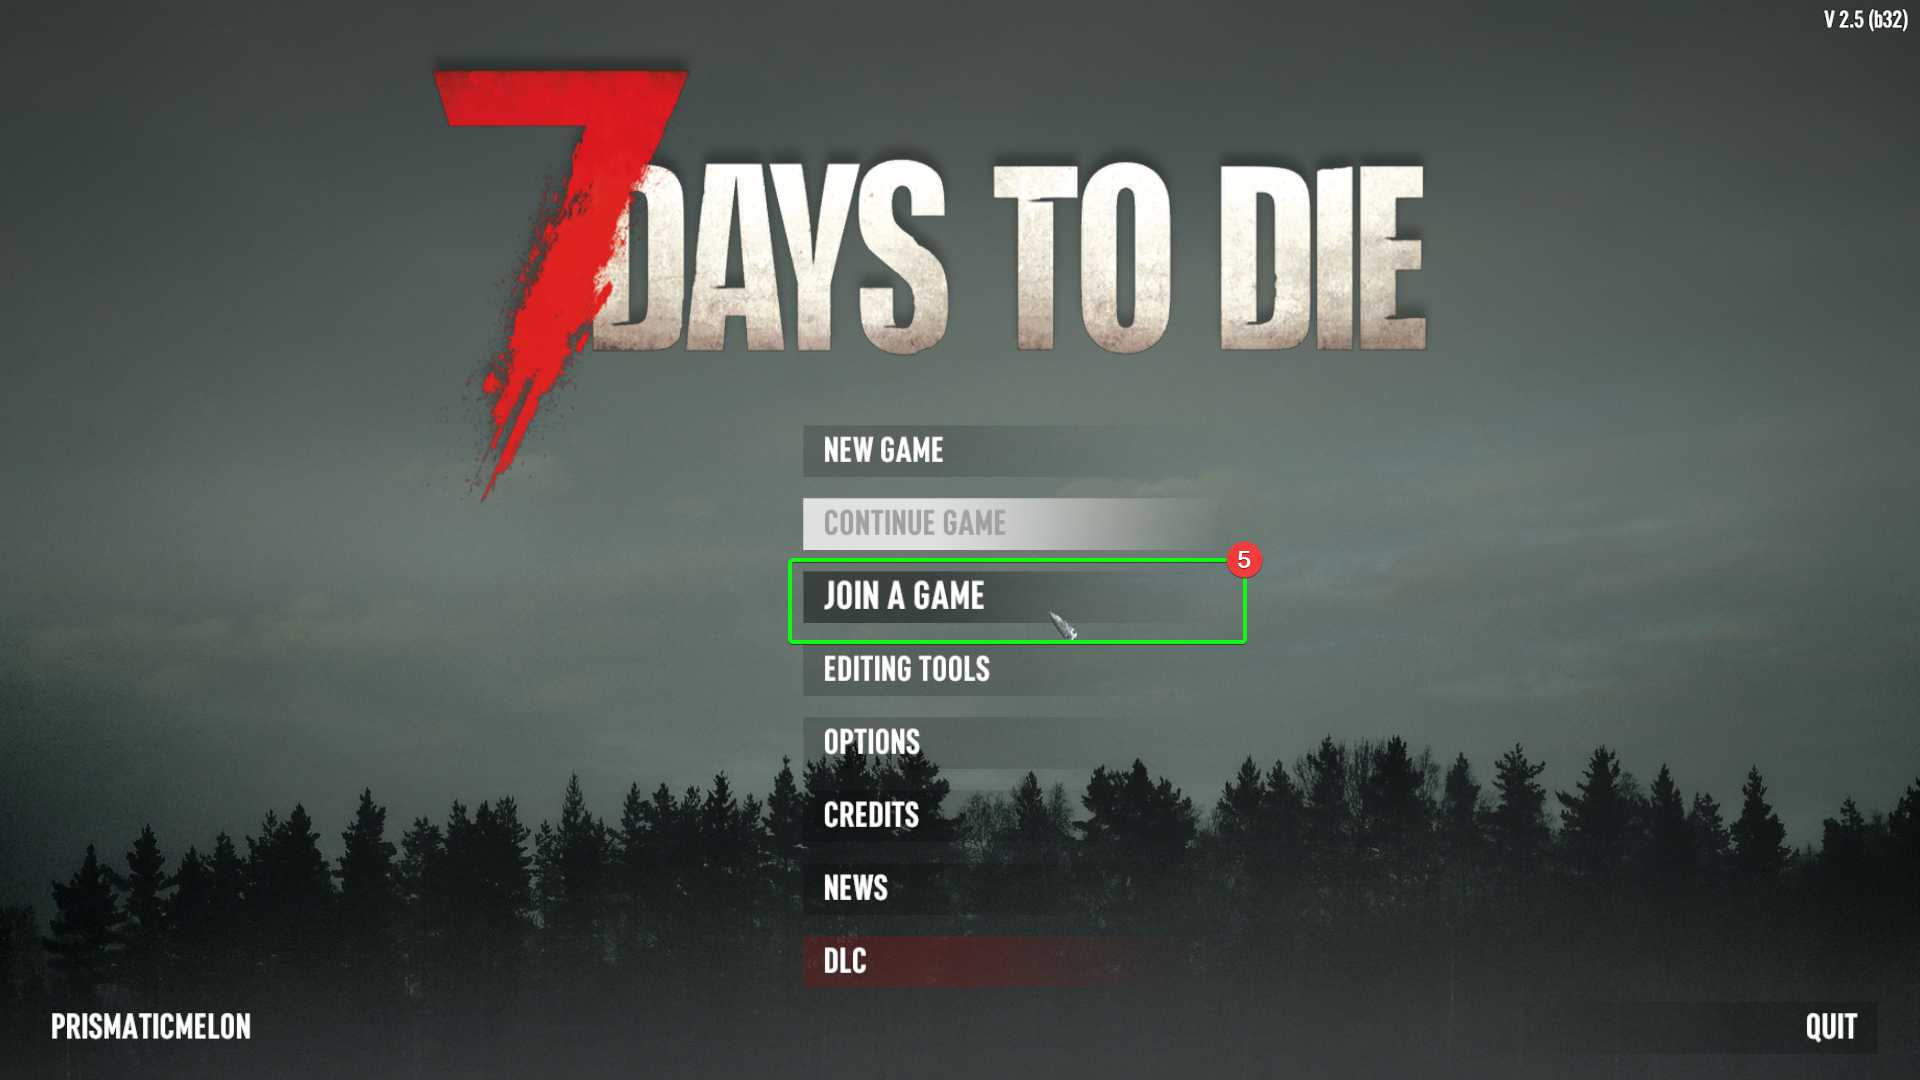
Next you'll need to open up 7 Days to Die on your PC, and progress to the main menu. From there:
- Select
Join A Gamefrom the menu.
- Select, create or edit a player profile.
- Select
OK.

- At the bottom of the screen, select
Connect to IP....
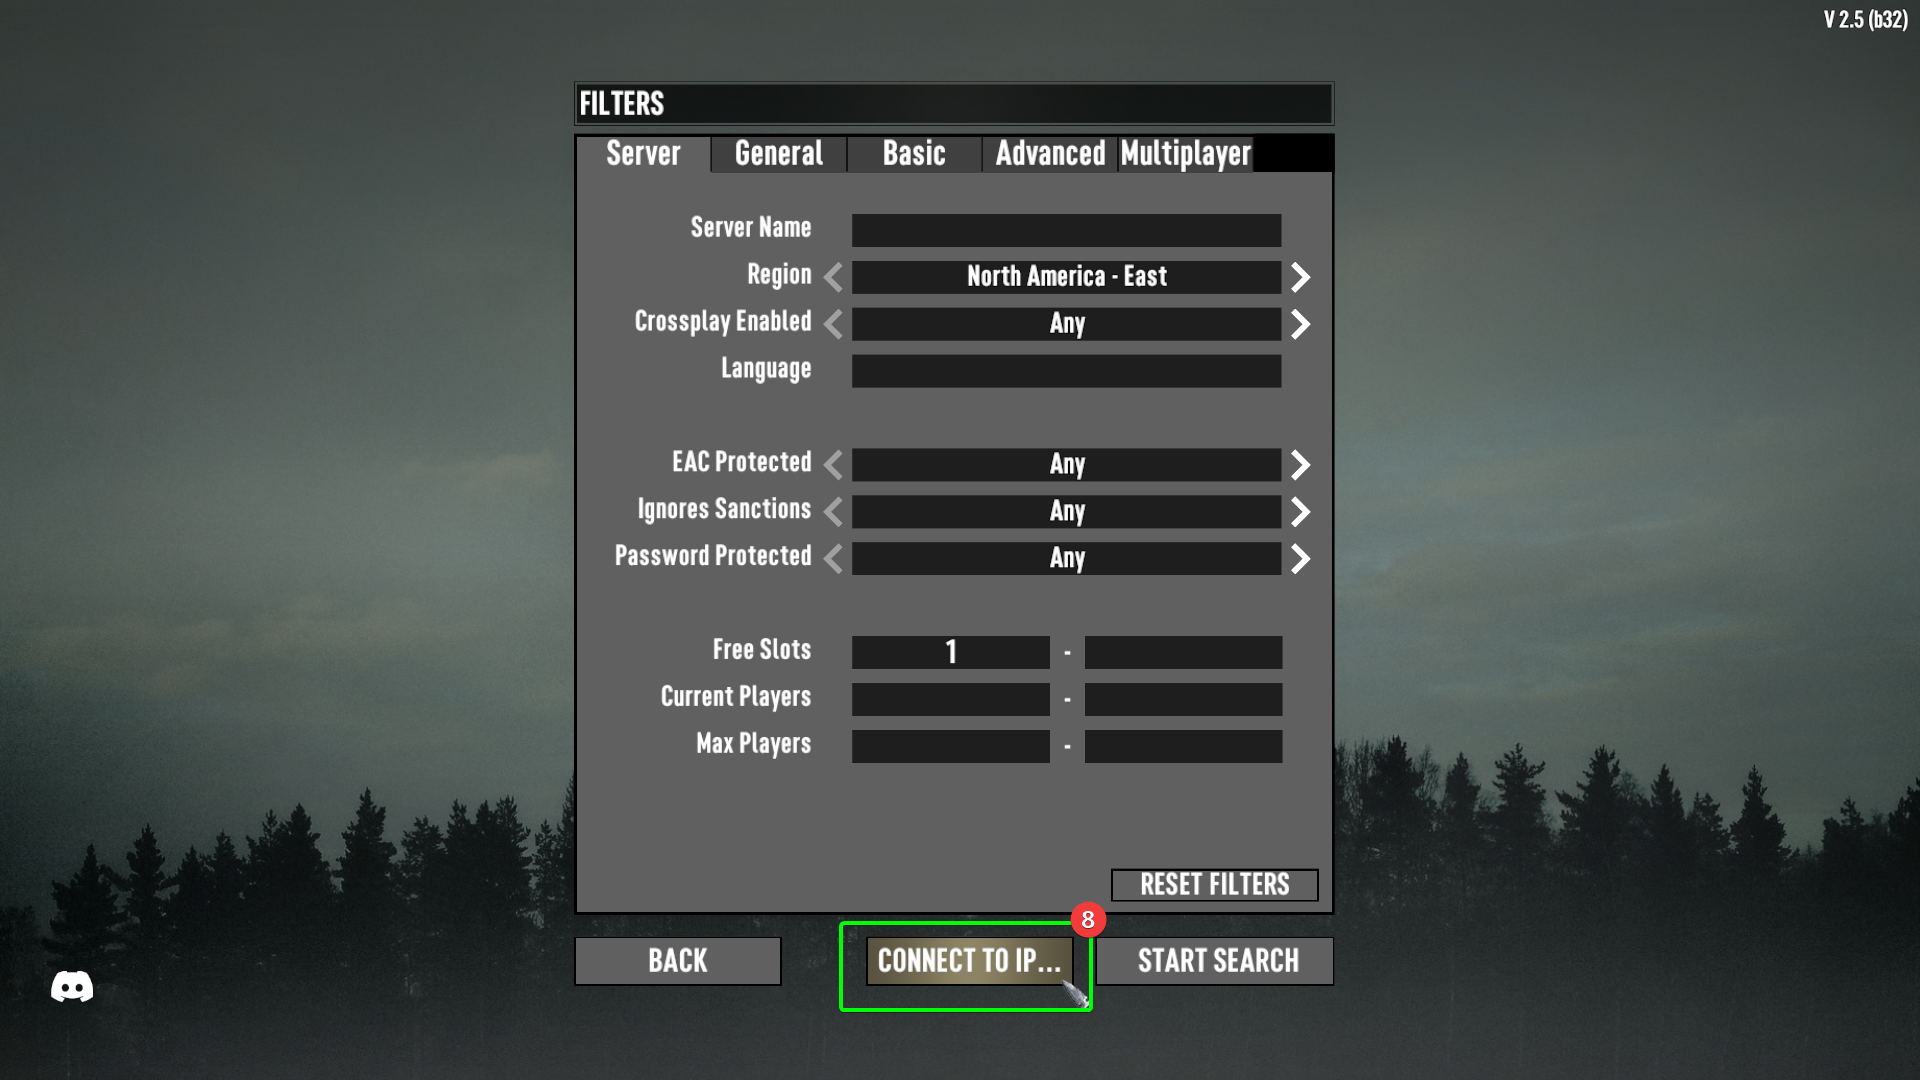
- In the pop-up, enter your IP in the
IPfield. If you have changed your server's port number, enter it in thePortfield. Otherwise, leave it blank. - When you have filled out the relevant fields, select
Connect.

- If you already have a friend playing, you can choose to spawn near them. Alternatively, select
Spawn in Random Location.
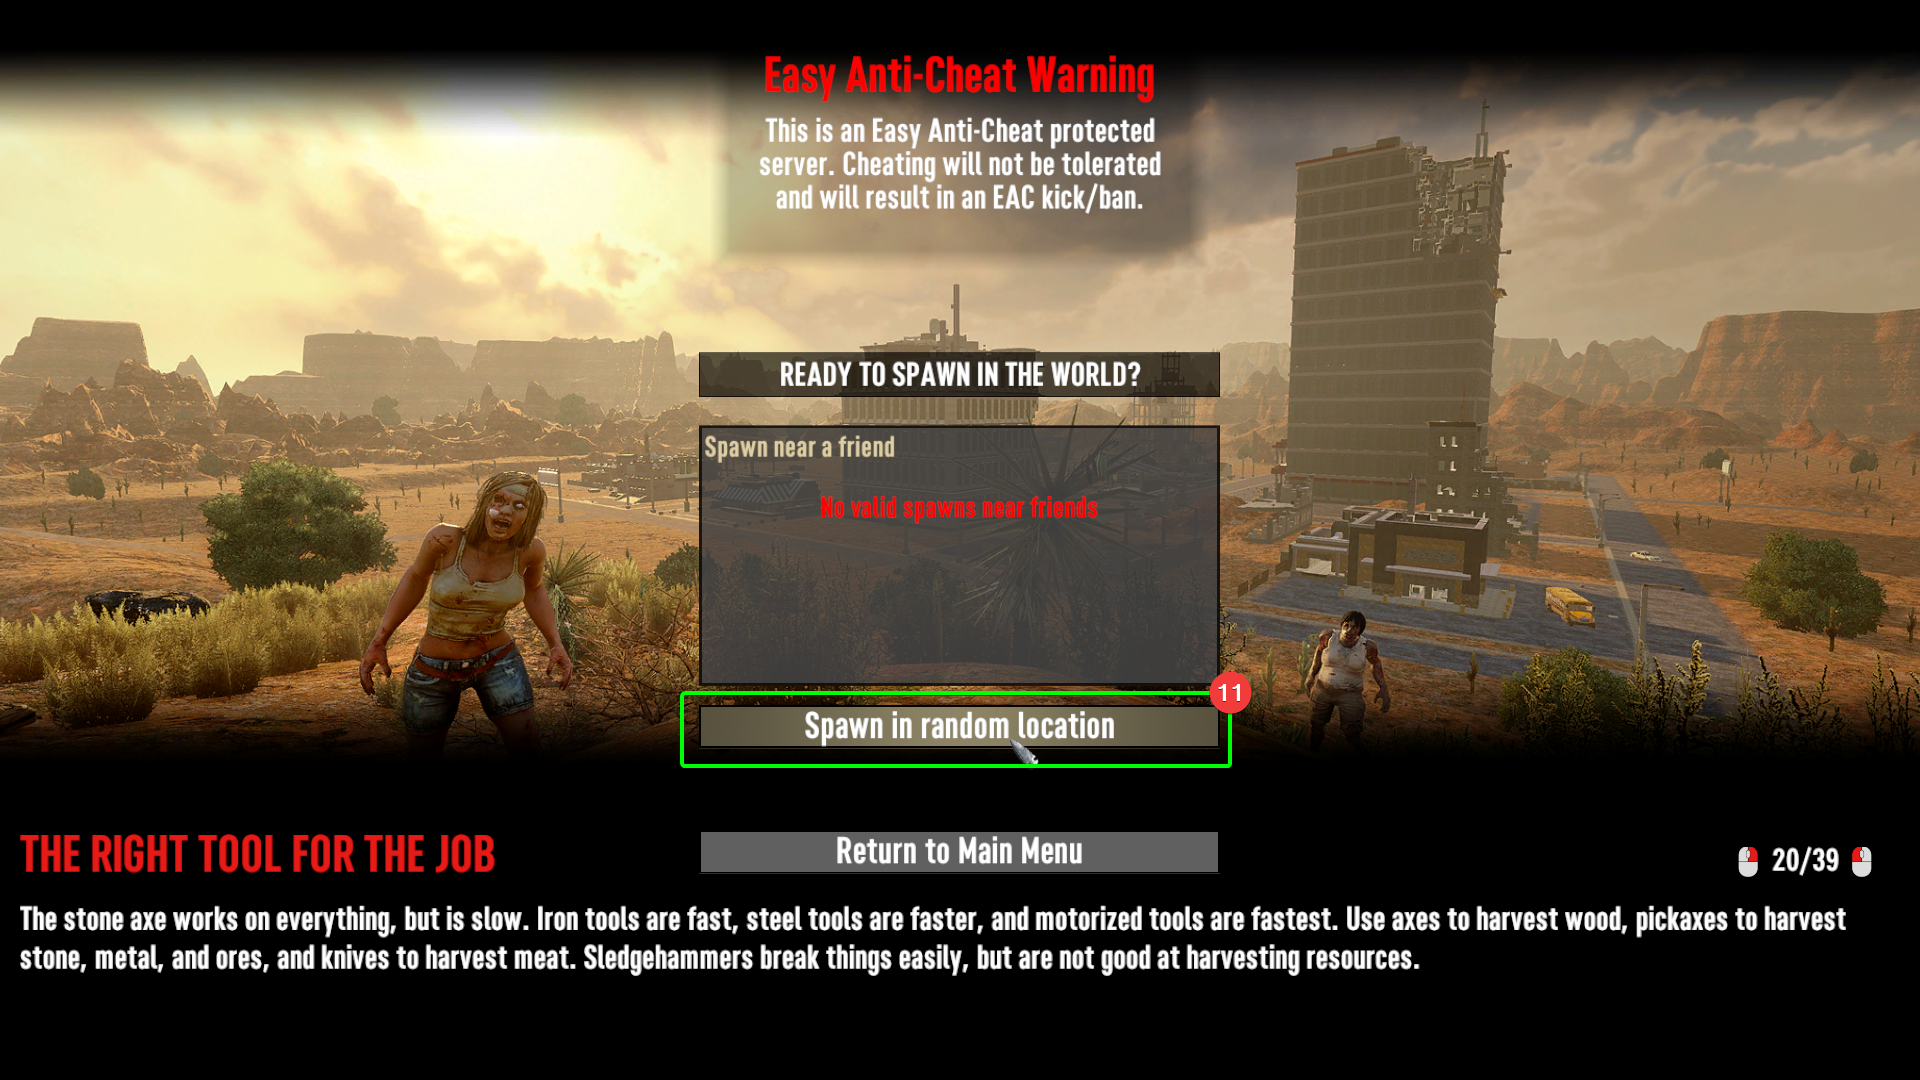
That's it! You should now have spawned into your 7 Days to Die server! Enjoy battling the endless hordes, with or without friends.