Adding admins
7 Days to Die allows you to add admins by editing a .xml file. Finding and editing the correct file is easy. To begin, navigate to your 7 Days to Die instance, then:
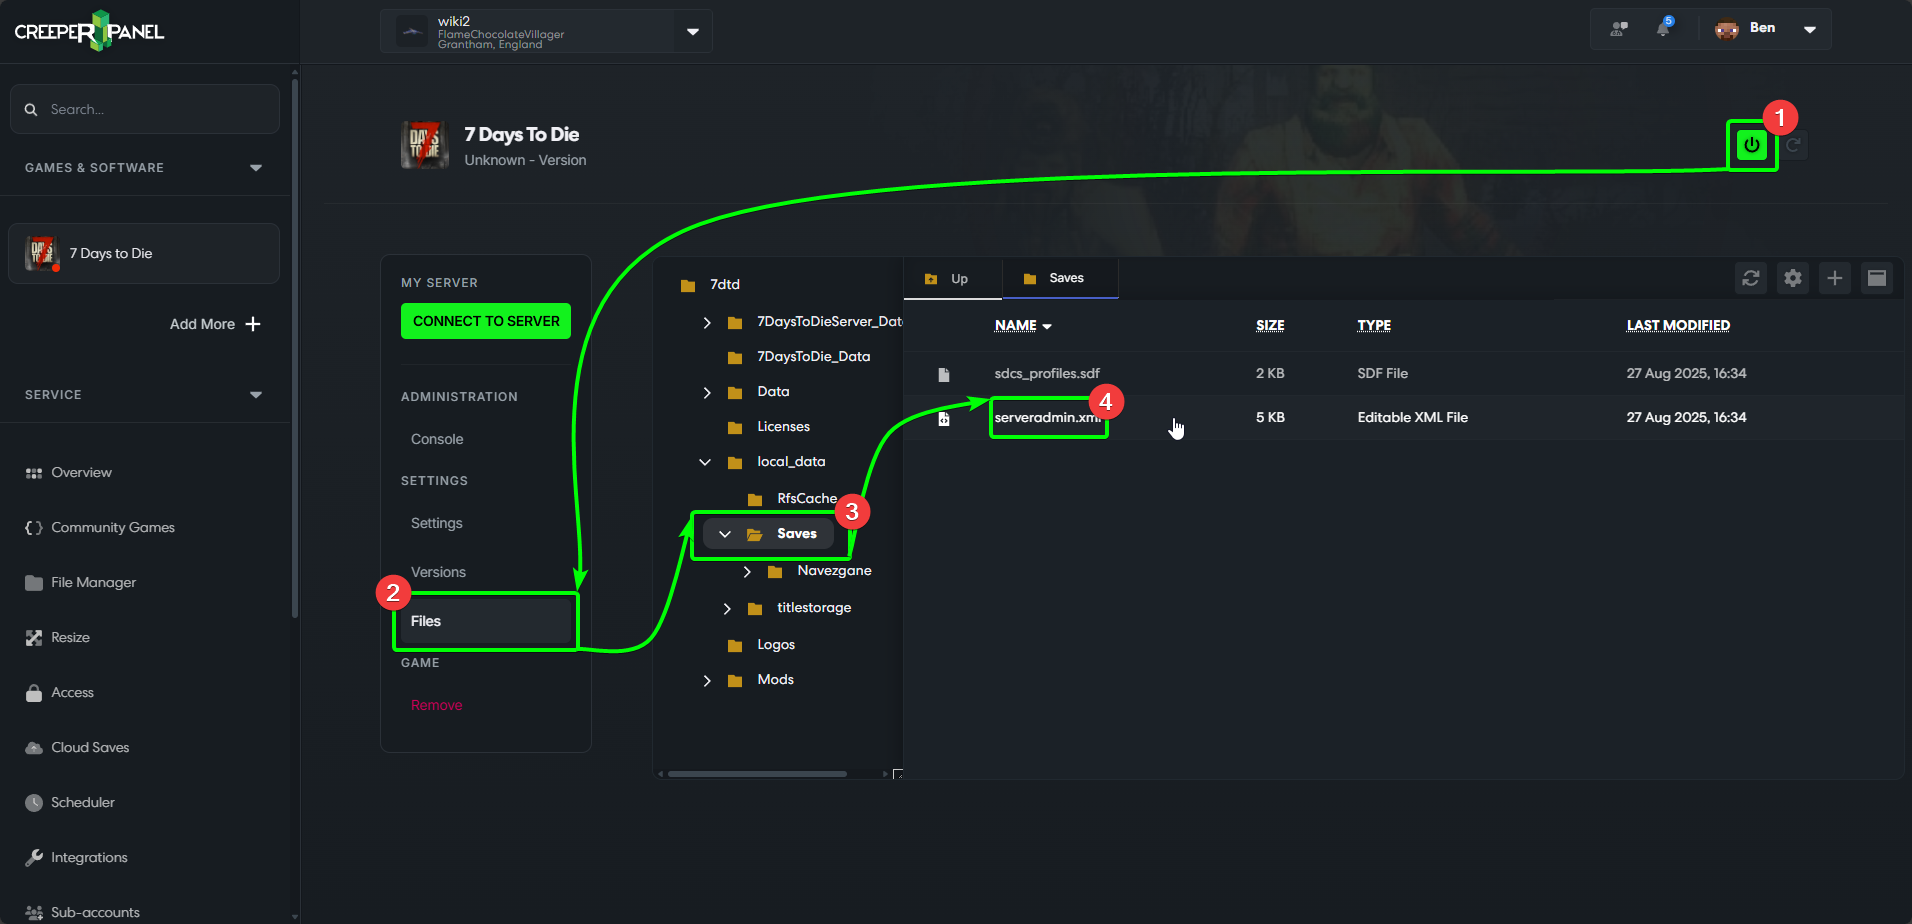
- Ensure you have stopped your 7 Days to Die server, by clicking the power button in the top right of the Panel.
- Navigate to
Filesunder the sub-menu. - Navigate to the
Savesfolder in the directory. - You will see a file named
serveradmin.xml; double-click on this file to open it in a new window in the console.
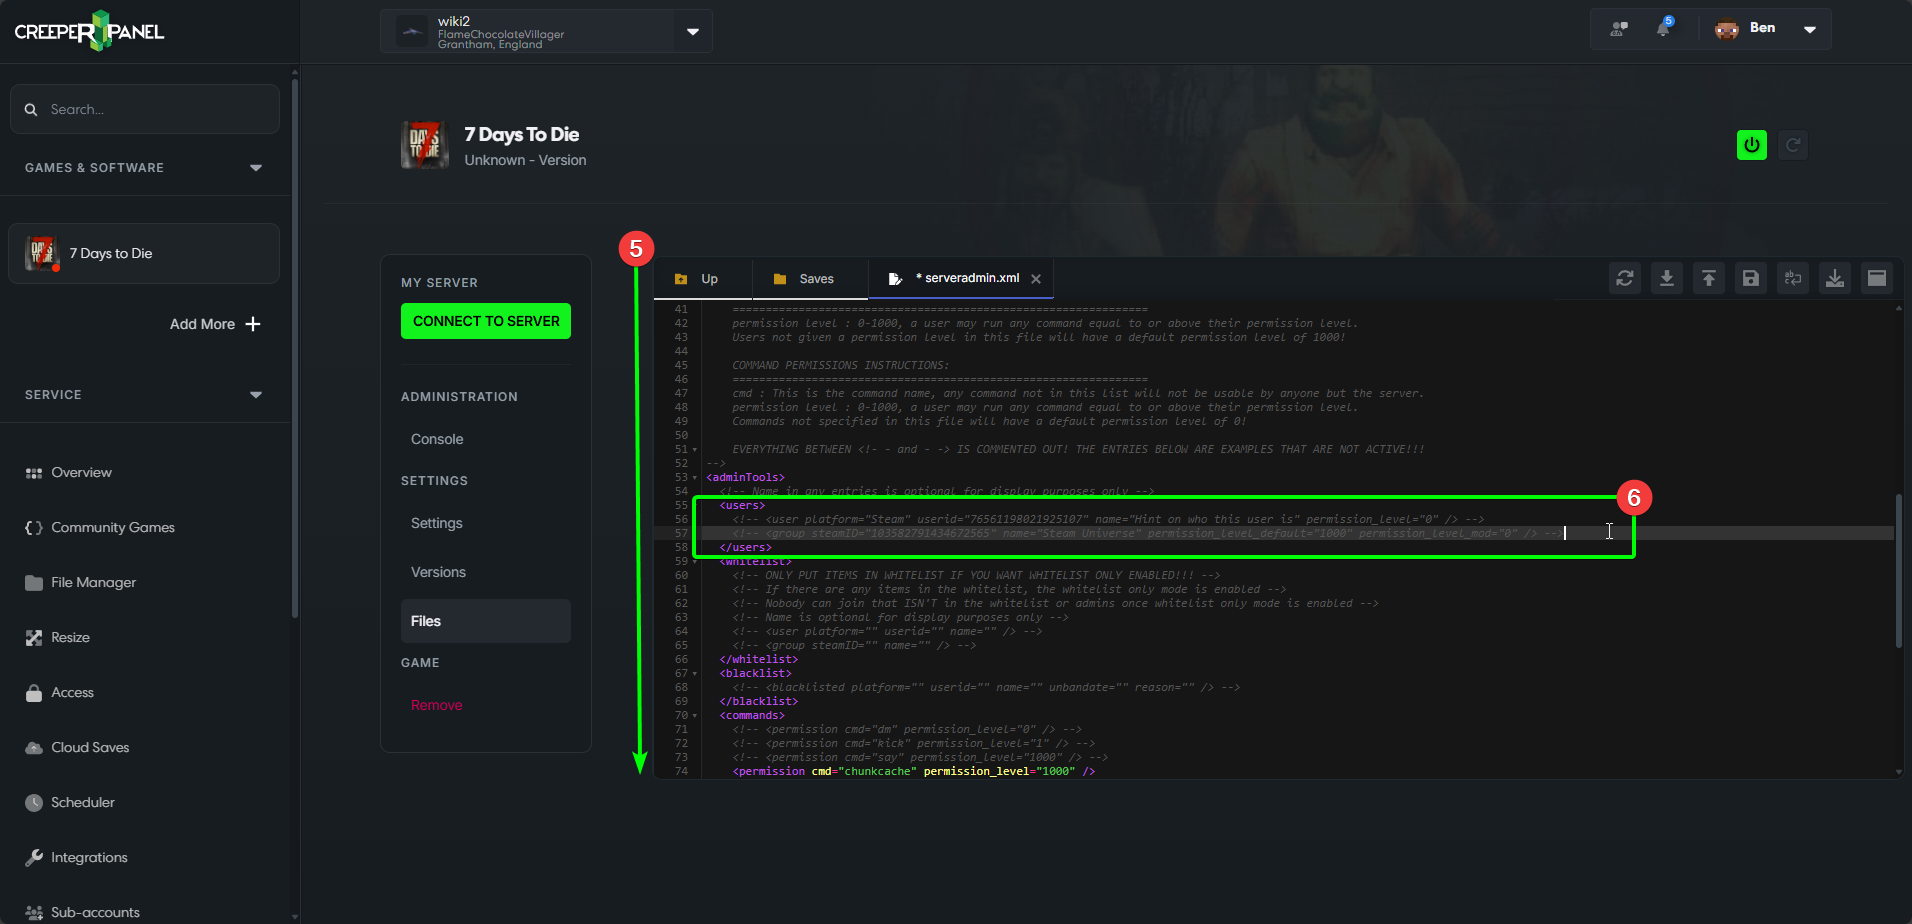
- Now
serveradmin.xmlis open, scroll down until: - You see the following lines. Keep an eye out for the
<admins>prefix.
<admins>
    <!-- <user steamID="76561198021925107" name="Hint on who this user is" permission_level="0" /> -->
    <!-- <group steamID="103582791434672565" name="Steam Universe" permission_level_default="1000" permission_level_mod="0" /> -->
</admins>
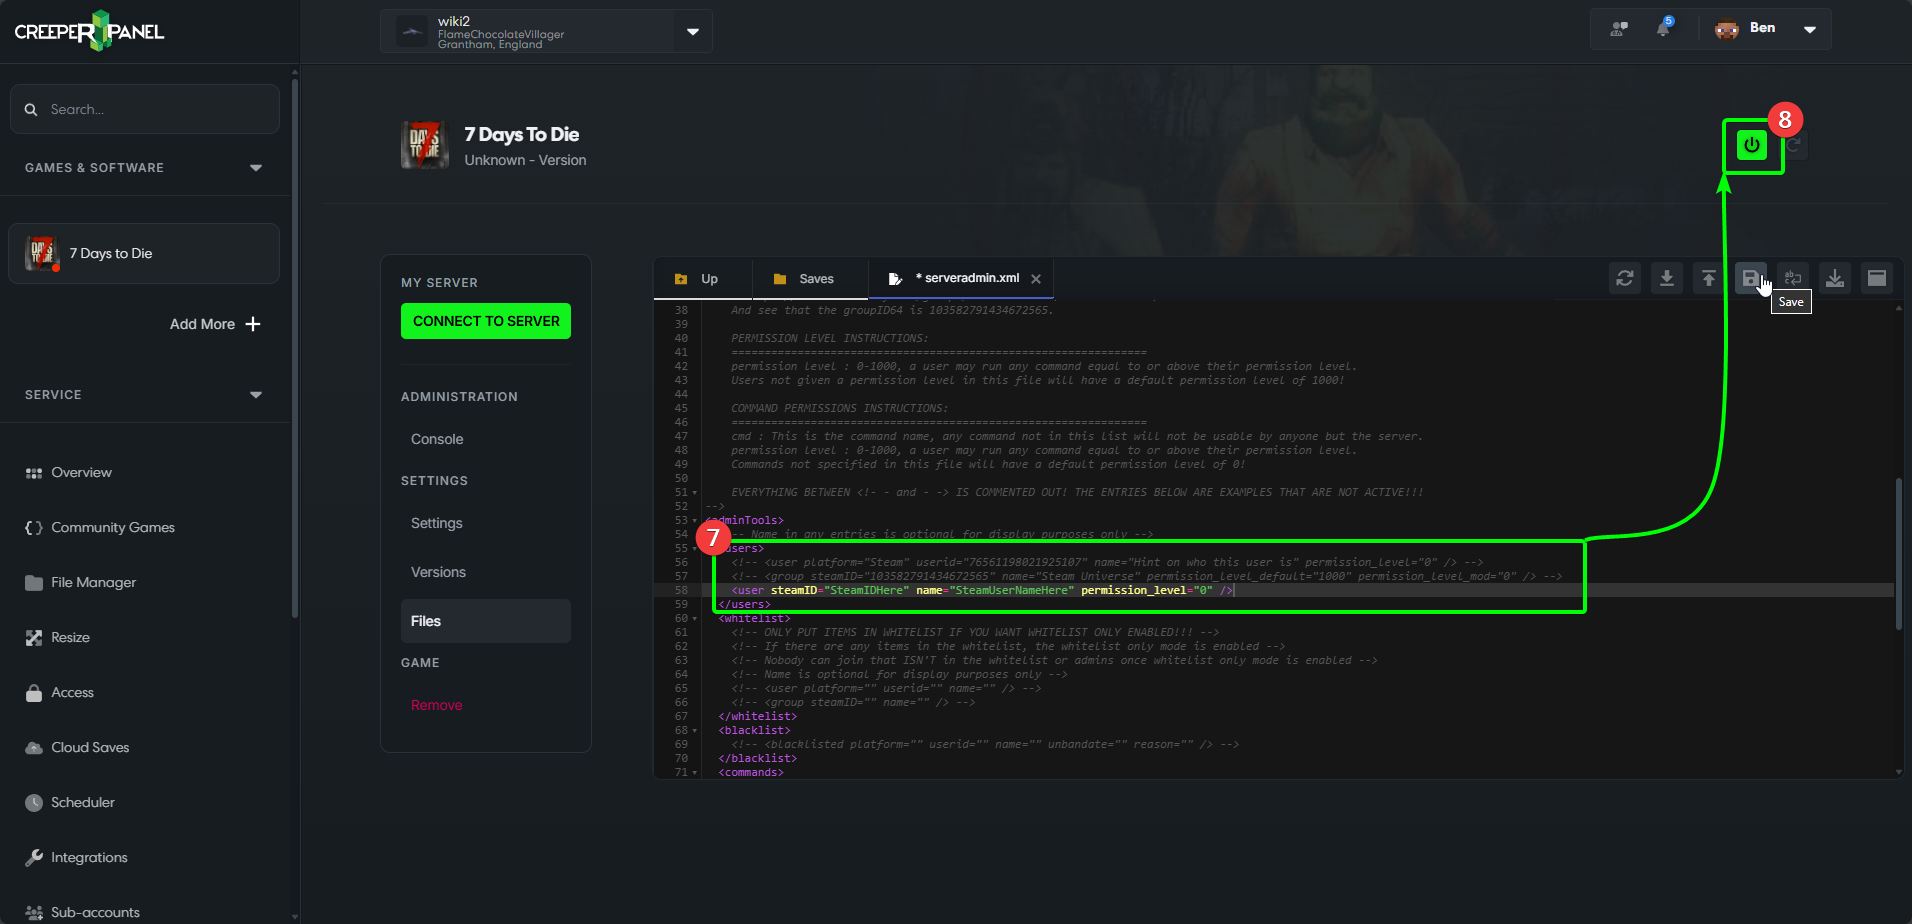
- Now add the following line below the line that starts with
<group>.
<user steamID="SteamIDHere" name="SteamUserNameHere" permission_level="0" />
You will need to replace the SteamIDHere with the Steam64ID of the player you wish to grant admin permissions to. Next, replace SteamUserNameHere with the Steam username of the player. This allows you to identify admins easier.
info
If you need help locating the Steam 64ID, you can follow our guide here.
The <admins> text block should now look like this:
<admins>
    <!-- <user steamID="76561198021925107" name="Hint on who this user is" permission_level="0" /> -->
    <!-- <group steamID="103582791434672565" name="Steam Universe" permission_level_default="1000" permission_level_mod="0" /> -->
  <user steamID="SteamIDHere" name="SteamUserNameHere" permission_level="0" />
</admins>
- Click the
Saveicon in the top right of the editor window to save your changes. You can now close theserveradmin.xmlwindow, and restart your server.