Uploading your local Sunkenland World
You will need to enable hidden file/folder browsing in the CreeperPanel to view some folders you'll need.
Before you start playing on your Sunkenland server, you'll need to upload an existing world from your client machine. To get started, we'll get the Panel prepared to receive uploads:
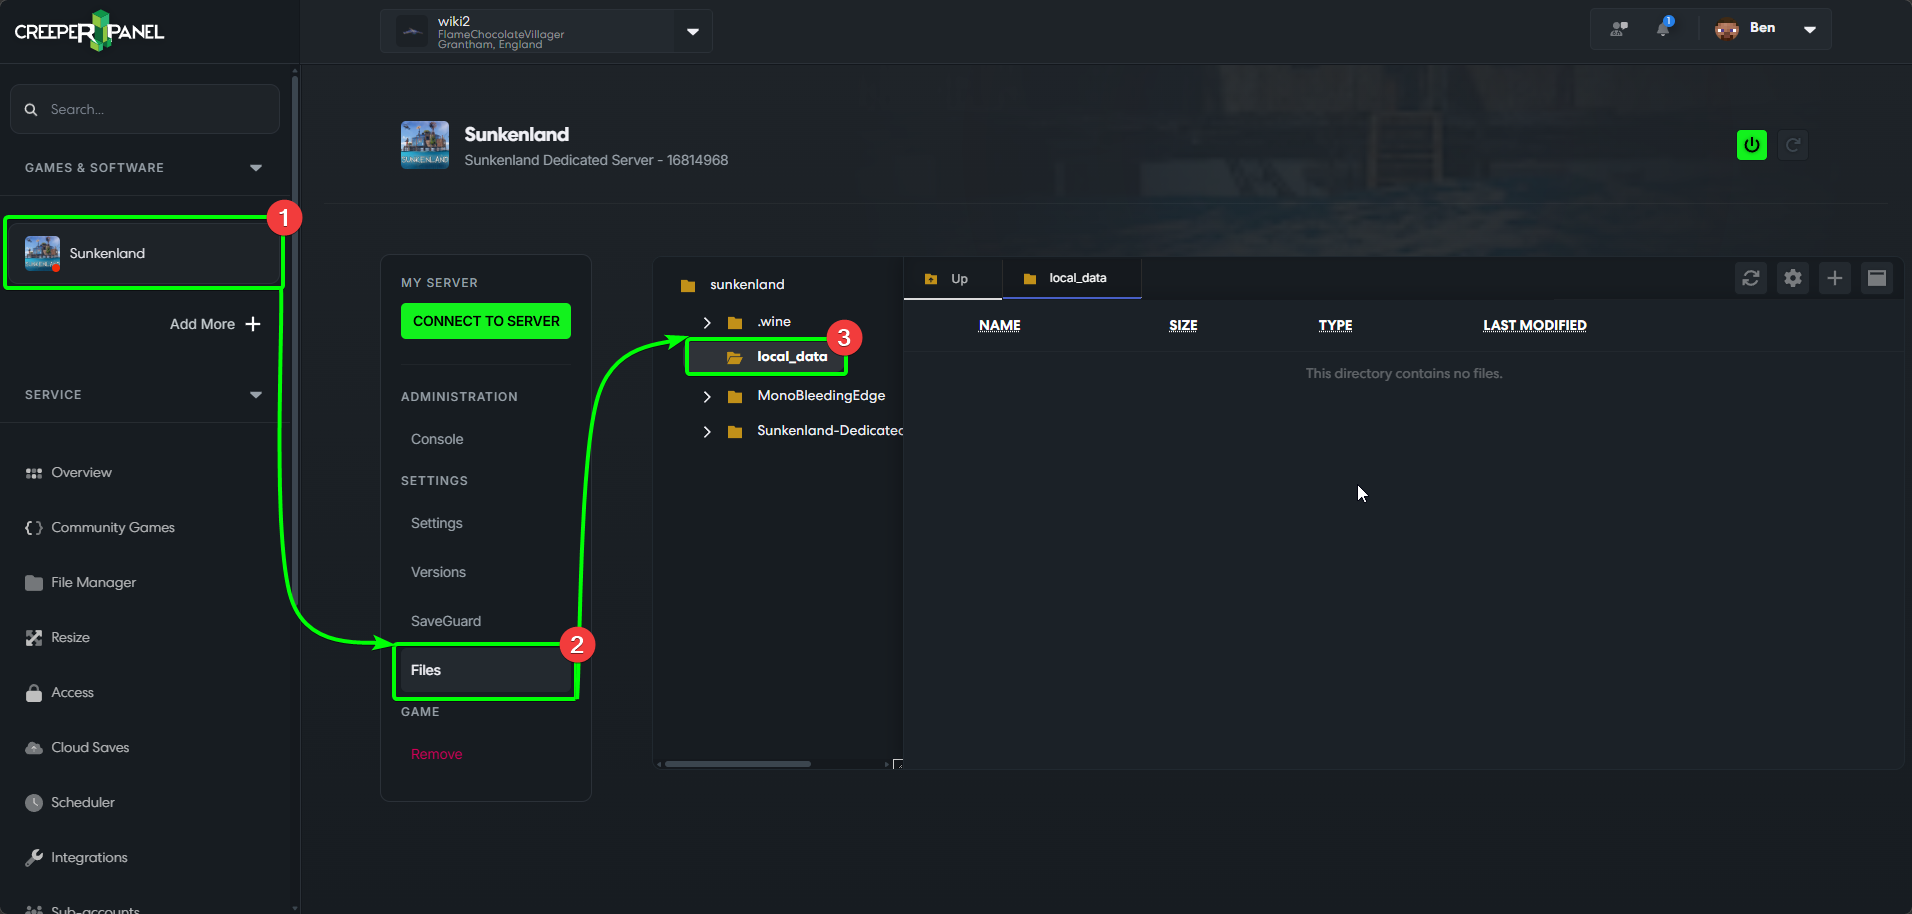
- Select your Sunkenland instance from the CreeperPanel sidebar, then
- Select
Settings, found underSettingson the instance's sub-menu - Open the
local_datadirectory in the File Manager
Next, we'll need to locate our Worlds directory on our local machine. Follow this path: C:\Users\YourProfile\AppData\LocalLow\Vector3 Studio\Sunkenland\Worlds\, replacing YourProfile with your user profile on your client machine.
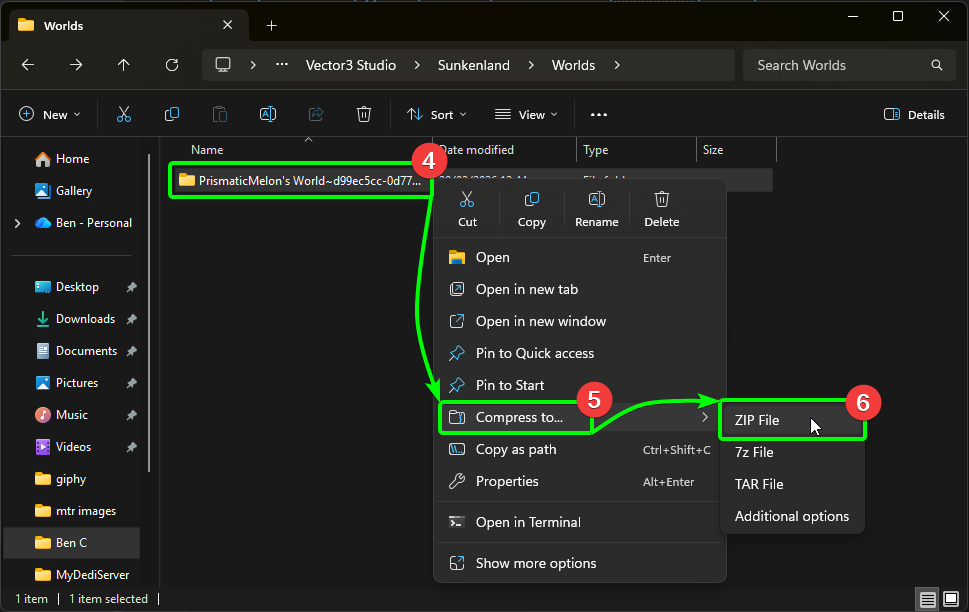
Inside, you'll find any world folders for worlds you have already created. Before uploading, we will need to compress the world to a .ZIP archive before the Panel will accept it, so:
- Right-click the world folder you wish to upload, then,
- Select
Compress to...from the menu, and then, - Select
ZIP Filefrom the available options.
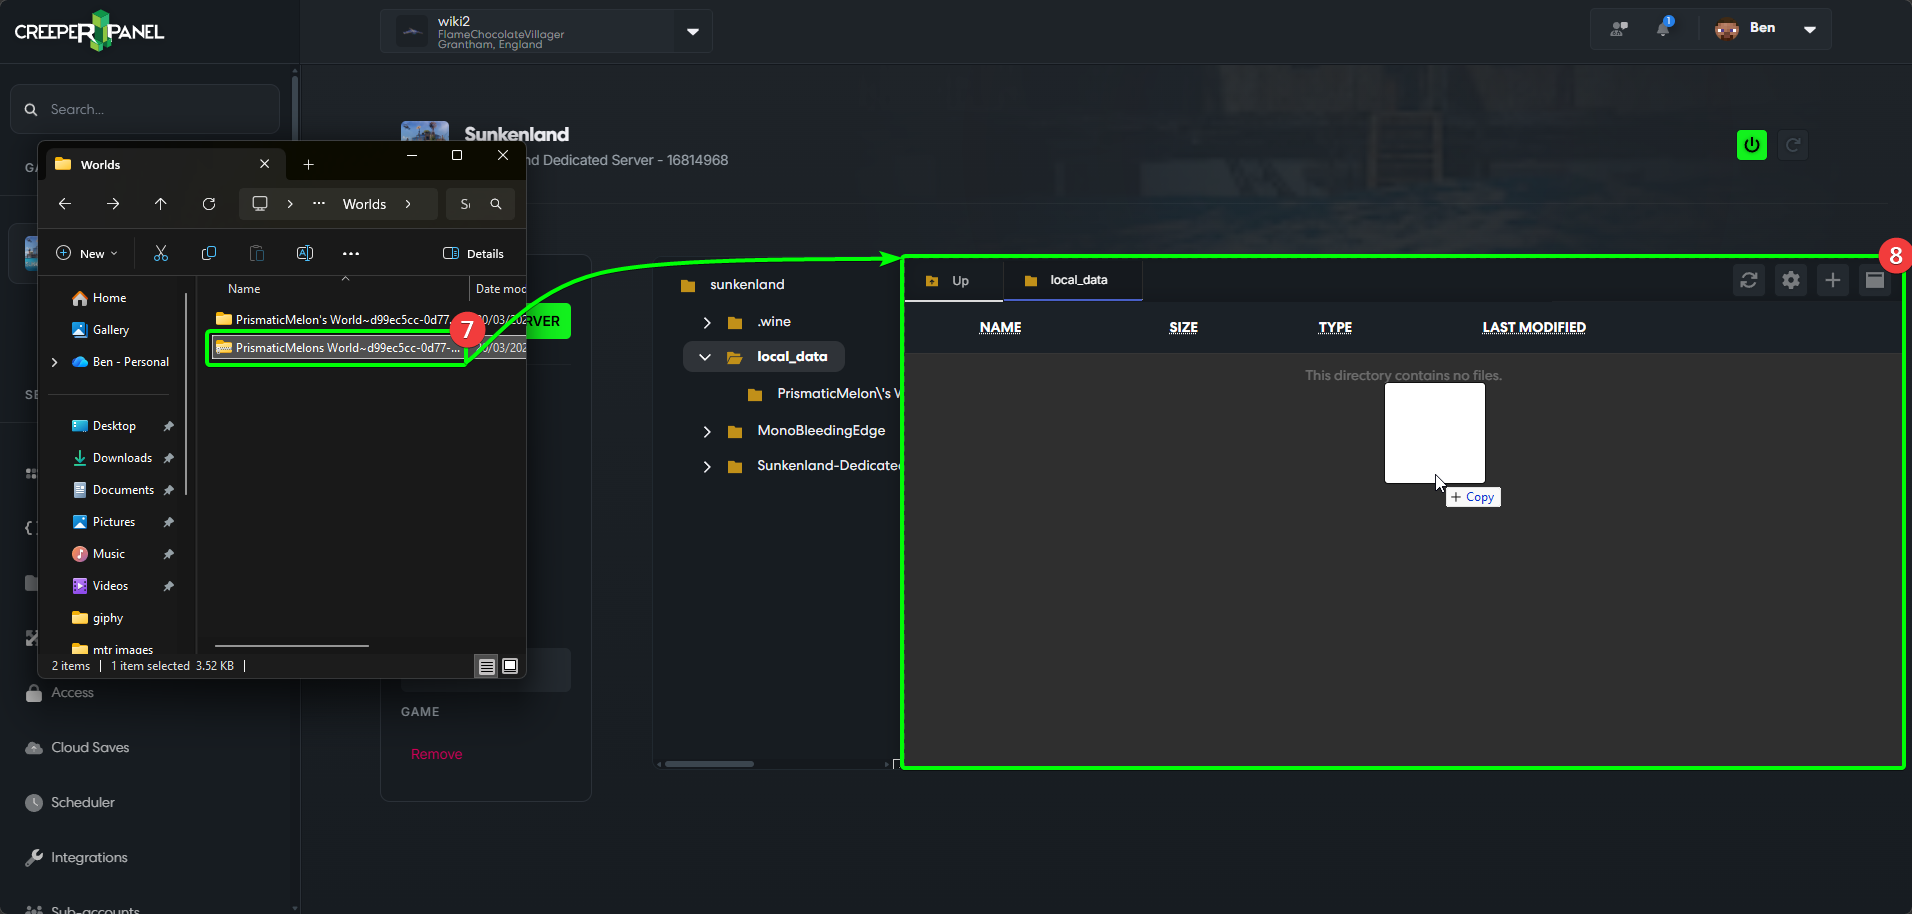
- Now, select your new
.ZIParchive, then, - Drag-and-drop it into the open
local_datadirectory on the CreeperPanel.
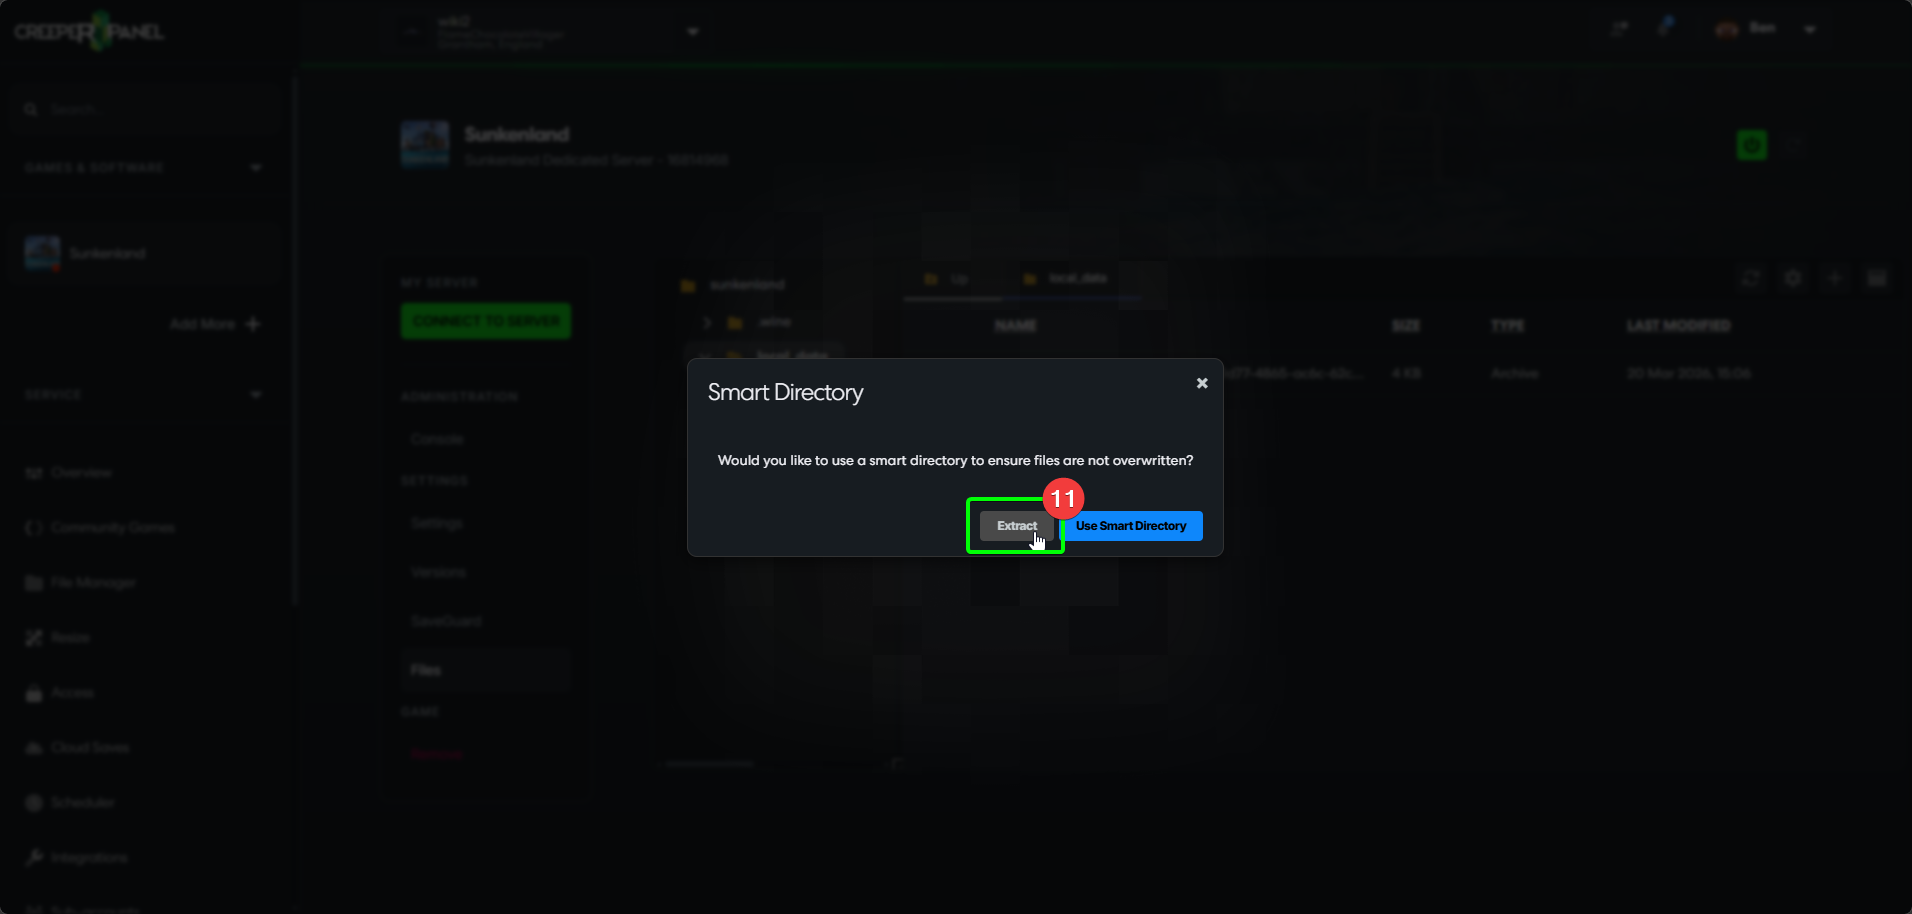
Once your world file has uploaded, you can close your explorer window. Head back to the CreeperPanel, then:
- Right-click your newly uploaded
.ZIP, then - Select
Extractfrom the options.
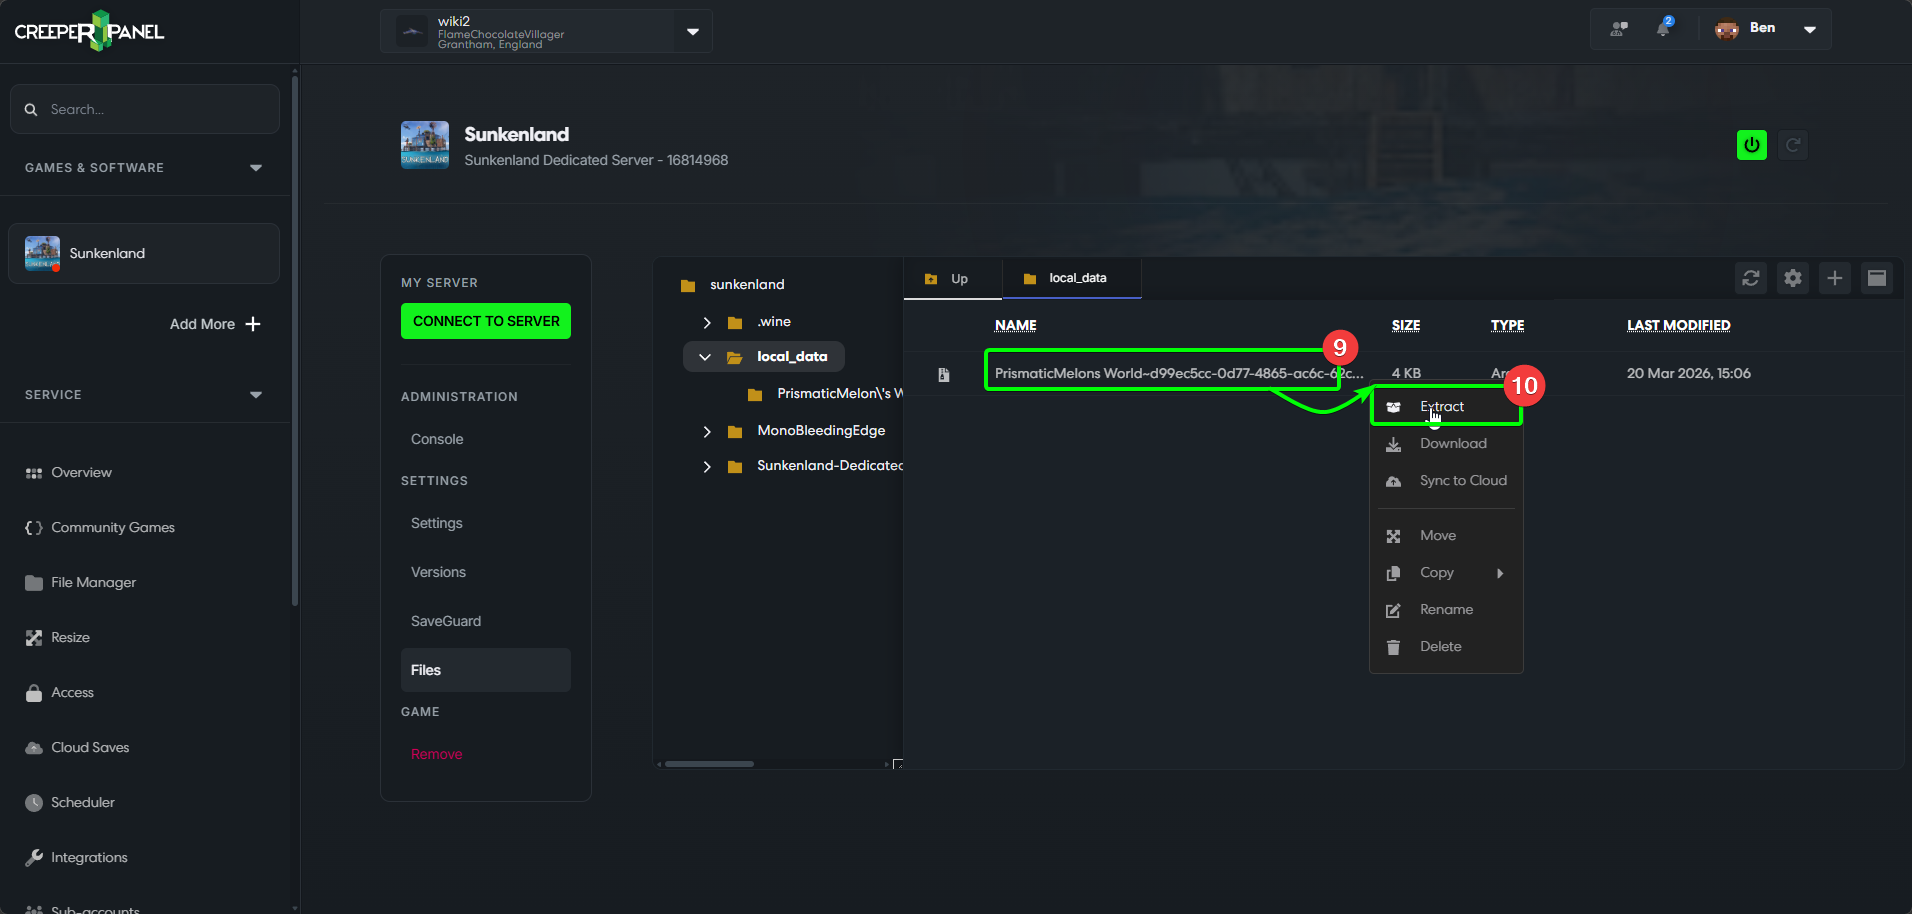
- In the pop-up, select
Extractto extract the.ZIP. If you selectUse Smart Directoryin this instance, you'll have to manually move the world files.
- You can select the newly created folder to confirm the files have both uploaded and extracted correctly.
- They should look like what you see in the image.
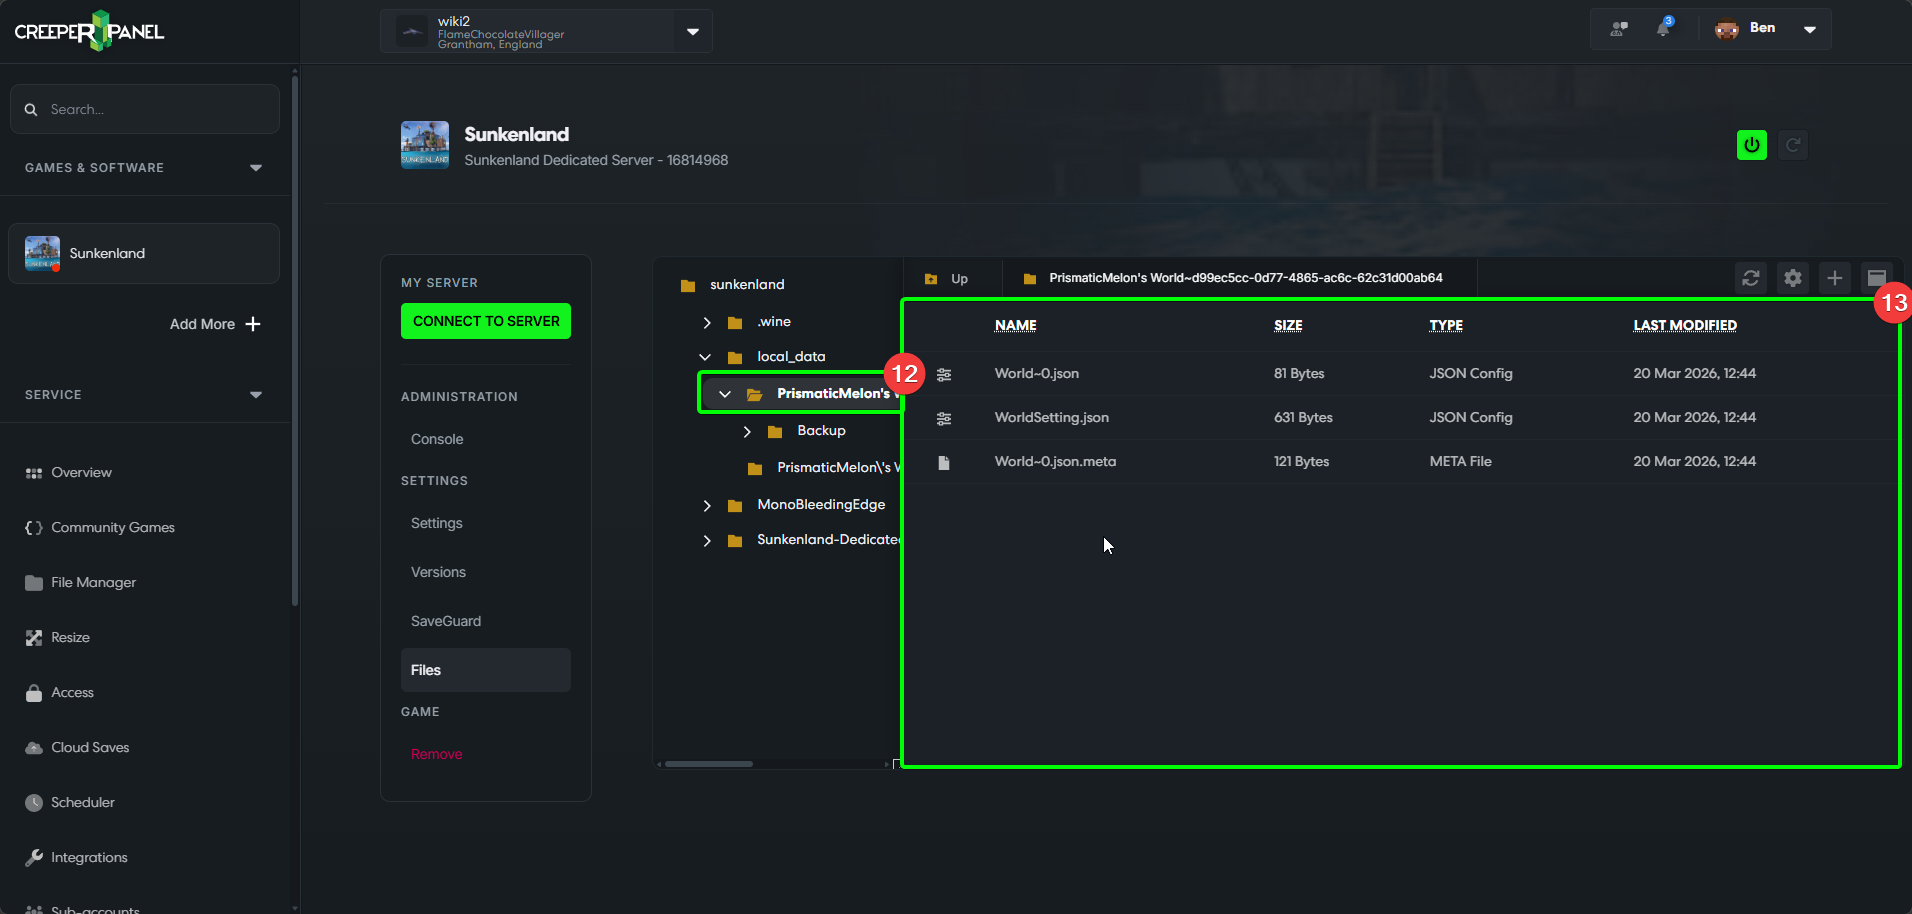
For this next step, you'll need your world's GUID. This is an alphanumerical string that appears after your world name, seperated by a ~ symbol. For example, the .ZIP file uploaded in this example is named PrismaticMelons World~d99ec5cc-0d77-4865-ac6c-62c31d00ab64. This means the GUID for this world is d99ec5cc-0d77-4865-ac6c-62c31d00ab64
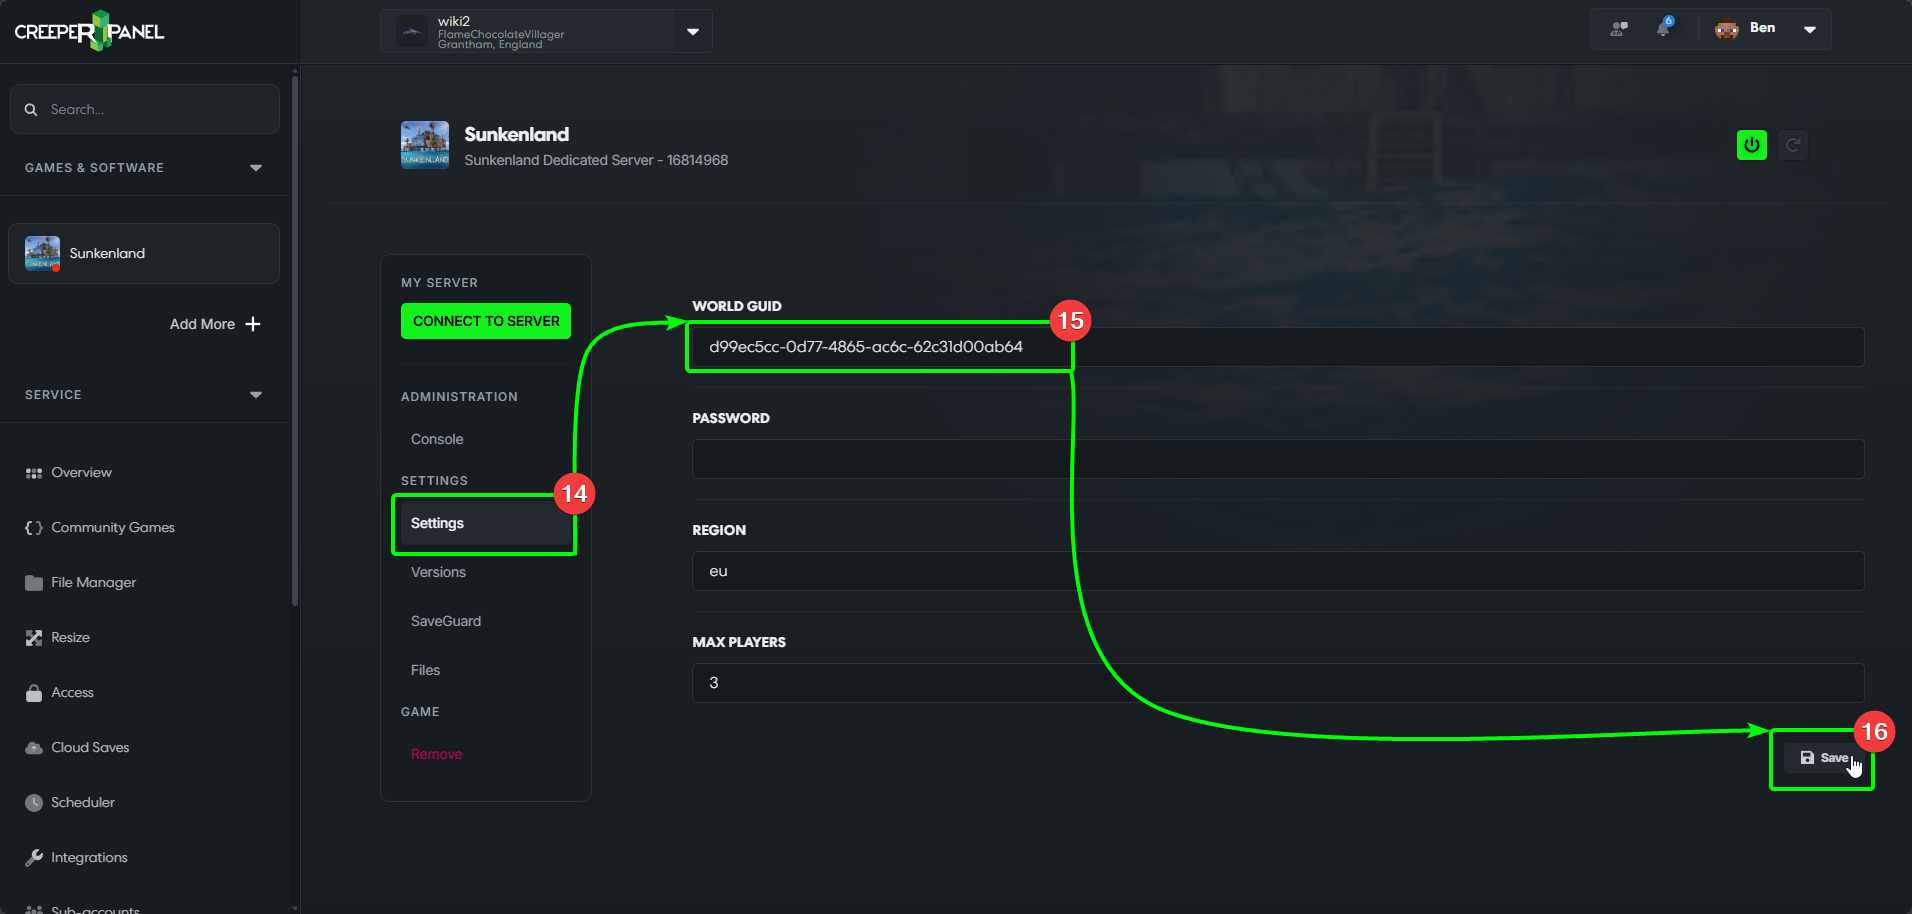
- Finally, you'll need to configure the instance to load the newly-uploaded map. Select
Settings, found underSettingsin the sub-menu. - Enter your world's GUID in the
World GUIDfield. - Click the
Savebutton to save your changes.
That's it! You should be free to start your server.