Adding Mods
This guide explains how to install mods on your Minecraft server using the CreeperHost control panel. You can add mods by searching the mod database or uploading mod files directly.
If you are struggling to find your Minecraft server, see our guide on Finding Your Instances.
Click on the instance you want to add mods to, then click on Mods in the instance navigation list.
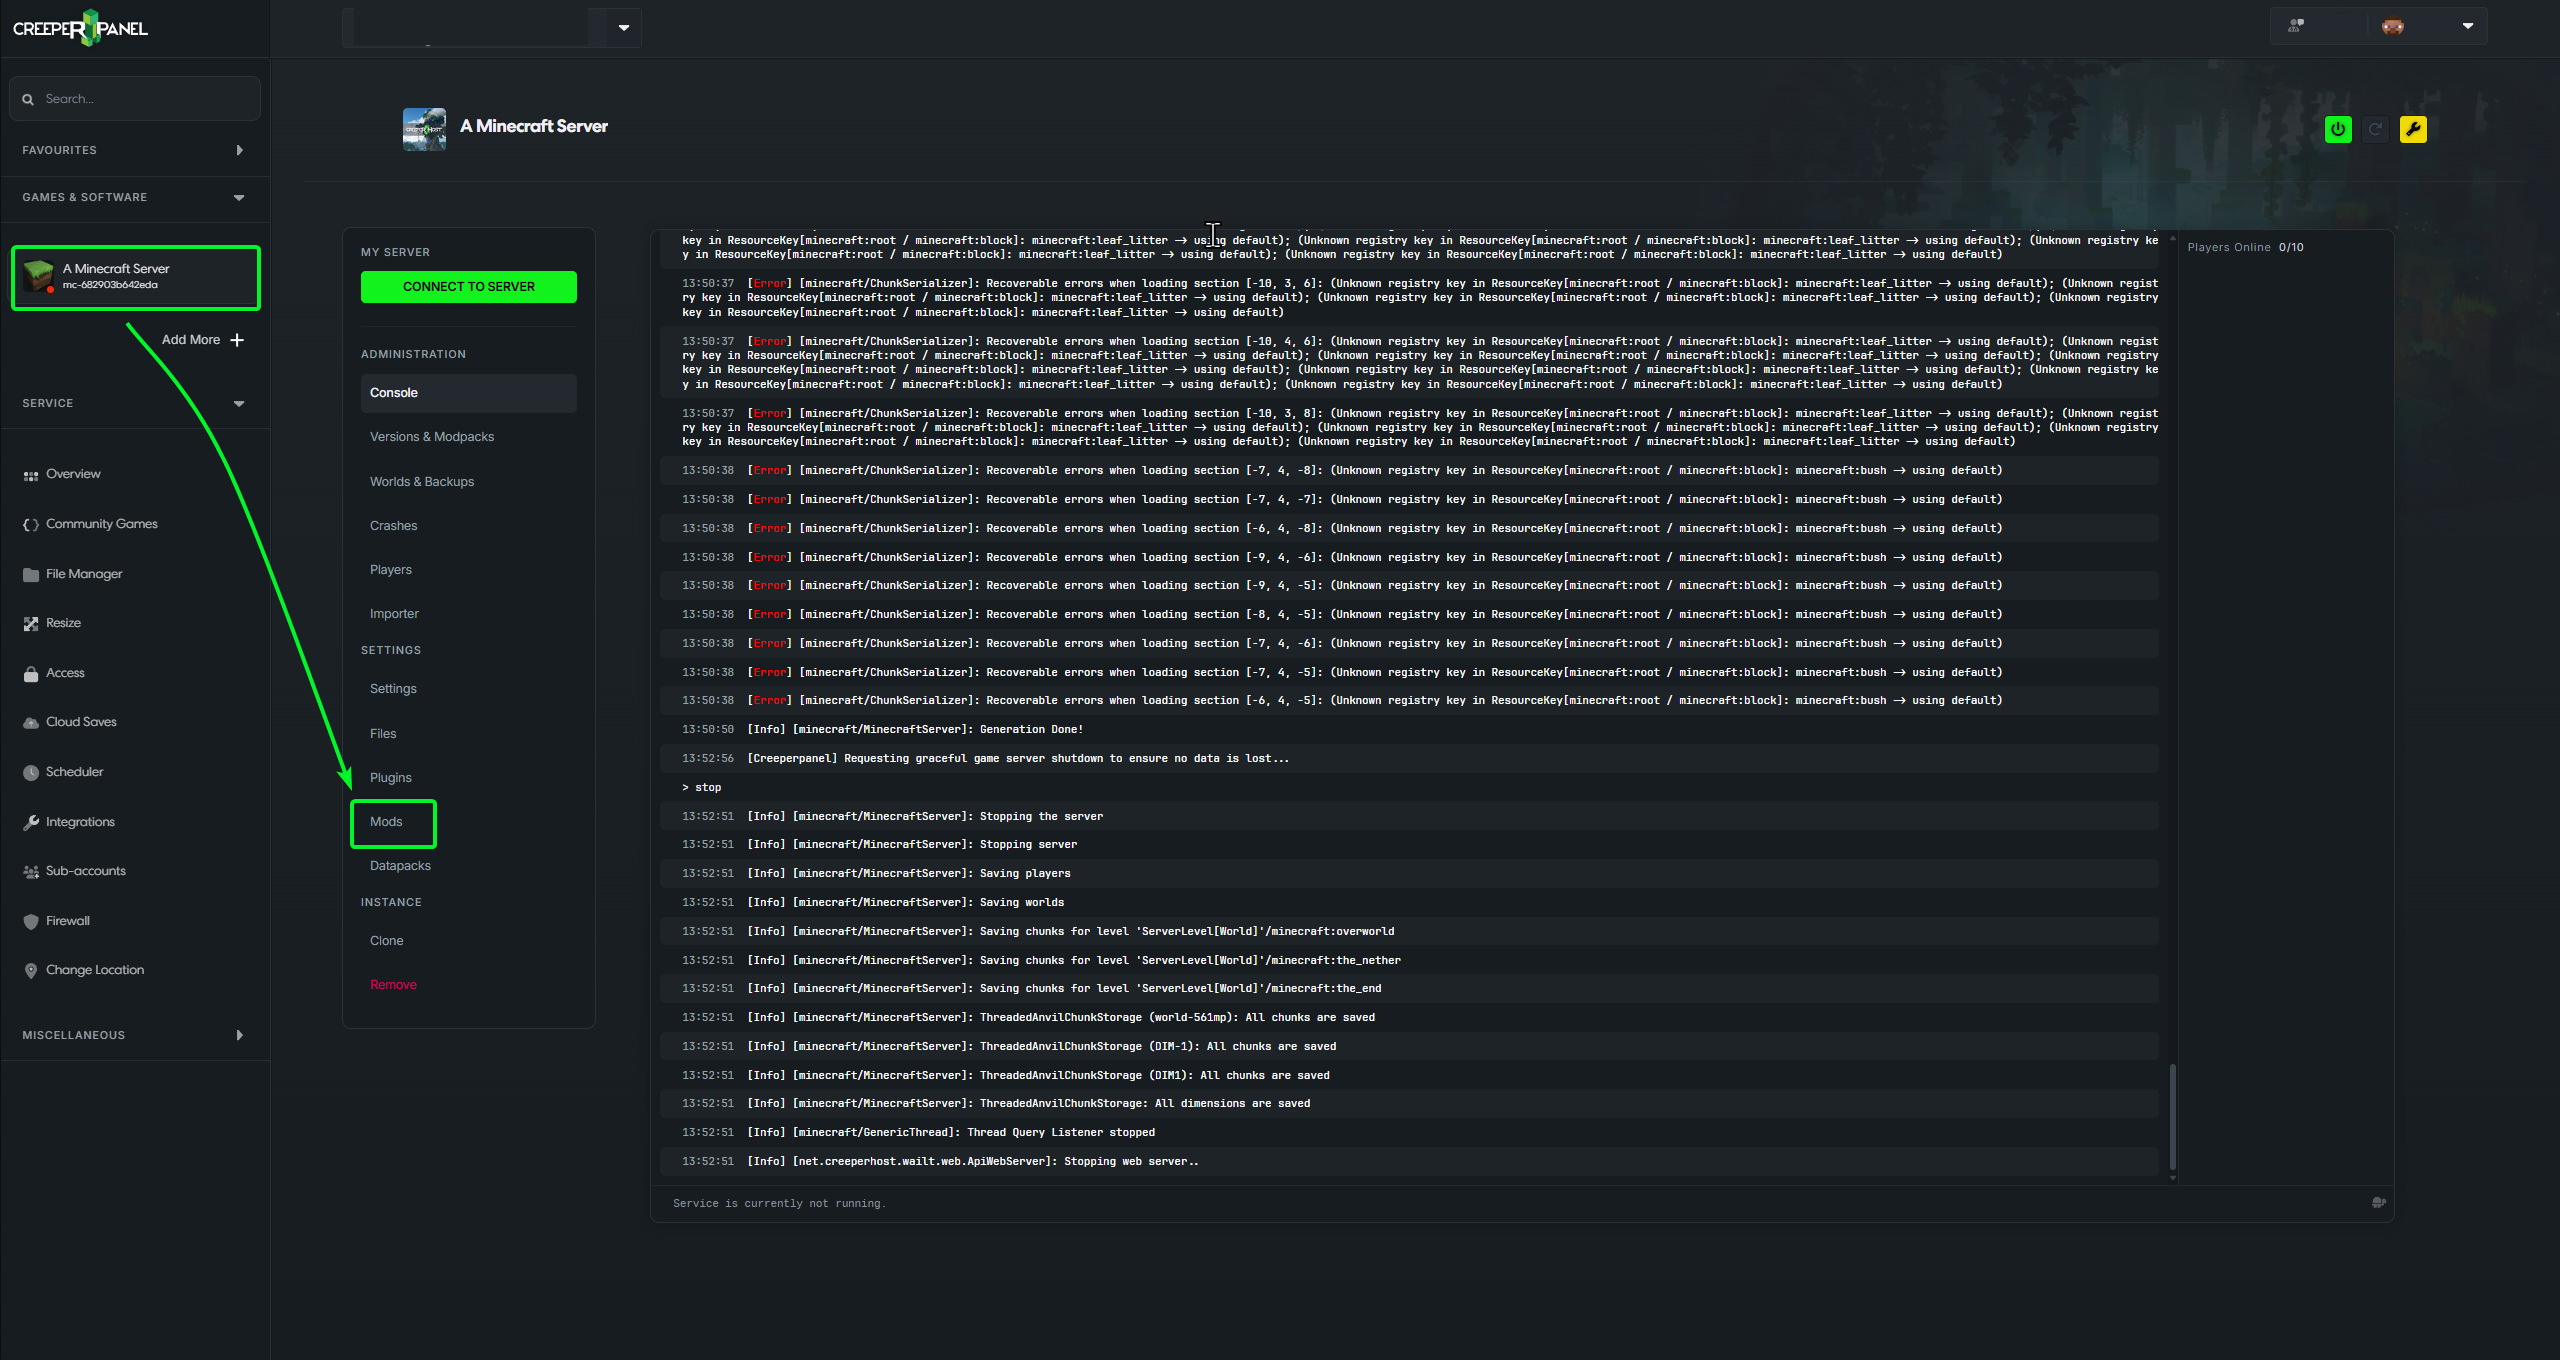
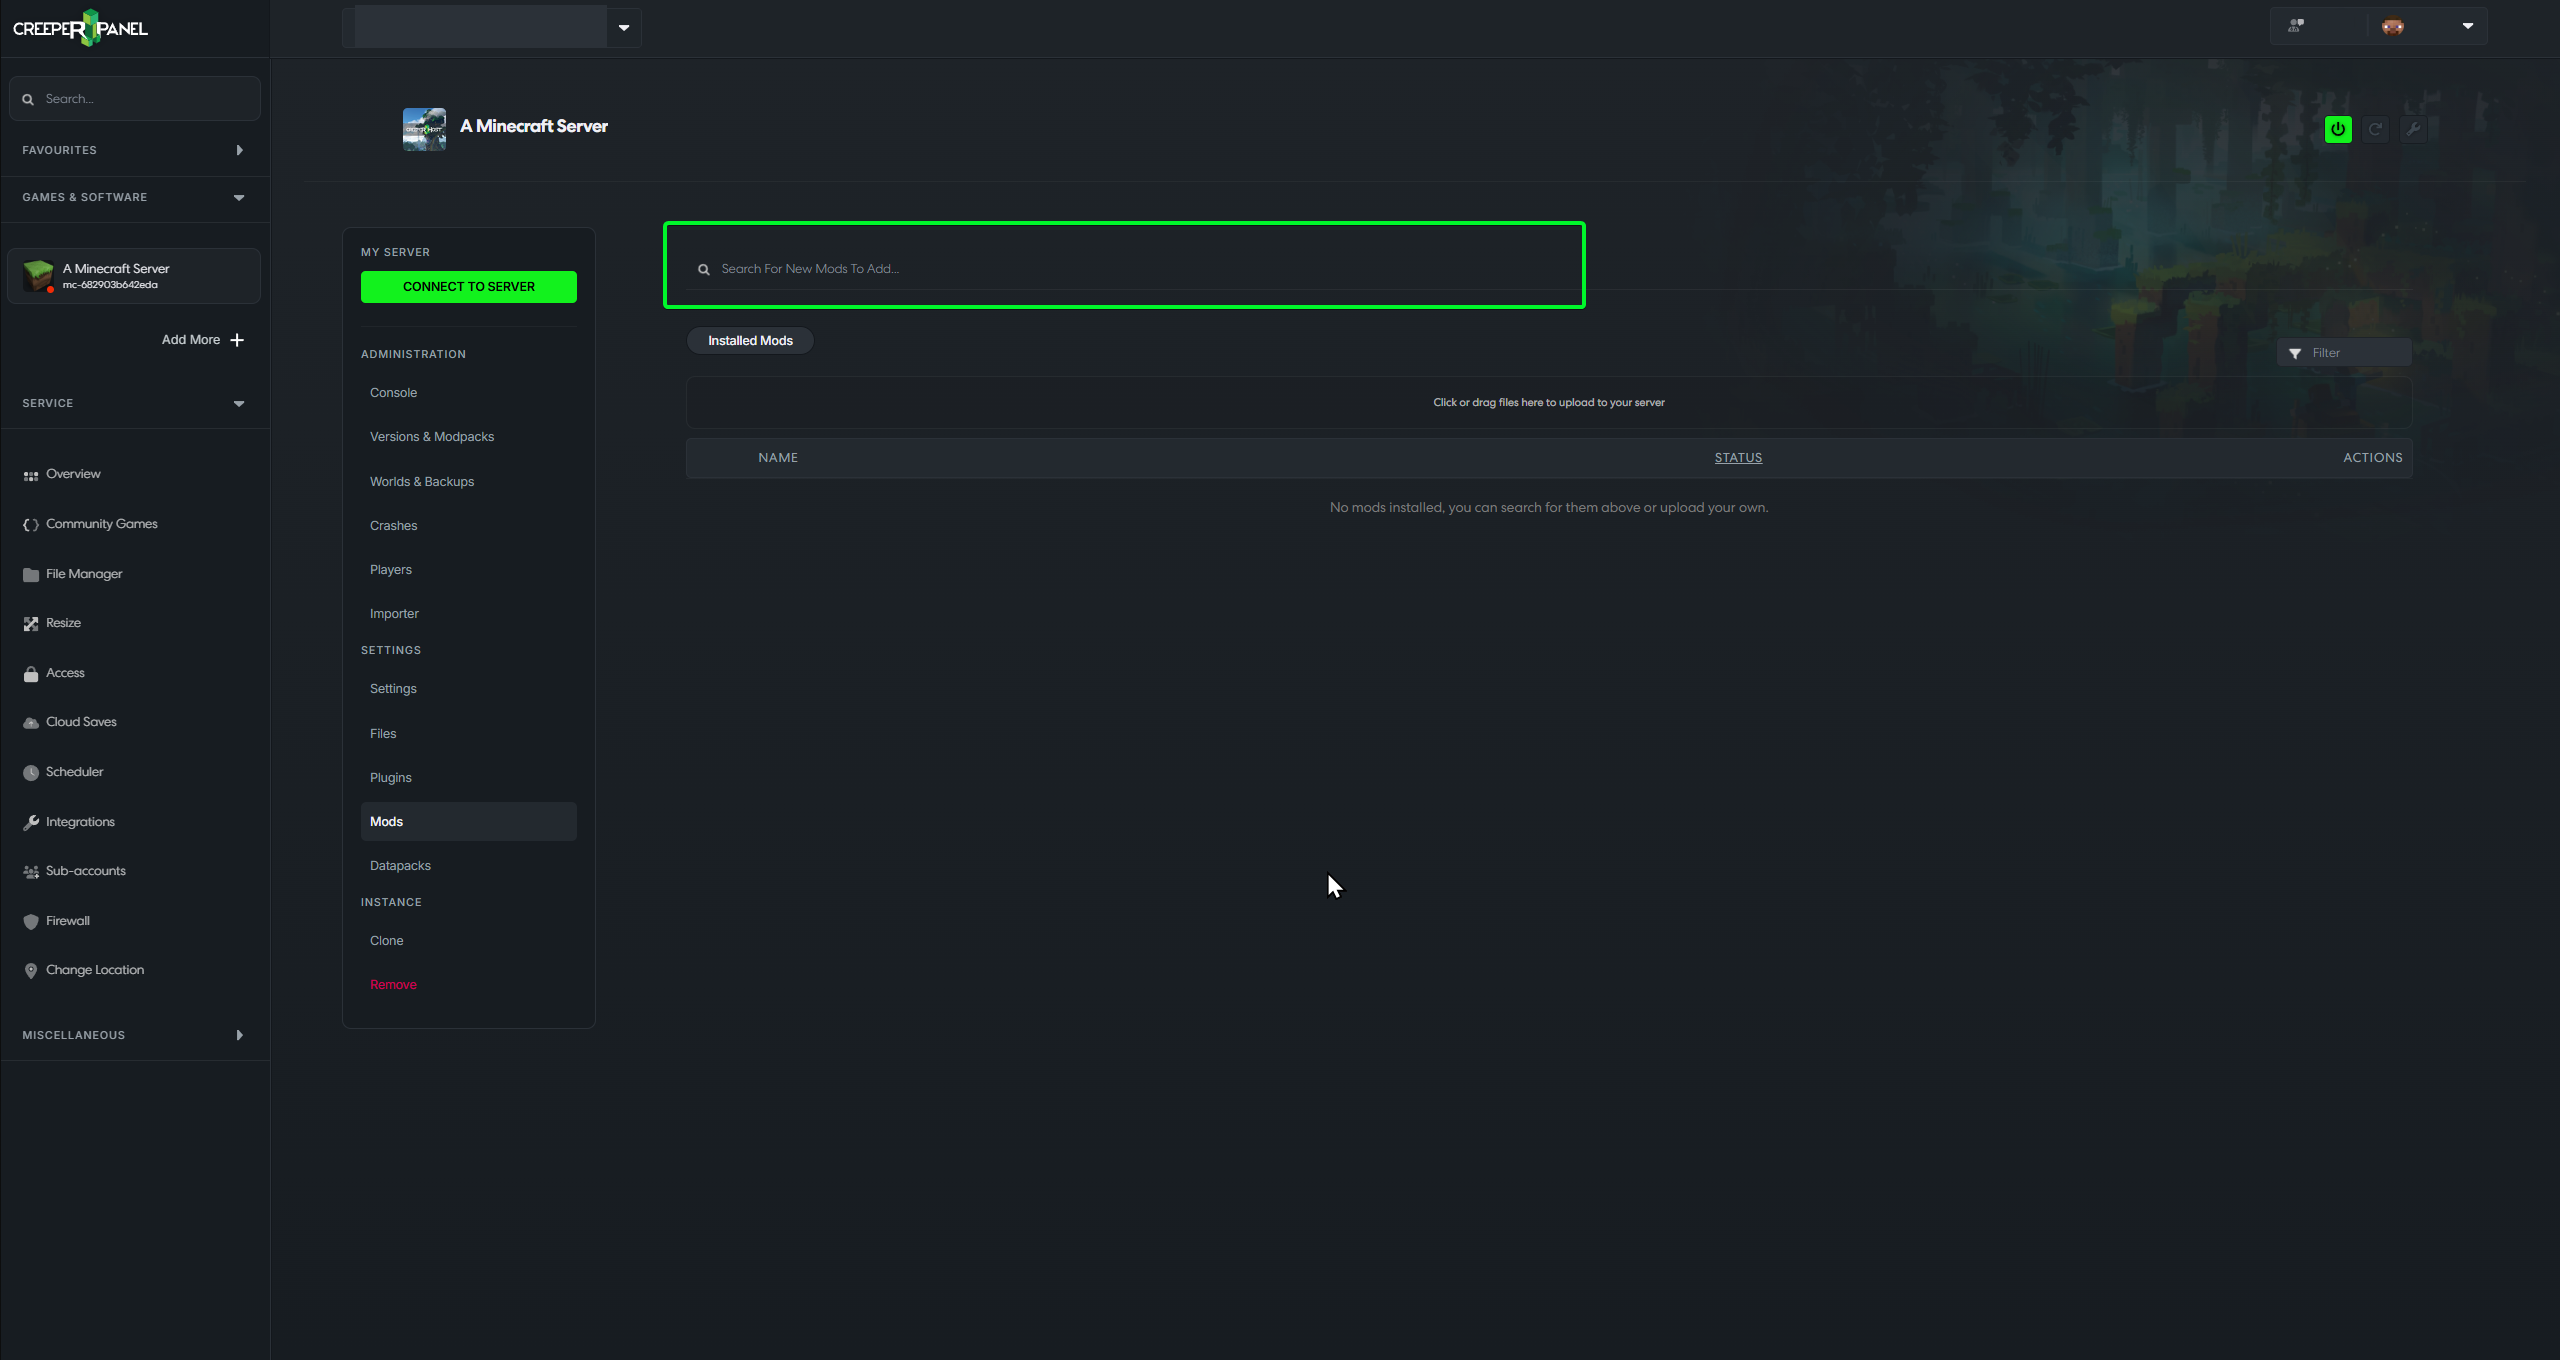
Once on the Mods page, there are multiple methods to install a mod. Each method is described below.
Method 1: Search and Install
Click on the large text box that says Search For New Mods To Add and search for the mod you want to install.
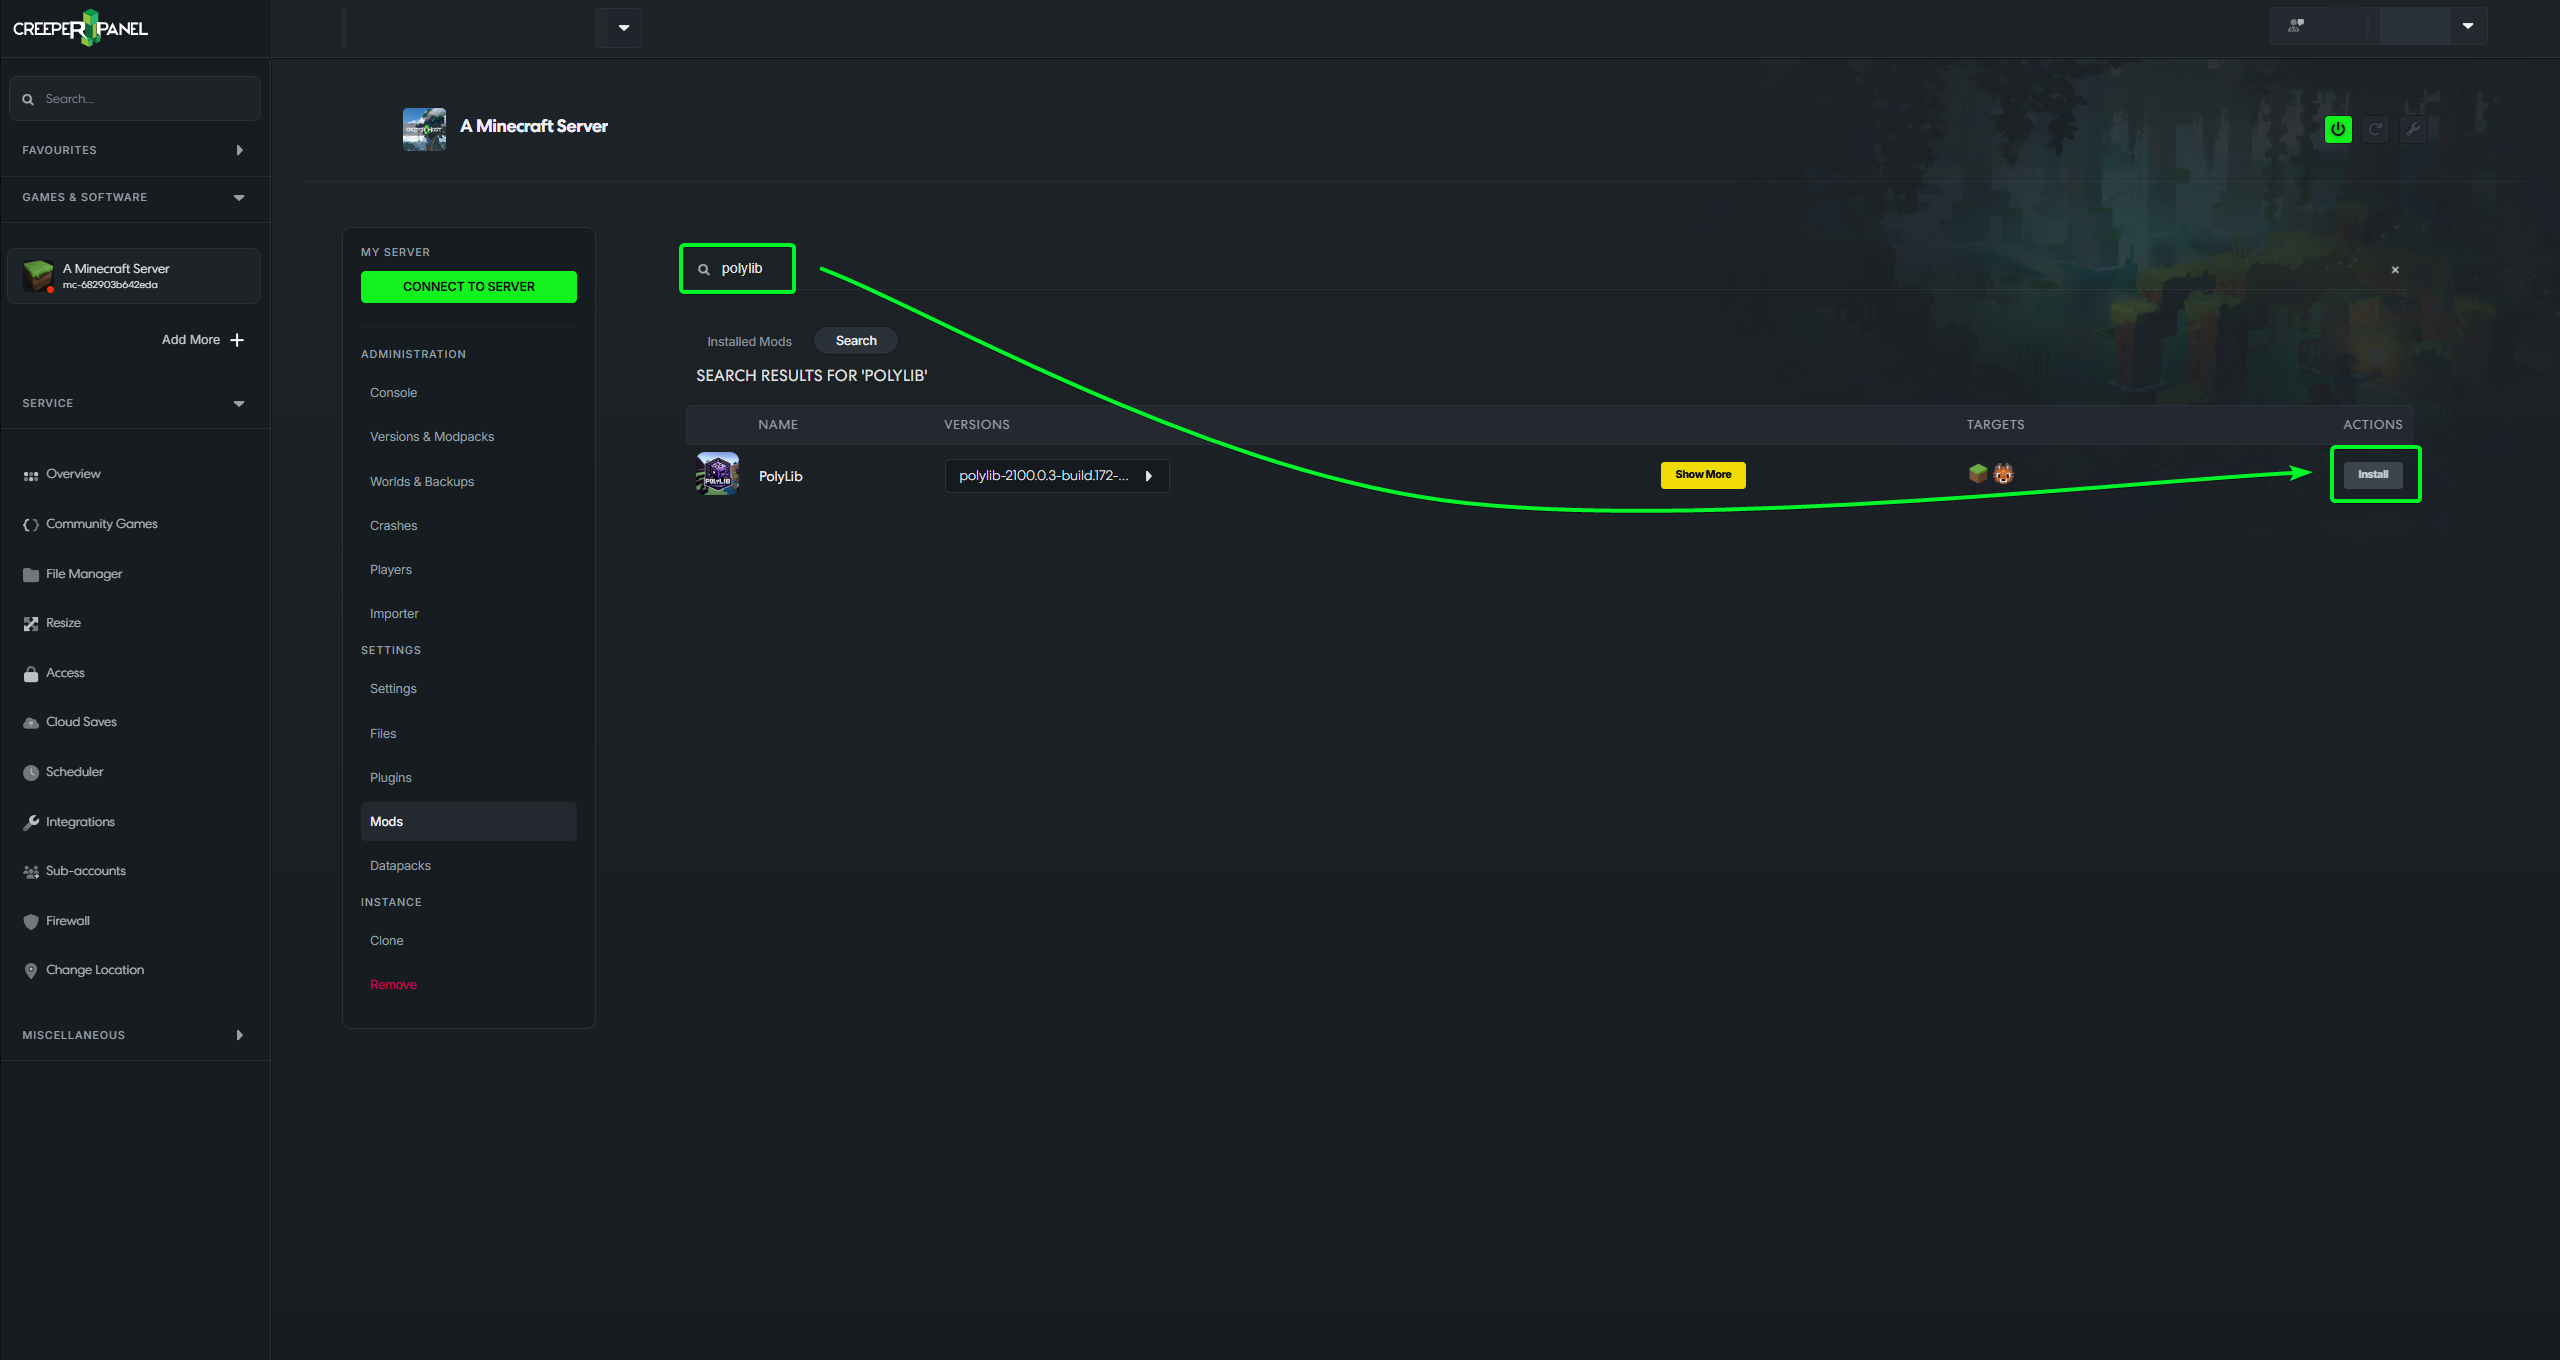
After you find the mod you want to install, make sure to select a version that will work with the version of Minecraft running on your server and click Install.
Method 2: Upload Mod Files
If you have the mod(s) that you want to add to your server already downloaded, you can click on the darker box that says Click or drag files here to upload to your server.
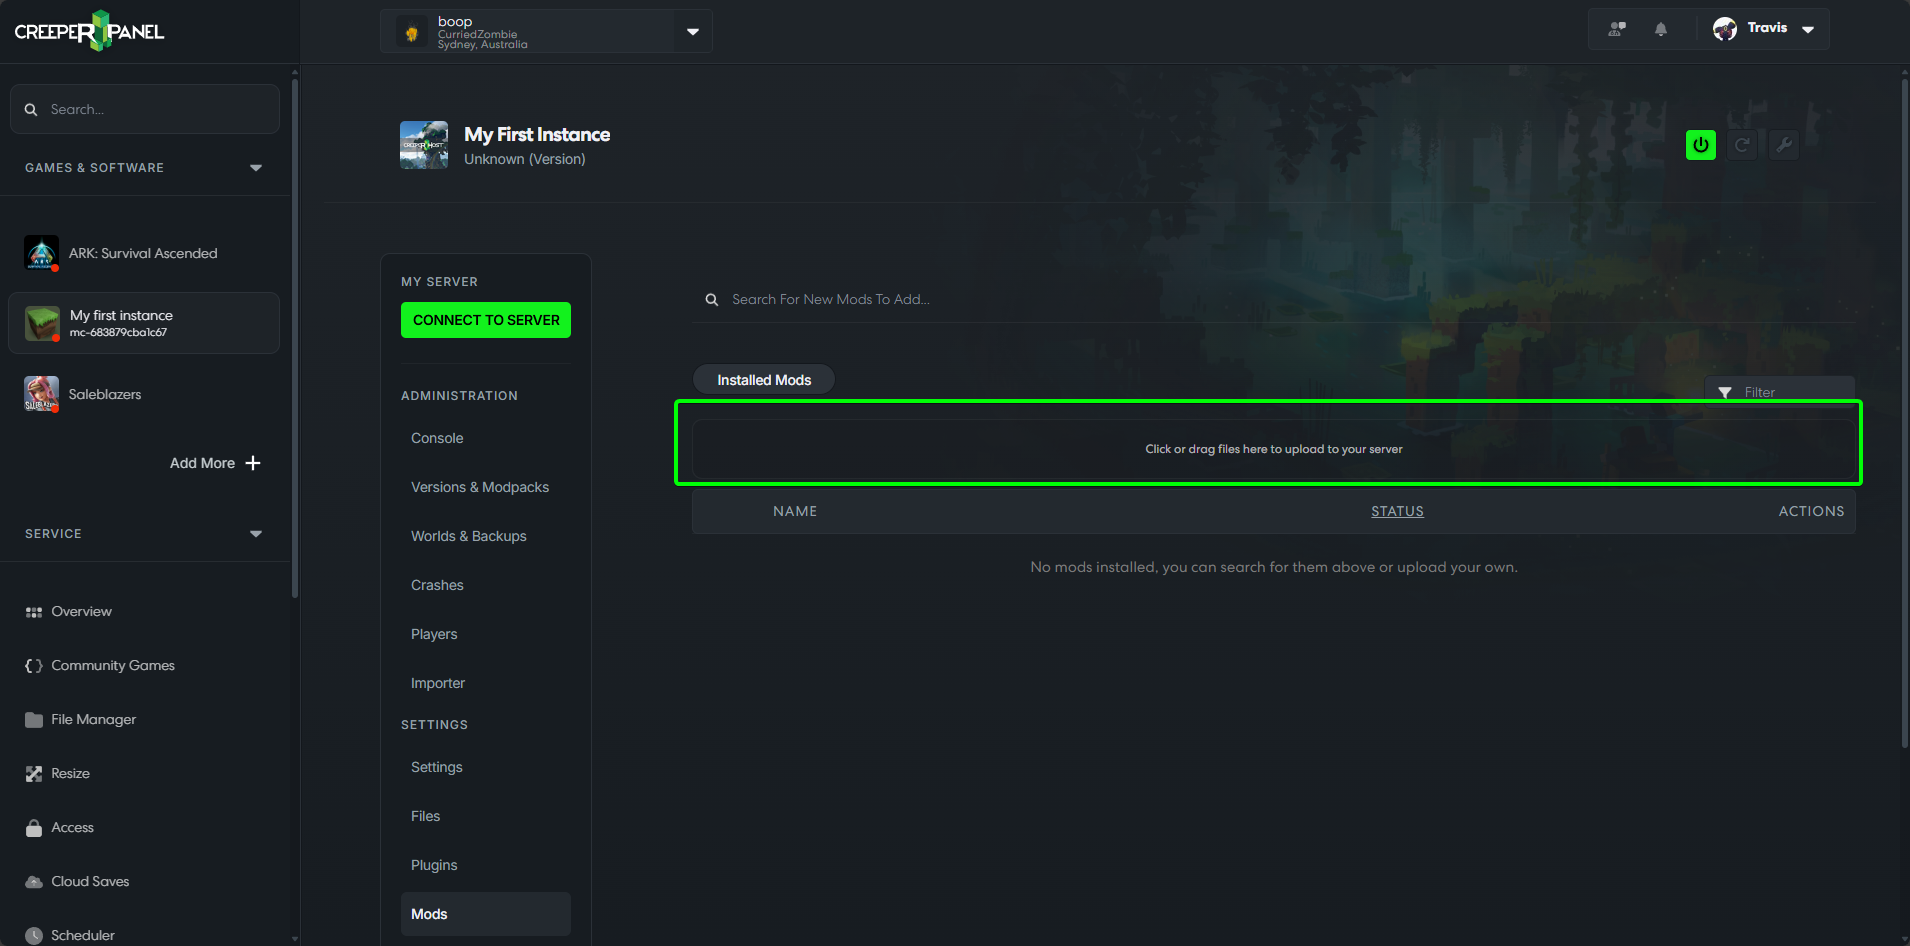
In the window that opens, navigate to where the mods you want to upload are located, then click Open.
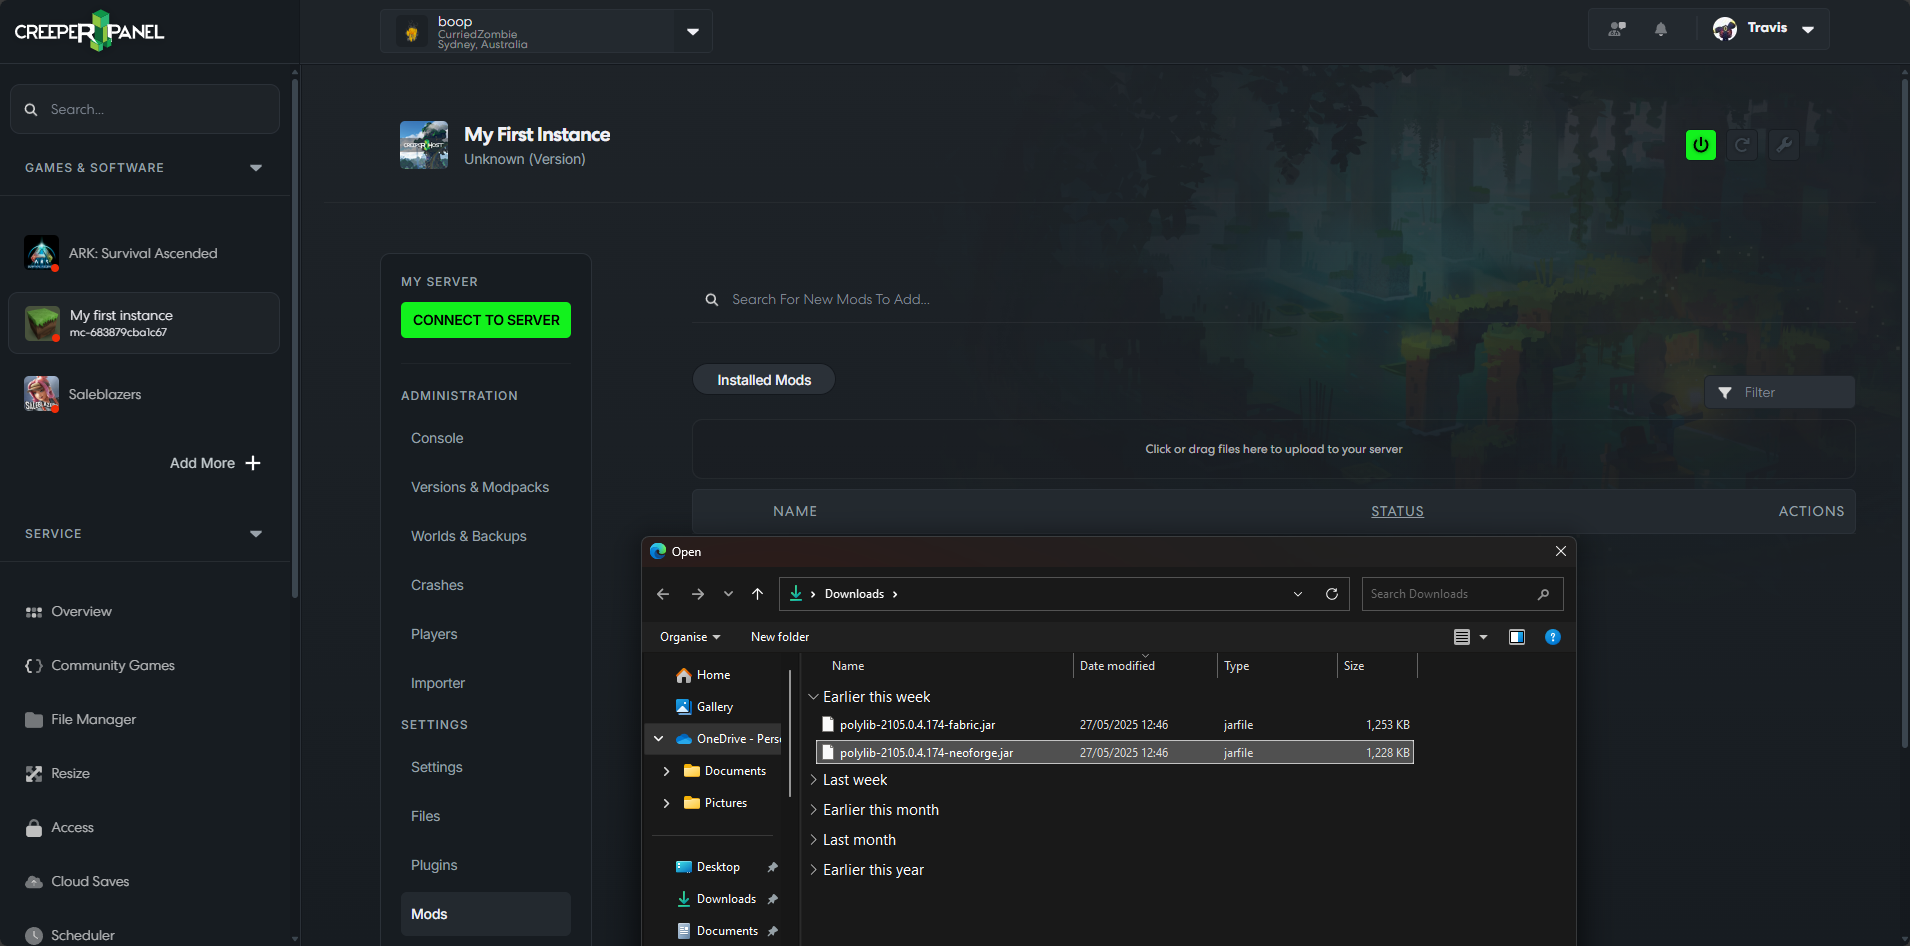
Once you have installed the mods you wanted, you will need to restart the server to enable them.
Managing installed mods
Use the filter above Installed Mods to find a filename or mod name. The All, Enabled, Disabled, Non-pack and Problems filters help narrow a large list. Non-pack means the mod was added separately from the pack; it is not automatically a problem.
Use Rows, Prev and Next to browse larger packs. Status indicators can flag duplicate files, client-side mods or a checksum mismatch. Check the indicated file and its compatibility before removing anything.
Stop the instance before making changes. The switch beside a mod enables or disables it, while the delete action removes its file. Where an update is offered, check that it matches your Minecraft version and loader before installing it. Restart afterwards to apply your changes.