Restoring Backups
Before restoring or modifying backup files, please ensure your service is switched off to avoid any missing data/ corruption.
There are two ways to restore backups using the CreeperPanel. The first method uses the CreeperPanel's inbuilt backup function, and automates the restoration; the second method is done manually.
Restoring a Backup via the Panel
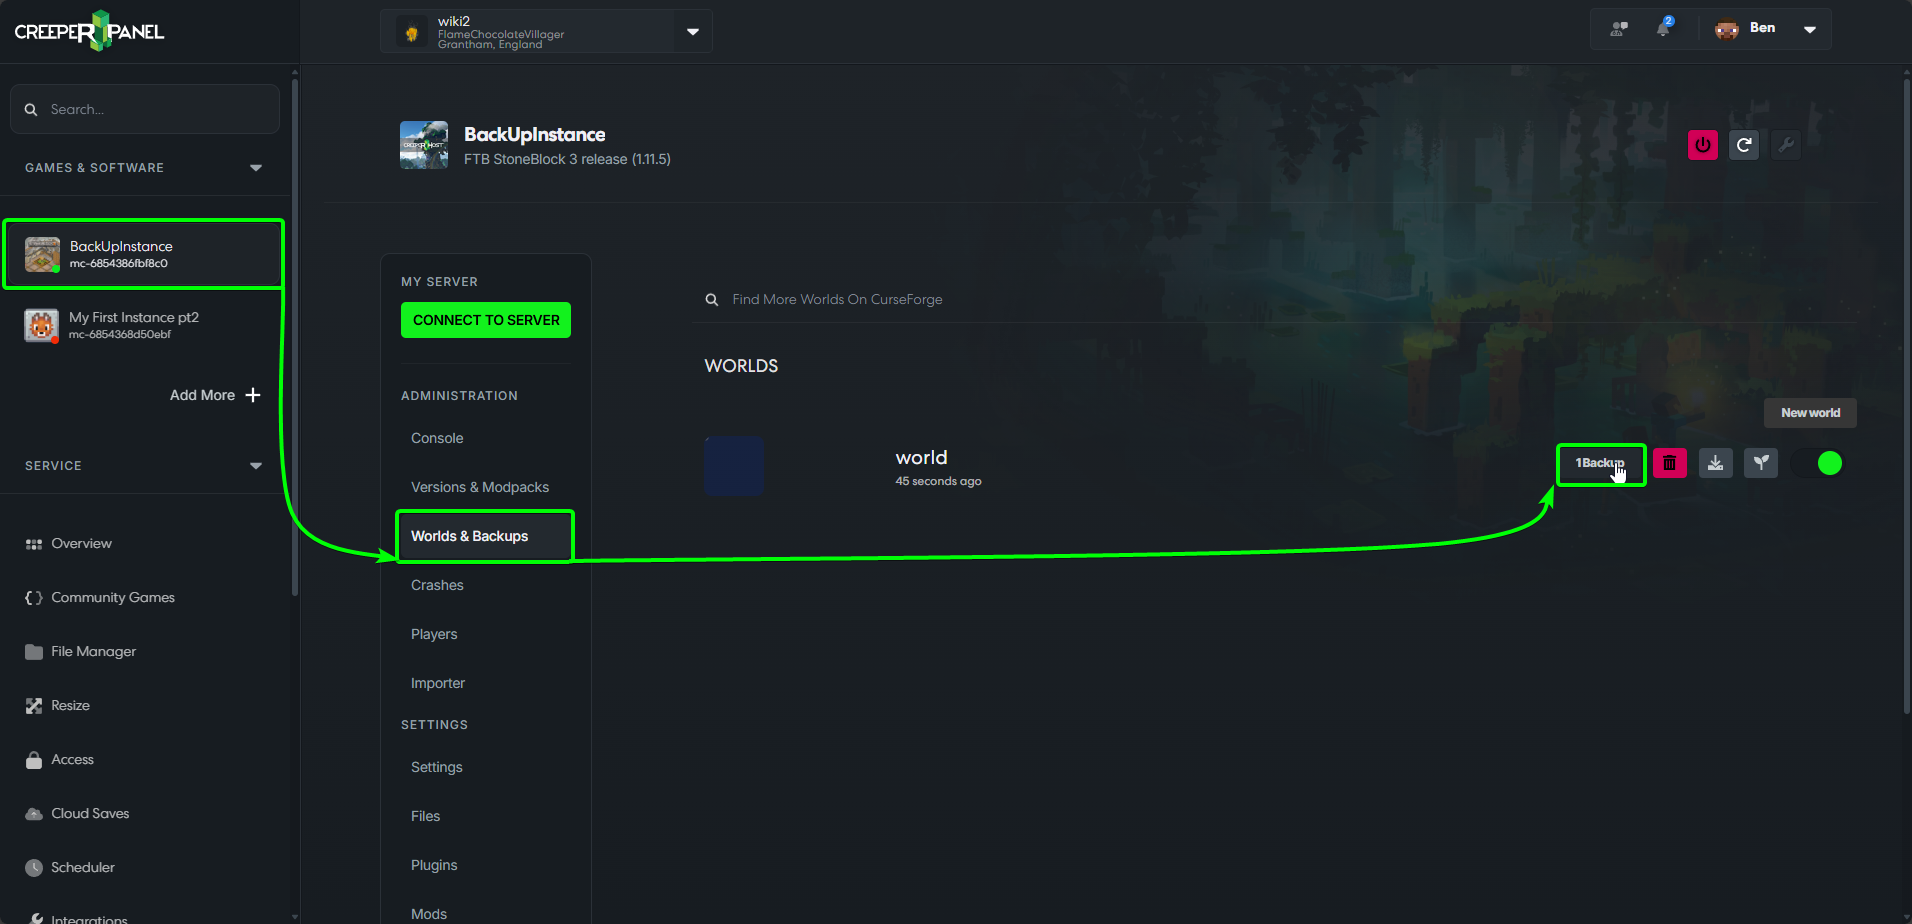
Restoring a backup created by mods such as FTBU (Feed the Beast Utilities), or Aroma1997's Backup, is a simple process using the CreeperPanel. To begin, navigate to the instance you wish to restore. Next, navigate to Worlds & Backups under the Administration tab. From there, select the Backup button to the right of the instance.
On the next screen, you can choose to either download your backup or restore it. Select Restore.
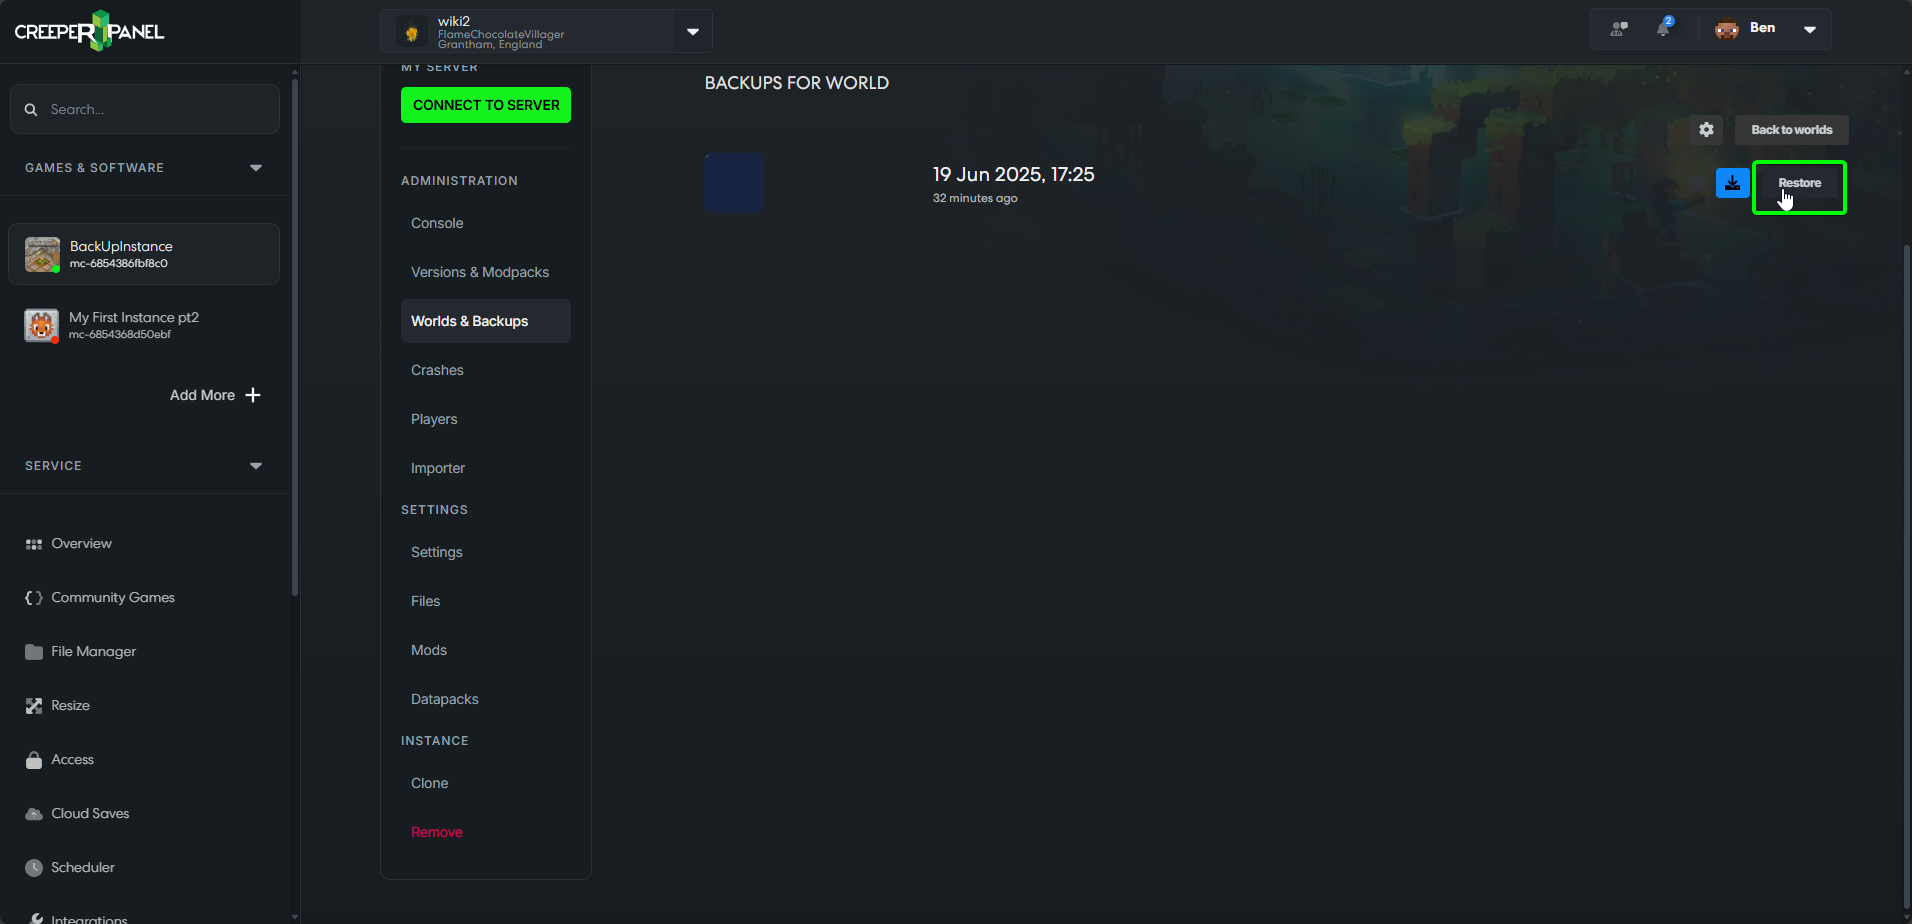
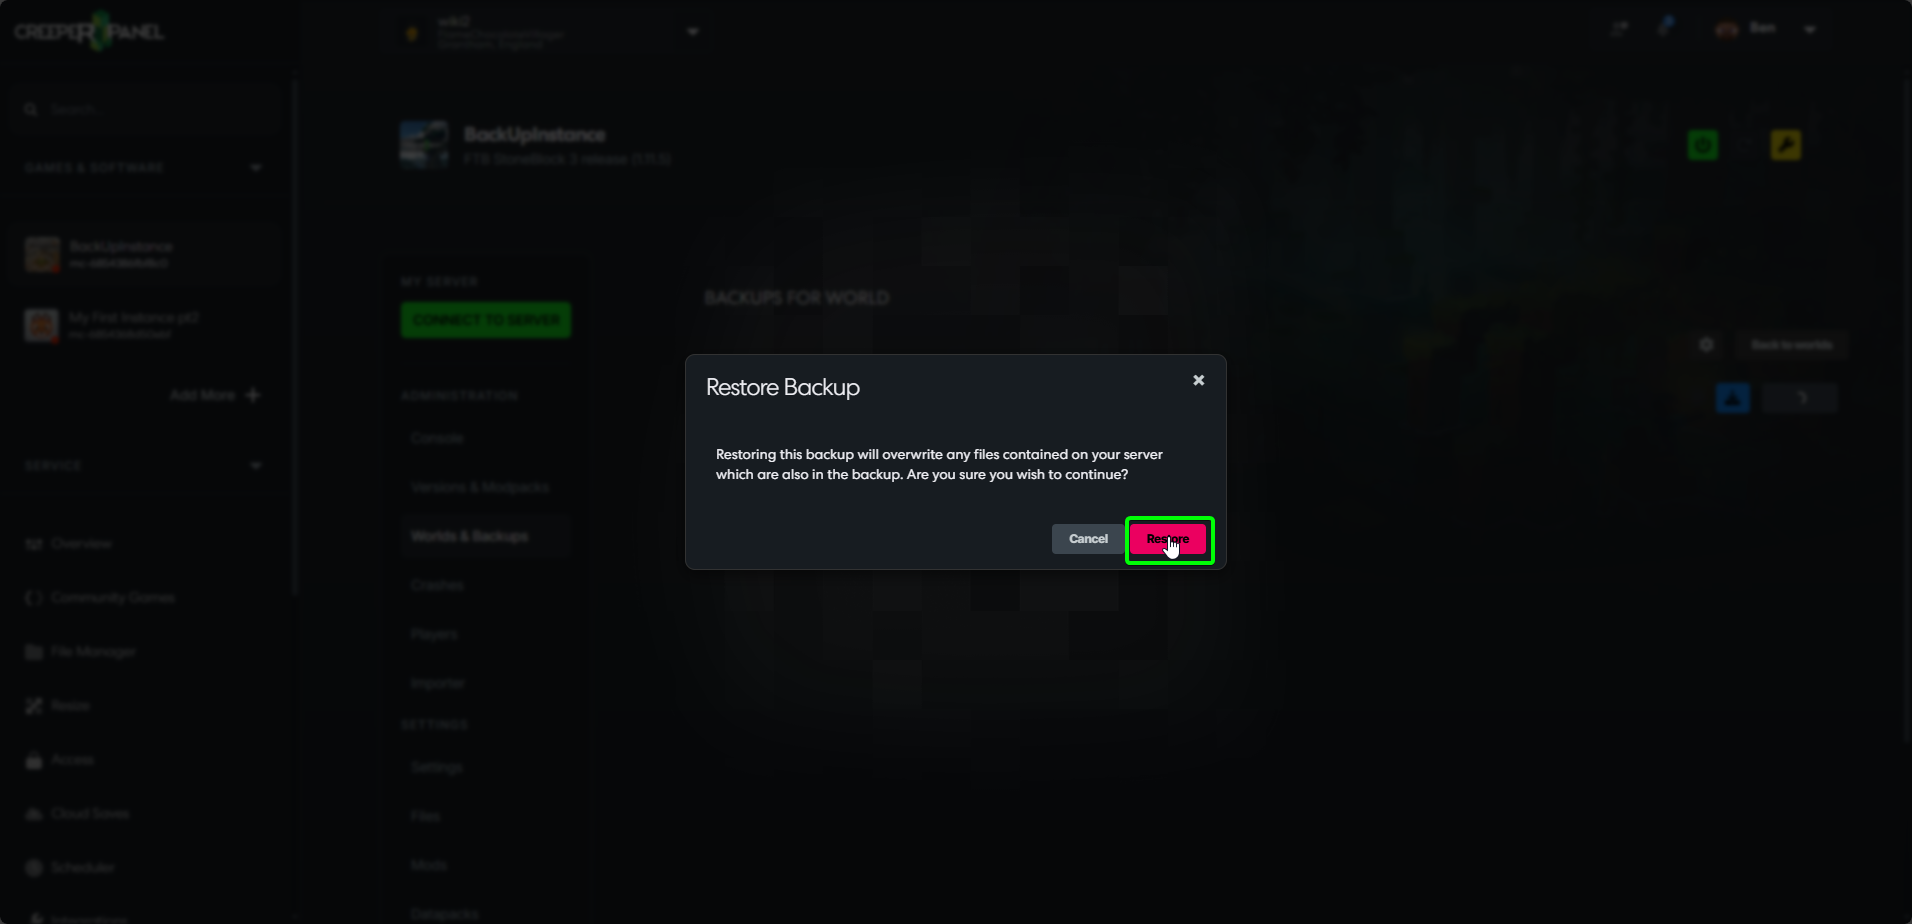
You will be presented with a window asking if you want to confirm the restoration. Click restore, and the Panel will overwrite your current world with your selected backup. When the backup is complete, you will return to the Worlds & Backups tab for the selected instance.
You can now turn your server back on, and connect to it as usual.
Manually restoring a Backup
Before deleting any world folders, make sure that you have a separate backup of your world to restore in case of any issues.
On the odd occasion you may need or want to perform a manual backup. To begin the manual process:
- Navigate to your instance via the sidebar. Ensure that your instance is turned OFF.
- Select
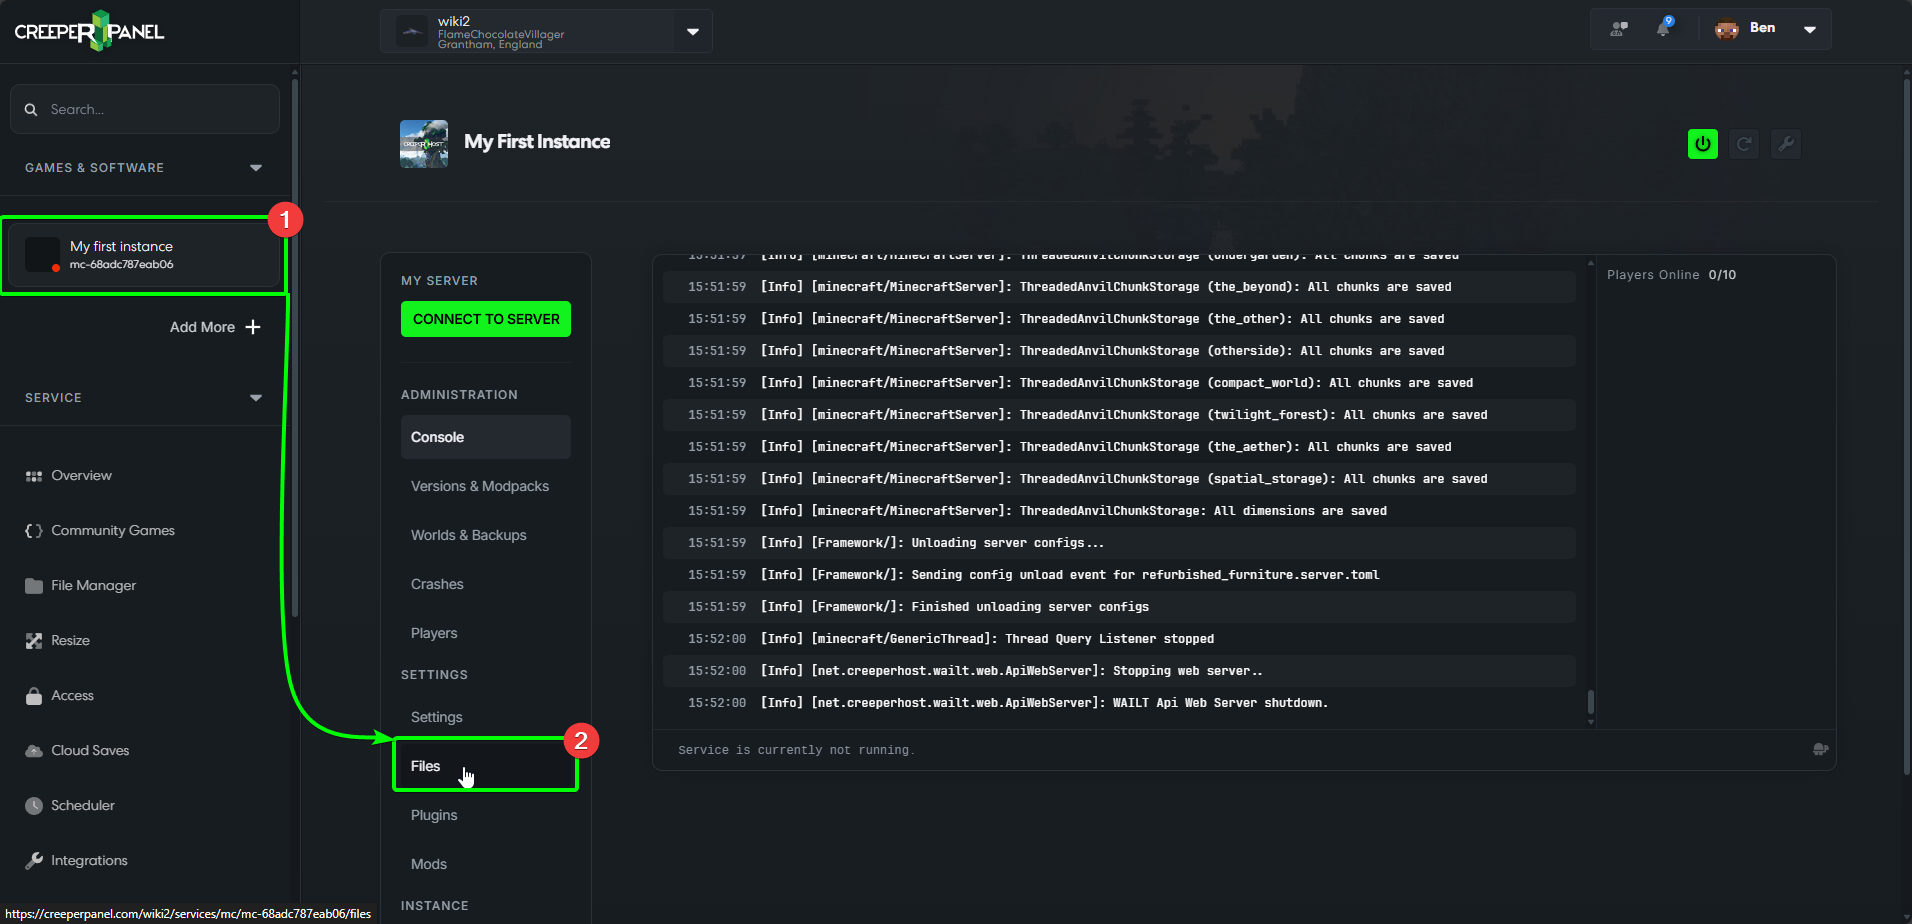
FilesunderSettingson the sub-menu. This will show you the files for the instance you have selected.
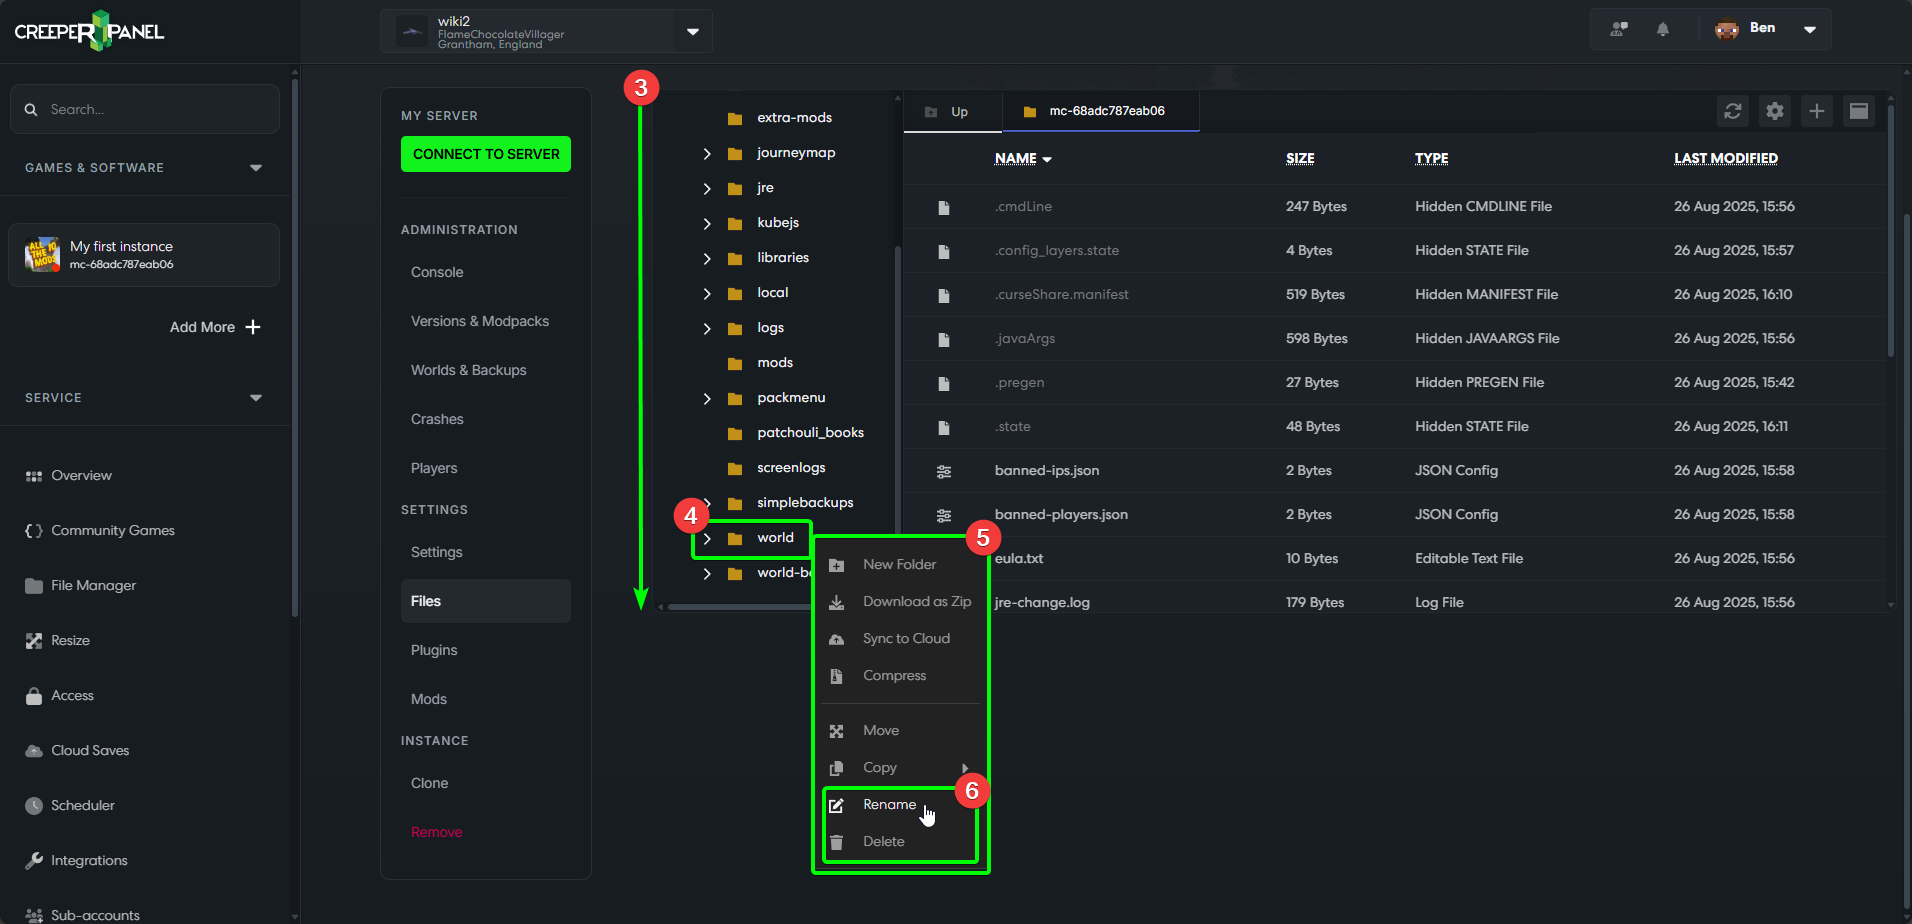
- Scroll down to find your current world folder. The default name is
world. - When you locate your world folder, right-click to bring up the sub-menu
- The sub-menu will show a few options: look for either
RenameorDelete. - If you would like to keep your current world, select
Rename. Otherwise, selectDelete.
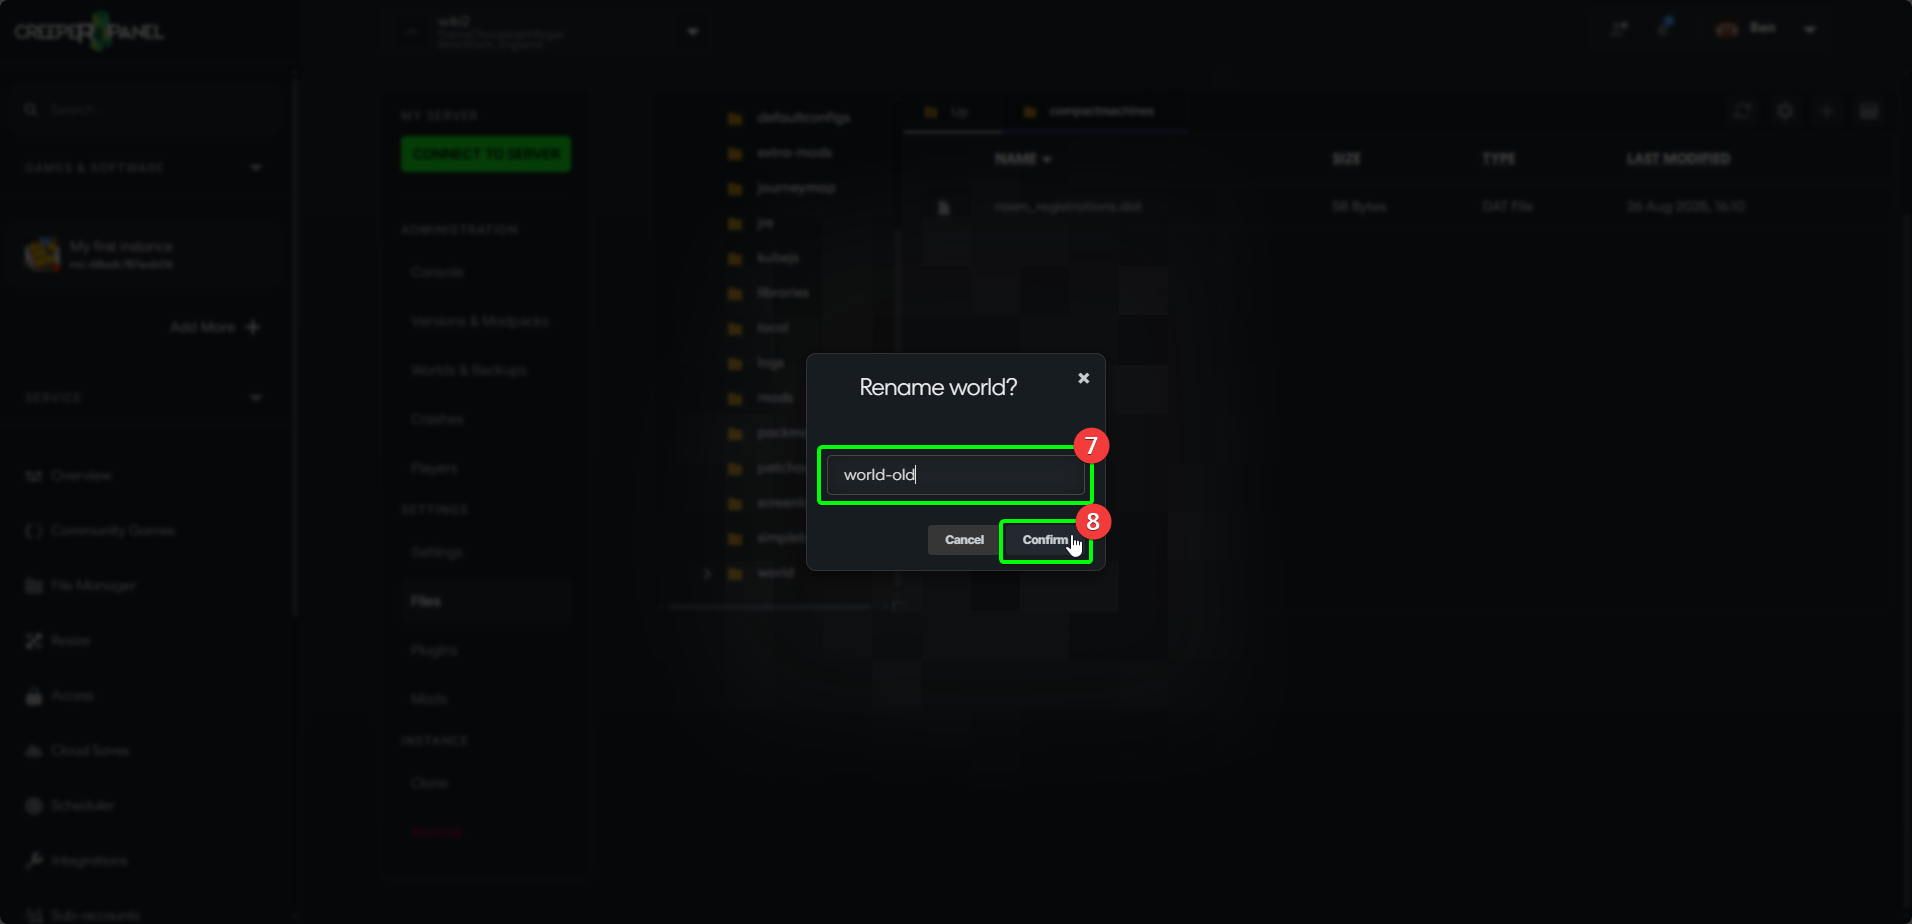
- If you selected
Rename, choose the new name for your old world. - Click
Confirmto save the changes.

- Locate your backups folder. In this example, we have used Simplebackups.
- In the sub-folder, you will find your backups. The backup names are formatted as such:
worldname-YEAR-Month-Day-Hour-Minute-Second, though this may vary depending on the mod, or mod version. The most recent backup is usually the last one listed in the directory. - Right-click the back-up you wish to restore. Select
Extract.
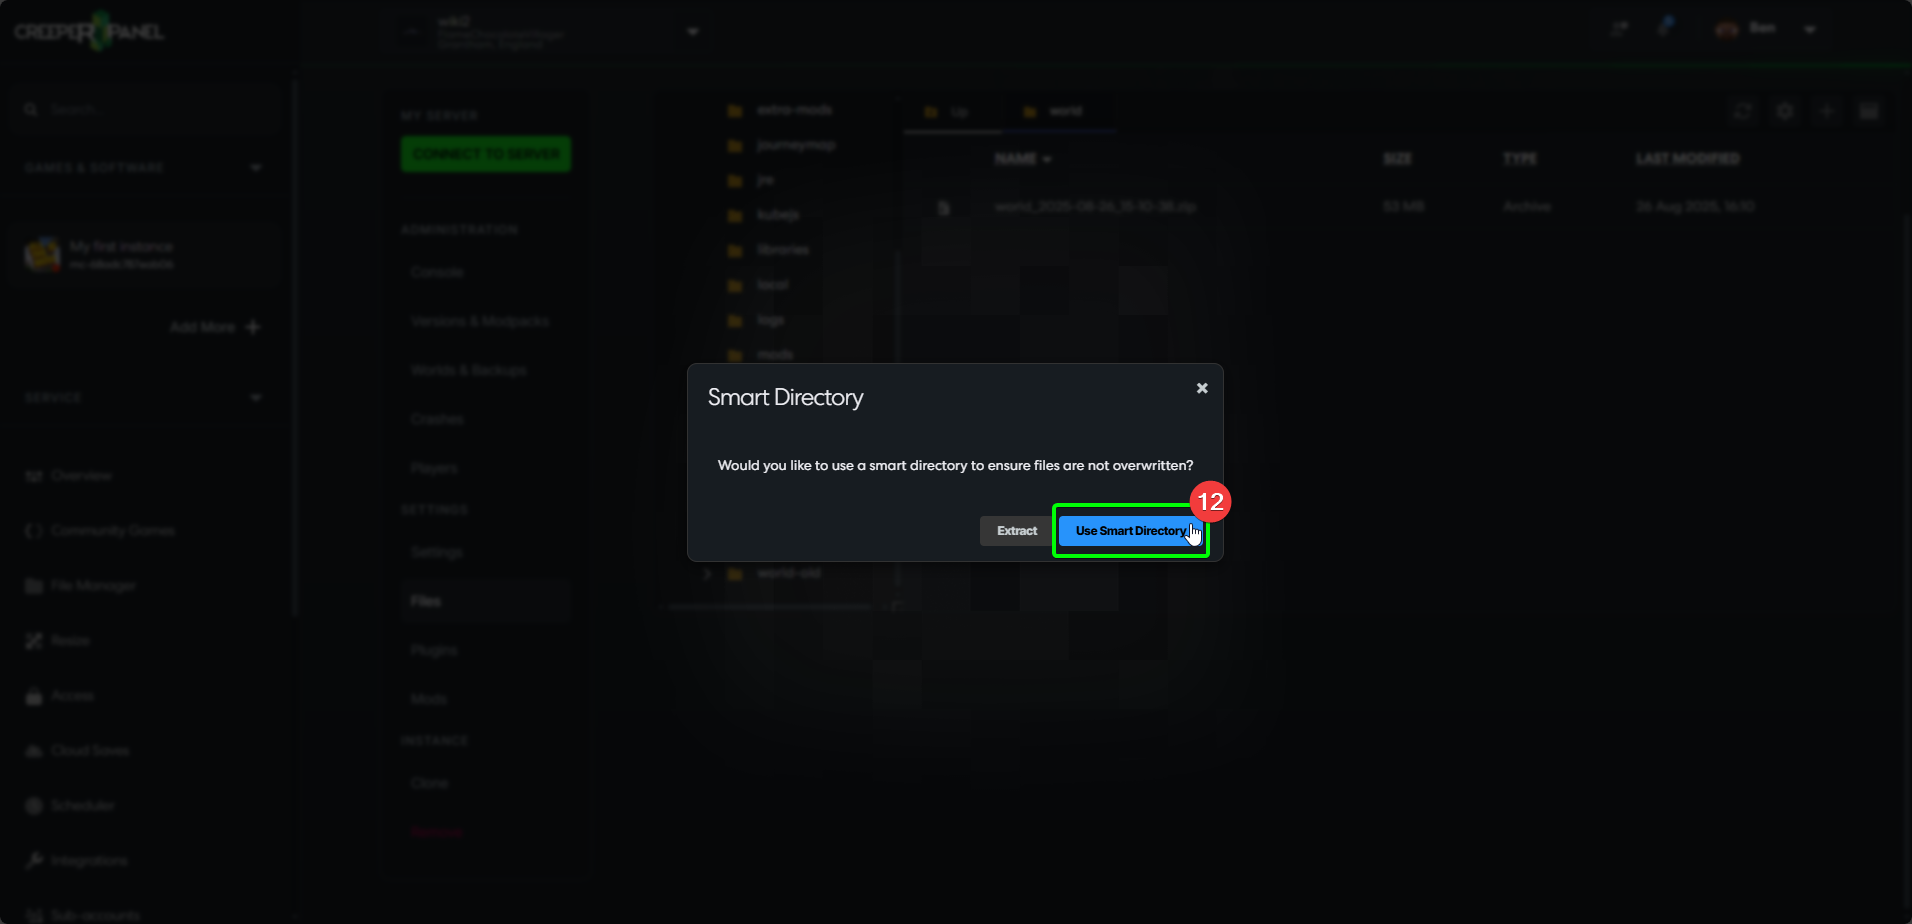
- The CreeperPanel will present you with a pop-up. You can select
ExtractorUse Smart Directory. It's best to use the Smart Directory option, so that no files are accidentally overwritten.
- The Panel will extract your backup. Locate the new folder (it will usually be nested within your backup folder).
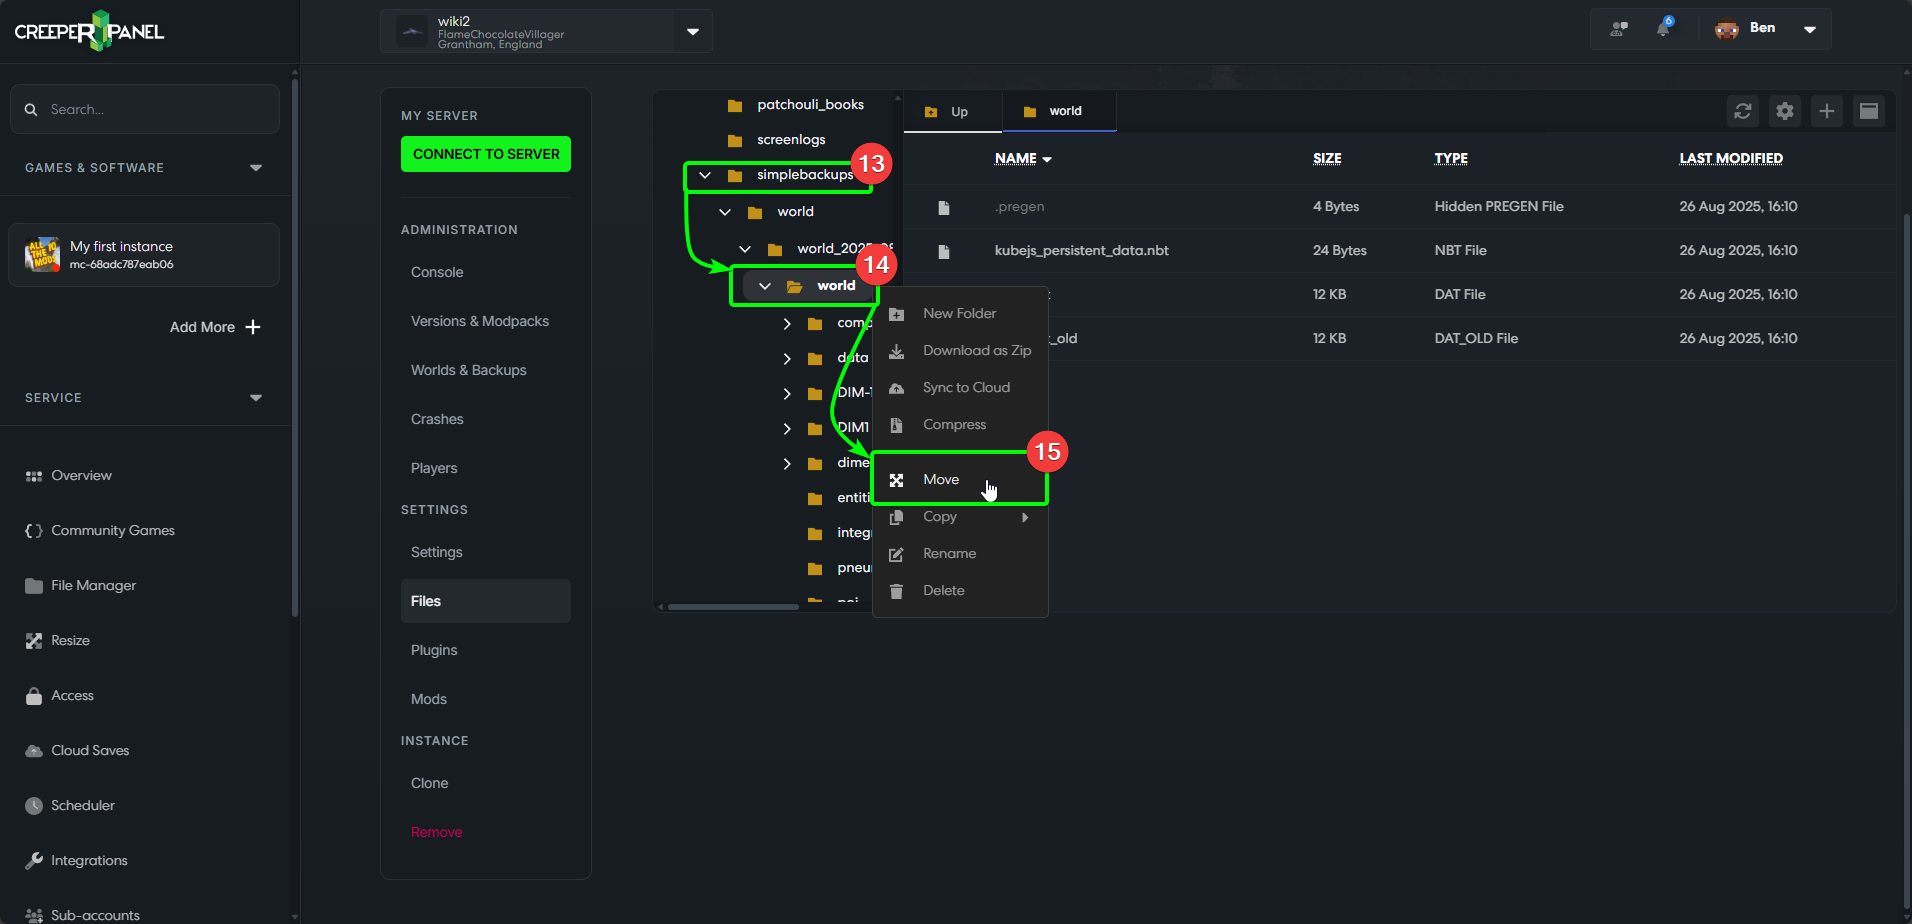
- Right-click the newly extracted backup folder.
- Select
Movefrom the sub-menu.
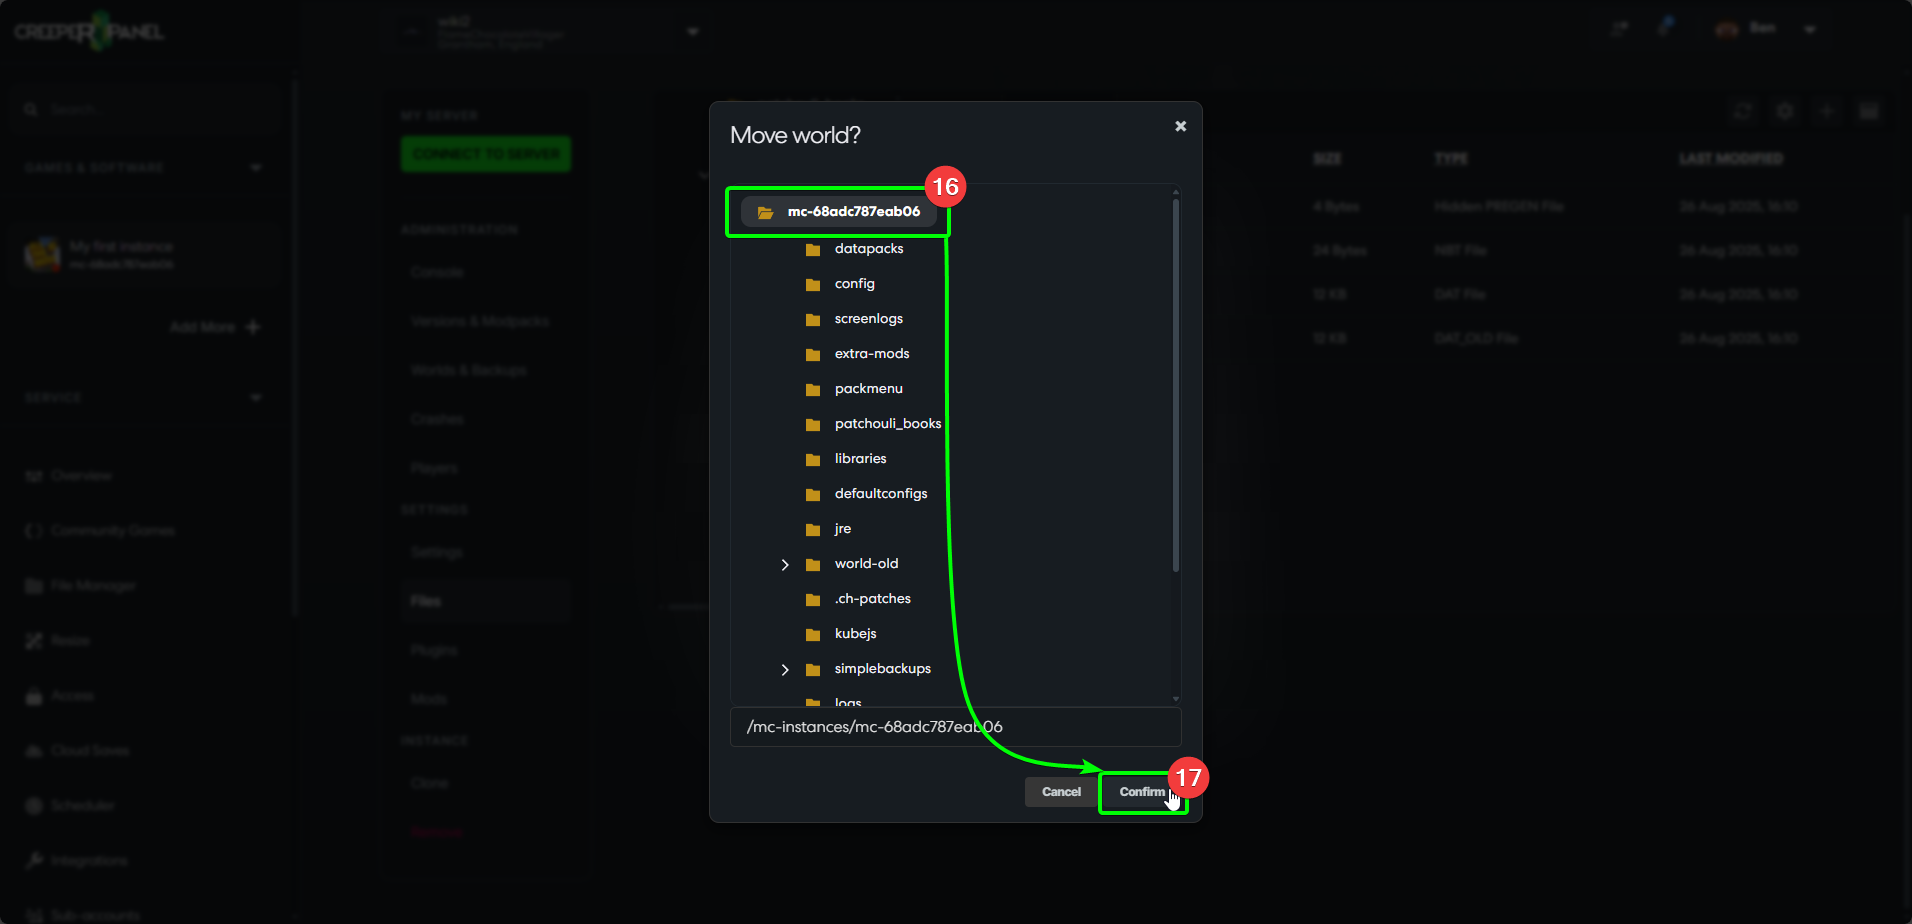
- The Panel will ask you to select a folder. Make sure that you select the top-most folder in the directory.
- When you have selected the correct folder, click confirm. The Panel will move the folder to its new location.

- When the Panel has moved the folder, you should be able to scroll and see it within the directory.
That should be it! You are now free to switch your server back on, and begin playing again!

Backup configuration (FTBU):
The FTBU backup configuration file is located in /configs/ftbutilities.cfg.
FTBU configurations for ranks etc, are stored within /local/ftbu/*
Note: /local/ftbutilities/ may show as /local/ftbu/ depending on mod version, and older versions store the 'master configuration' in the /local/ftbu/. It can be accessed via the instances Files menu or sFTP (see Installation Location).
backups {
    # Timer in hours
    # 1.0 - backups every hour
    # 6.0 - backups every 6 hours
    # 0.5 - backups every 30 minutes
    # Min: 0.05
    # Max: 600.0
    D: backup_timer=2.0

    # The number of backup files to keep
    # More backups = more space used
    # 0 - Infinite
    # Min: 0
    # Max: 32000
    I: backups_to_keep=12

    # 0 - Disabled (output = folders)
    # 1 - Best speed
    # 9 - Smallest file size
    # Min: 0
    # Max: 9
    I: compression_level=1

    # Prints (current size | total size) when backup is done
    B: display_file_size=true
    B: enabled=true

    # Absolute path to backups folder
    S: folder=
    B: silent=false

    # Run backup in a separated Thread (recommended)
    B: use_separate_thread=true
}
Reducing "backups_to_keep" is recommended if:
-
You have a very large world, as you can quickly fill your SSD disk space.
-
You use our own backup system (Service > Backups menu) - This system will backup the entire Minecraft installation directory. Use with caution; you can easily end up exceeding your SSD disk space limit as the backup will include any restore points made by FTBU. Backup inception!
If you reduce the backups_to_keep (3~6), it is also recommended to increase the backup_timer to 6.0, 12.0 or 24.0. This spreads out the backups over a larger time range, and allows easier management of your backups by making sure they are easily discernible by their time stamps.