Scheduling server tasks
Scheduler can run tasks such as restarts, console commands and supported backups for you. Select the correct hosting service before creating a task.
Create a task
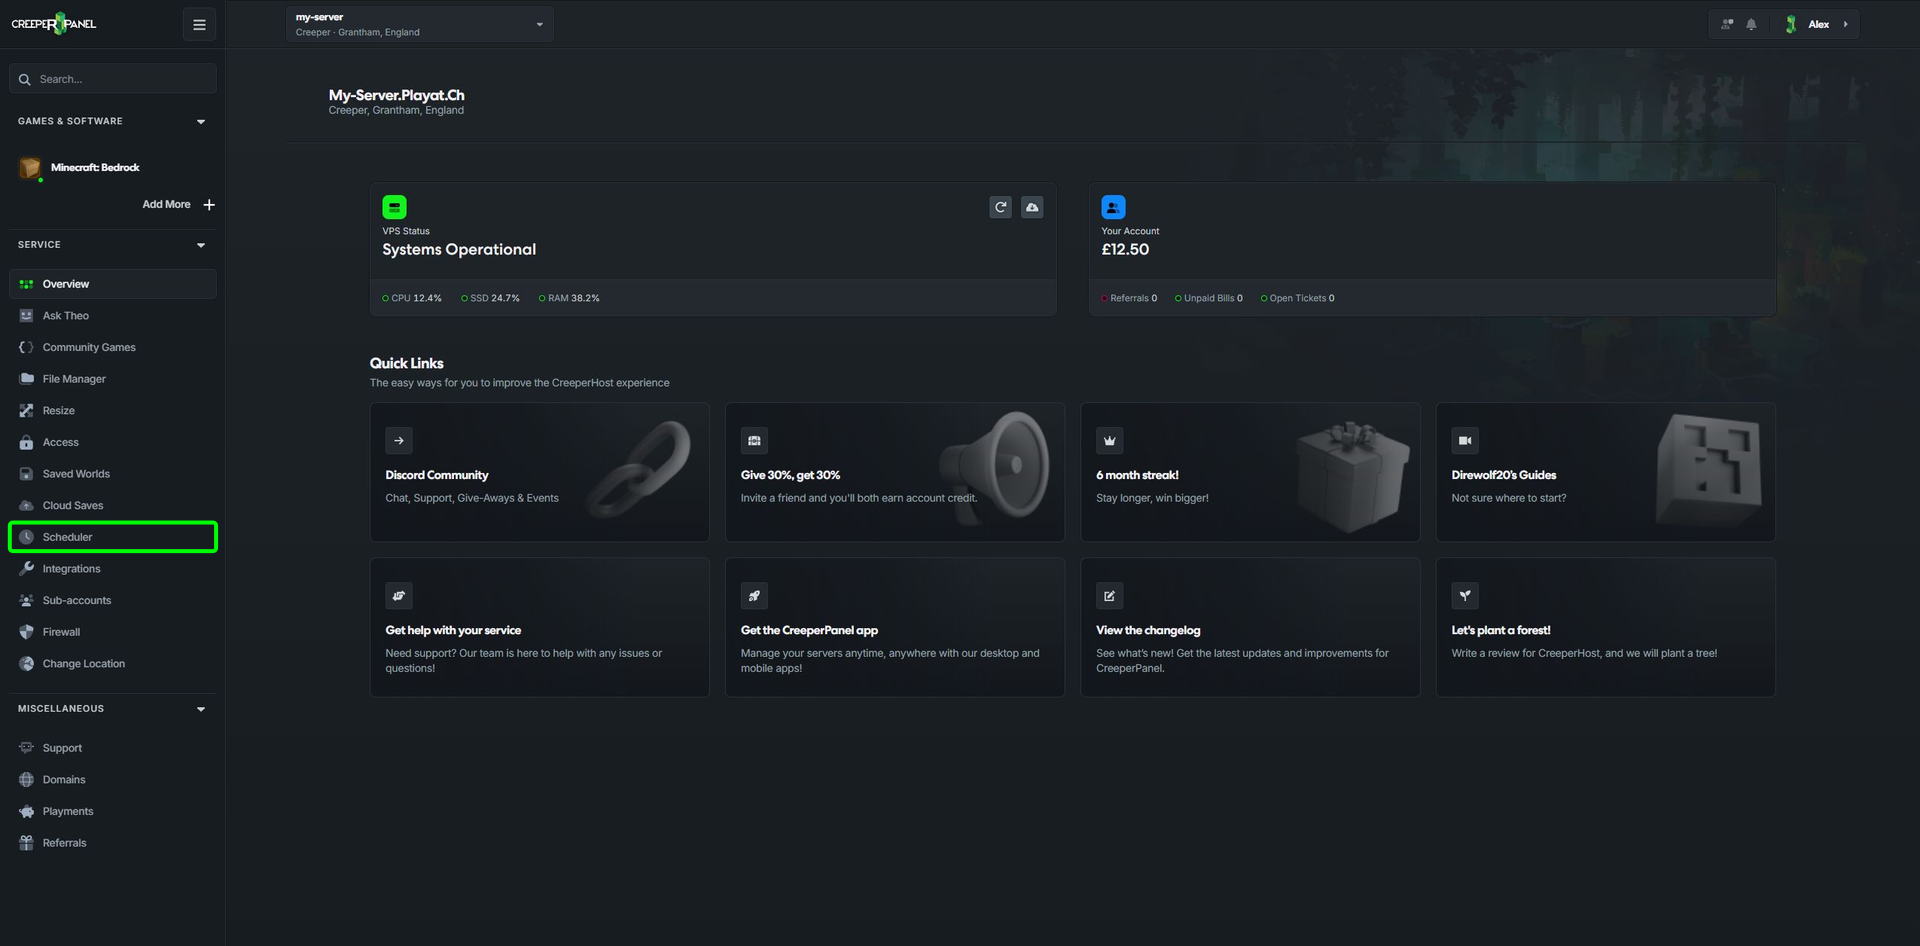
Open Scheduler from the server navigation.
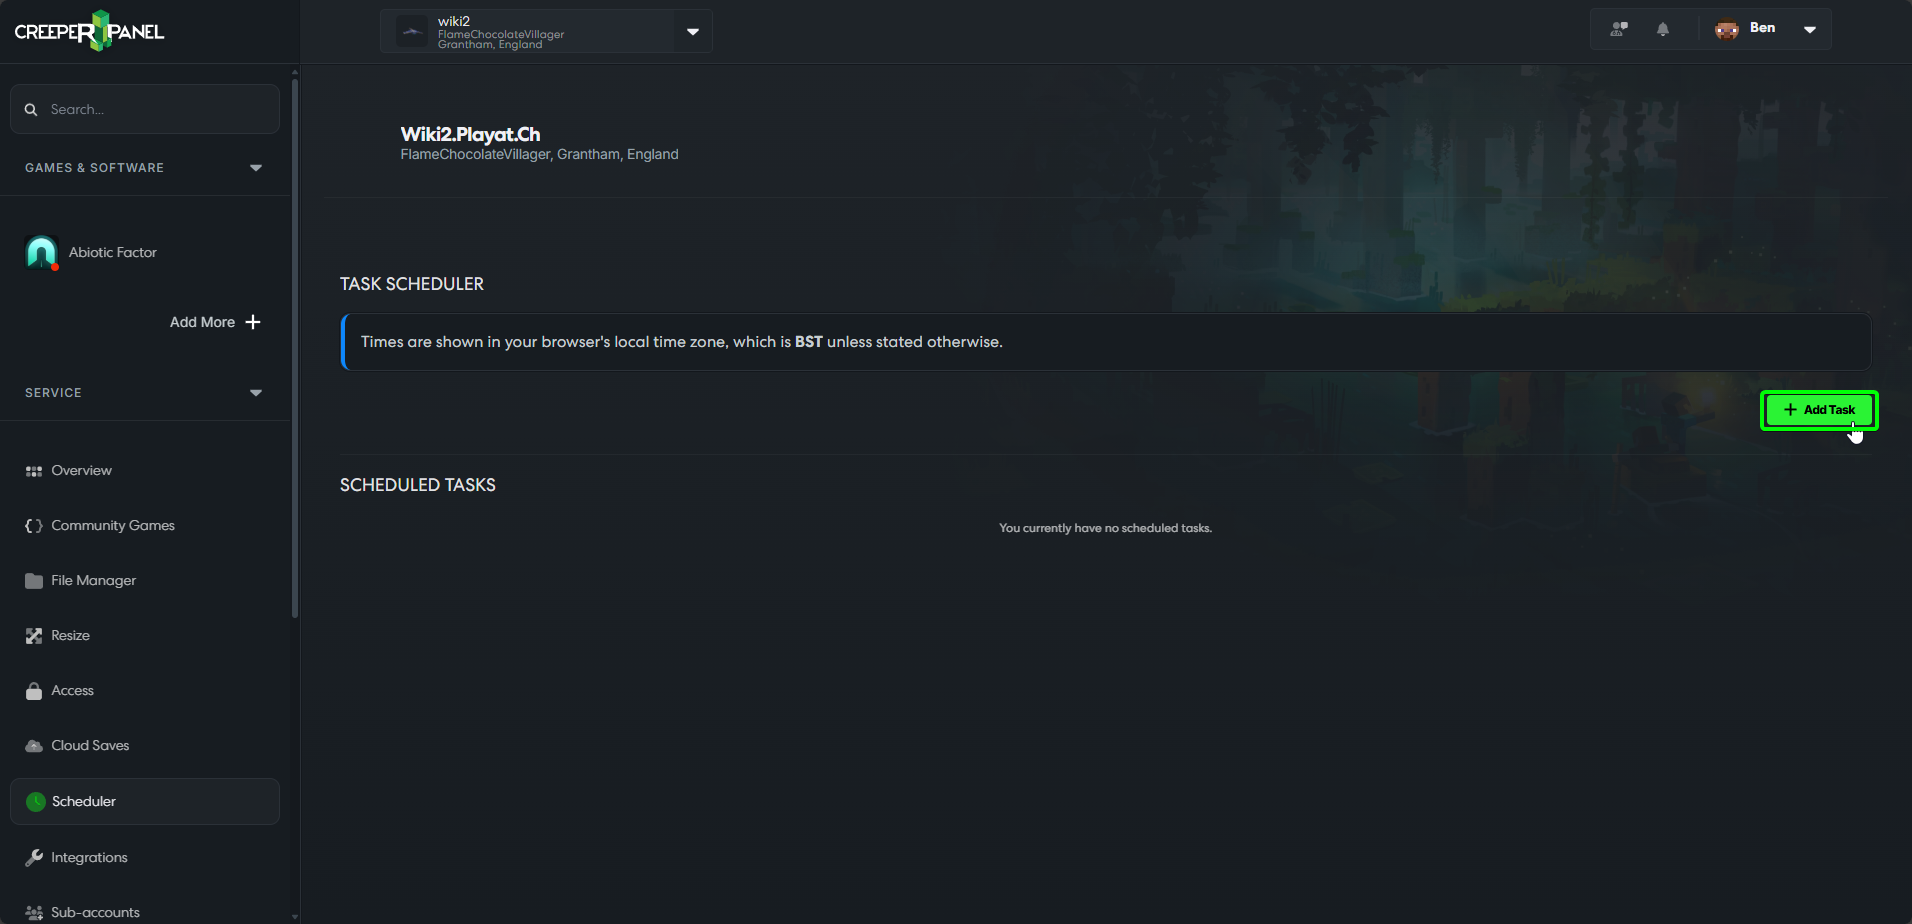
Select Add Task.
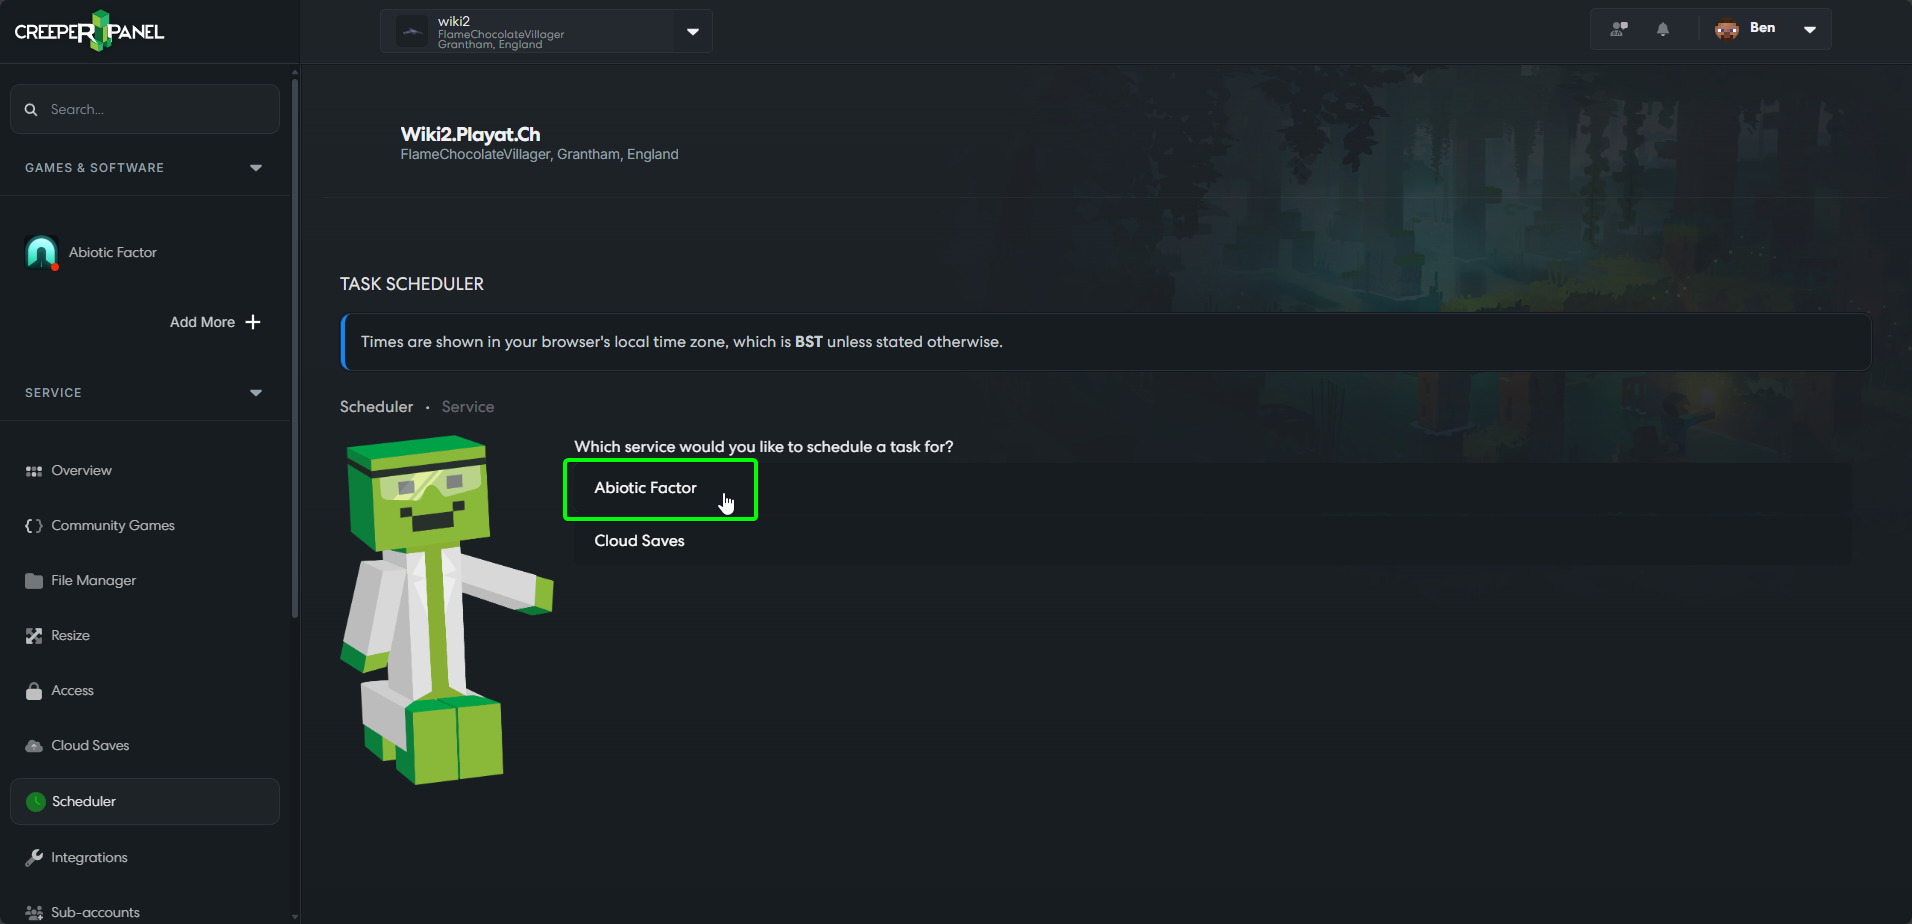
Choose the game or service, then the instance if asked. On eligible services, Cloud Saves lets you schedule a remote sync instead.
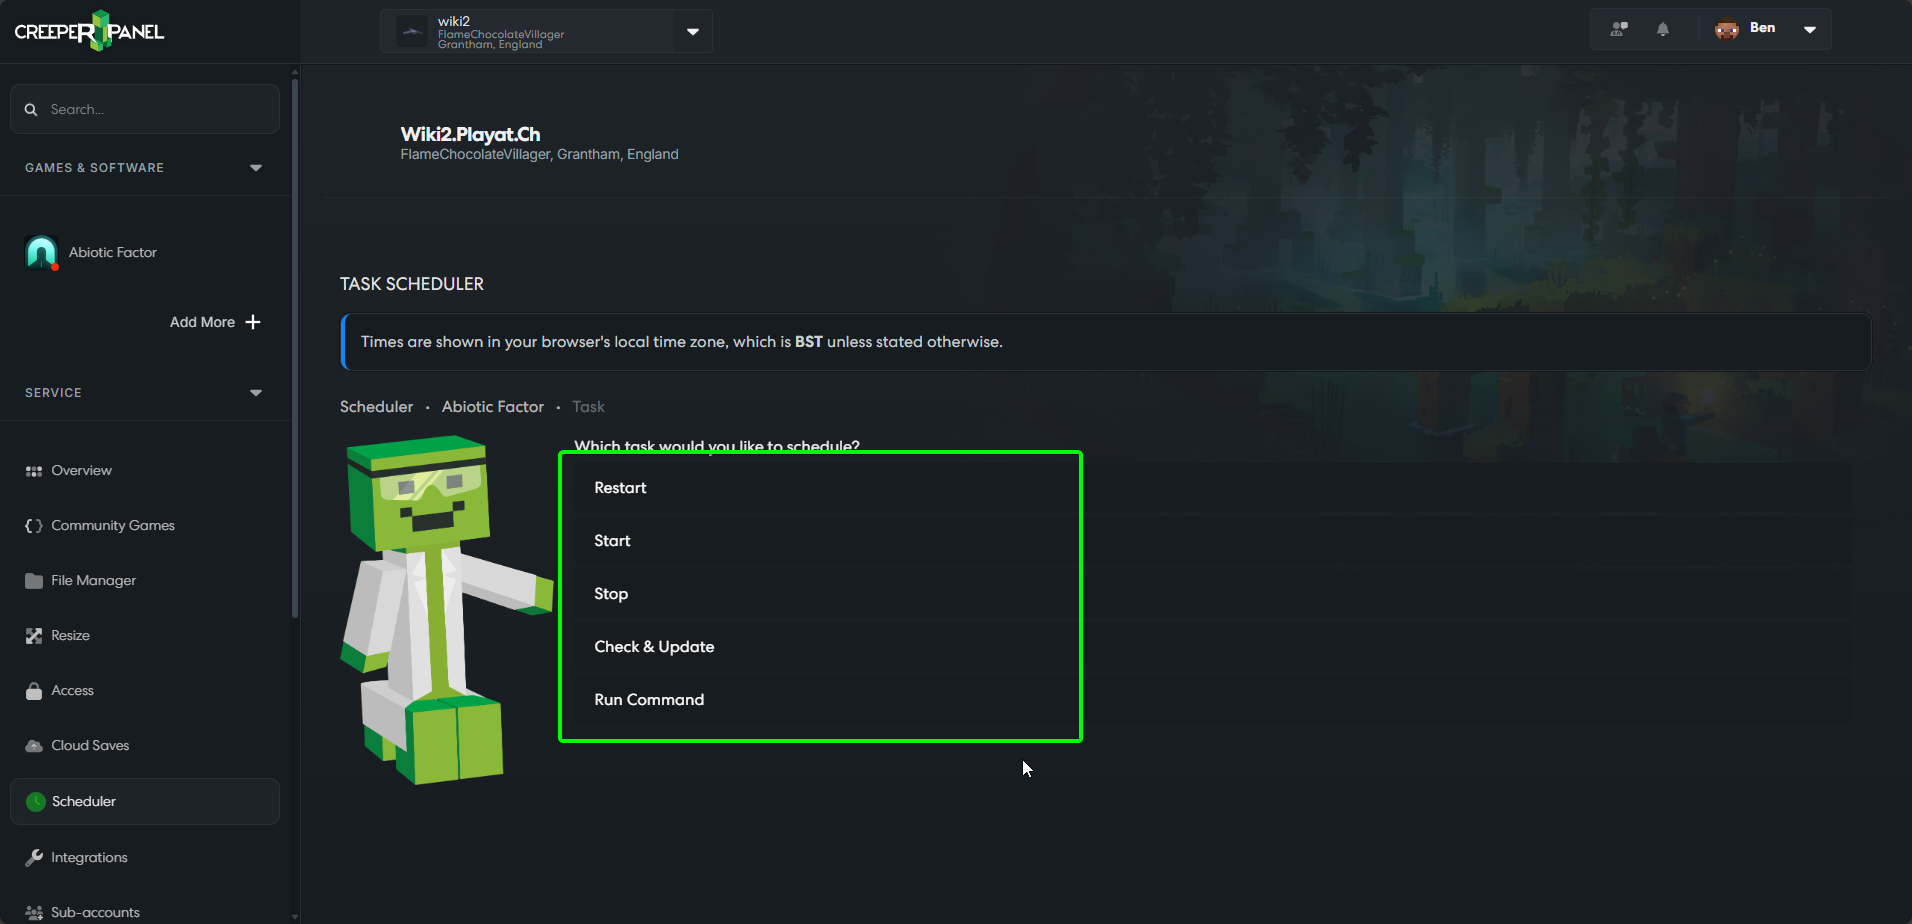
Choose the available task. For example, select Restart to restart that game on a schedule. A console-command task asks for the command to run; only enter a command supported by that game.
Choose when it runs
Times use your browser's local time zone unless the panel states otherwise. Check the zone shown at the top of Scheduler.
For an Assisted schedule, type an instruction such as Every Sunday at 10am. Check the schedule the panel generates, then select it if it matches what you meant.
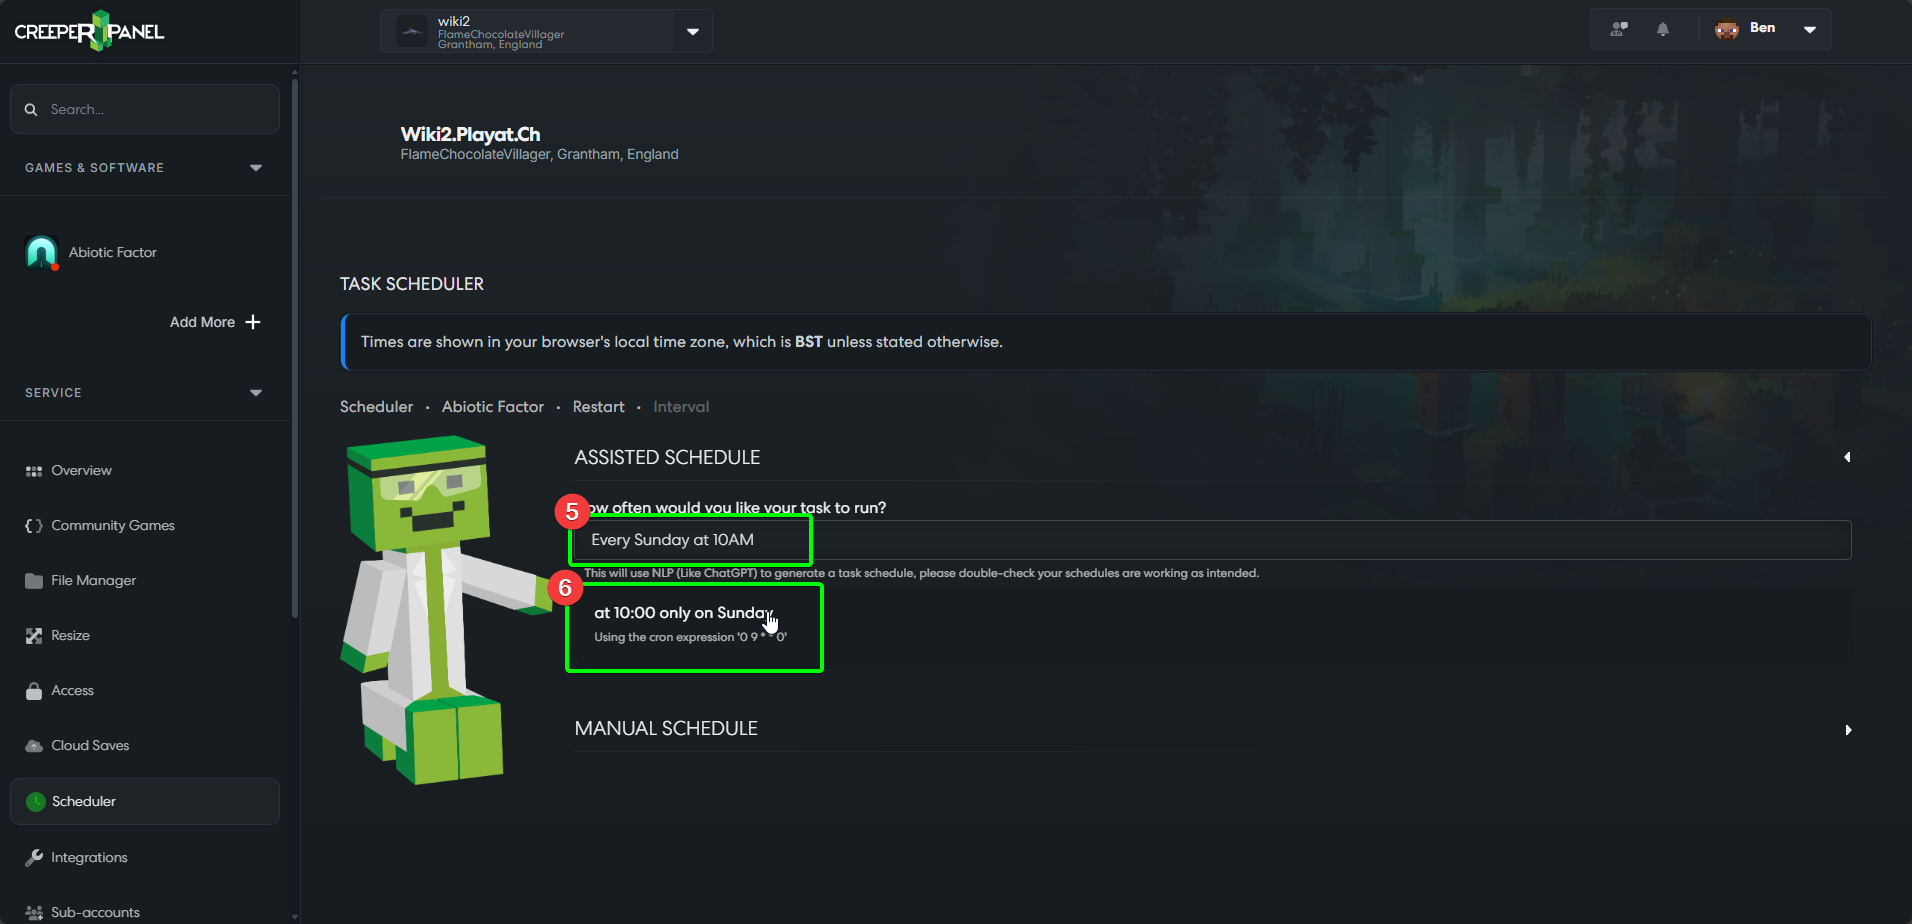
For a Manual schedule, choose an interval and fill in its controls. Advanced lets you supply a cron schedule. Check the displayed interpretation and time zone, then select the completed schedule.
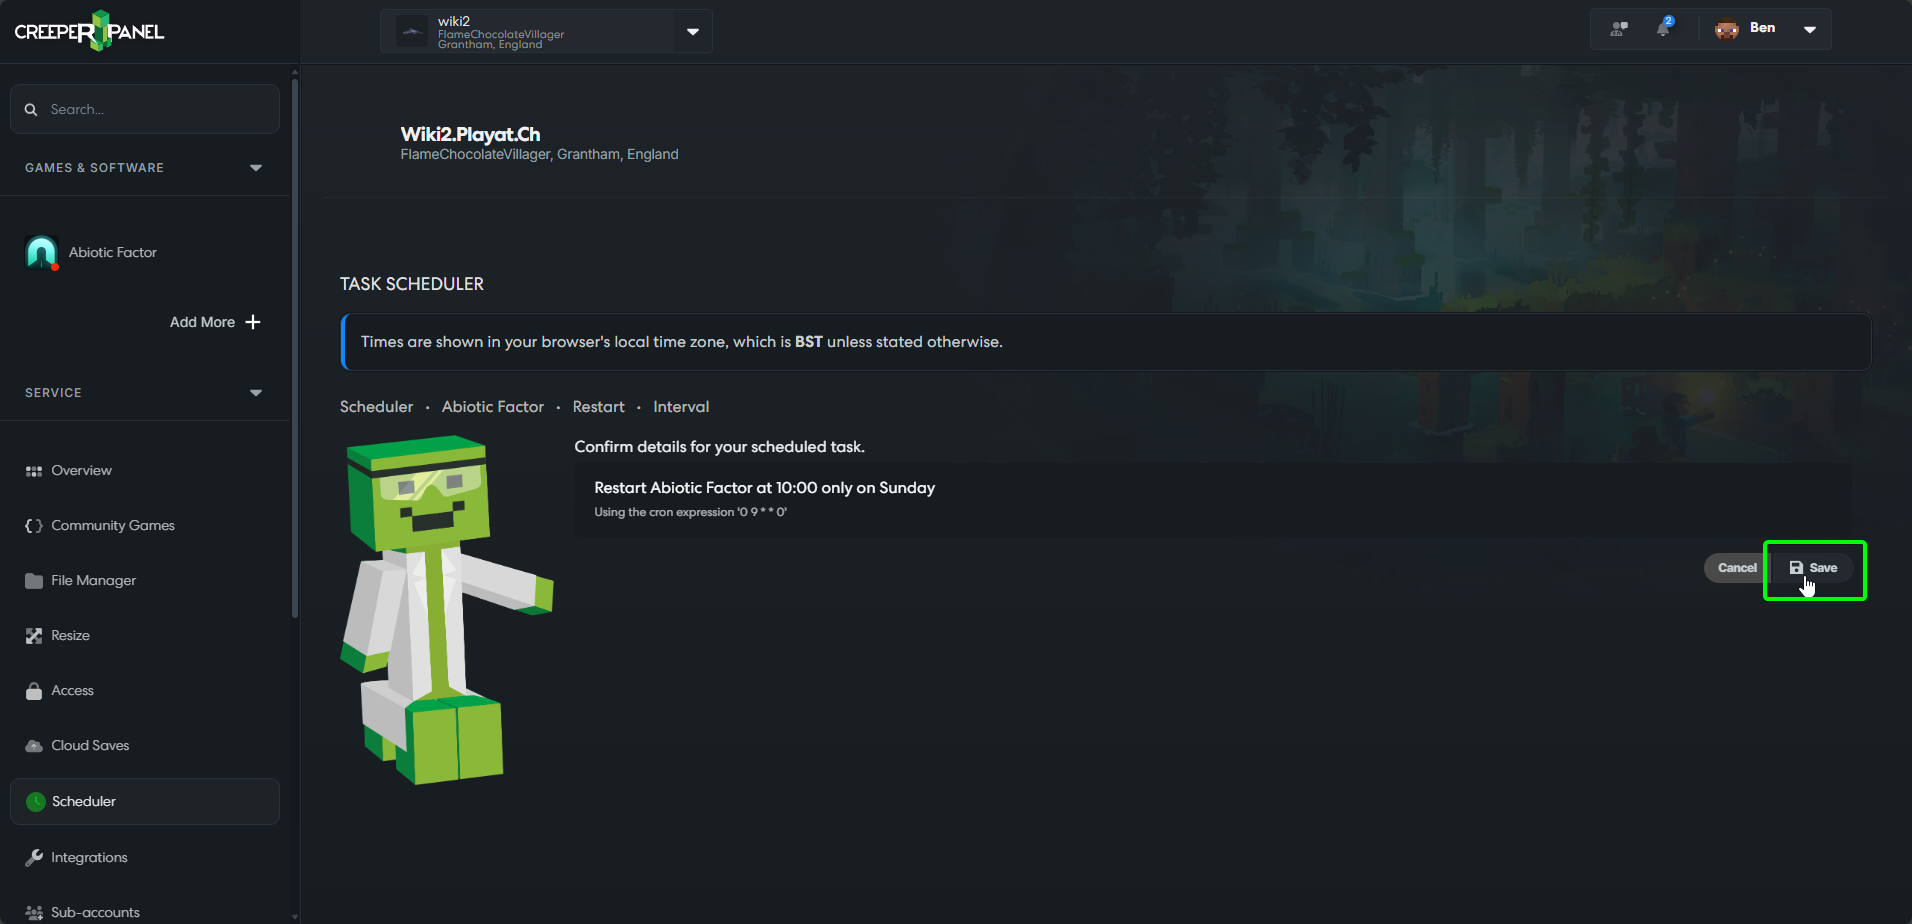
Review the service, instance, action and time together, then select Save.
Check, pause or change a task
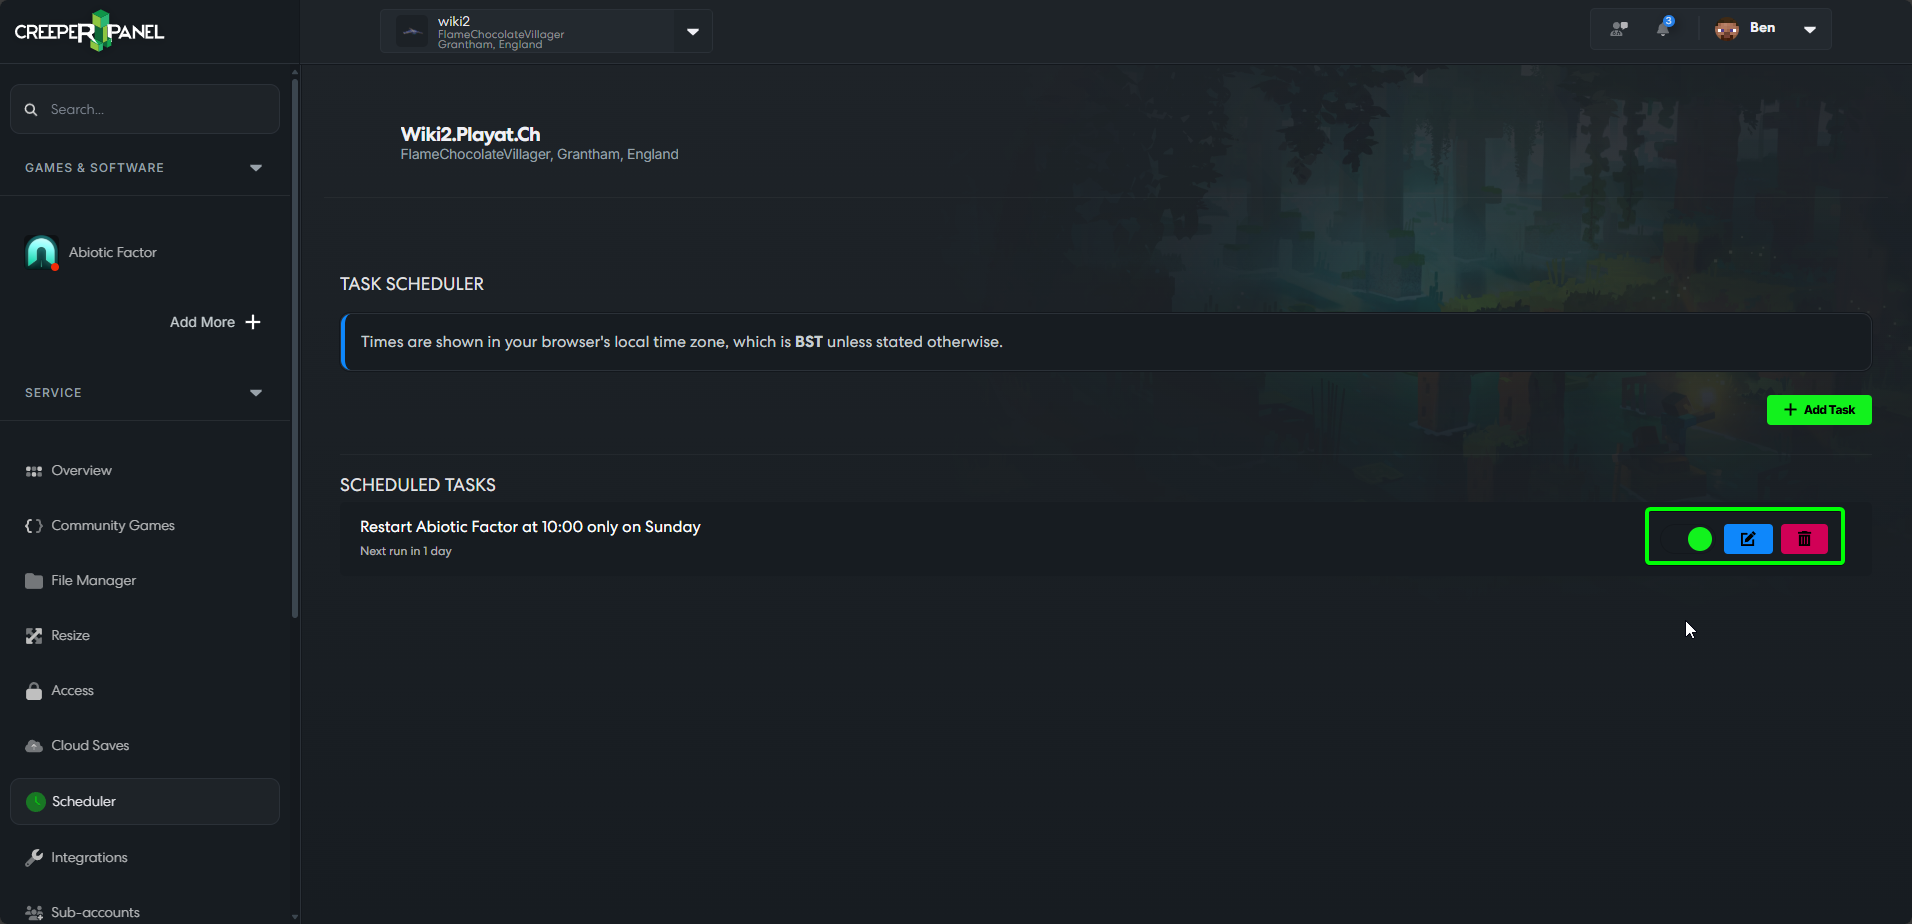
Your task appears under Scheduled Tasks, with its next run when enabled. Use the switch to pause or enable it. The row controls let you edit or delete it; deletion asks for confirmation.
After the first run, check the result. For a restart, look at the console; for a remote sync, check Cloud Saves. Avoid scheduling a restart and a backup for exactly the same time, as restarting can interrupt an operation already running.