Adding mods to your Hytale instance
warning
Before adding any mods to Hytale, please ensure your instance is switched OFF. Any changes you make to Hytale whilst it is running will not persist after a restart, including mods.
Adding mods to your Hytale instance is incredibly easy to accomplish with the CreeperPanel. To get started:
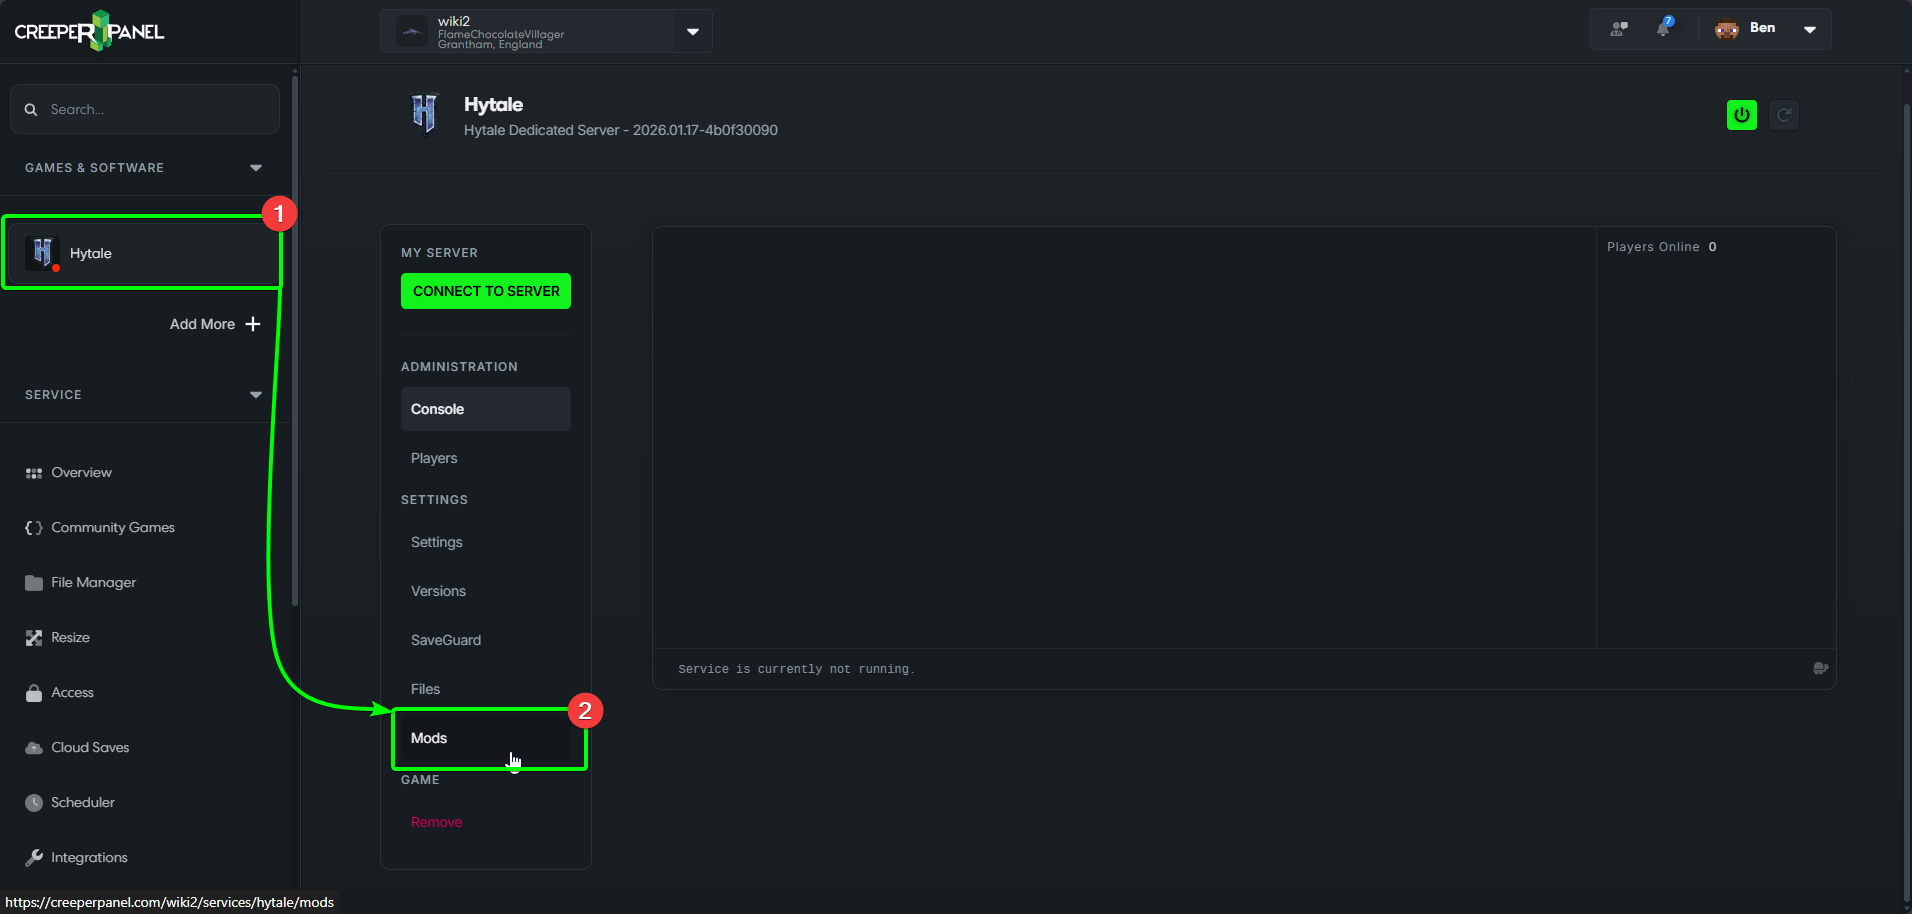
- Navigate to
Hytalein the sidebar of the CreeperPanel. - Navigate to
Mods, found underSettingsin the sub menu.
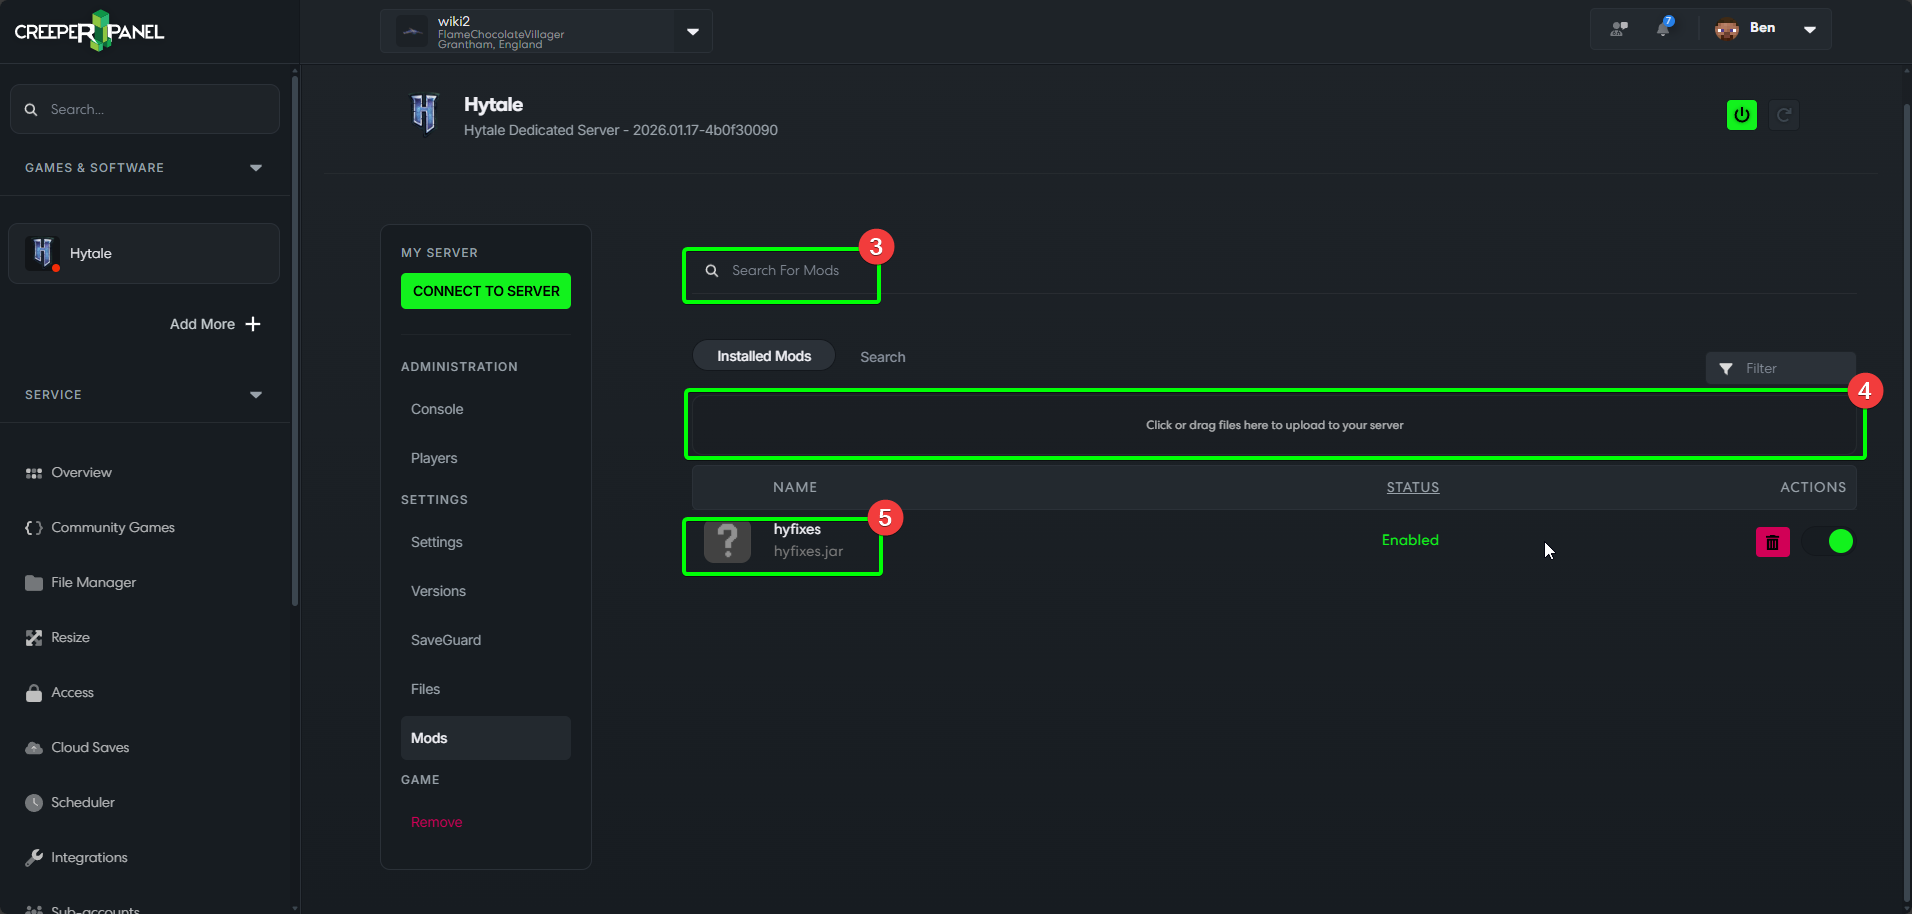
Now you're on the Mods tab, you should be able to see:
- A search bar - you can use this to search for a specific mod or mods.
- Drag'n'Drop box - you can drag mod files from your client machine to this box to upload them to the mods folder.
- A list of installed mods - CreeperHost deploys Hytale with
hyfixespre-installed to help with common bugs.
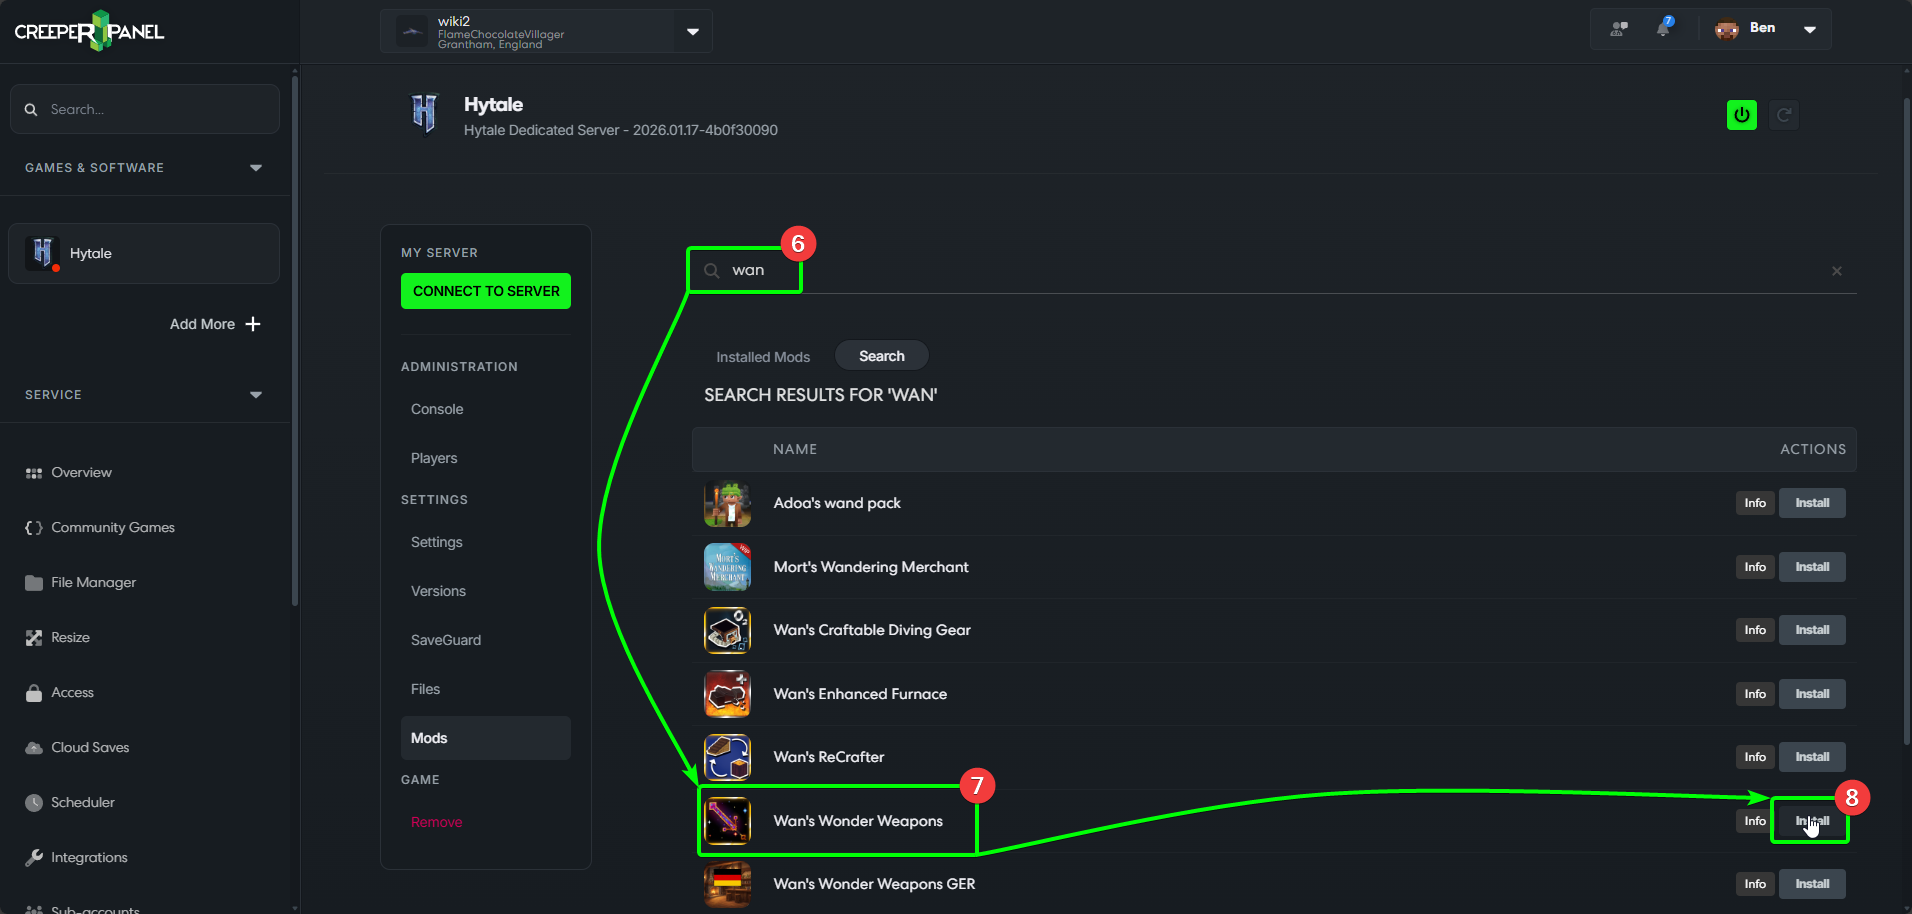
To find a mod in this guide, we'll use the search bar.
- Click on the search bar, and type the name of the mod you wish to install. The Panel will auto-populate results as you type - the more you enter, the more specific your search will be.
- Find the mod you wish to install.
- Select
Install. The Panel will download and install the selected mod.
- If you would like to confirm the mod has installed, you can select the
Installed Modstab at the top of the mod list. - You should see the mod installed; in the
Statuscolumn, should showEnabled.
info
Remember - any mods you install on your server will automatically be downloaded to client machines upon logging into the server.