Turning your Whitelist On/ Off
Vintage Story's whitelist should be enabled by default, but you can enter commands on the instance's console to toggle it's on/off status.
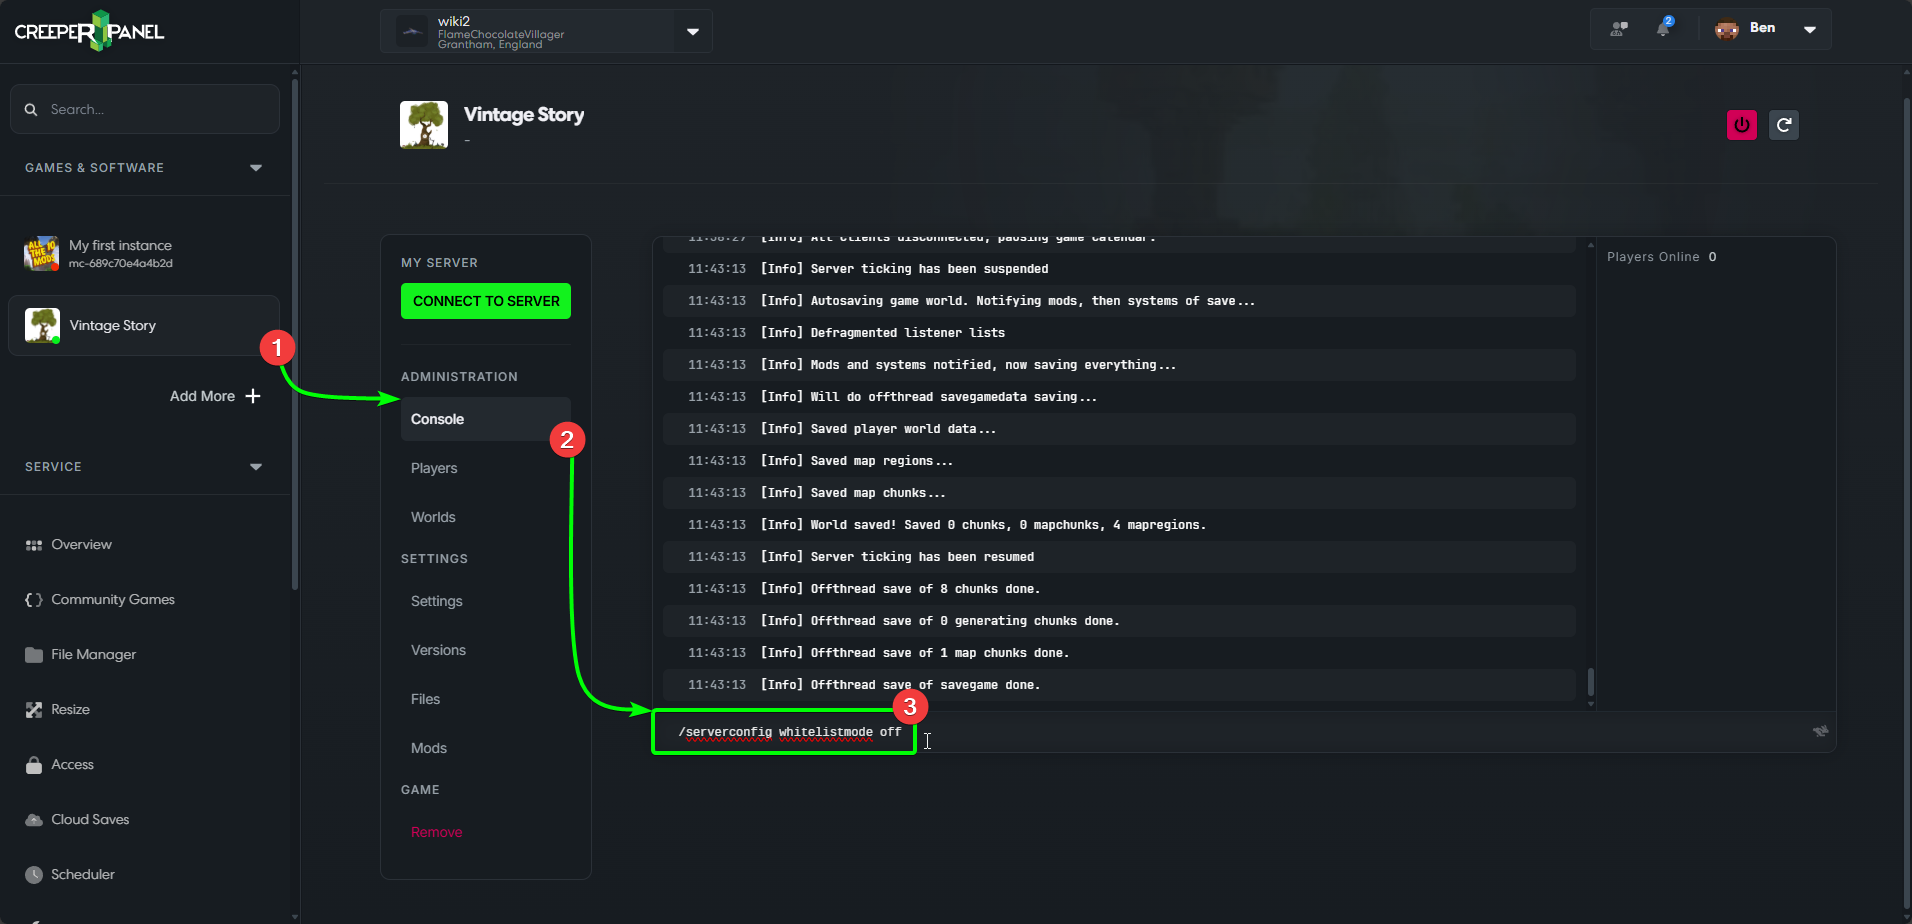
Disabling your Whitelist via the Console
To turn off your whitelist:
- Navigate to the console for your Vintage Story instance on the CreeperPanel.
- Select
Console, underAdministration, if not already on this page. - Select the text box at the bottom of the console screen. Enter
/serverconfig whitelistmode off, and press enter.
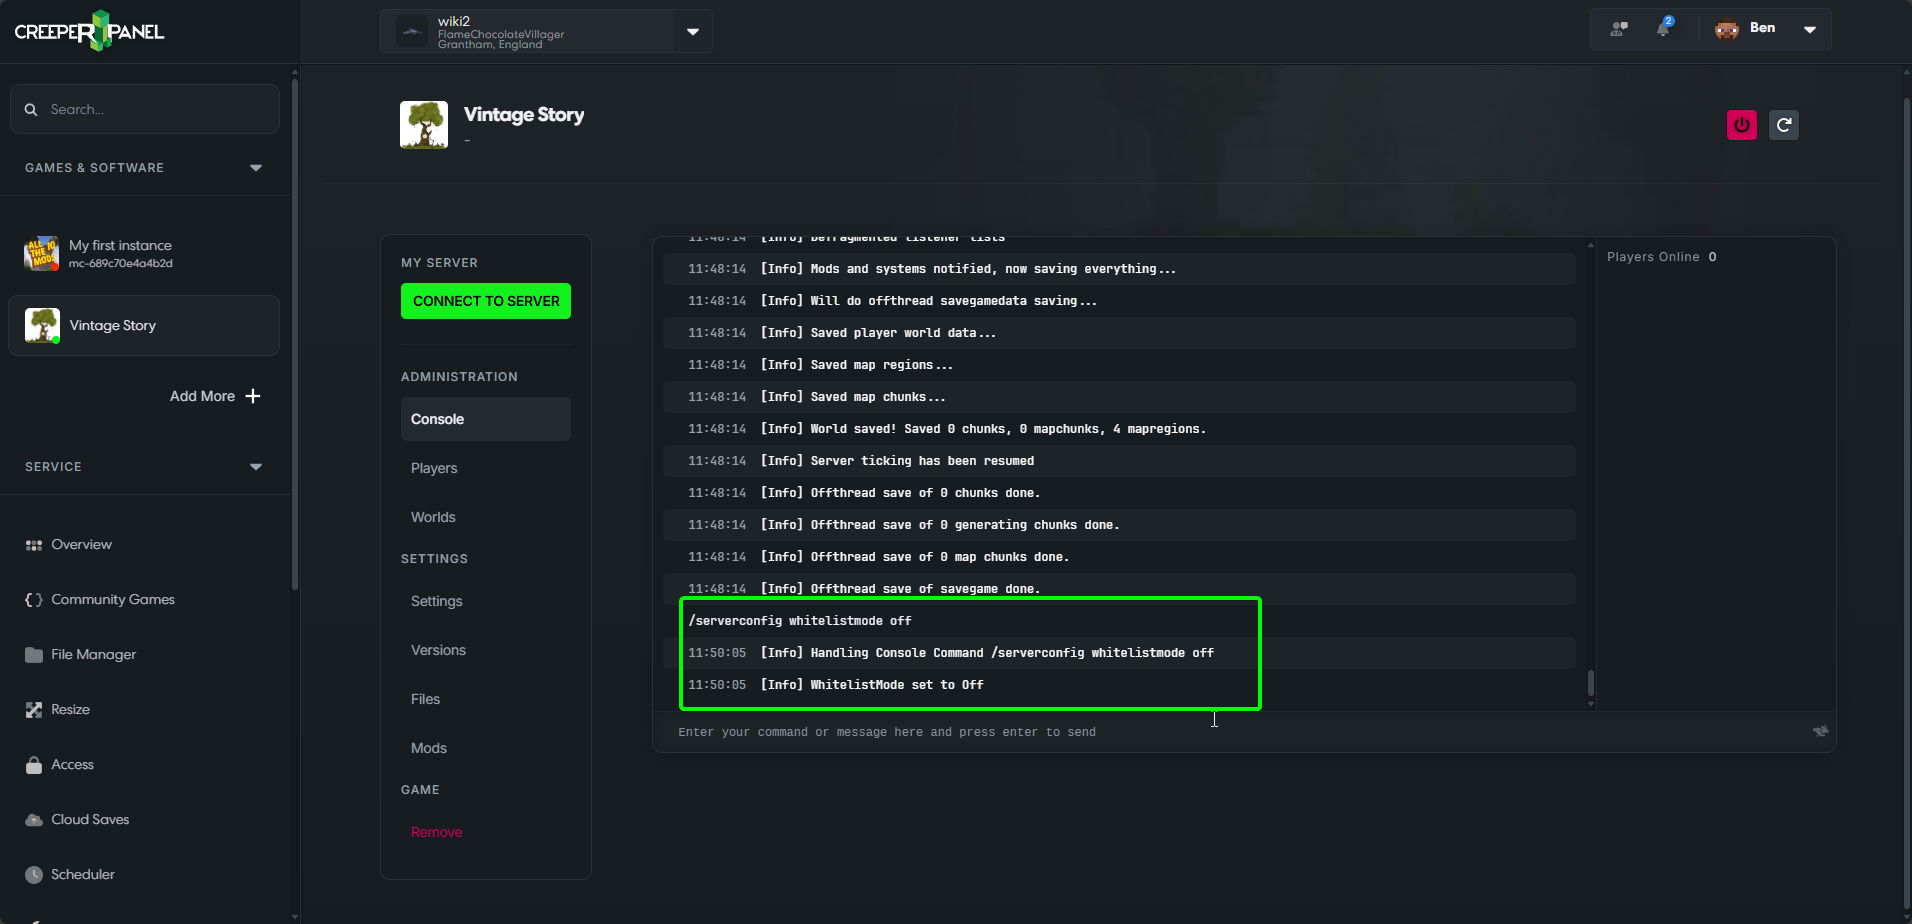
You should see a message in the console confirming that the whitelist is now off, as below:
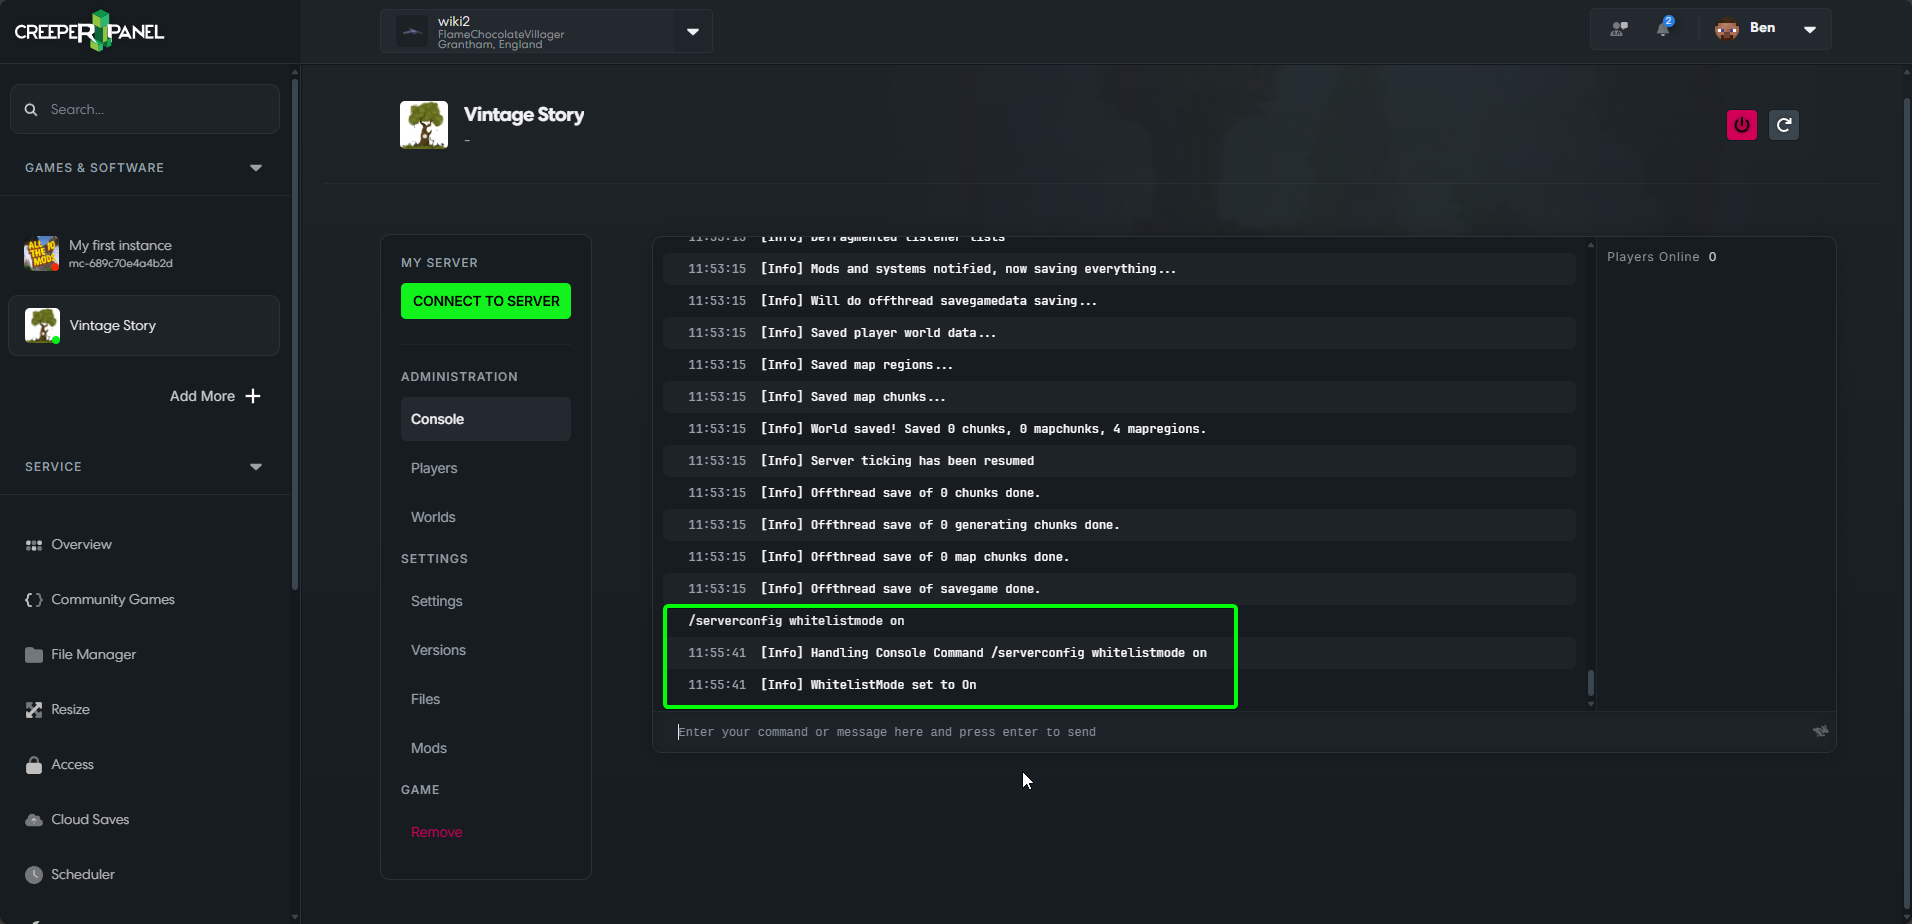
Enabling your Whitelist via the Console
To switch your Whitelist back on:
- Navigate to the console for your Vintage Story instance on the CreeperPanel.
- Select
Console, underAdministration, if not already on this page. - Select the text box at the bottom of the console screen. Enter
/serverconfig whitelistmode on, and press enter.

You should see a message in the console confirming that the whitelist is now on, as below:
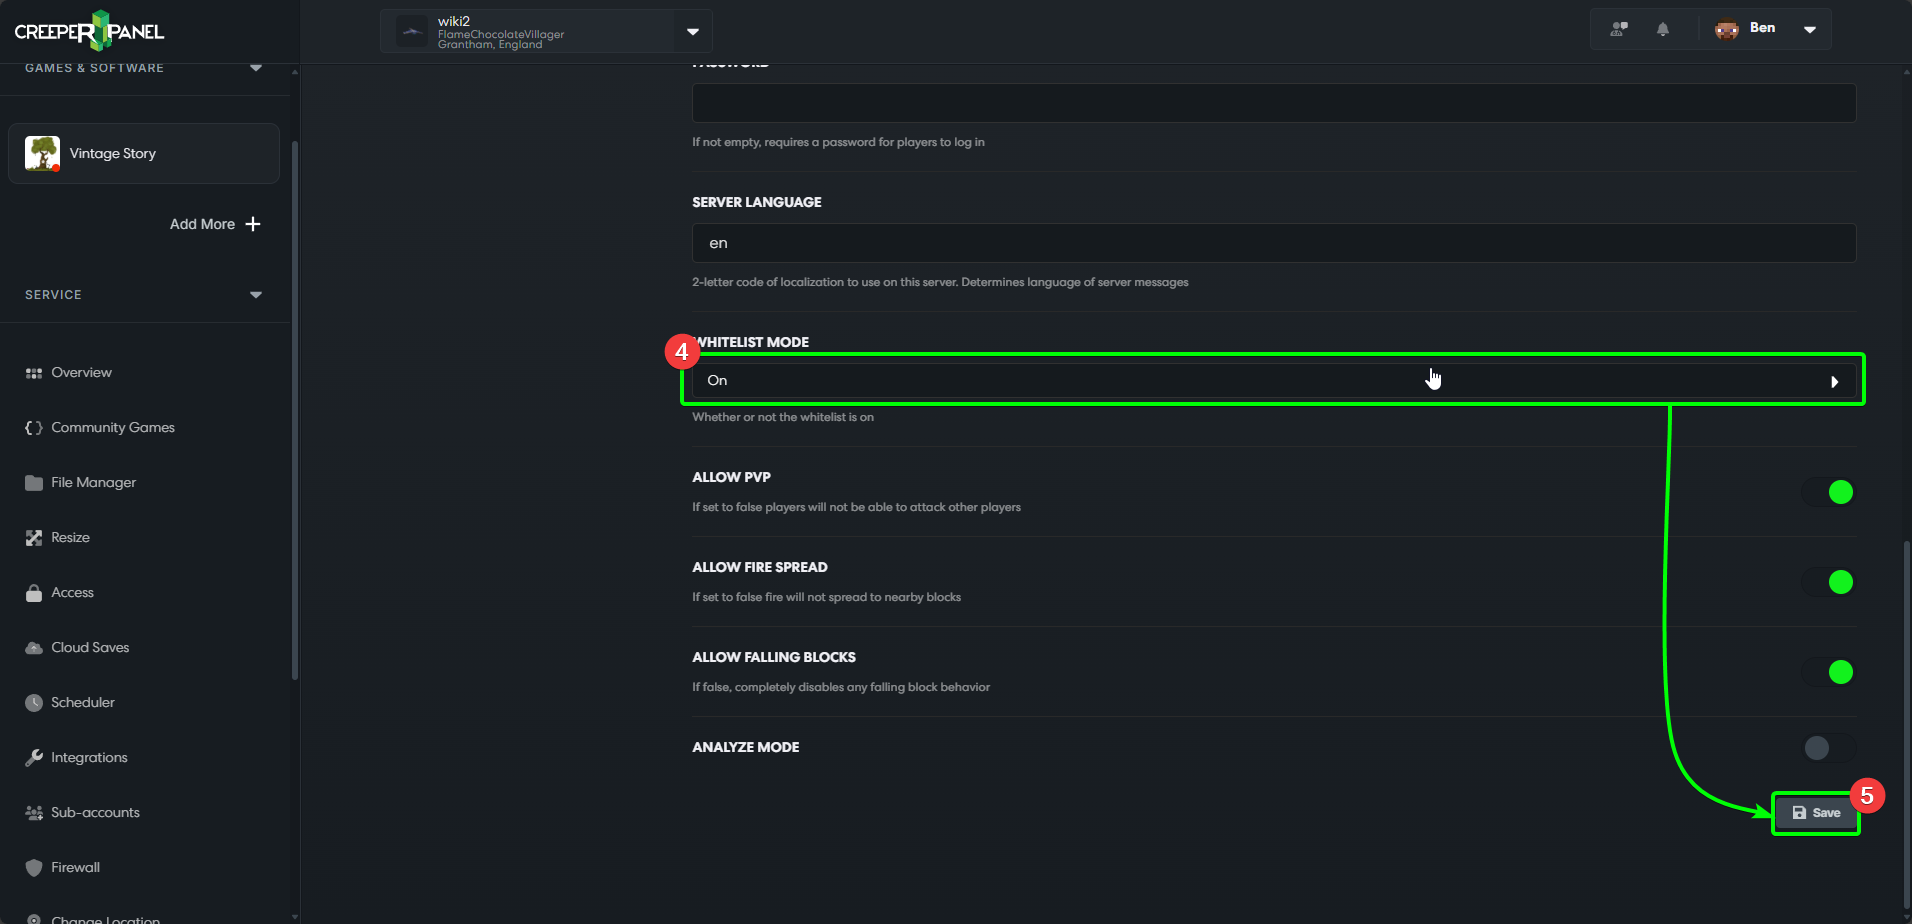
Enabling/ Disabling your Whitelist via the CreeperPanel
There is an alternative method for those who prefer not to use server commands. To begin:
- Navigate to the console for your Vintage Story instance on the CreeperPanel
- Select
Settingsunder theSettingstab. - Scroll down until you see
Whitelist Mode - Select either
OnorOfffrom the dropdown menu to configure your Whitelist setting. - Scroll to the bottom, and select the
Savebutton in the bottom left to save your changes.

You are now a whitelist command master! Nice!