Configuring your Nightingale Server
info
Before proceeding to make any changes to the server settings, please ensure that you have stopped your server.
Altering Settings via the CreeperPanel
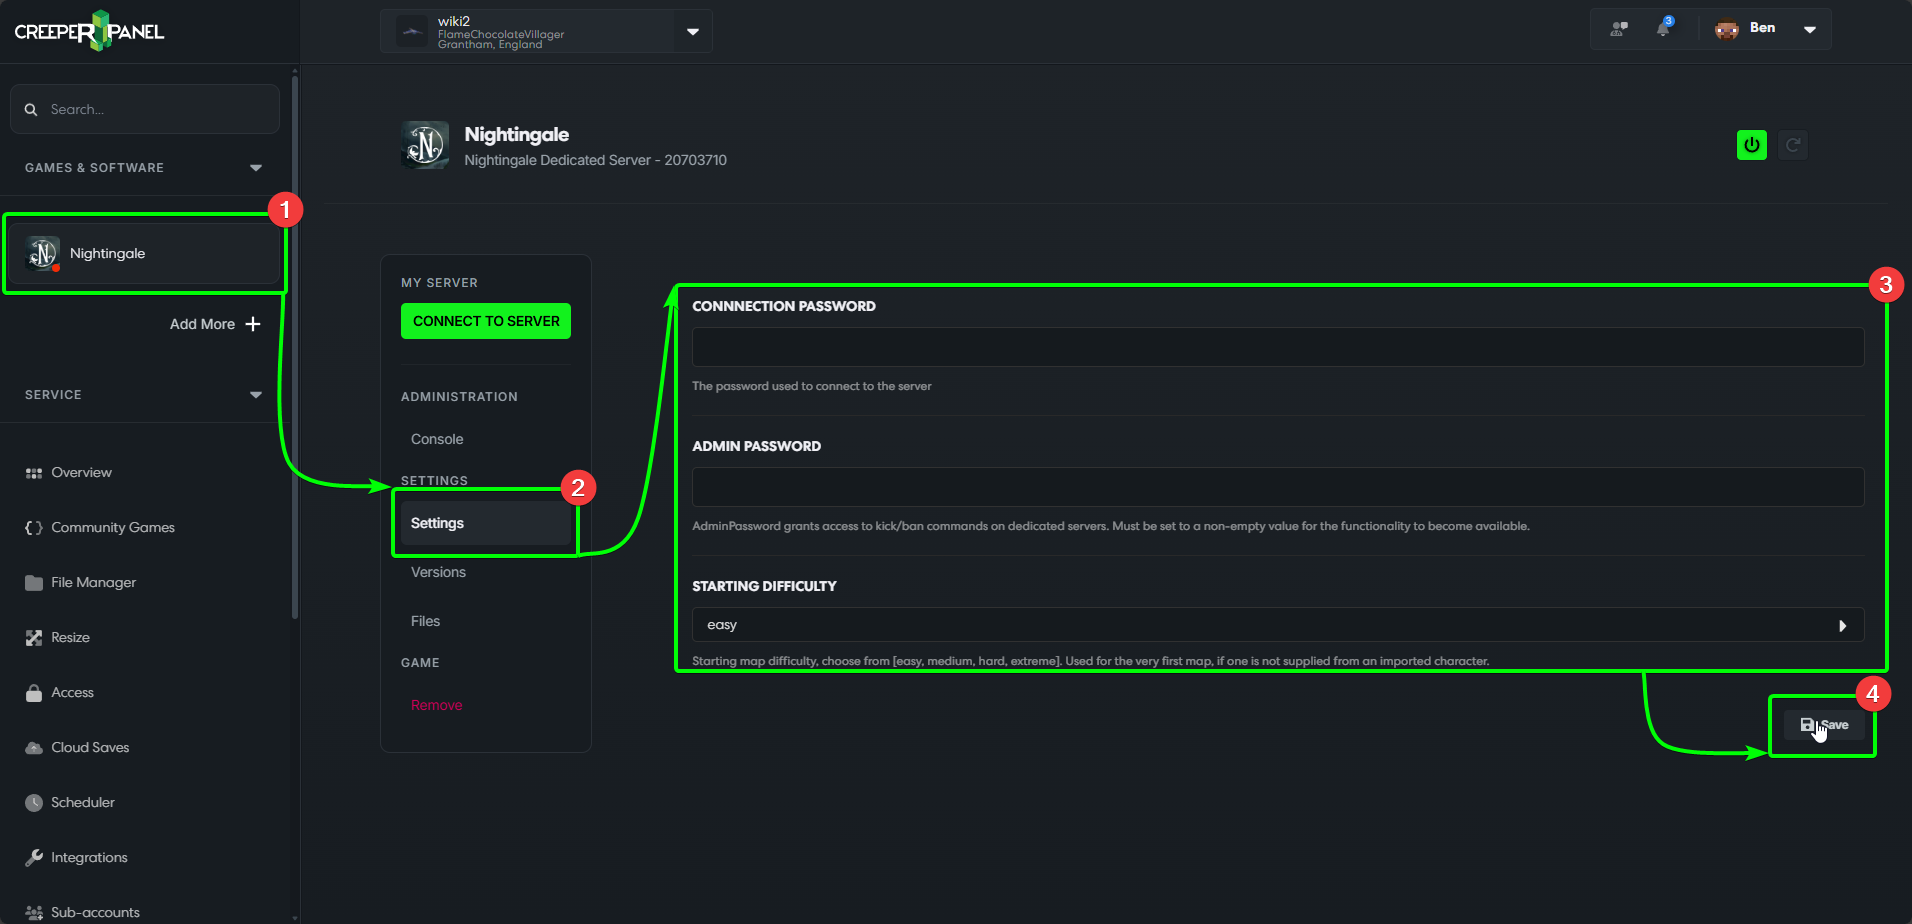
- Before connecting to your server, you may want to change some of the game settings. This is not a necessary step; if you don't want to change anything, you can skip this. Otherwise, navigate to Nightingale in the CreeperPanel.
- Select
SettingsunderSettingsin the console's side-bar. - You will see the currently available settings you are able to change:
- Connection Password - your basic server password.
- Admin Password - you'll need to set this password to log in as an admin, to have access to admin commands on the server.
- Starting Difficulty - choose from easy, medium, hard, or extreme. If you import a character before your first play session, you won't need to change this.
- After you have made any changes, make sure to select the
Saveicon to confirm and save your settings.
Altering Settings via Game Files
info
Before editing your game's .ini file, save a copy, or the contents of the file. This way, you will have a backup of the file's contents in case there are any issues.
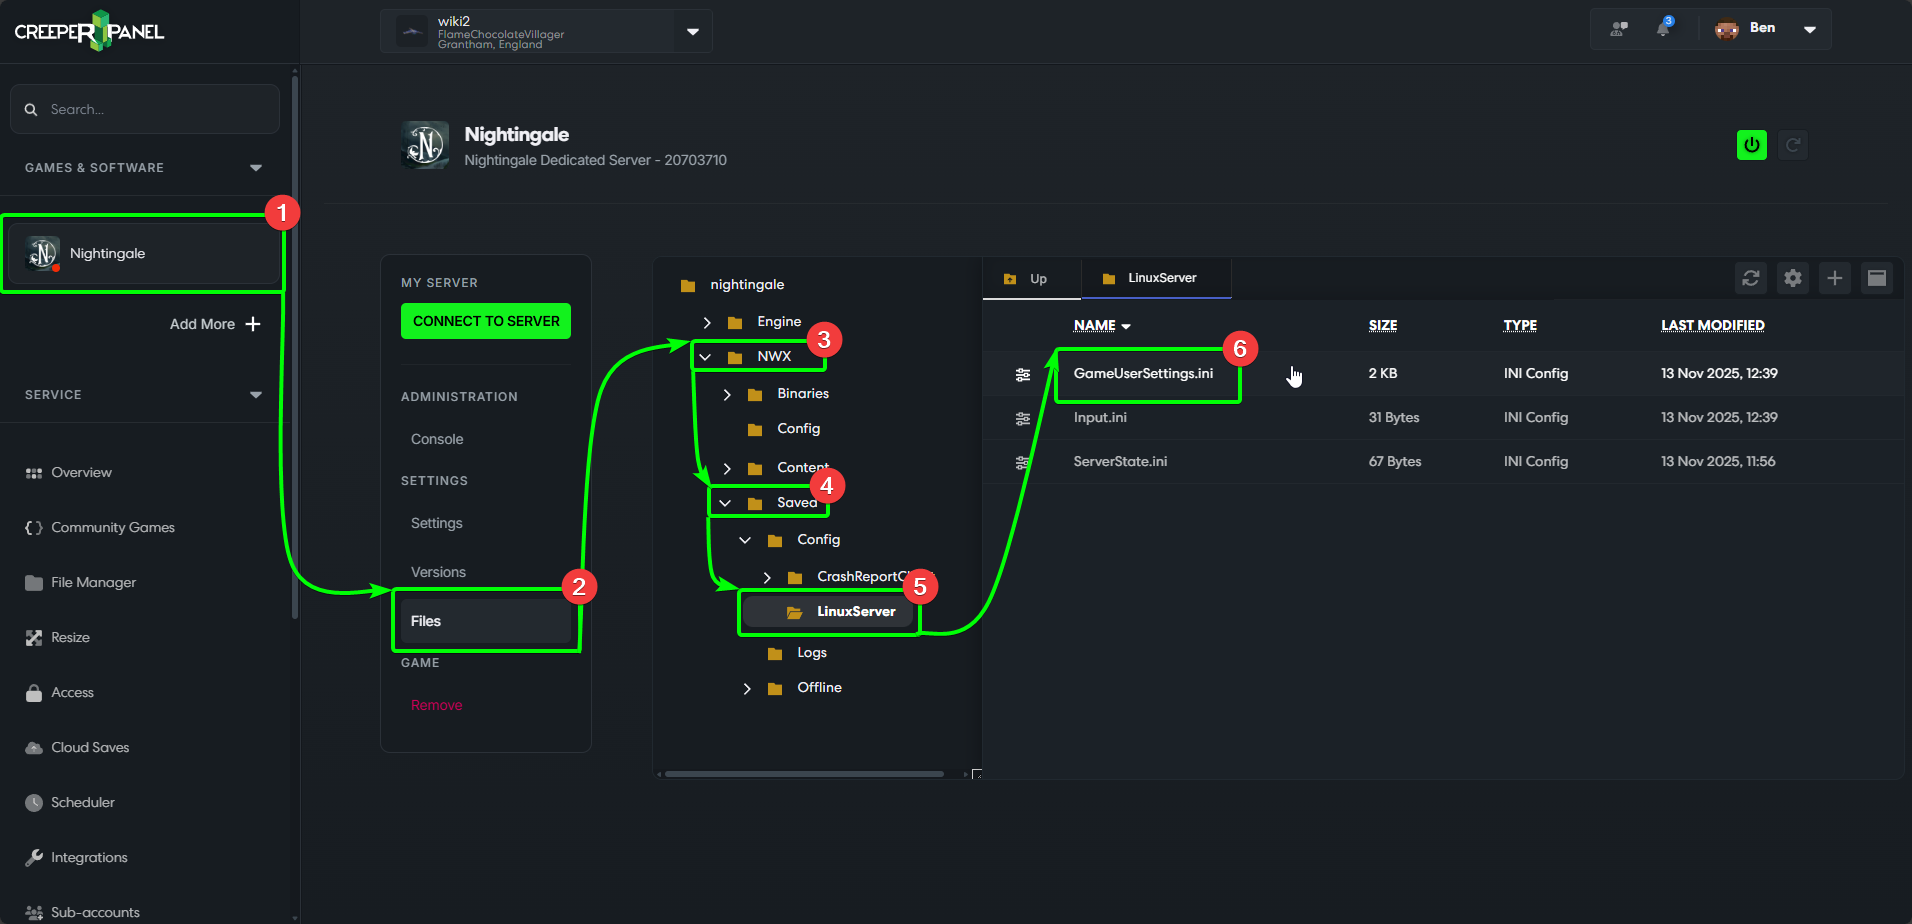
- Navigate to your Nightingale's console page on the CreeperPanel.
- Select
FilesunderSettingsin the console's sub-menu to view Nightingale's files. - Locate the
NWXdirectory, and expand it. - Inside
NWX, locate theSaveddirectory, and expand it. - You should see a directory labelled
LinuxServer- click on the folder to open it in the main console window, so you can view the files. - You will see a file called
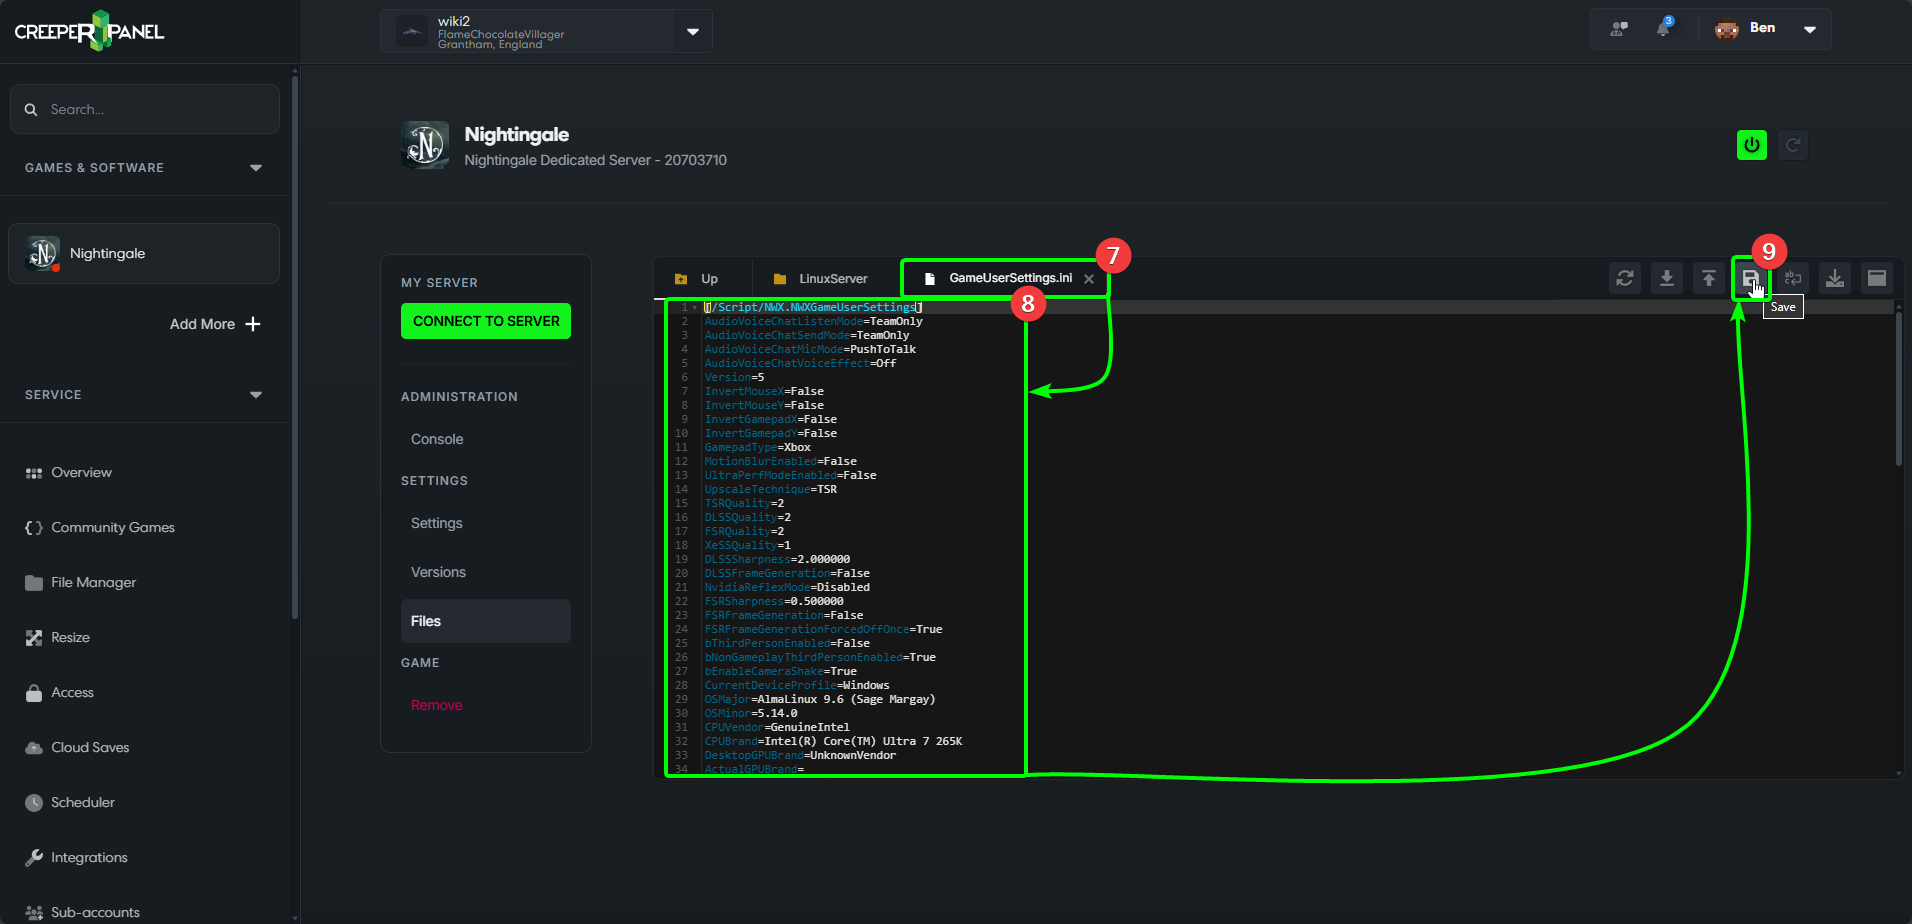
GameUserSettings.ini- double click to open the file in the console.
- You'll see the file opened in a new tab on the console - you'll also see the list of settings you can change.
- Select the option(s) you would like to modify, and change them appropiately.
- When you are happy with the changes you have made, make sure to select the
Saveicon in the taskbar at the top of the console to save and apply your changes.