Installing addons
info
When using addons or mods, load order is important. Please check each mod to see if they need to be loaded in a specific order, or require any dependencies to start.
Addons are a key aspect of running a GTA:V server. They allow you to tailor the experience of players who join your server. To begin:
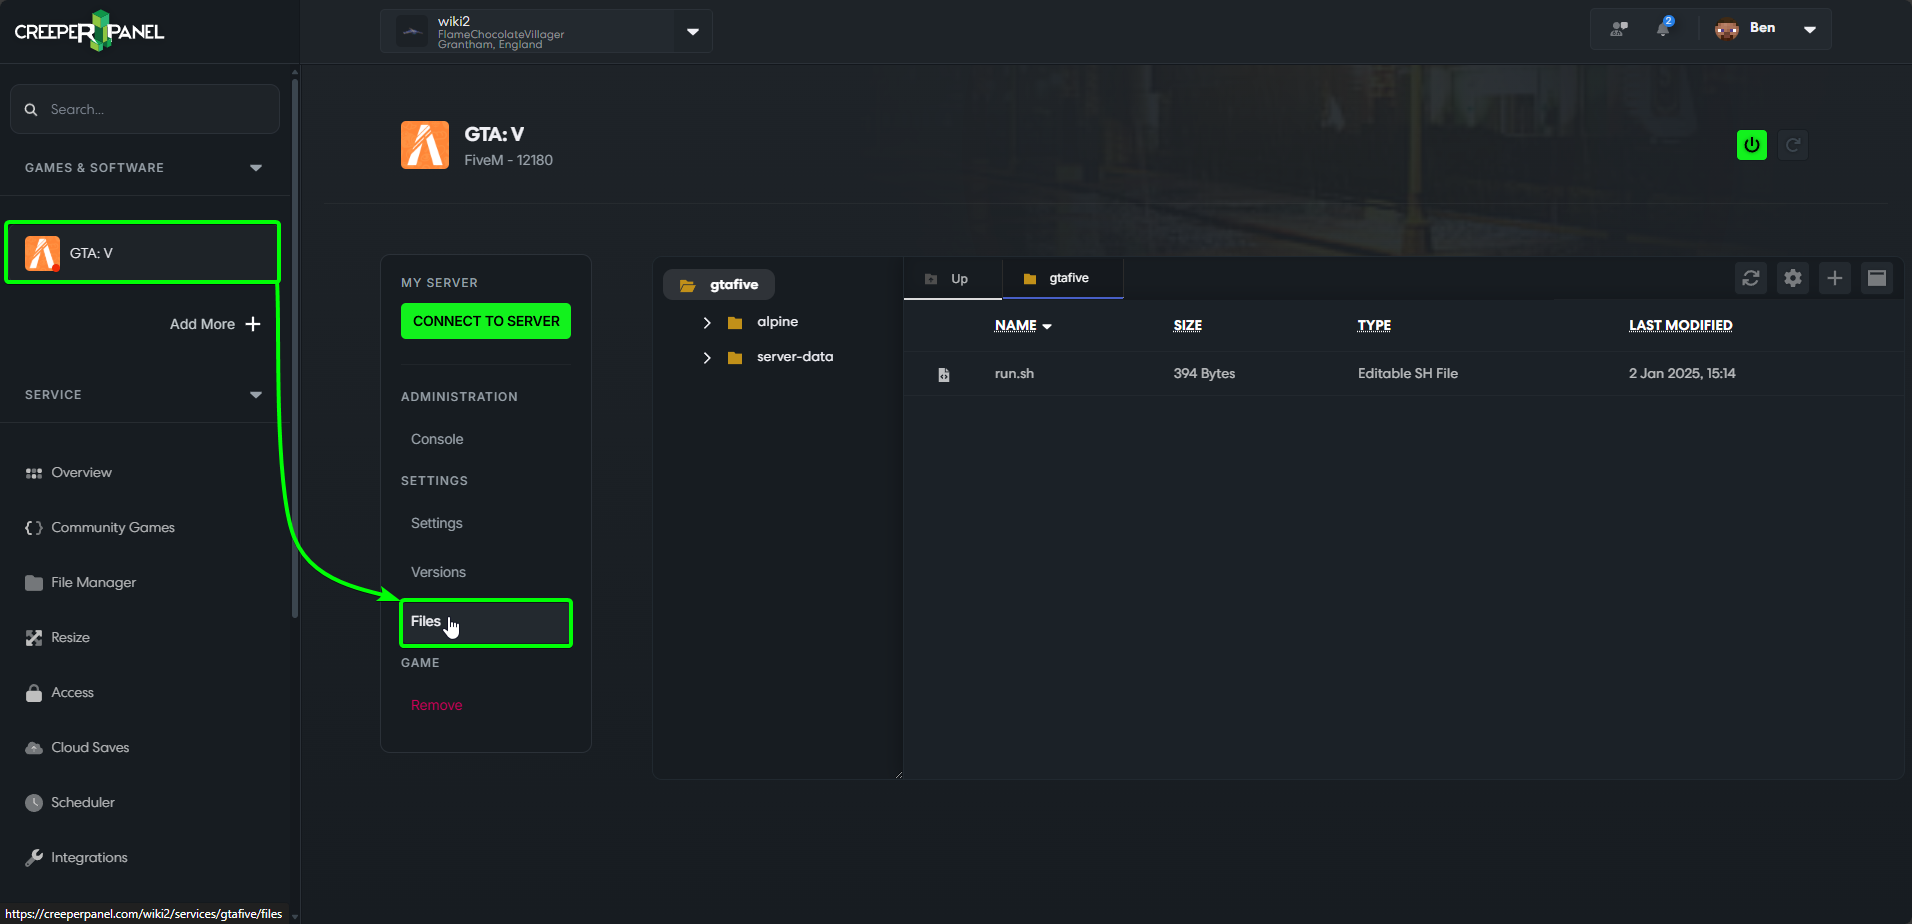
- Navigate to your FiveM instance on the CreeperPanel. Next, select
Files.
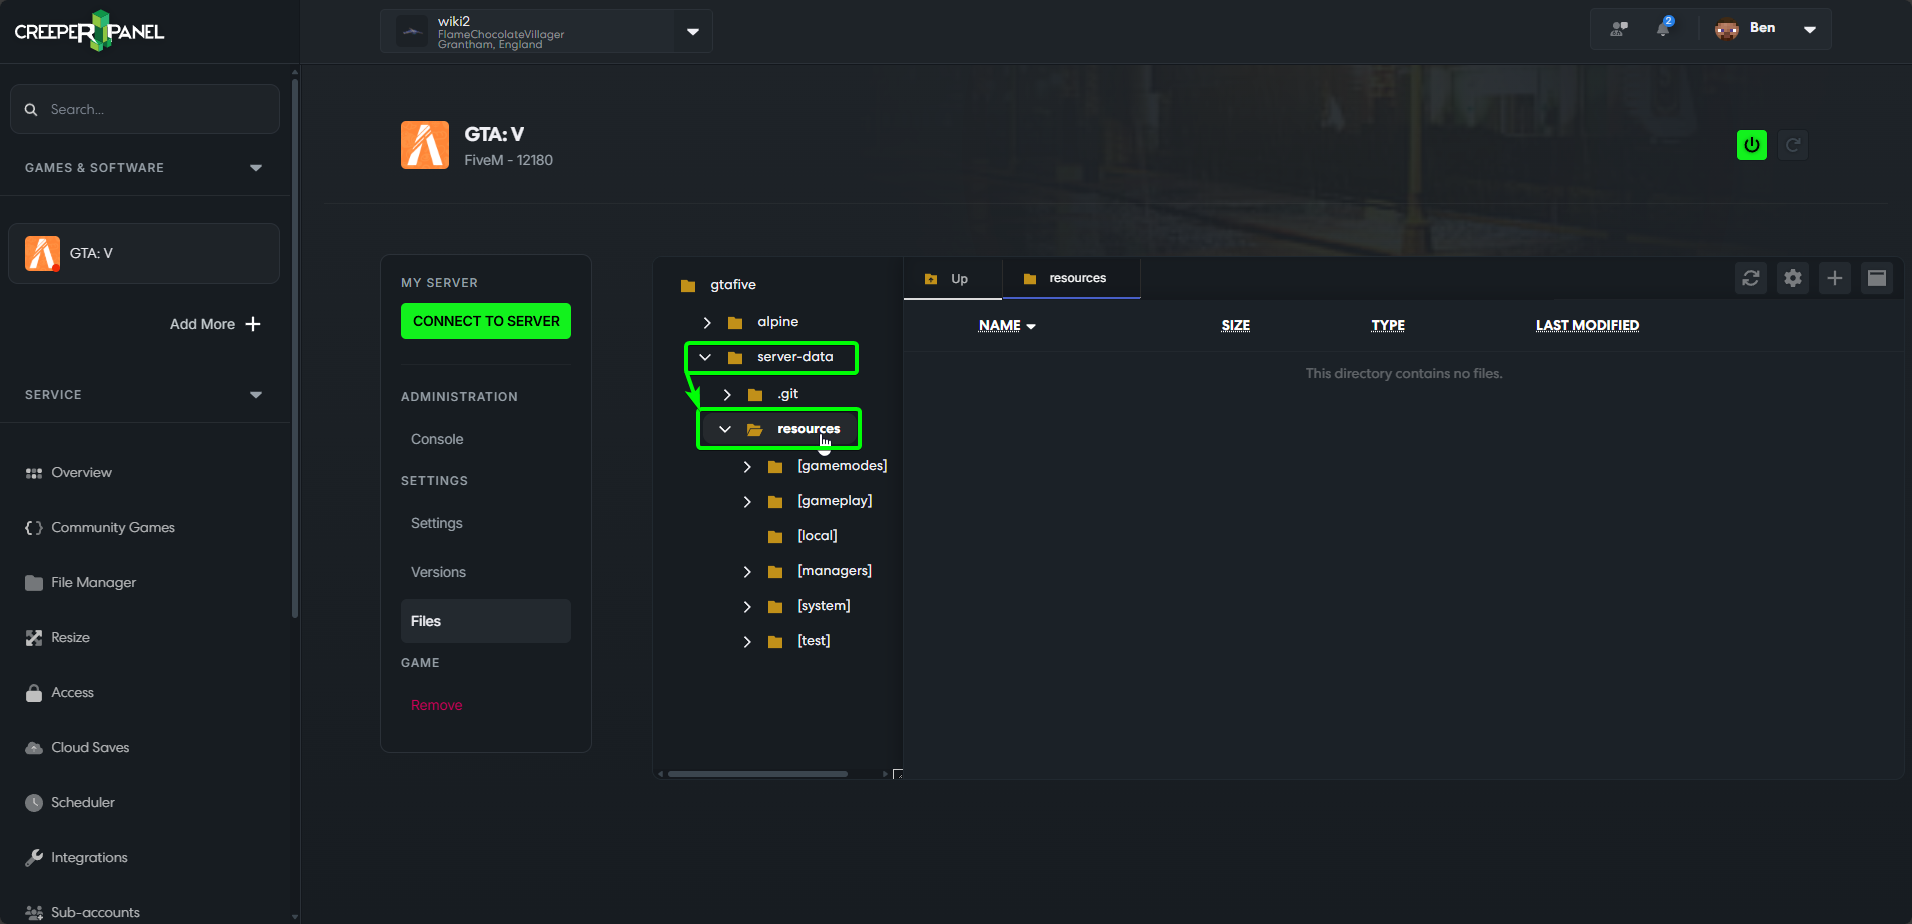
- On the Files page, navigate to
server-data, thenresources.
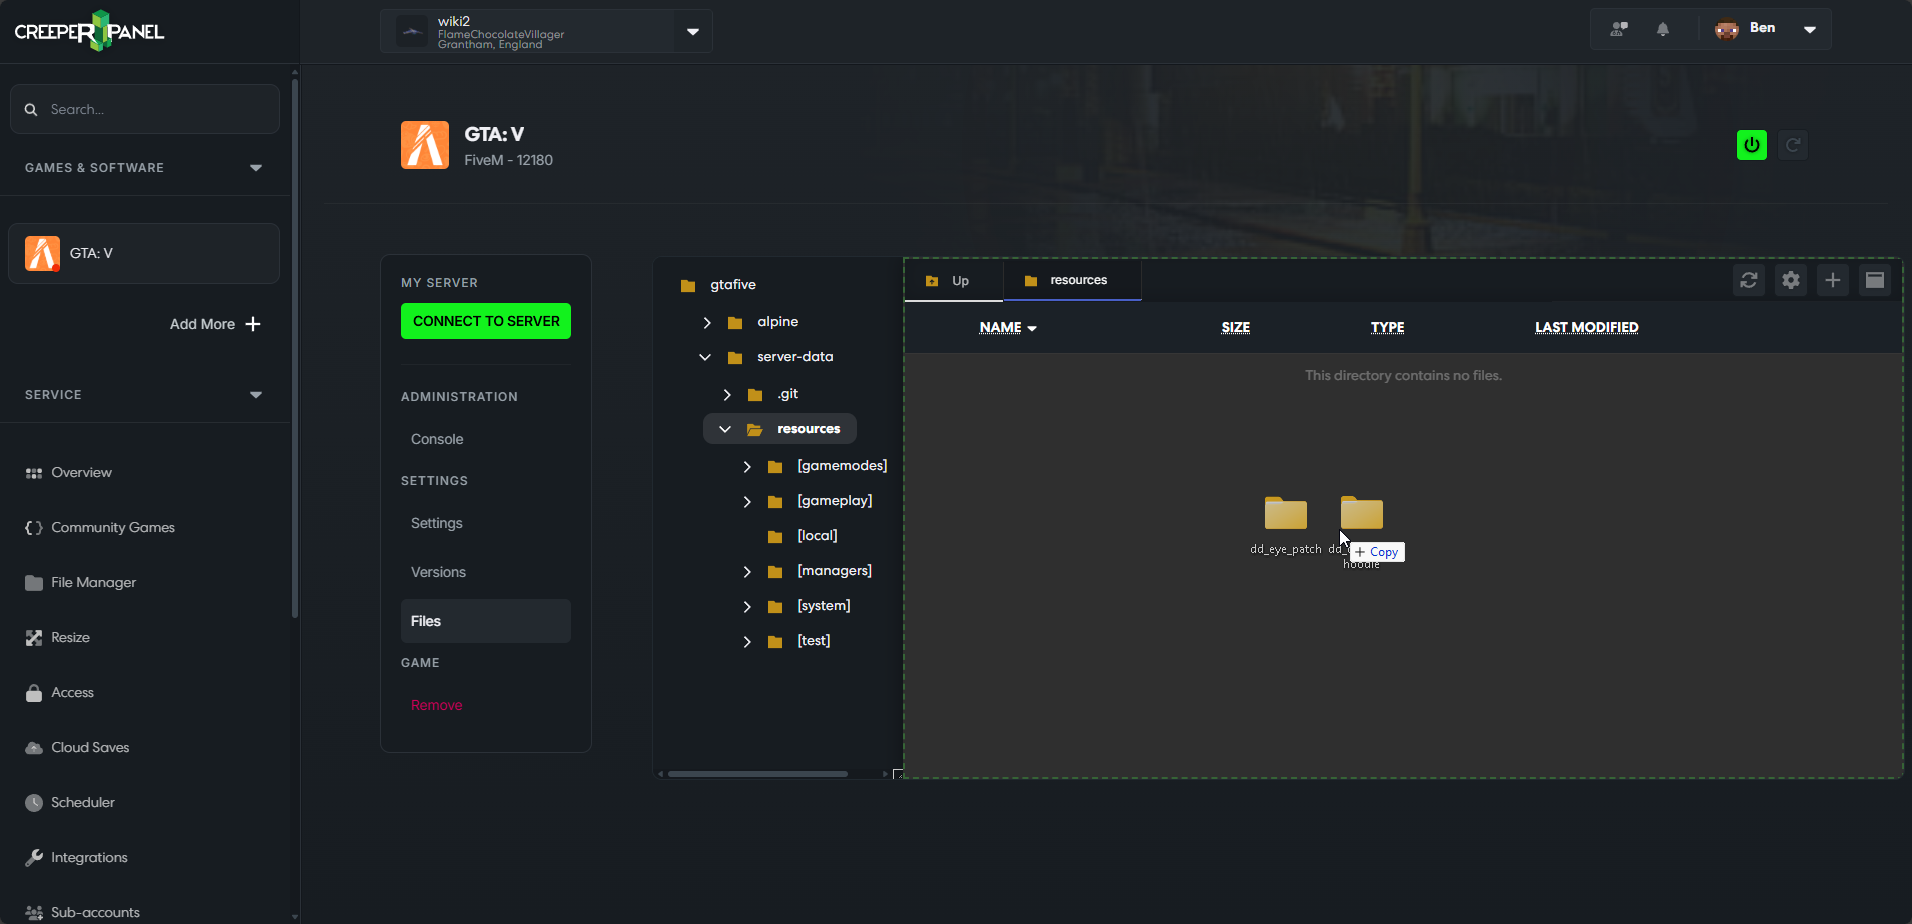
- Now you are in the
resourcesfolder, select the addons you wish to upload from your PC. Next, drag and drop them into the file viewer window to upload them to your server.
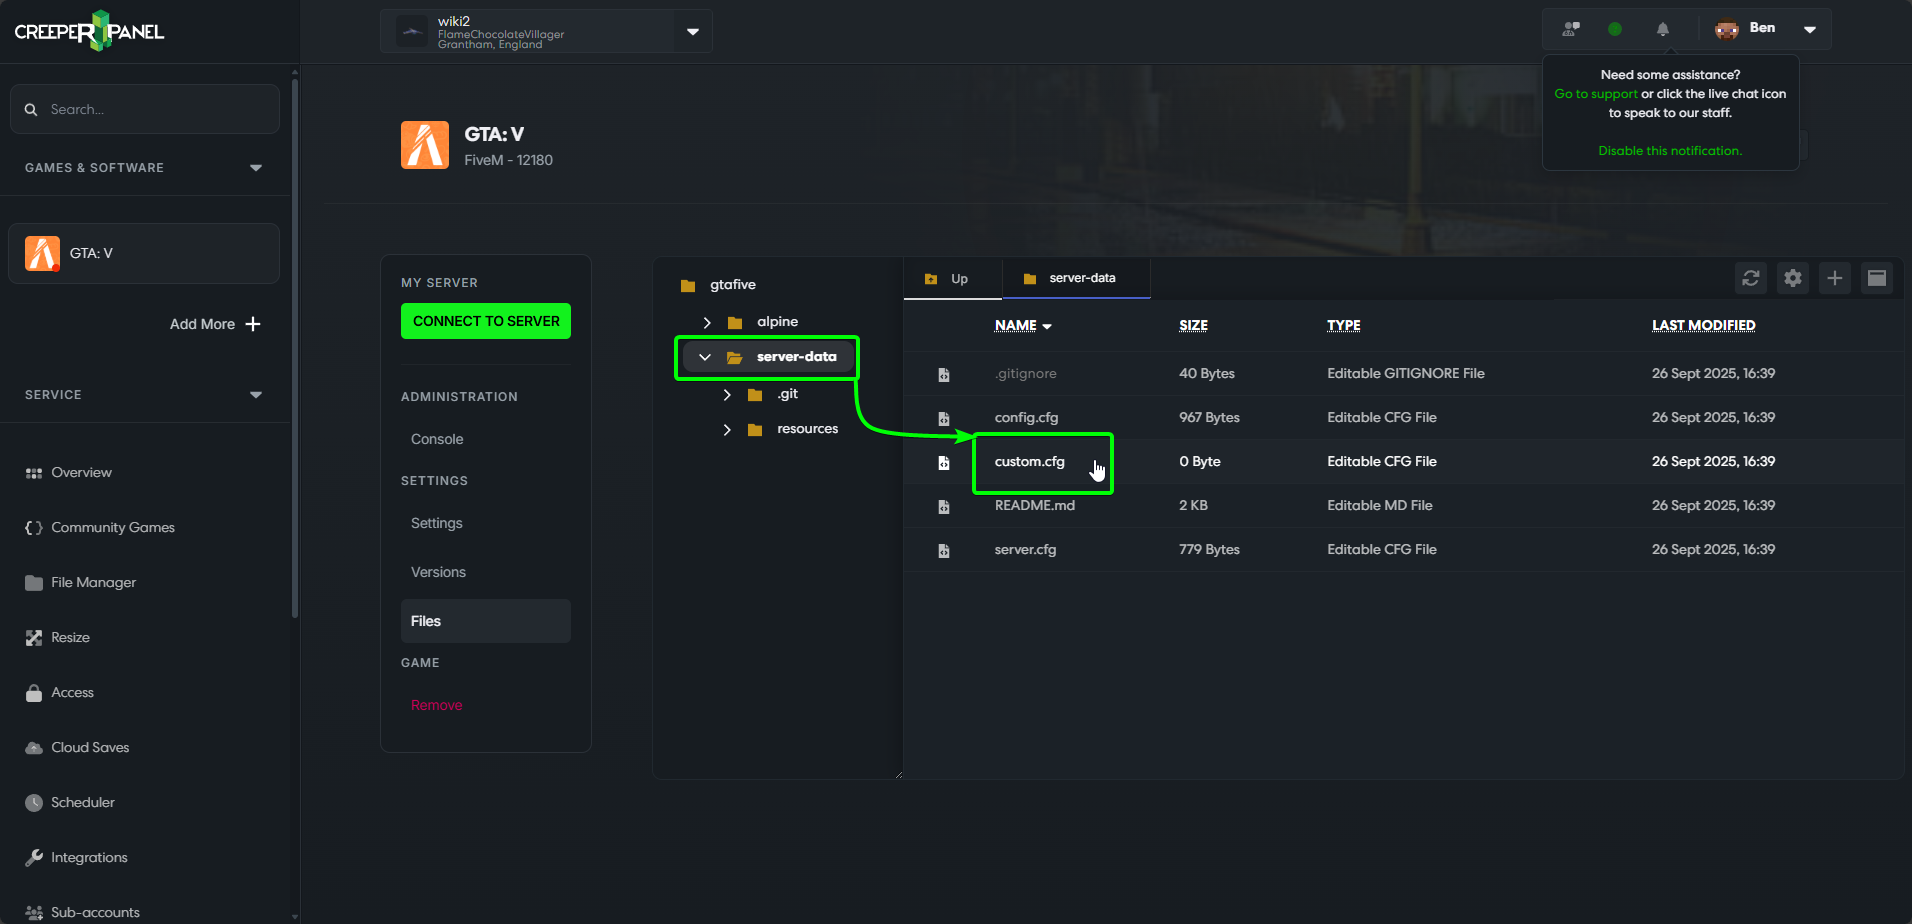
- Next, navigate back up to the
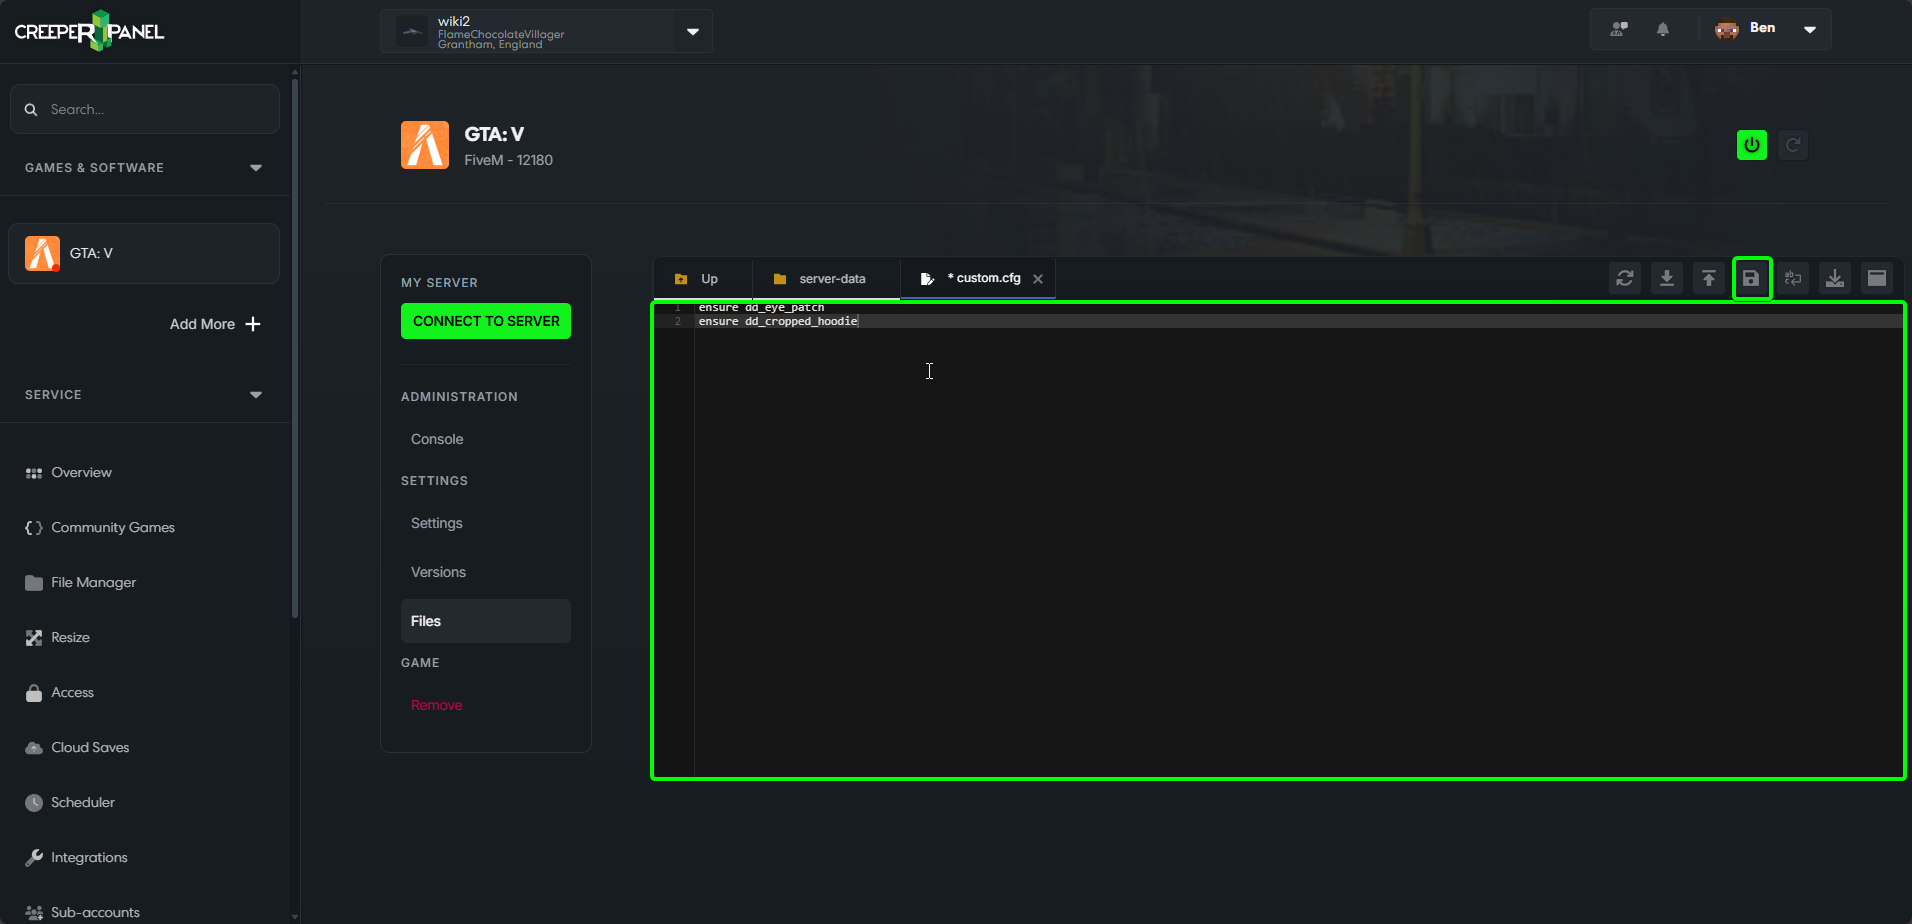
server-datafolder. In there, you will find a file calledcustom.cfg. Double-click to open it.
- You will need to add each mod-folder name manually, prefixed with
ensure. For example, to enable the eye-patch addon shown, you would need to add the lineensure dd_eye_patch. You will need to add a new line in the same format for each addon you would like to use. When you are finished, click thesaveicon to save your changes.
You should now be free to start your server. If you experience issues during initialisation, please check to ensure that your mods are in the correct order, and any required dependencies are also installed.