Modding Your DayZ Server
The modding process on the CreeperPanel is currently being updated. Some settings may move when the changes are completed, and others may be added. Check back here later for more information.
Uploading Mods/ Maps to the CreeperPanel
Maybe you would like to add a new map and missions to spice up your DayZ gameplay. Fortunately, DayZ is easy to mod. Before you start modding, you may want to make sure you have the mods, and any associated dependencies, to hand. Some mods will be available via the Steam Workshop, and others will be available via a GitHub repository. In this case, we will be adding a map mod. This guide will cover both installing the mod, and the missions.
To begin adding mods to your server:
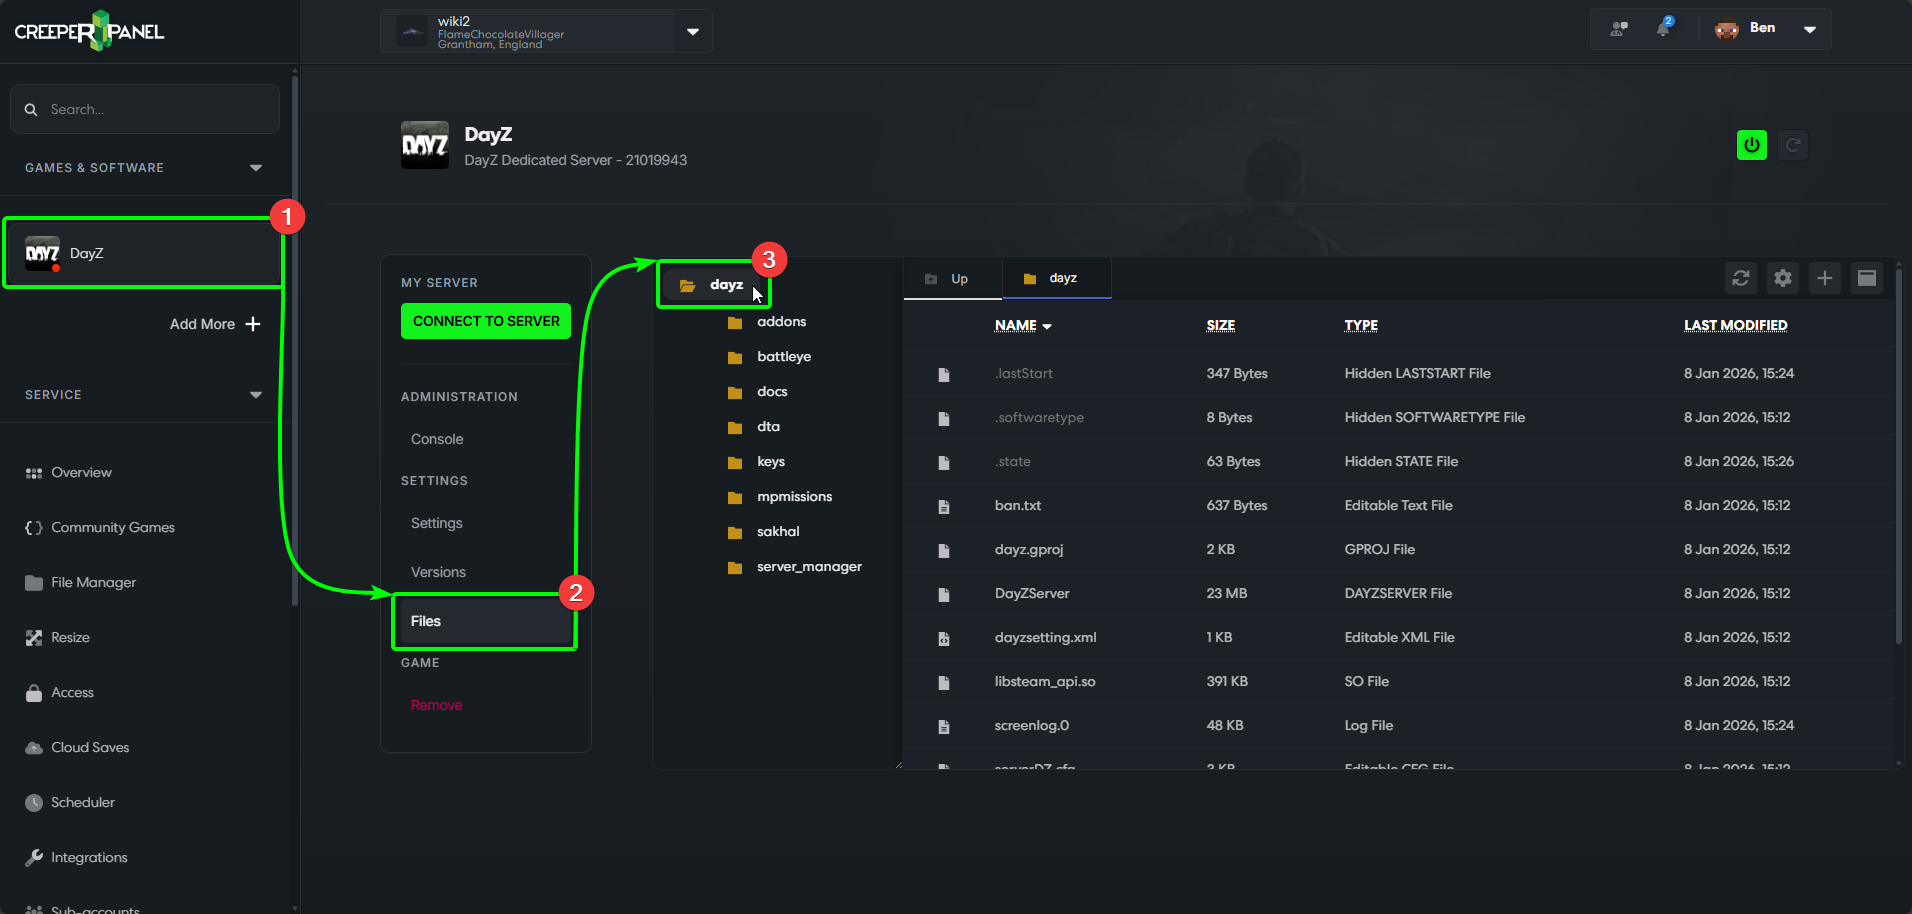
- Navigate to your DayZ instance on the CreeperPanel.
- Select
Filesunder theSettingsmenu, in the instance's sub-menu. - Ensure you are viewing your root directory folder - this will be shown as
dayzin the File Manager.
Now, we will need to locate the map files, and compress them to a .ZIP. Most maps will be downloaded via the Steam Workshop. To find your Workshop downloads, you'll need to:
- Head to
\Steam\steamapps\workshop\content\221100. Locate the folder that contains the map you wish to upload. - Right-click the containing folder.
- Select
Compress to. - Then select
.ZIP File. Wait for the compression to finish, then move the archive somewhere safe.

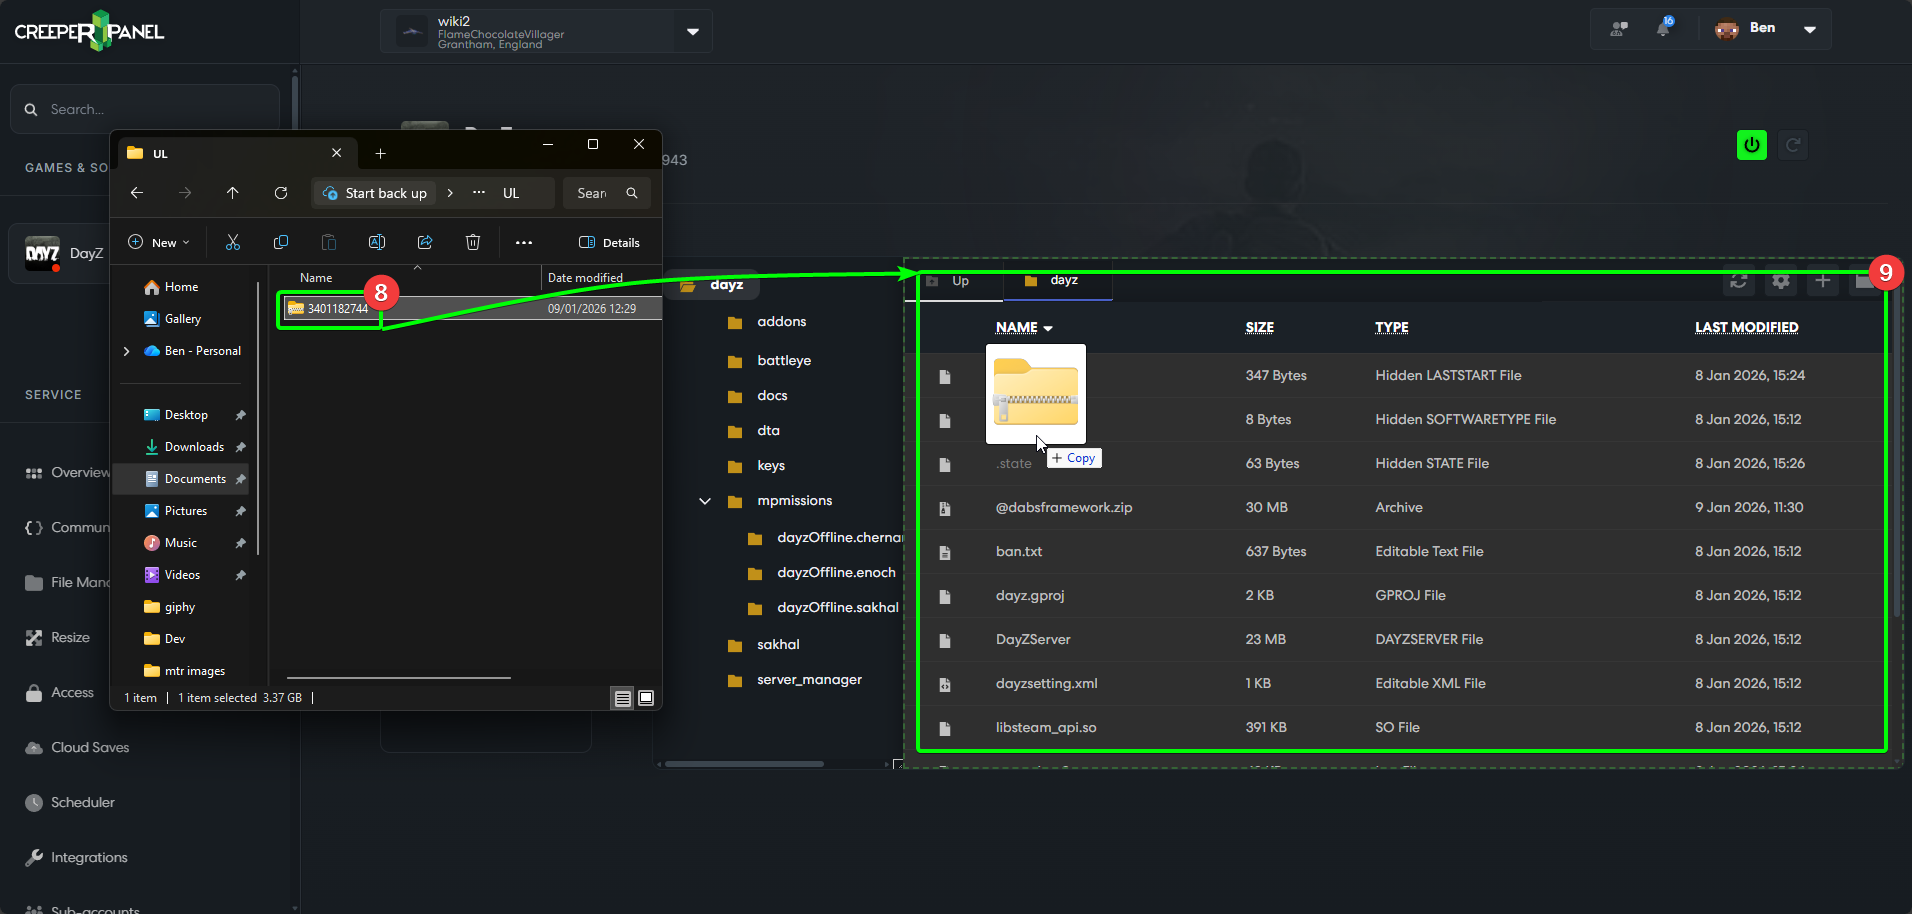
Open your .ZIP file's containing folder over the CreeperPanel File Manager, then:
- Select your
.ZIPof your map. - Drag and drop into the root folder shown on the Panel to begin the upload. This may take a minute, as many mods and maps are 2GB+.
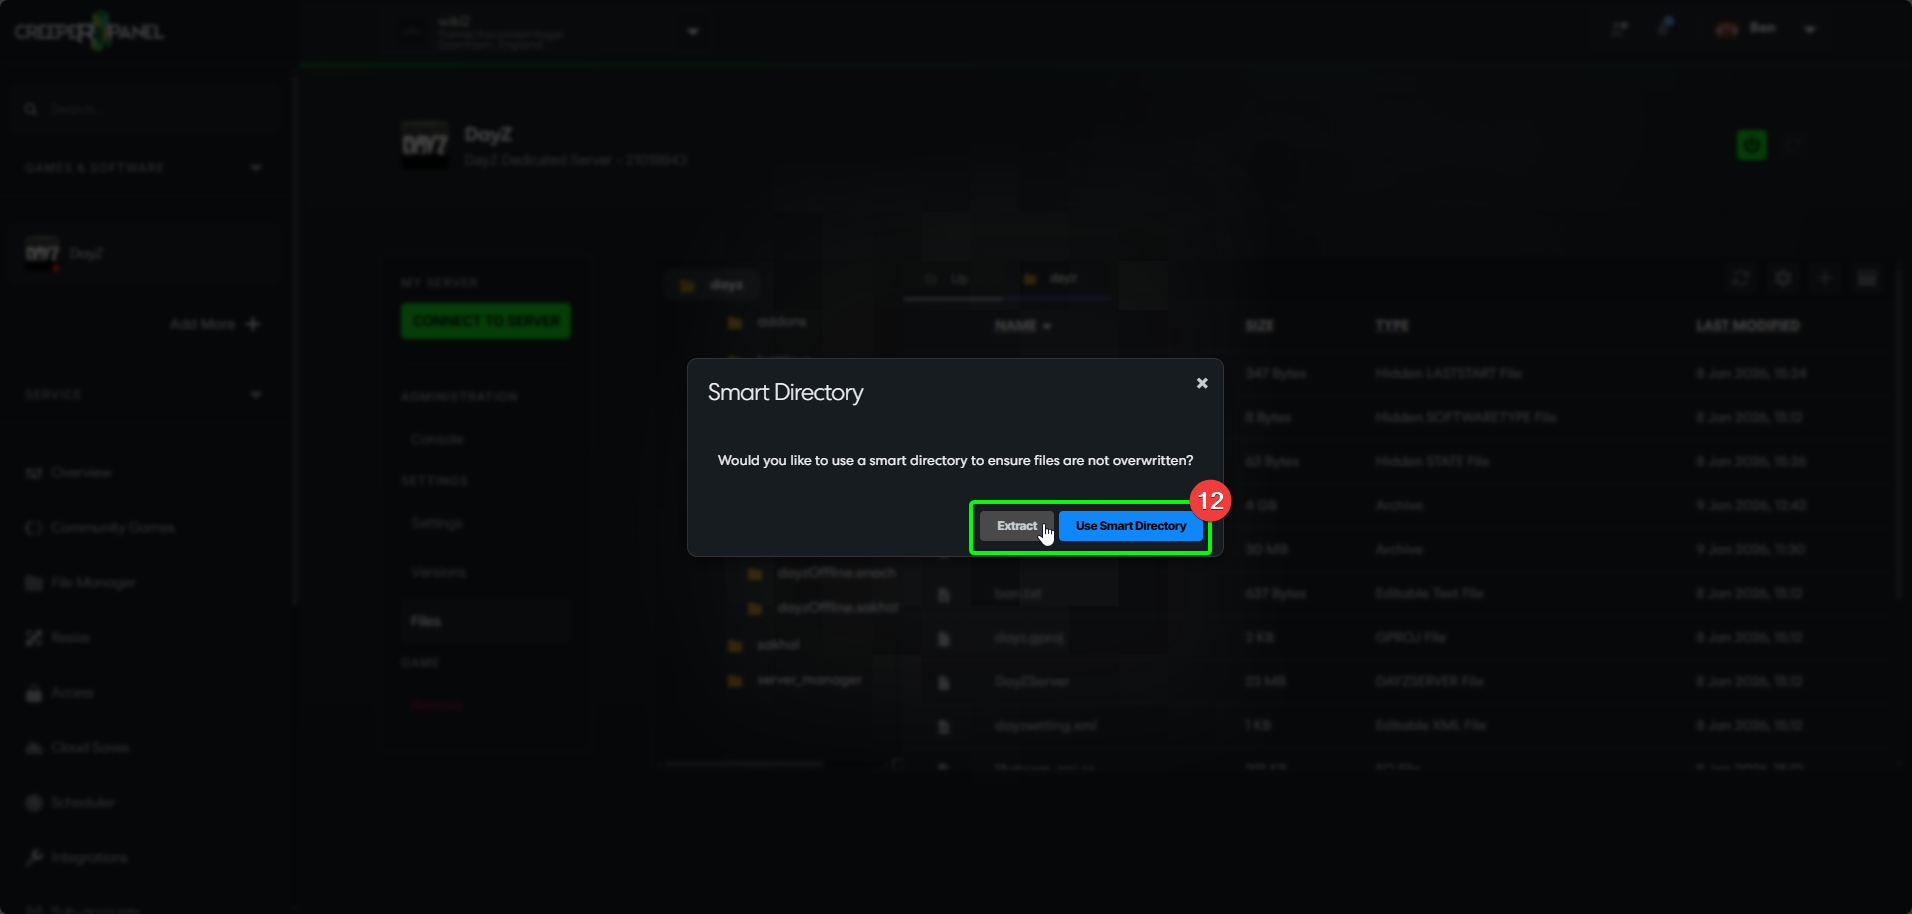
Now the mod is installed, you will need to unpack it. Locate the file in your root folder, then:
- Right click .ZIP you've uploaded.
- Select
Extractfrom the menu.

- Unpack the directory.
Extractis best, as usingSmart Directorymay nest the folders, causing the mod not to run.
You will need to follow these same steps for any dependencies your mods may require - they all need uploading to your server, and extracting to the root directory.
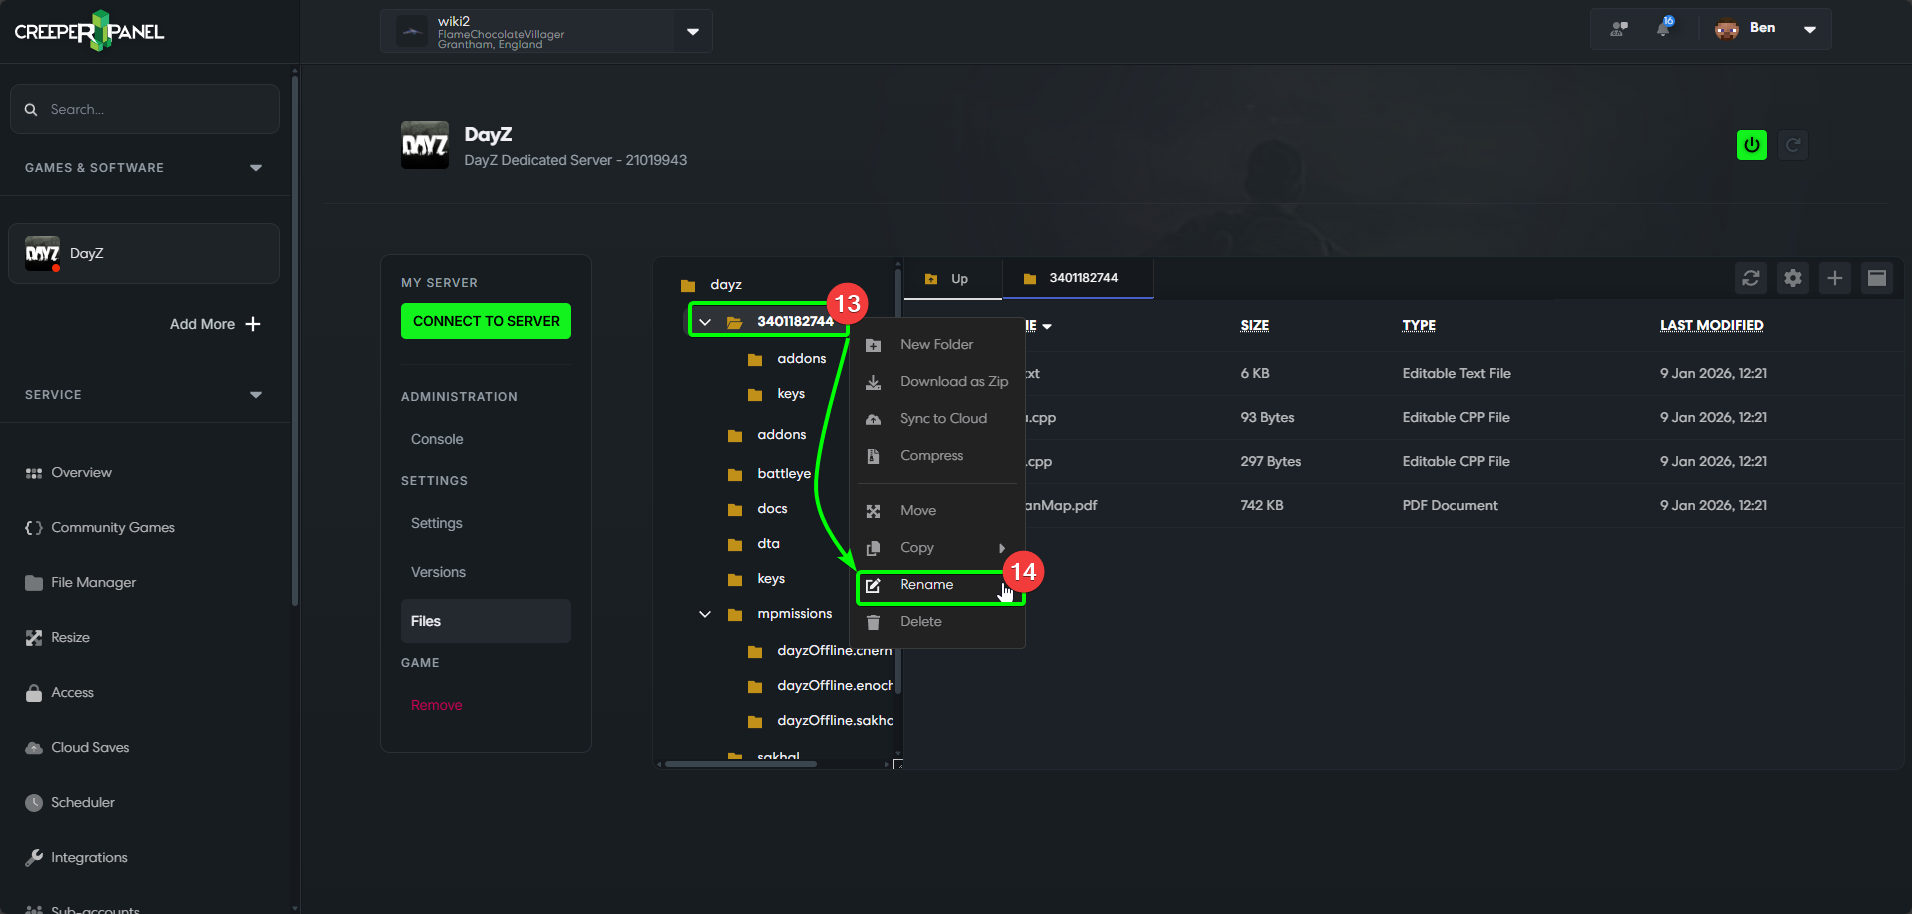
You can now rename the map folder from the published ID to something else. The mod folder name can be what you wish, but it's advised to rename it to match the mod. You can also prefix the mod with an @ to keep them grouped together. The result will look like @Raman.
- Right-click the folder, then
- Click
Renamein the menu.
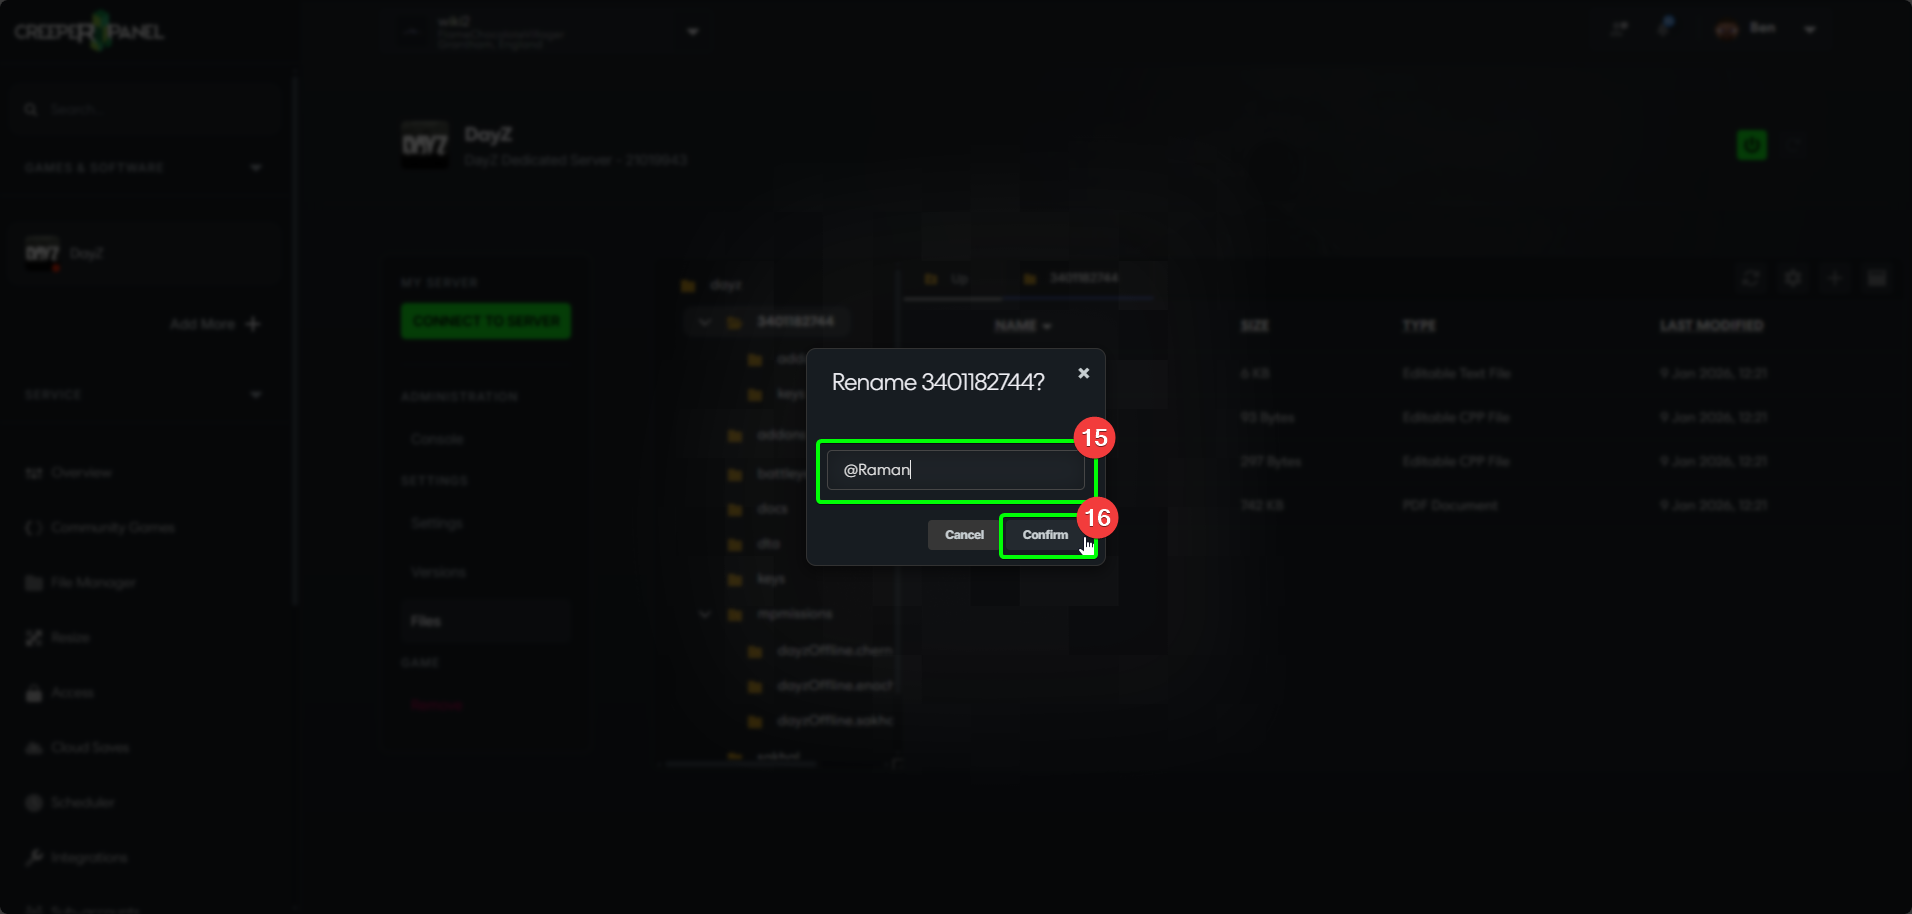
In the next window:
- Rename the folder. Don't forget to put the
@prefix! - Select
Confirm.
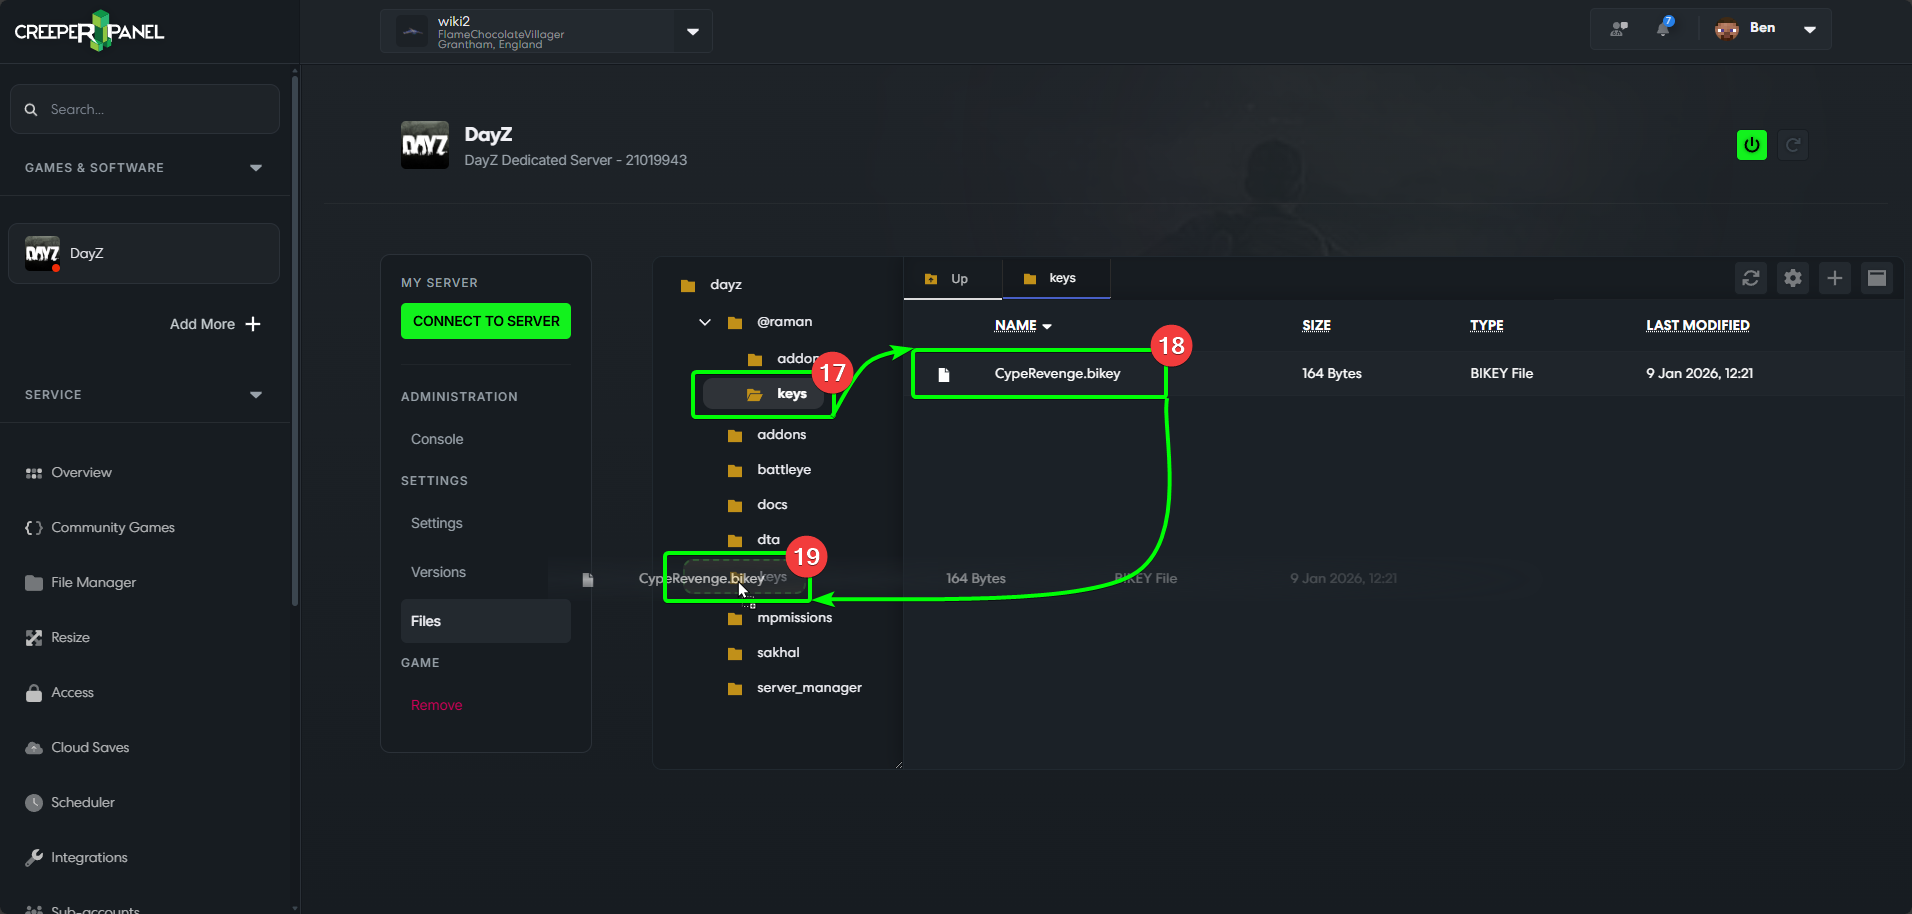
Now it's unpacked and renamed, you will need to move a .bikey file from inside the map folder to the keys folder.
You will only be required to add the .bikey file on servers that have anti-cheat enabled. If you don't have anti-cheat enabled, you do not need to move the .bikey file, but it is still recommended.
First, expand your newly named mod folder, then:
- Open the
keysfolder. You'll find your key inside. - Select the
.bikeyfile. - Drag it over to the
keys, located in thedayzfolder in the sub-menu.
That's it - your mod should be set up. If it's a map mod, you'll need to follow the instructions below for adding any associated mission files. If not, you can move on to Enabling Mods/ Missions.
Uploading Missions to the CreeperPanel
As mentioned, maps mostly have missions that come with them - these need to be uploaded separately, and have slightly different requirements.
You can download most mission files for Workshop maps from the Workshop, or GitHub. Find the appropriate repository for the map you have uploaded, and download the mission files. Inside the download, extract the appropriate mission files.
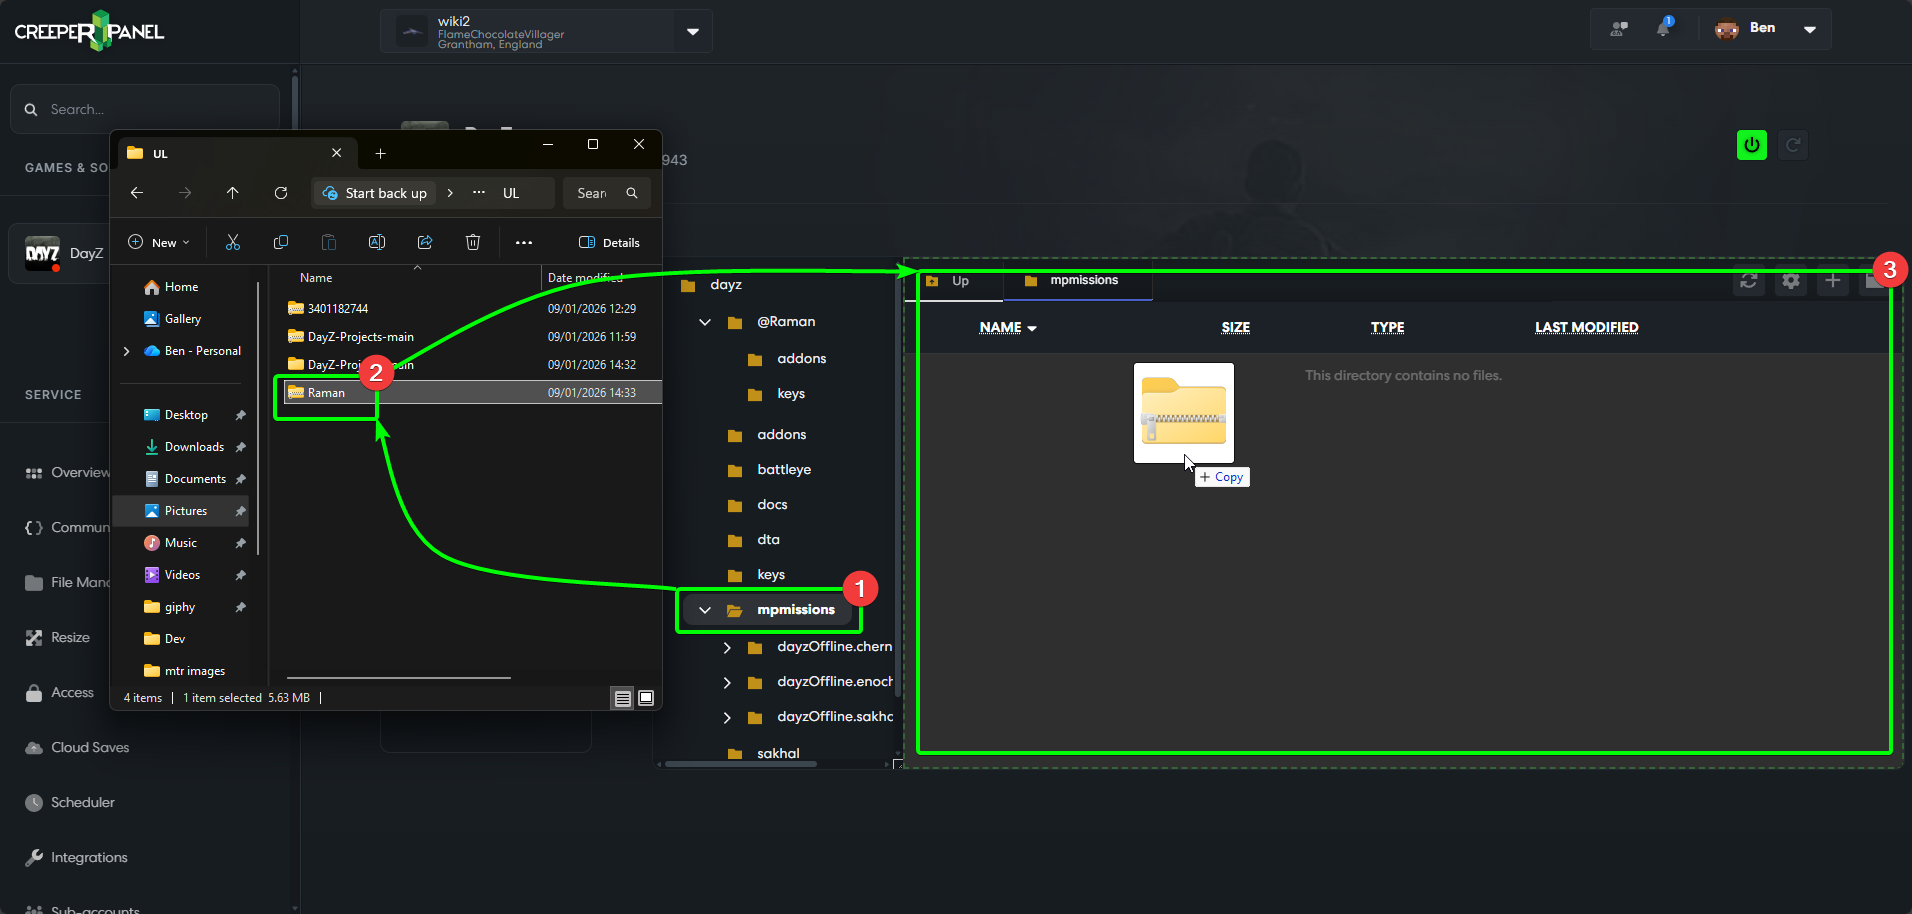
Now you've compressed the mission files:
- Select the
mpmissionsfolder. It should be visible in the File Manager's sub-menu. - Select your mission files.
- Drag and drop them into the
mpmissionsfolder.
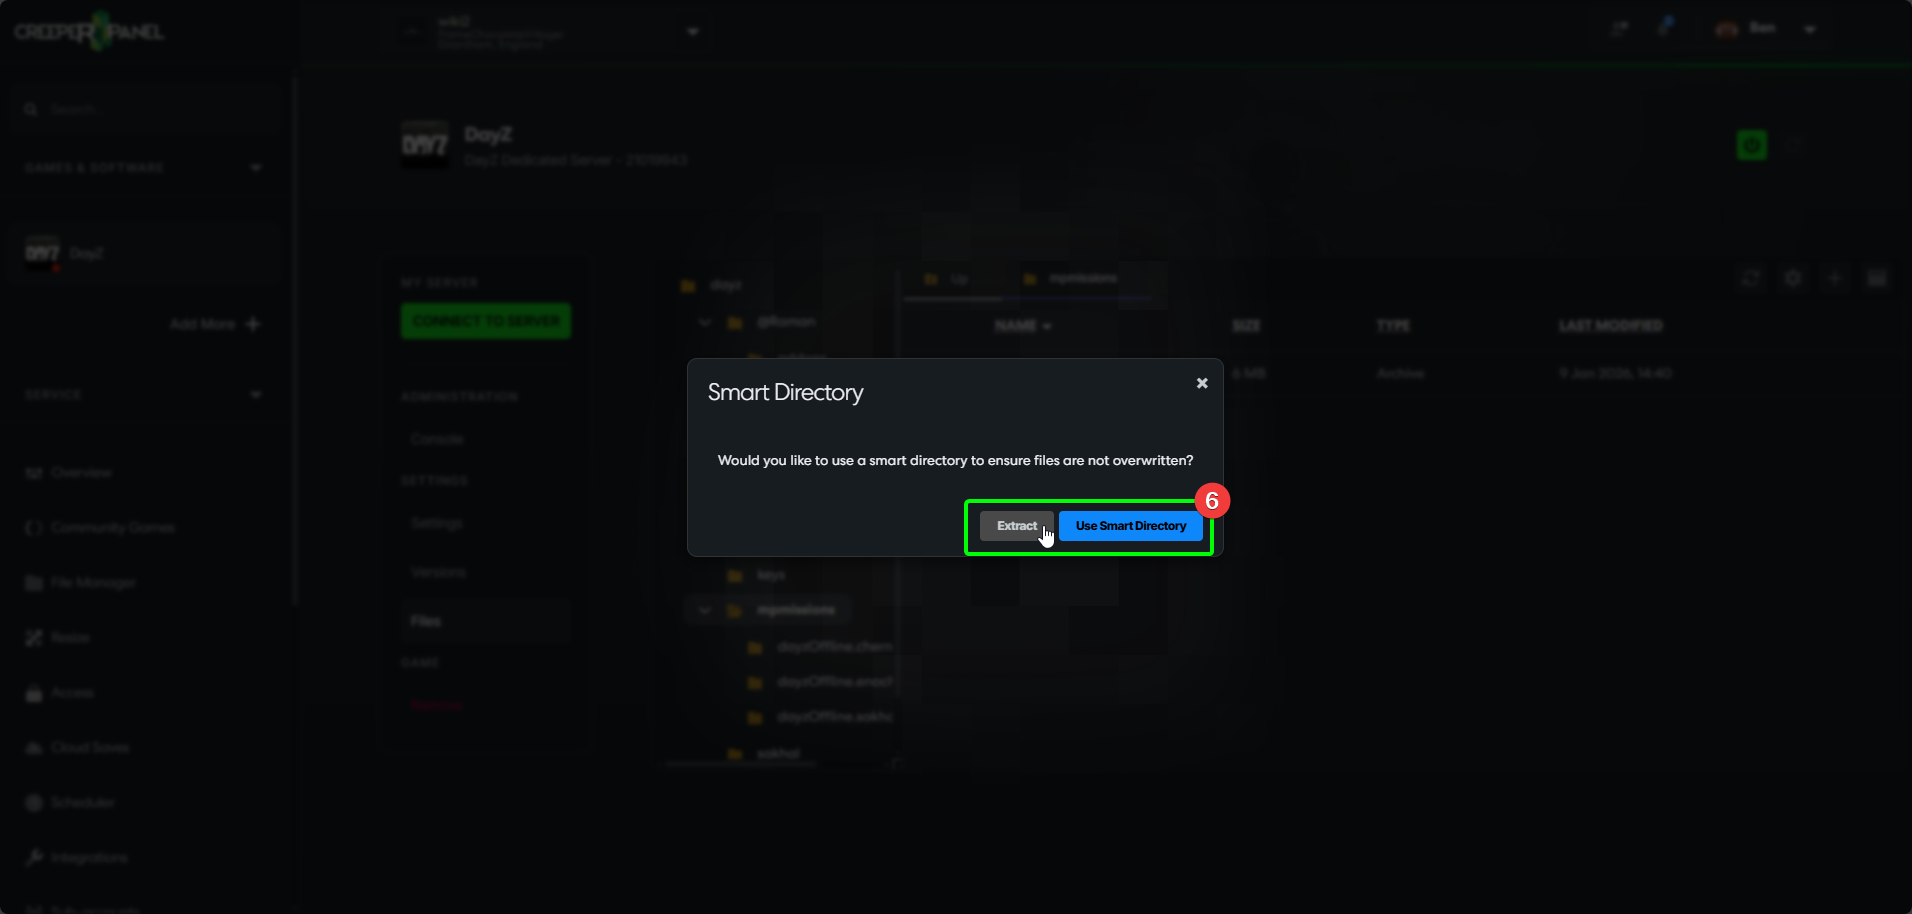
- Right-click the
.ZIPyou just uploaded, then - Select
Extract.
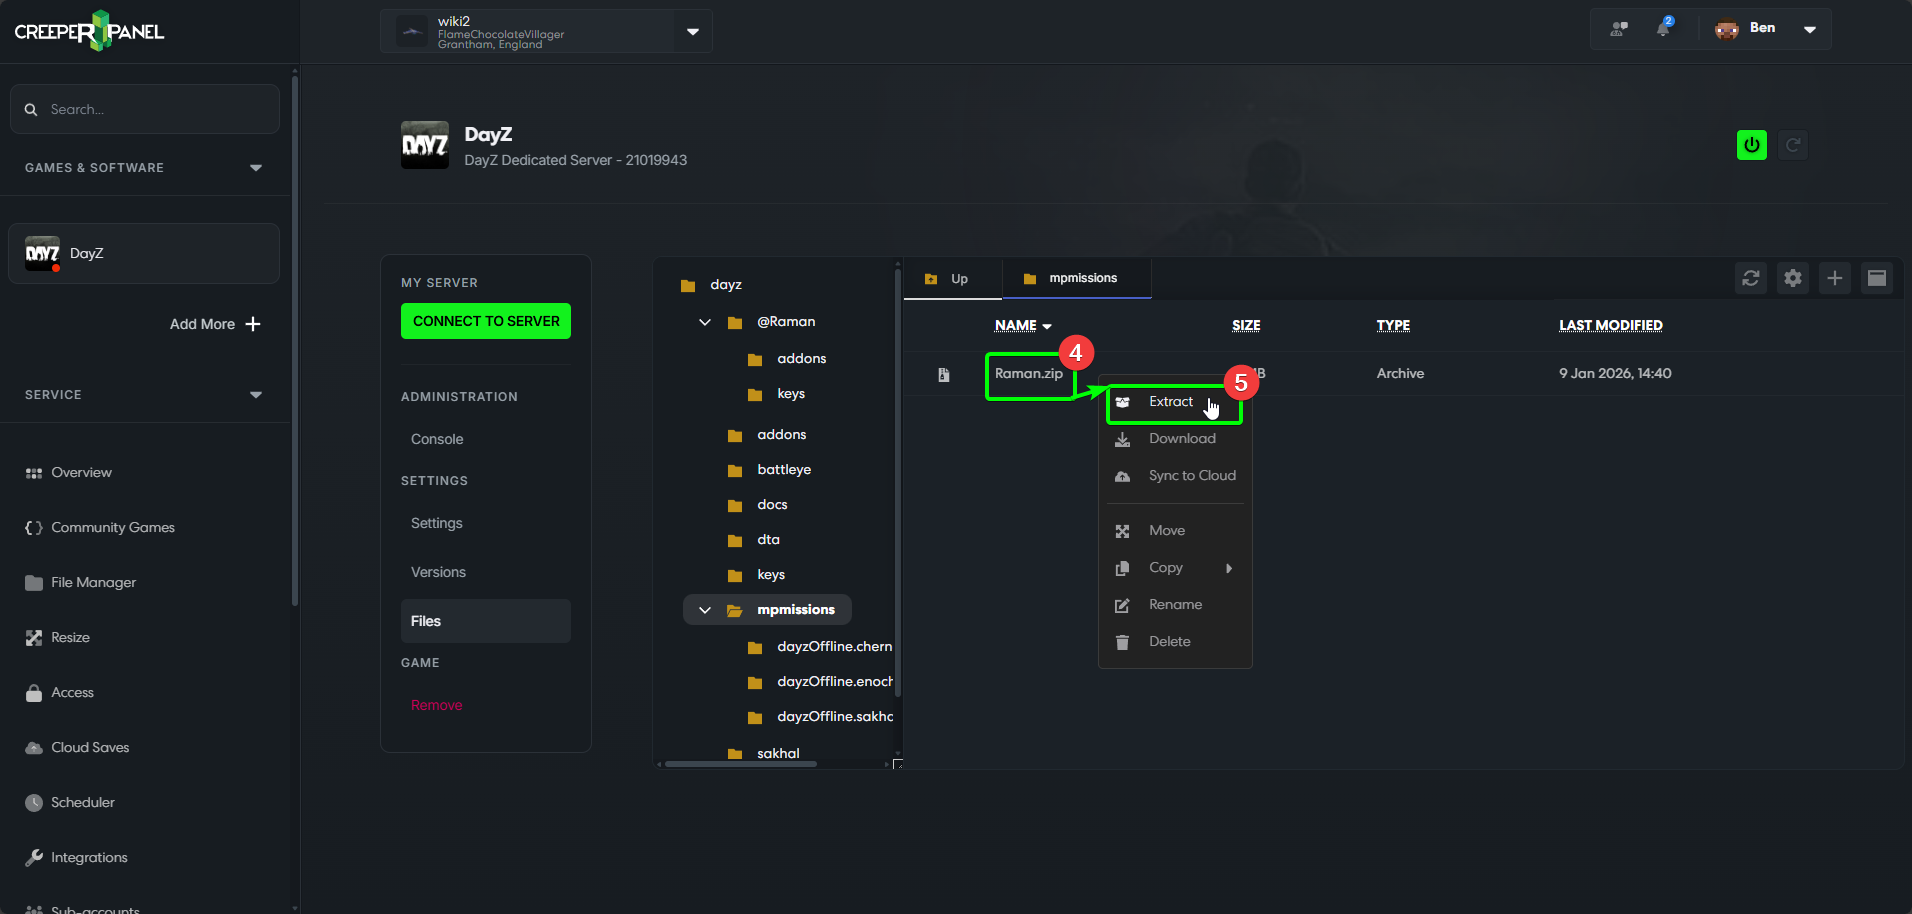
- Select
ExtractorUse Smart Directory.
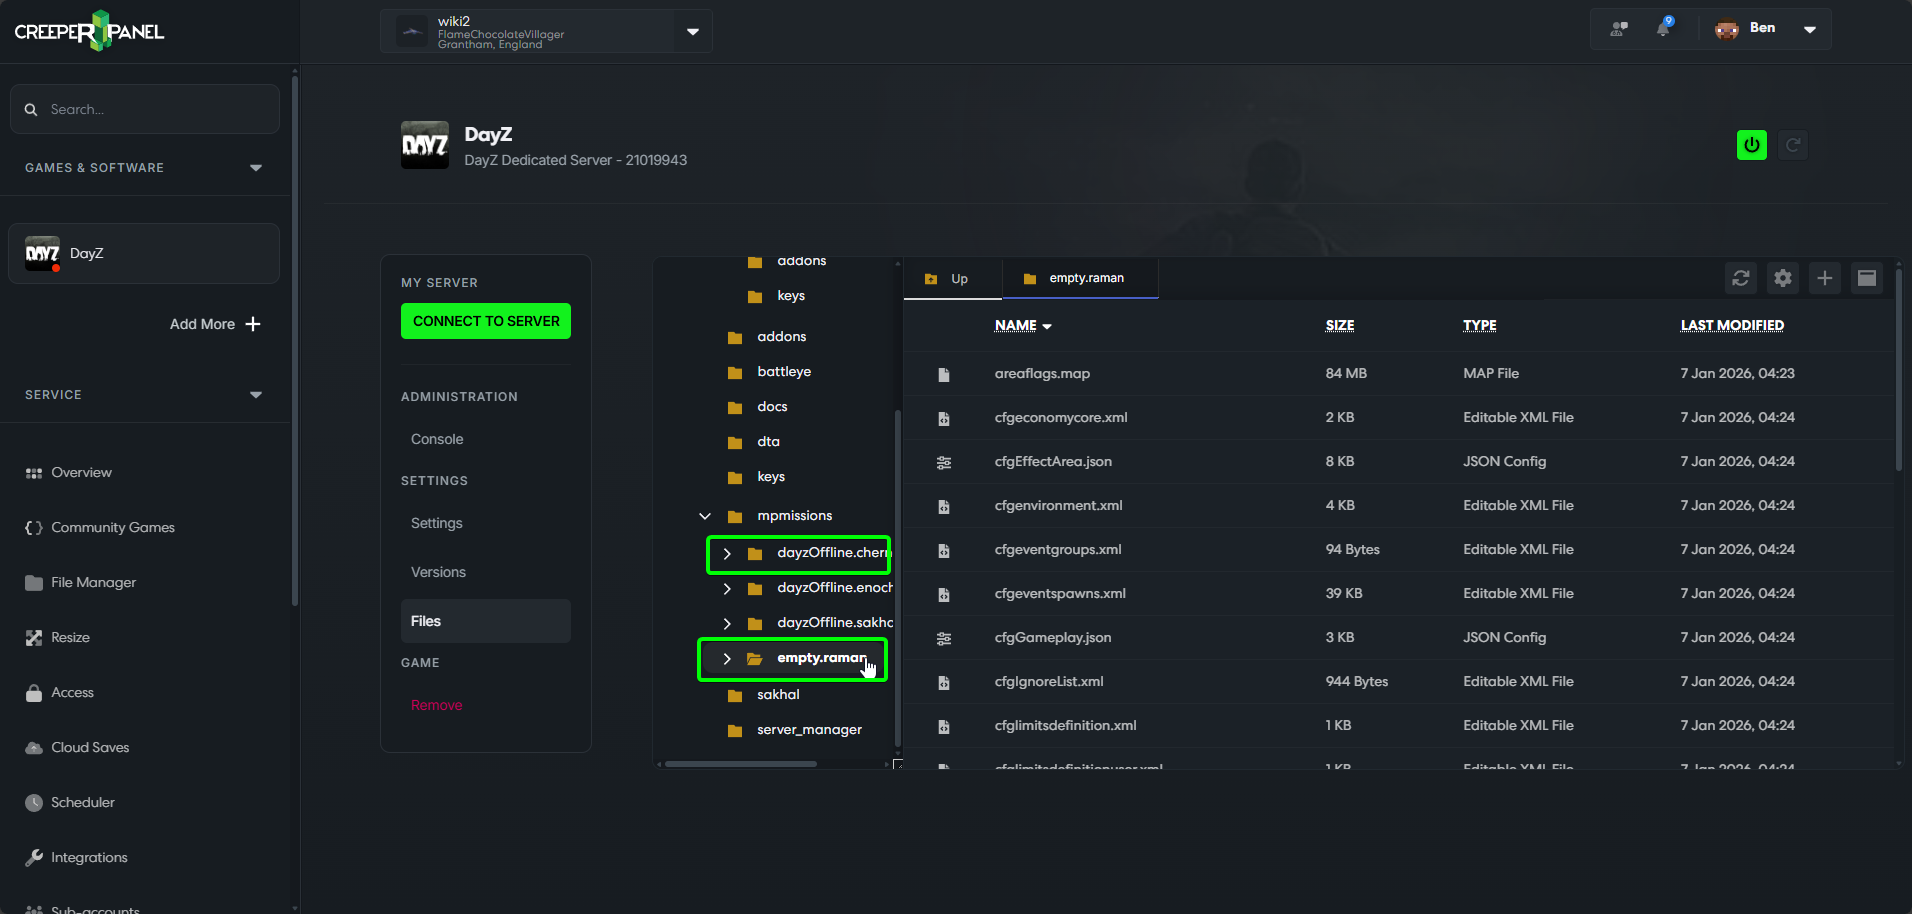
When the mission is extracted, you will need to prefix the folder with empty.. So for Raman, your Raman mission folder should be named empty.raman. Below, you can see how your mission folder should look inside mpmissions:
Nearly there! We've uploaded the mods and put stuff where it needs to be, and now we only need to instruct the server to load them!
Enabling Mods/ Missions
Before we can play the mods, we need to make sure the server is instructed to load them on start-up.
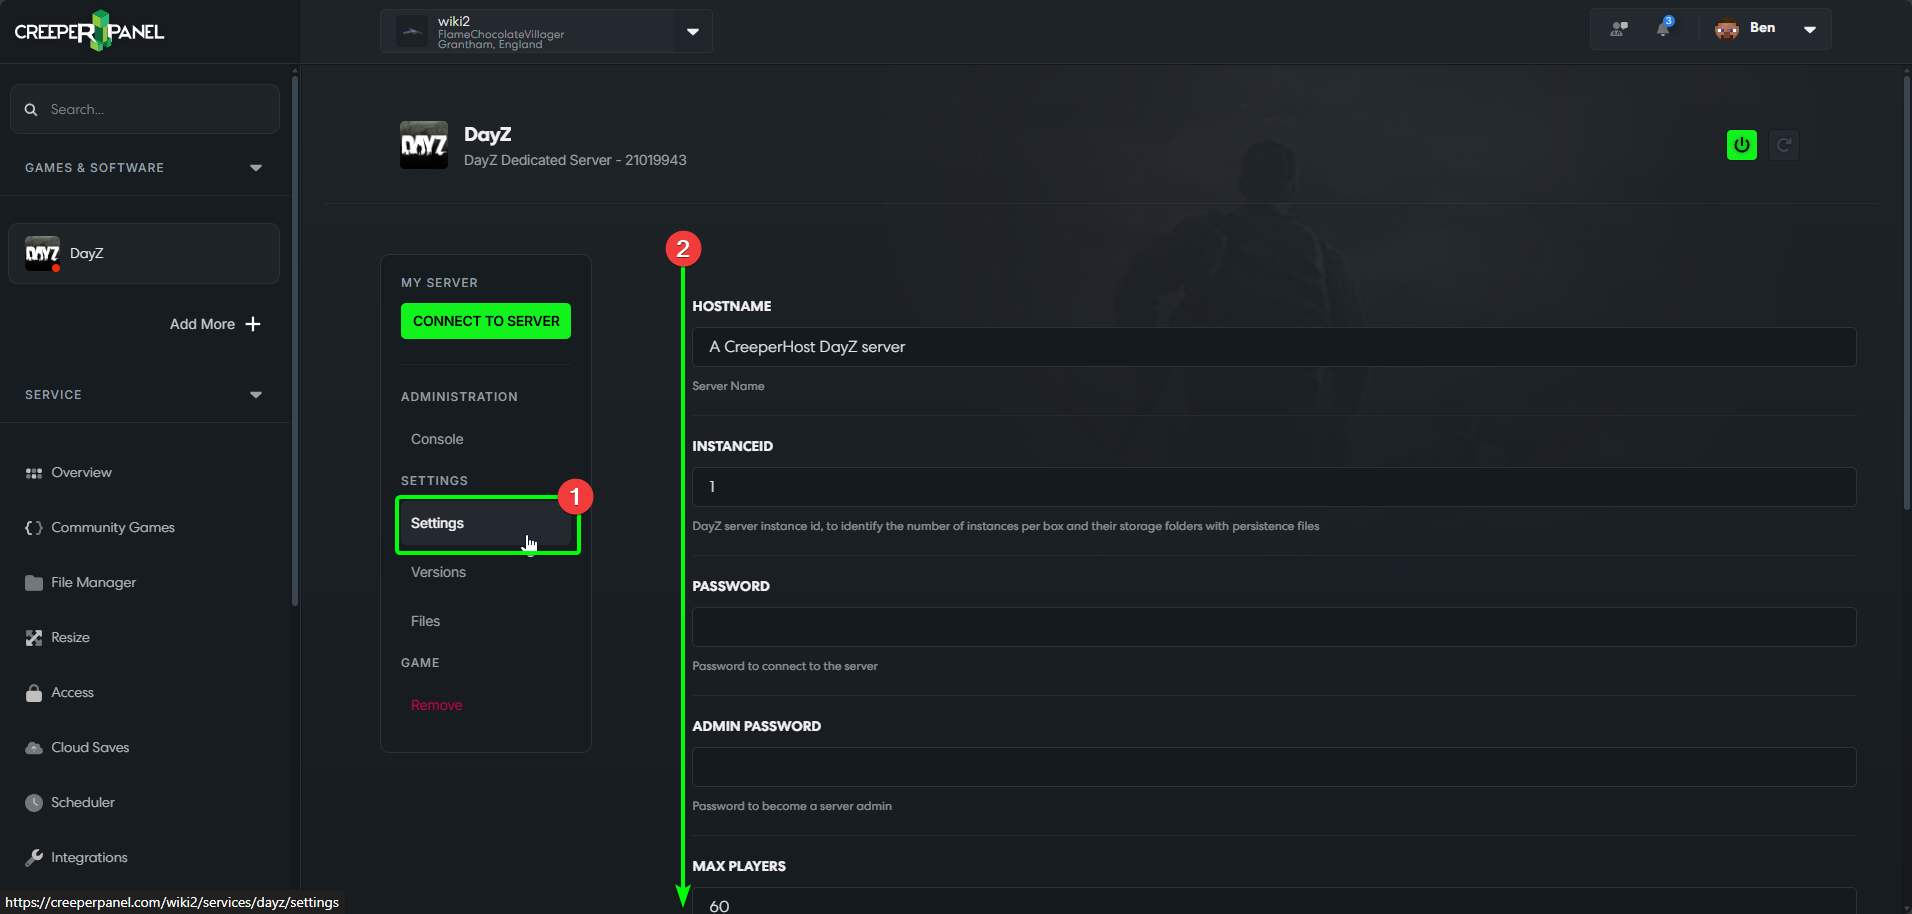
- Navigate to the
Settingstab for your DayZ server, found underSettingson the sub-menu. - Scroll down until you find the
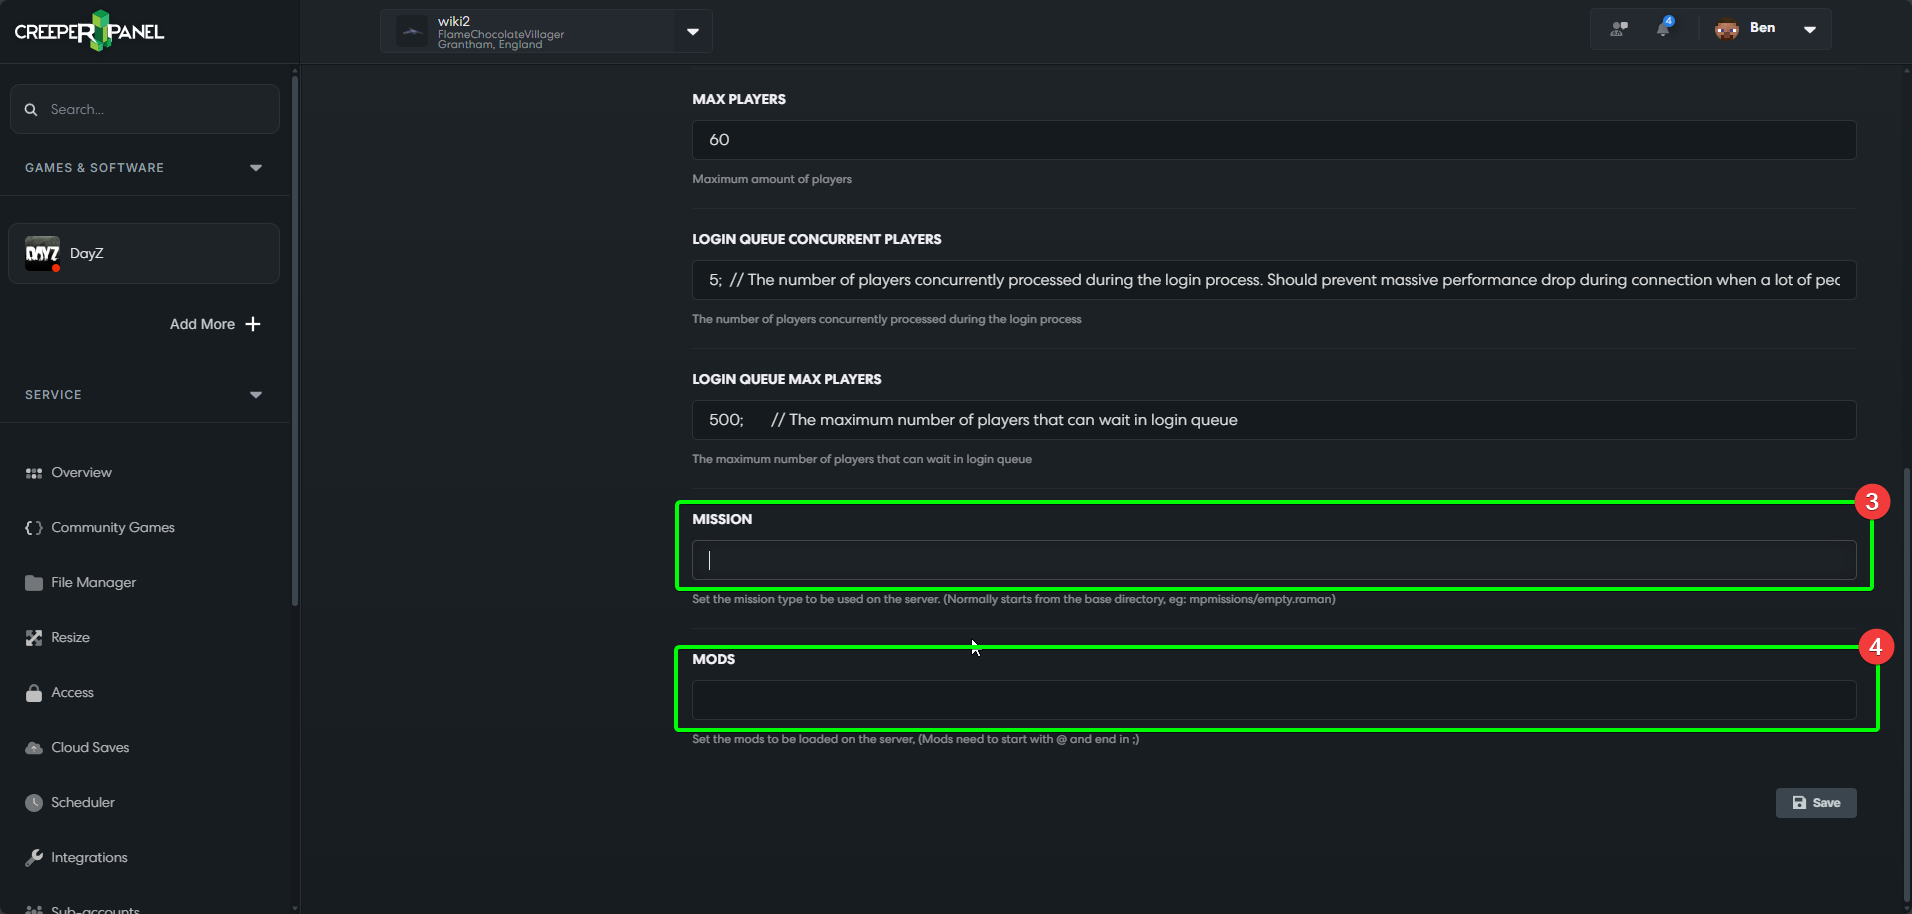
MissionandModsfields.
- For the mission, we need to enter
mpmissions/<missionname>, replacing<missionname>with your chosen mission name, including the.emptyprefix. This tells the server where to load the mission from. - For the mods, we need to list each mod as such -
@example1;@example2;. Each mod listed must start with@, and end with a;- even if it is the last mod listed!
When done, it should look like this for:
- The
Missionsfield, and, - For the
Modsfield. - When you've completed these steps, click the
Saveicon to save your changes! Navigating away from the page before saving will reset any changes you've made.
