Enshrouded server settings and player preferences
Set up your shared world to suit your group, from tougher fights to more time for building. This guide covers server settings, player preferences and permissions, with steps for CreeperPanel and other hosts or self-hosted servers.
For changes provided by mods, see Installing and managing Enshrouded mods.
Server settings and player settings
Server settings control the shared world and who can join it. Personal settings belong to each player's game client: the copy of Enshrouded running on their own PC. Both still apply when you're playing on a dedicated server.
| What you want to change | Where to change it |
|---|---|
| Server name, player limit, browser tags and chat availability | Server settings; General in CreeperPanel |
| Difficulty, enemy strength, resource rates and glider turbulence | World settings; choose Custom under General → Difficulty Preset, then open Game in CreeperPanel |
| Passwords, building permissions and reserved slots | Server permission groups; User in CreeperPanel |
| Personal gameplay preferences, including Updraft charge behaviour, aiming and HUD options | Each player's in-game Settings menu |
| Graphics, sound, keyboard, mouse and controller options | Each player's in-game Settings menu |
Change your personal settings in the game client
Each player can choose their own controls, display, audio and gameplay preferences while sharing the same world. These options must be changed in their own game client. They cannot be applied to everyone through the server configuration.
- Open Enshrouded on your PC.
- While in game, press Esc and open Settings. On an Xbox controller, use Start to open the menu.
- Open the section for the option you want to change. For key bindings, select Keyboard & Mouse or Controller.
- Adjust your preferences. Other players can make their own choices in their clients; the dedicated server does not need a restart.
Keen's official Controls & Keybinds guide explains how to open this menu and customise your controls.
Change the shared world rules
World settings apply to everyone on the server. They cover things such as enemy damage, resource drops, day length and glider turbulence. Choose the Custom difficulty preset to apply individual values.
For example, Glider Turbulence controls whether air turbulence affects gliding in your world. You'll find it in CreeperPanel's Game tab.
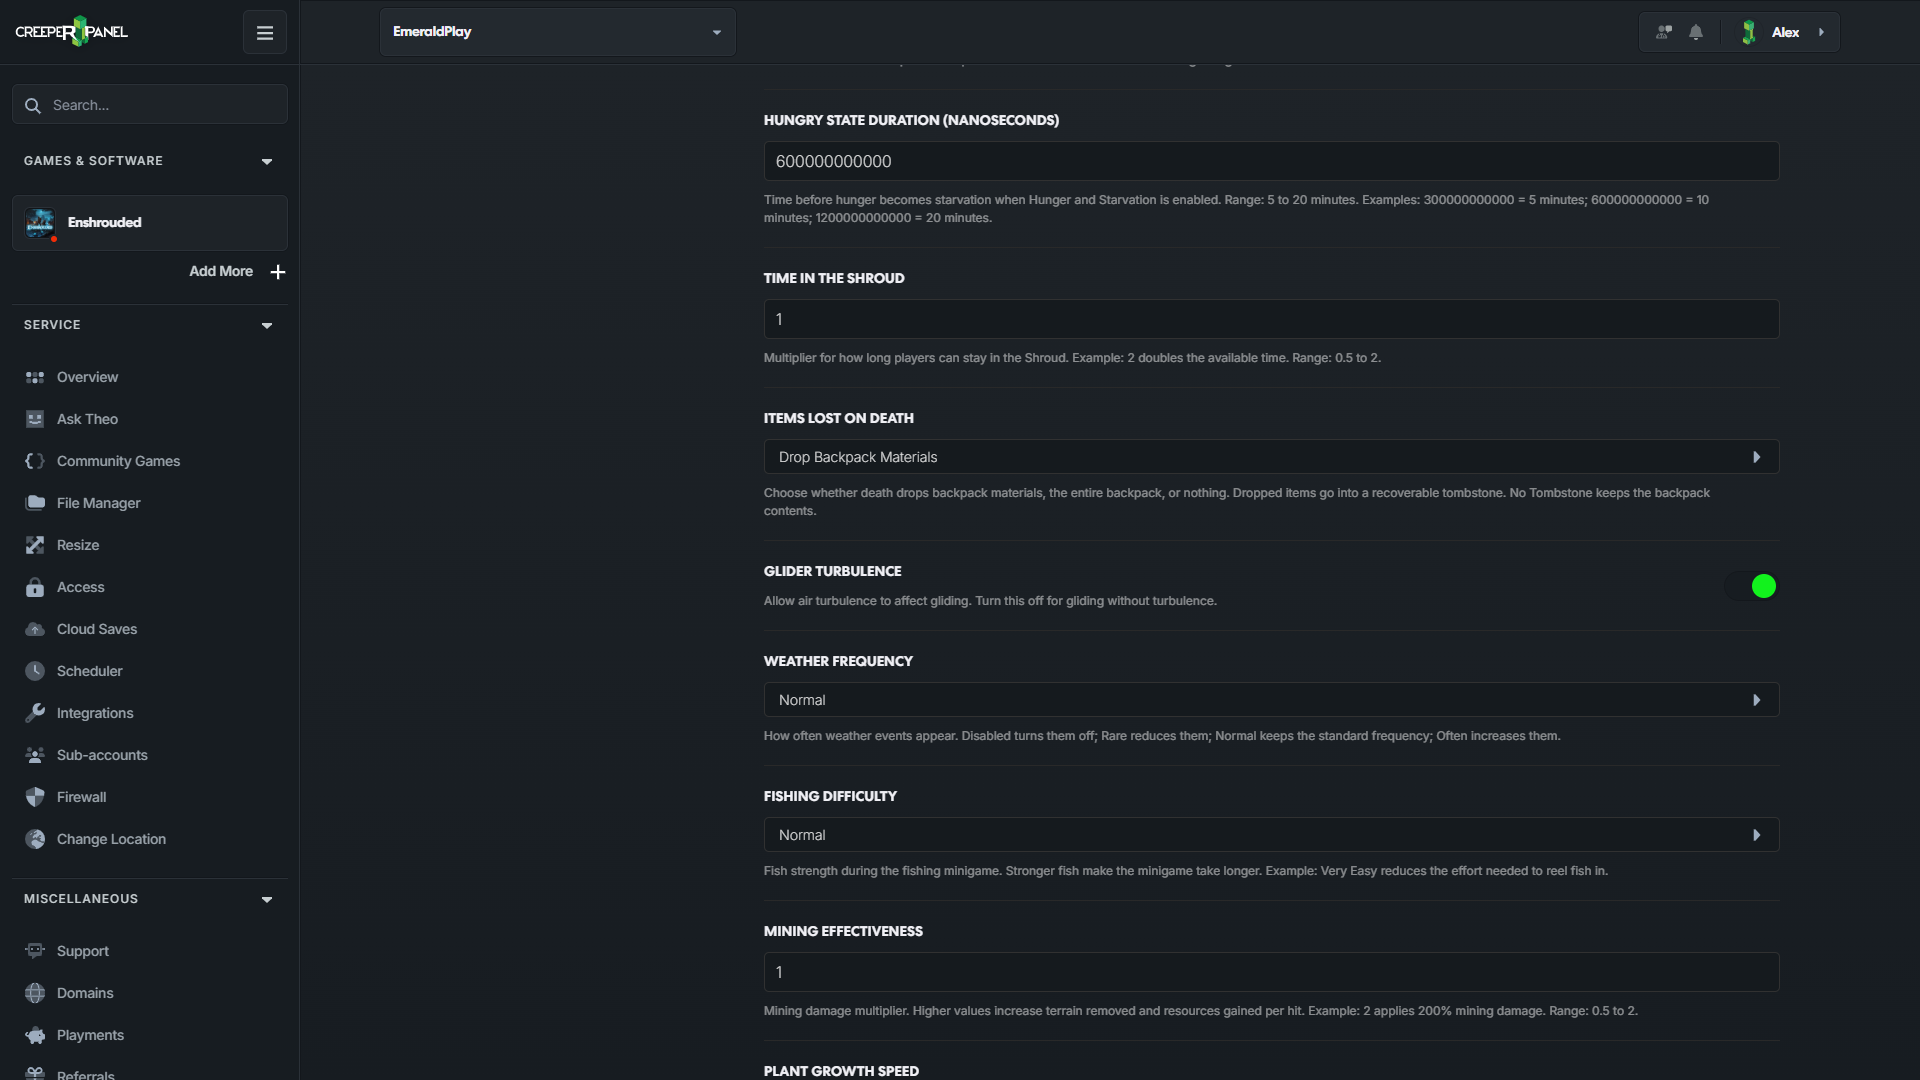
The official Enshrouded wiki's World Settings guide explains the difficulty presets. On a dedicated server, make these changes through your server's settings or configuration file.
Change server settings in CreeperPanel
Stop your Enshrouded server before changing its configuration. Save your changes, then start it again to apply them.
The screenshots use the example server EmeraldPlay and account Alex.
- Open Enshrouded → Settings in CreeperPanel.
- Use General for the server name, player limit, browser tags and chat availability.
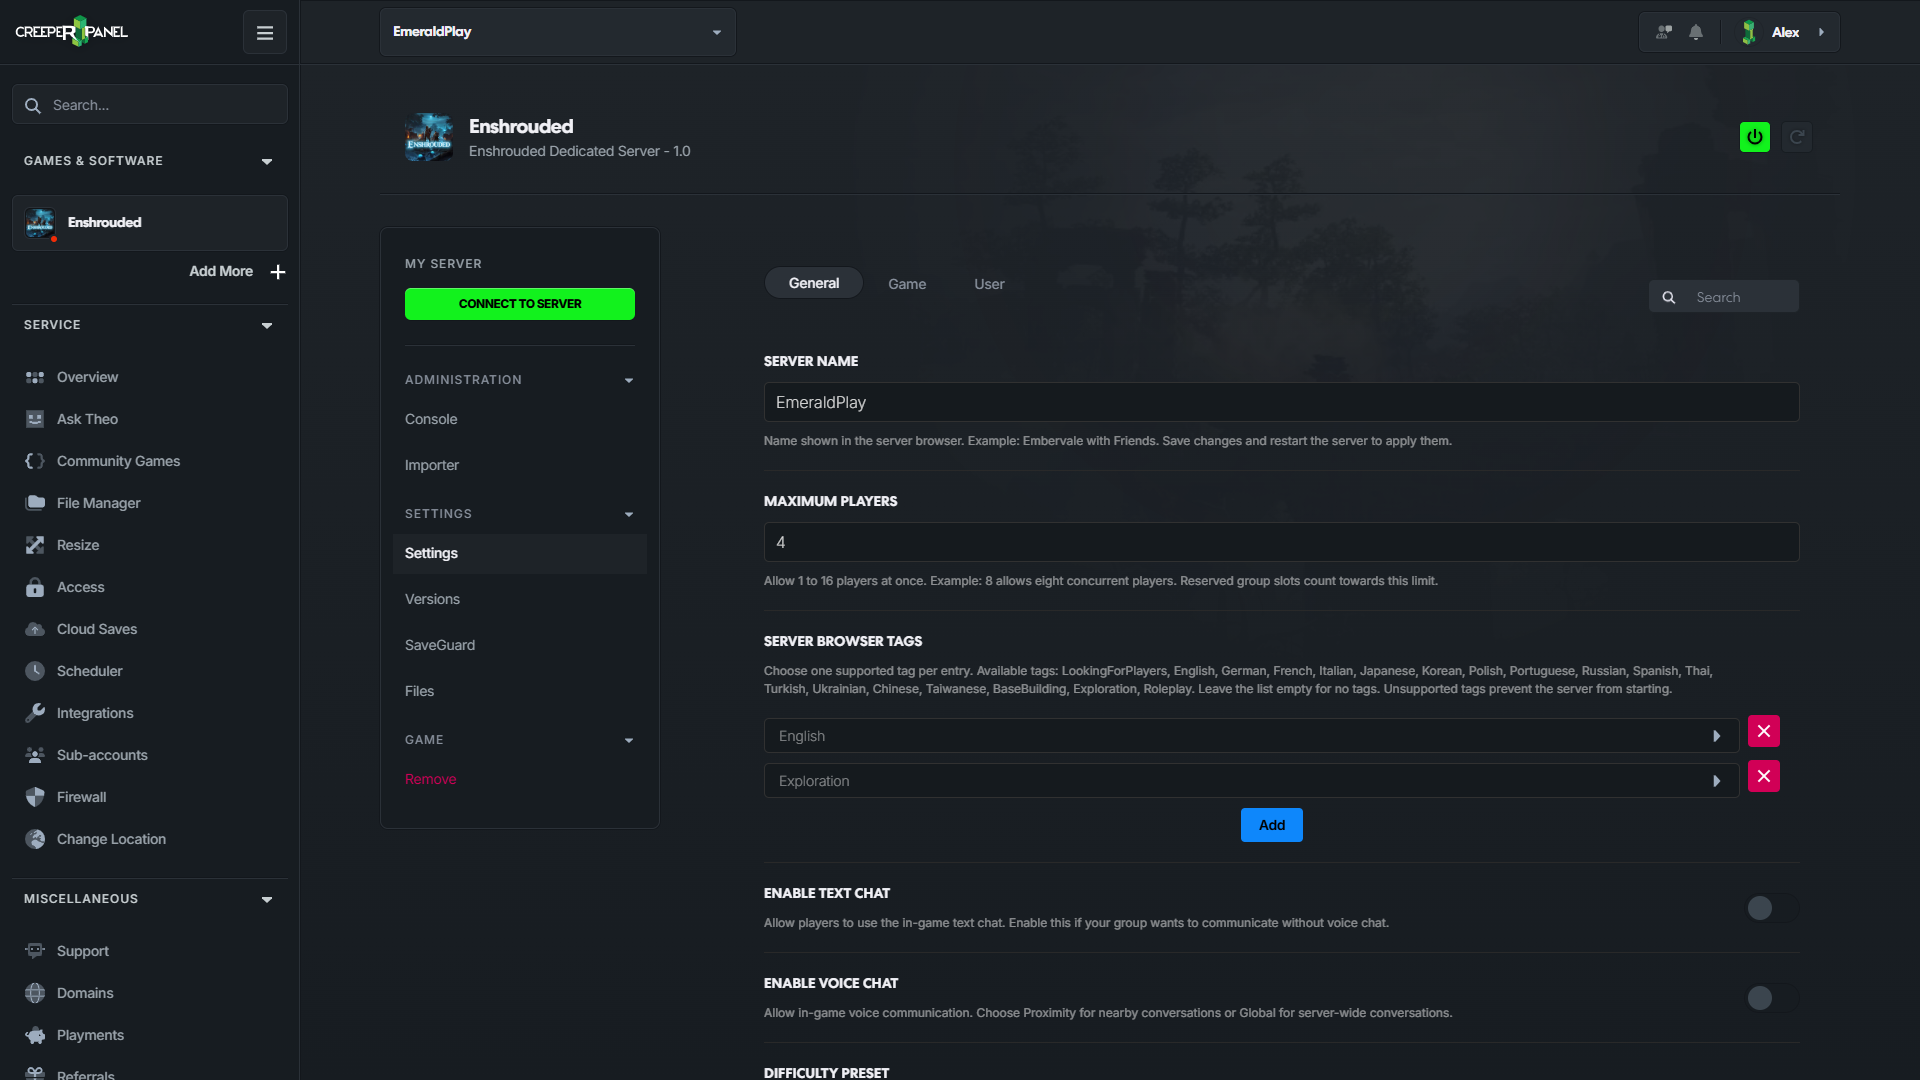
- For individual world rules, scroll down in General and set Difficulty Preset to Custom. Default, Relaxed, Hard and Survival use their own preset values.
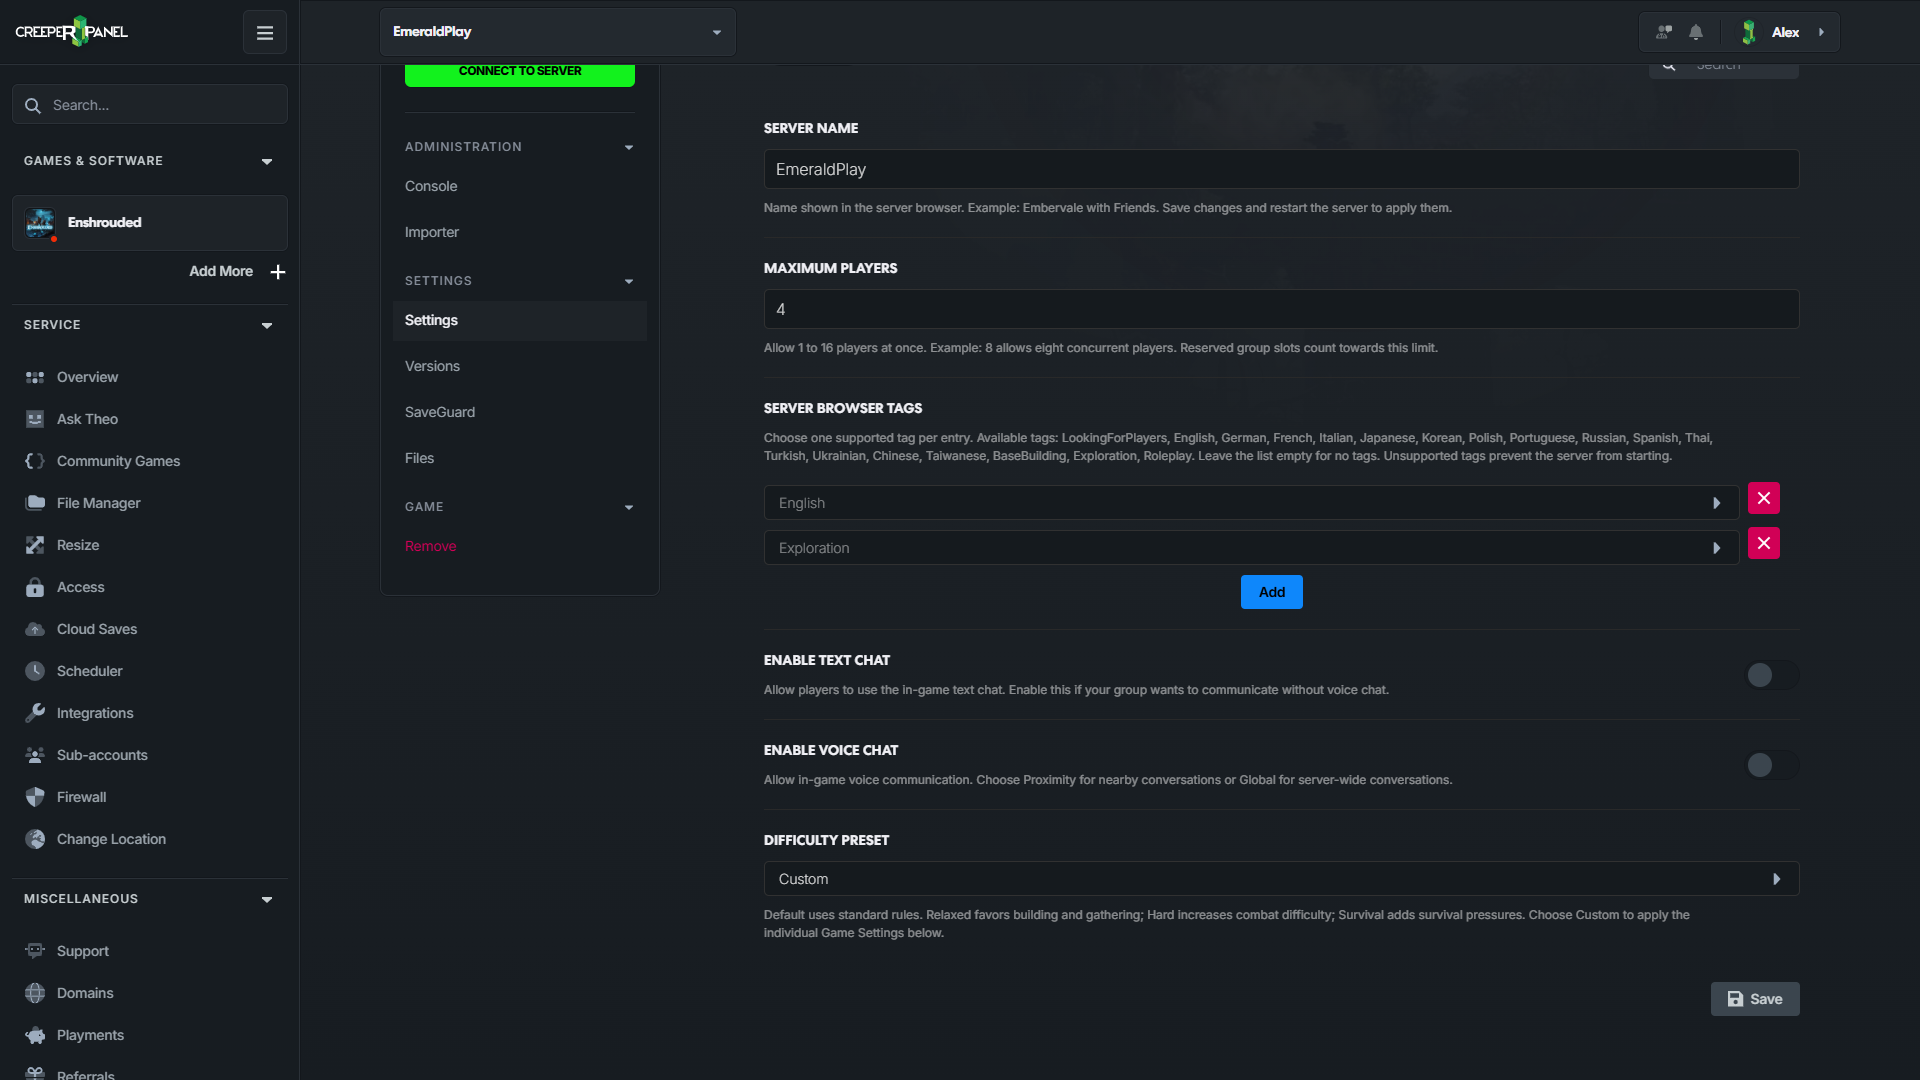
- Open Game to adjust player and enemy modifiers and other world rules. Each setting's description explains its range and units.
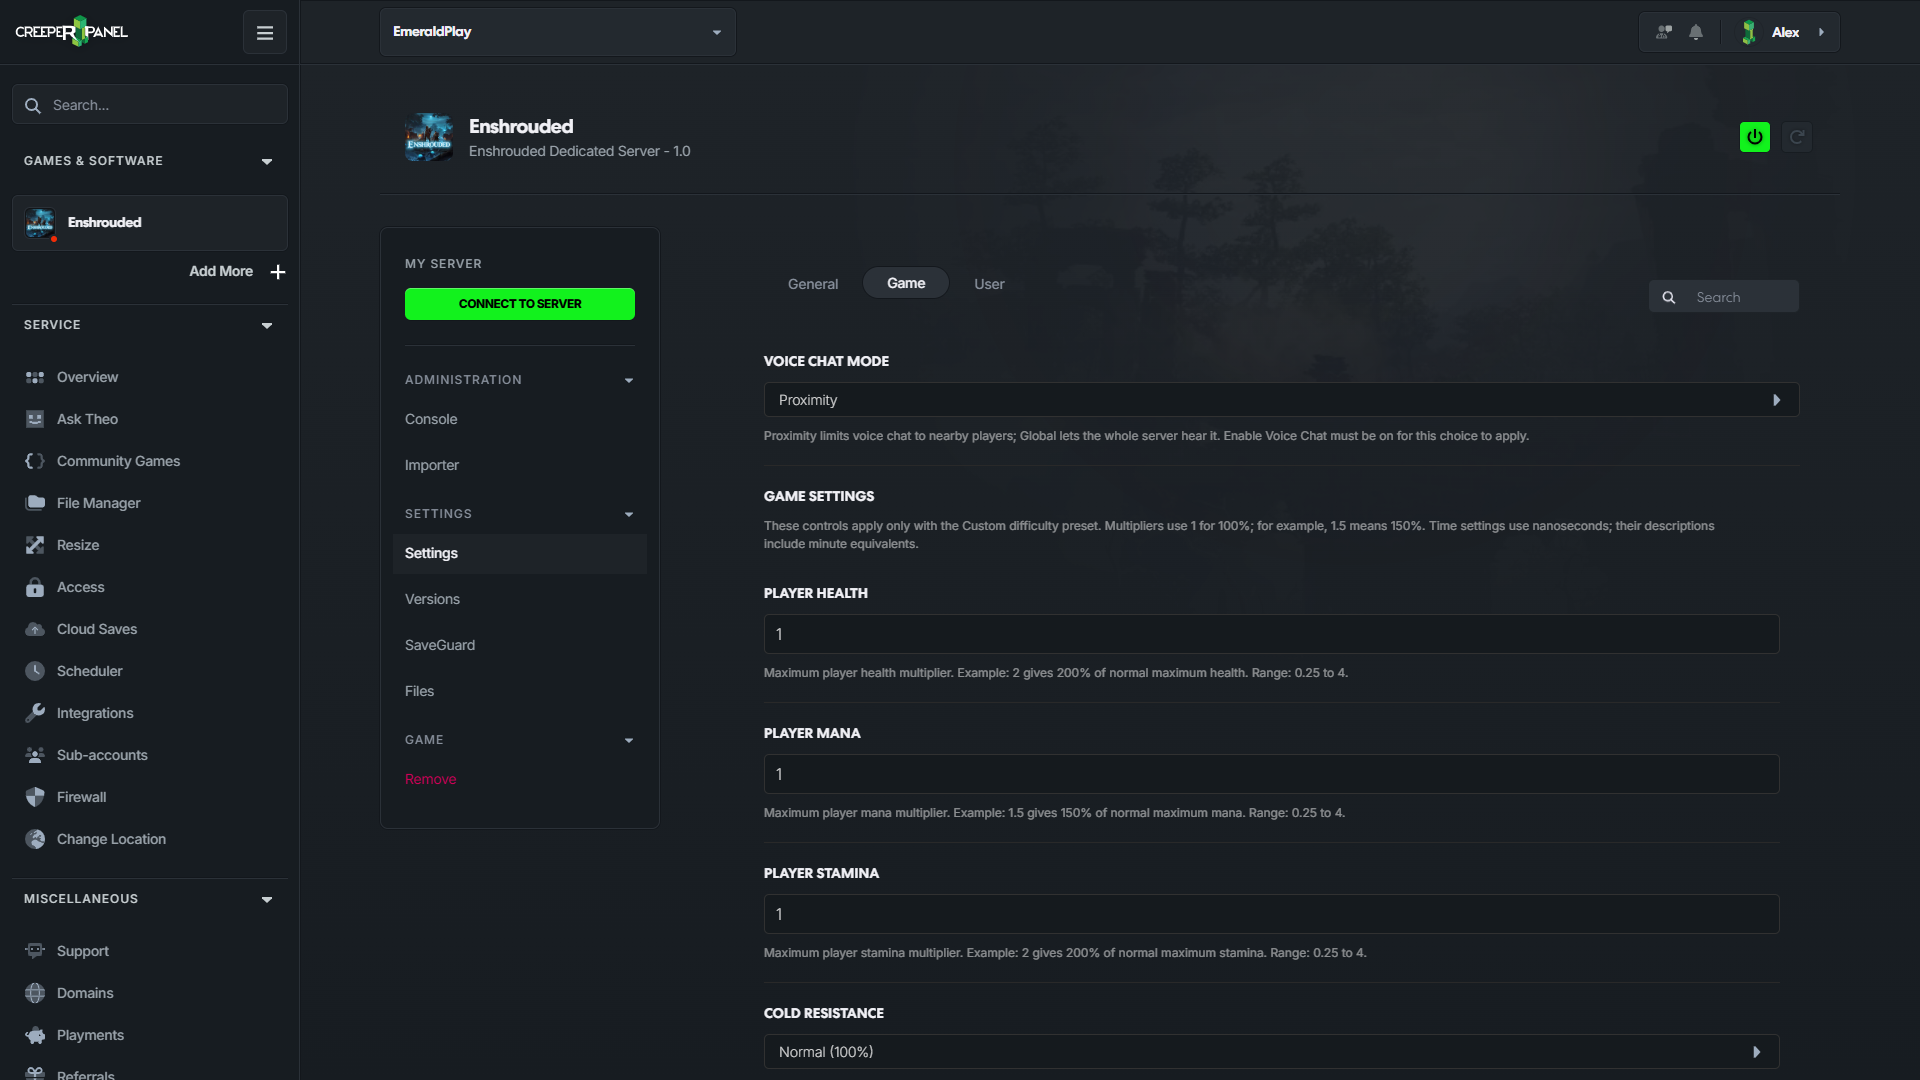
- Open User to manage group passwords and permissions.
- Click Save at the bottom of the settings, then start your server. Join your world to check the changes.
Passwords and player permissions
On a dedicated server, the password used to join selects a permission group. Give each group a different password and share it with the players who need that level of access.
These are the default groups shown in CreeperPanel. Existing servers keep their own group configuration.
| Group | Kick or ban | Use base containers | Edit bases | Manage Flame Altars | Edit the world outside bases |
|---|---|---|---|---|---|
| Admin | Yes | Yes | Yes | Yes | Yes |
| Friend | No | Yes | Yes | No | Yes |
| Guest | No | No | No | No | Yes |
| Visitor | No | No | No | No | No |
Group names are labels; their permission switches decide what players can do. Check these under Settings → User, especially when opening an existing world to new players.
- Edit Base allows building and terrain changes inside player bases.
- Edit World allows terrain and object changes outside bases. Disable both editing permissions to prevent changes in either area.
- Extend Base allows placing, upgrading and removing Flame Altars.
- Access Containers allows use of containers and workstations in player bases. It does not control open-world loot.
- Reserved Slots keeps spaces available for a group within your player limit. For example, reserving one slot on an eight-player server leaves seven available to other groups.
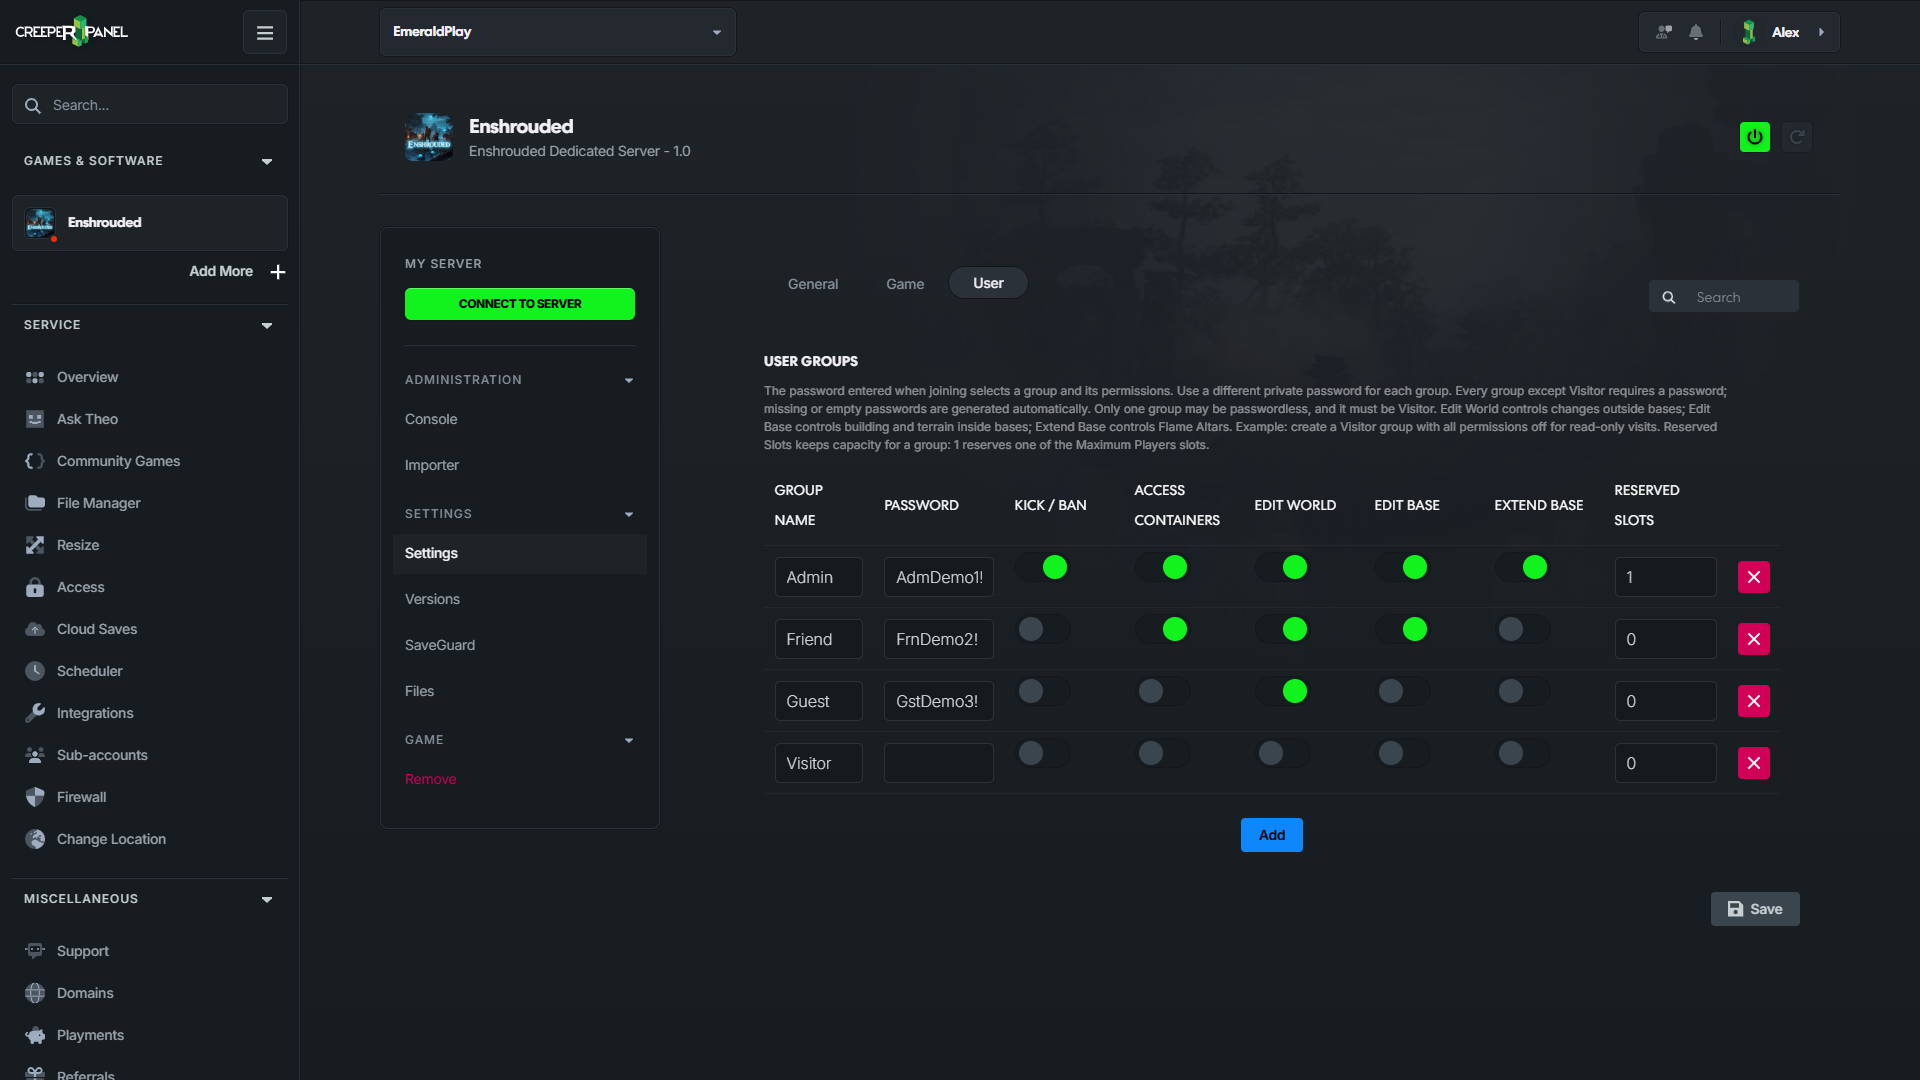
The passwords shown are examples. Choose your own distinct passwords.
Let visitors join without a password
- Stop the server and open Settings → User.
- Set a different password for Admin, Friend, Guest and any other privileged groups. In CreeperPanel, use 8–128 characters without line breaks.
- Add a Visitor group if needed. Turn off all its permissions, including Edit World, and leave Reserved Slots at 0.
- Leave Visitor's password blank and check that every other group has a password. Enshrouded allows only one passwordless group.
- Save, start the server and join without a password to check the visitor permissions.
For a private server, give Visitor a password too, or remove that group. Guest can edit the world outside bases, so use Visitor for public access without editing permissions. If you previously used a passwordless Guest group, give it a password before adding Visitor.
Edit the configuration file in CreeperPanel
You can also edit enshrouded_server.json directly. Stop the server and download a copy of the file first so you can restore it if needed.
- Open Enshrouded → Files and locate
enshrouded_server.json.
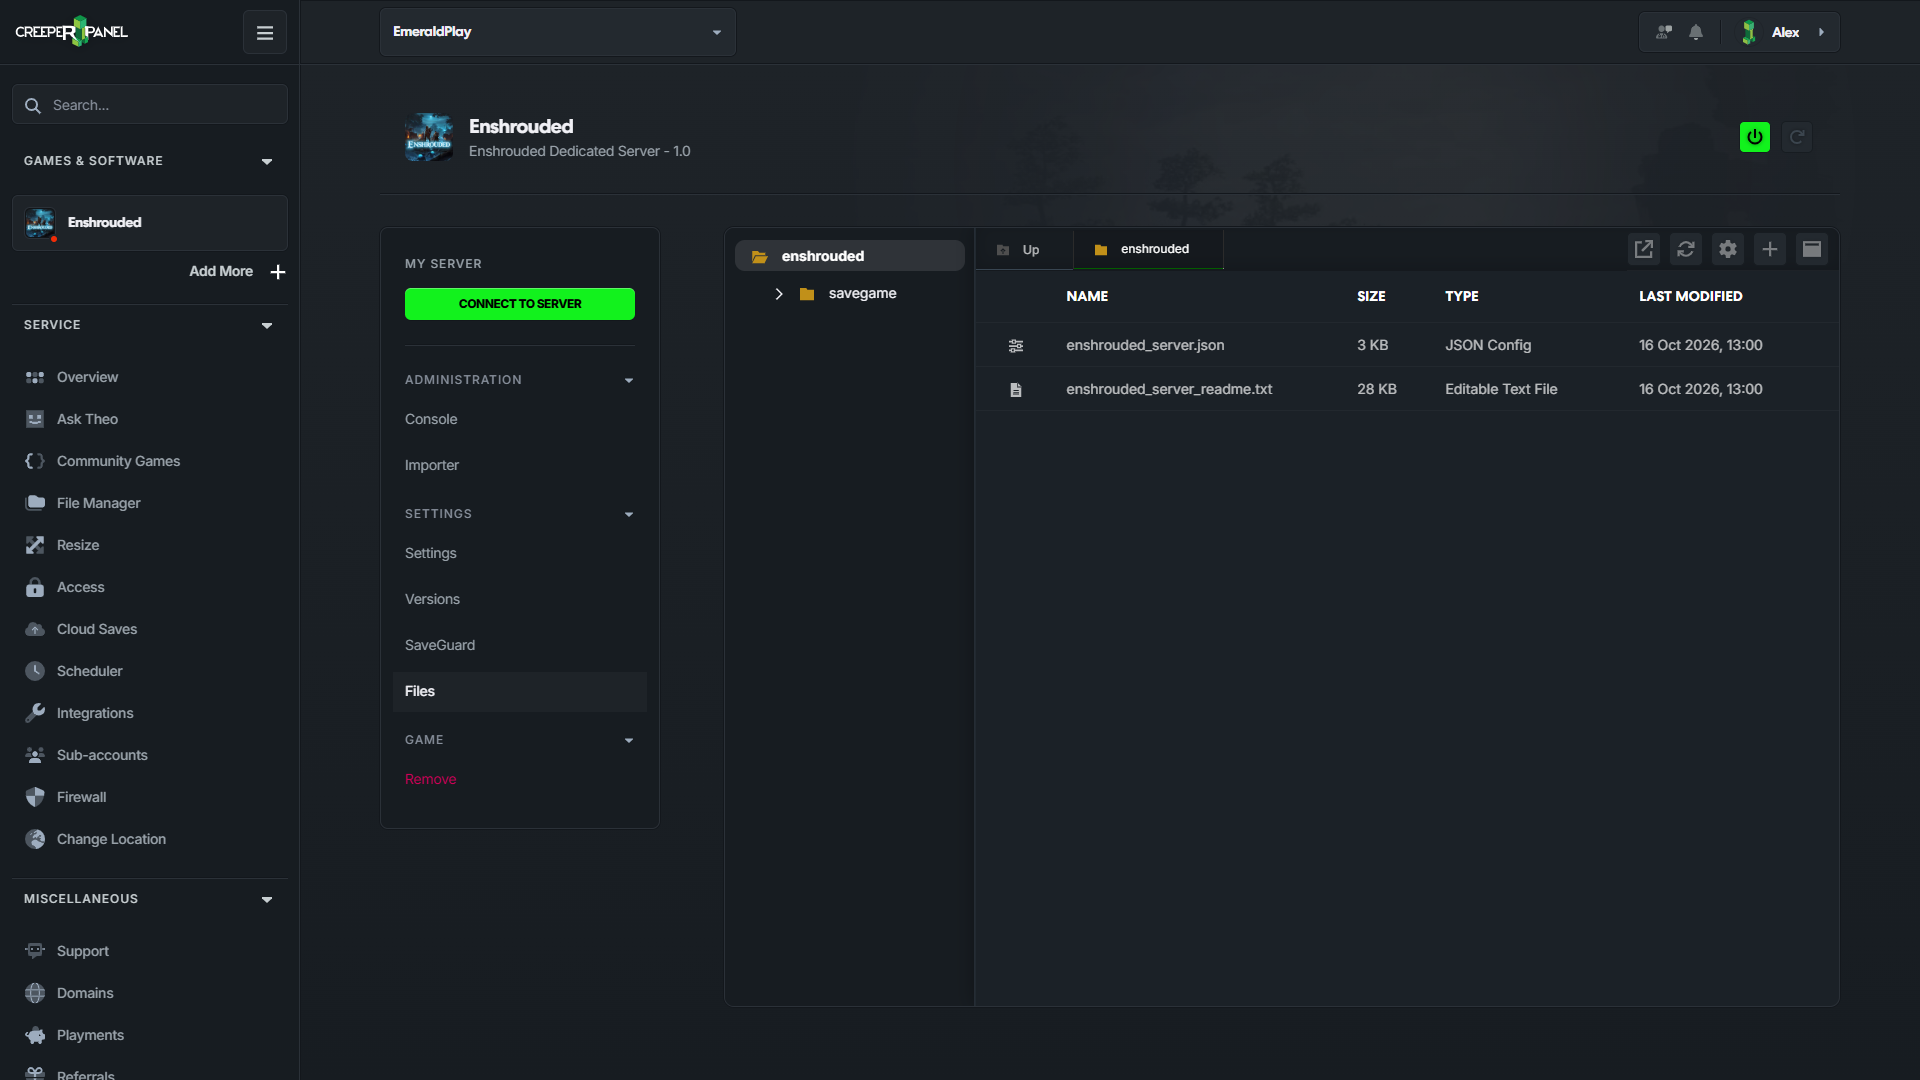
- Double-click the file to open an editor tab.
- Make your changes using the JSON settings below.
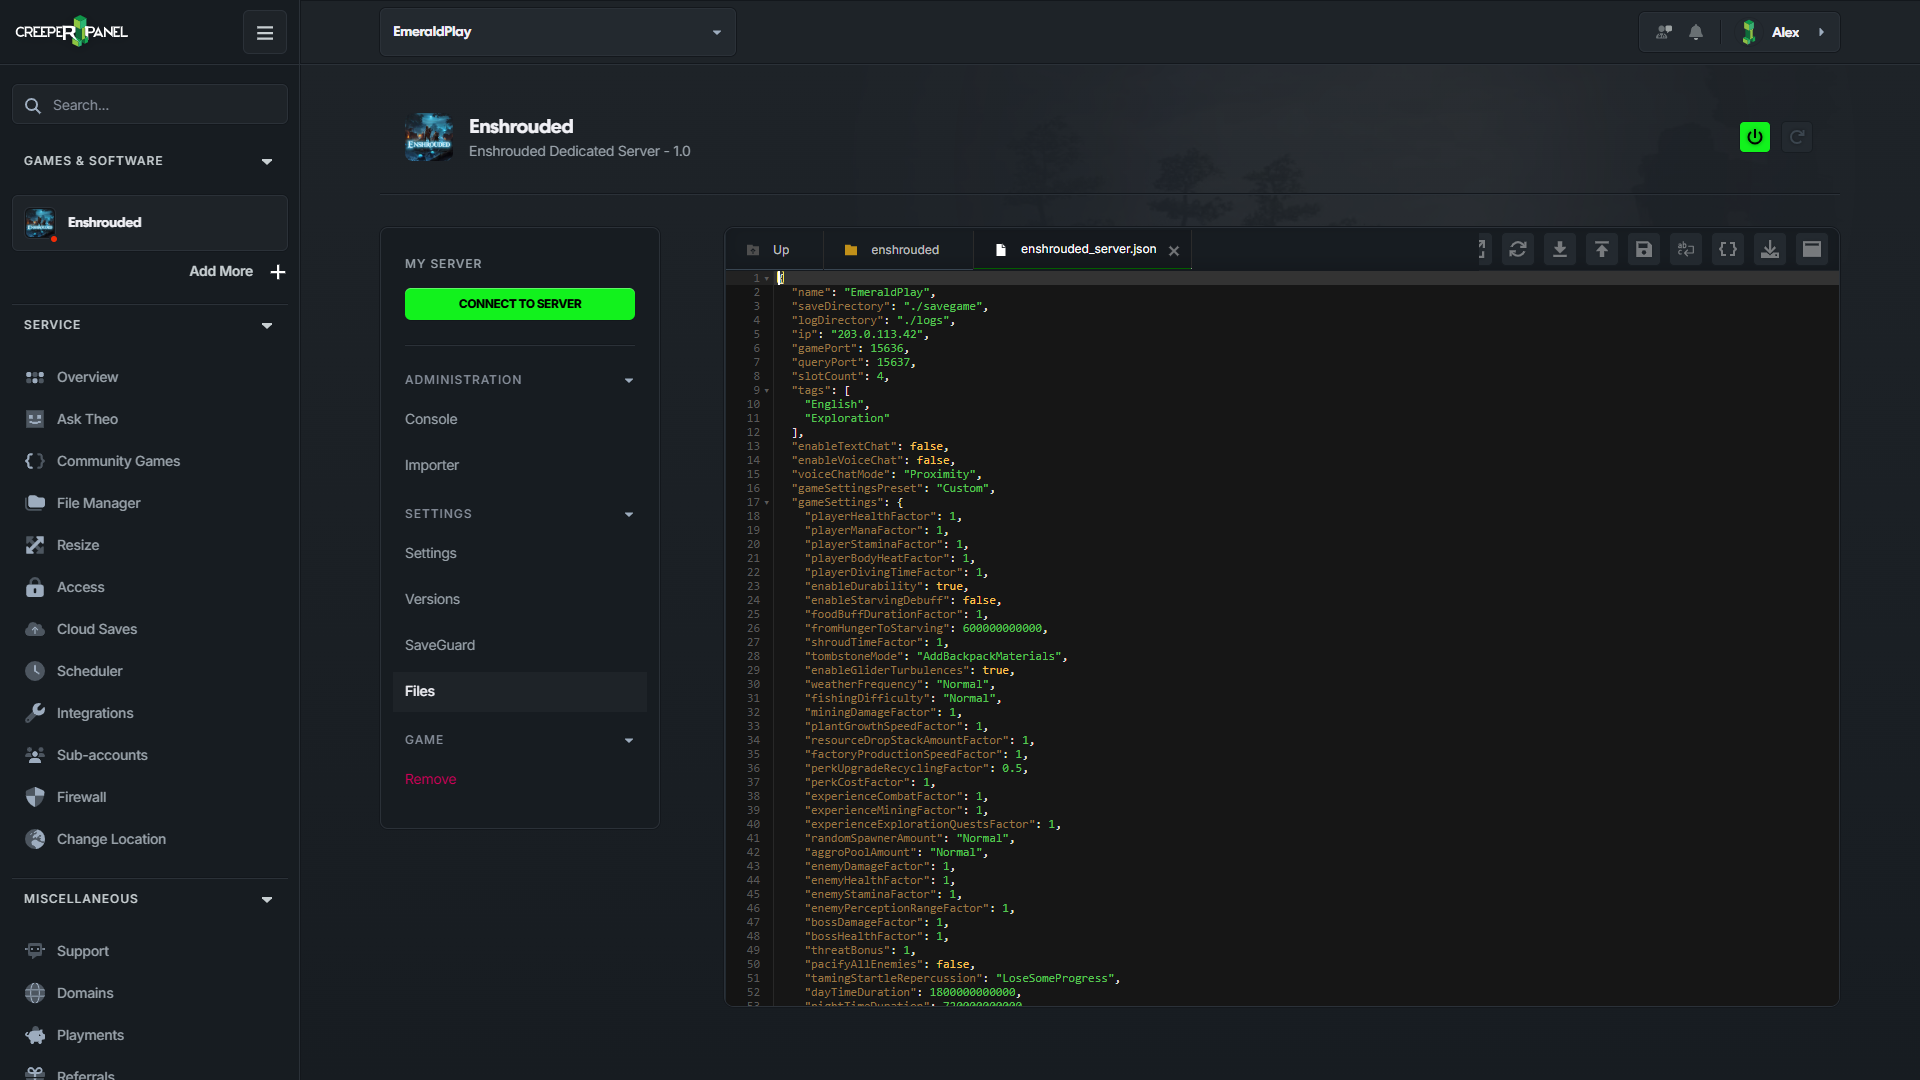
- Click the Save icon in the editor toolbar, then start the server. Reload Settings before making further panel edits so you're working with the updated values.
Other hosts and self-hosted Enshrouded servers
Hosting elsewhere or running Enshrouded on your own machine? The same settings are available in enshrouded_server.json. You'll need access to the dedicated server's files; joining as an in-game Admin does not grant file access.
- Stop the dedicated server through your host's panel or server manager.
- Locate
enshrouded_server.json. A standard installation keeps it alongsideenshrouded_server.exe; your host may provide a configuration editor or a separate mounted folder. - Download or copy the existing file as a backup.
- Edit it using your host's file editor or a plain-text editor on the server. If you download it to edit locally, upload the changed file to the same location afterwards.
- Save, start the server and join to check your changes. If it fails to start, check the server log for a configuration error and restore your backup if needed.
Difficulty and world settings in JSON
Set gameSettingsPreset to "Custom" at the top level of the file. Put individual world rules inside the existing gameSettings object.
This example shows a few settings: double player health, standard enemy damage and glider turbulence switched off. Merge these values into your existing file; this is not a complete server configuration. Keep the other settings already present.
{
  "gameSettingsPreset": "Custom",
  "gameSettings": {
    "playerHealthFactor": 2,
    "enemyDamageFactor": 1,
    "enableGliderTurbulences": false,
    "flameLevelFogRemoval": 11
  }
}
Multipliers use 1 for the normal value and 2 for double. flameLevelFogRemoval sets the Flame level needed to place Flame Altars in the Shroud; it accepts a whole number from 0 to 20 and defaults to 11.
Keep numbers and booleans unquoted, and text values in double quotes. Avoid duplicate keys and trailing commas. Keen's Server Gameplay Settings guide explains the options; the enshrouded_server_readme.txt supplied with your installation covers its game version.
Passwords and permissions in JSON
Find the top-level userGroups array. Each group has a name, a password and its own permissions. Edit the existing groups using these keys:
| Permission | JSON key |
|---|---|
| Kick or ban players | canKickBan |
| Use containers in bases | canAccessInventories |
| Edit the world outside bases | canEditWorld |
| Edit player bases | canEditBase |
| Place, upgrade or remove Flame Altars | canExtendBase |
| Reserve spaces within the player limit | reservedSlots |
Set permission values to true or false, and reserved slots to a whole number. Use the group permissions above to plan your setup. Set a distinct password inside each protected group; the old top-level password field is not the place to configure group access.
For a public Visitor group, leave its password empty, set all five permissions to false and reservedSlots to 0. Check every other group's password before starting the server. Changing a group's name does not change its permissions.
Personal controls, audio, display and gameplay preferences still belong in each player's game client, whichever host you use.