Adding mods to an Arma 3 server
Before adding mods to your Arma 3 server, first ensure the server is switched off, and that you have the mods you want to install on the server downloaded to your computer.
To begin installing mods on your Arma 3 server:
-
Navigate to your Arma 3 instance on the CreeperPanel.
-
Navigate to
Filesin the sub-menu. (If you want to keep your mods in a mod folder, follow the next steps. Otherwise, skip to step 7). -
While in the
arma3folder, select the+icon in the top right of the File Manager window. -
On the next screen, select
New Folder.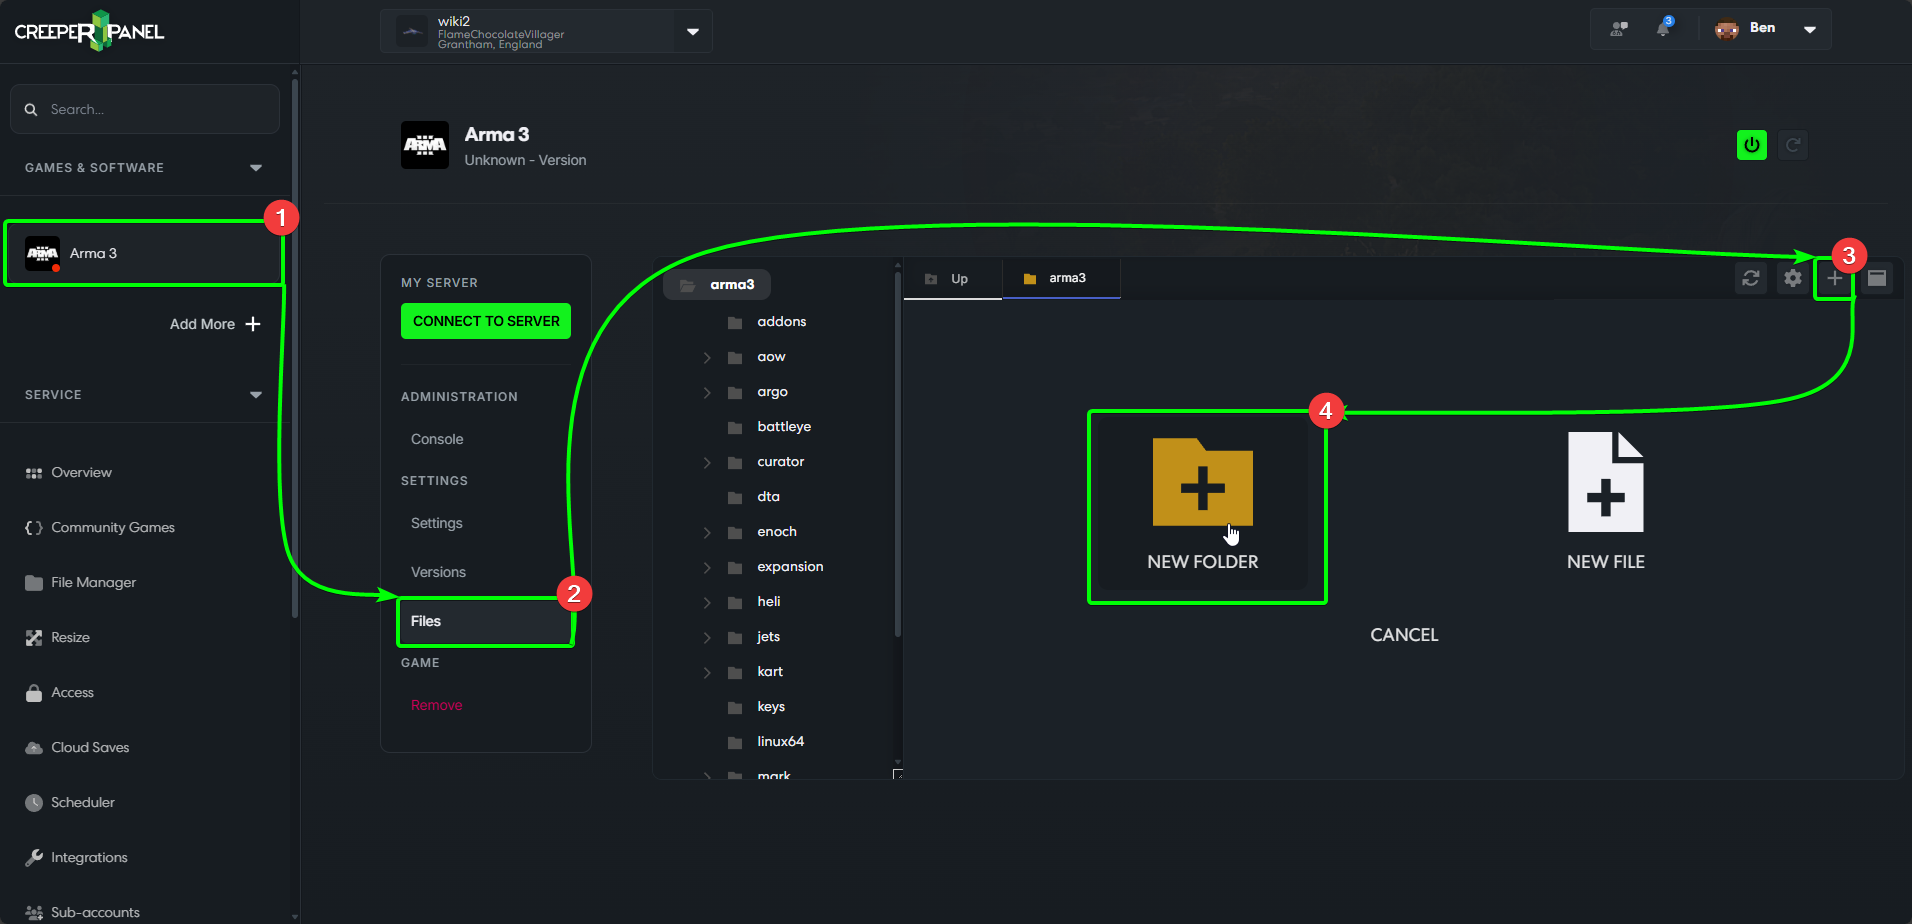
-
Name the new folder
mods. -
Select
Confirmto create the folder.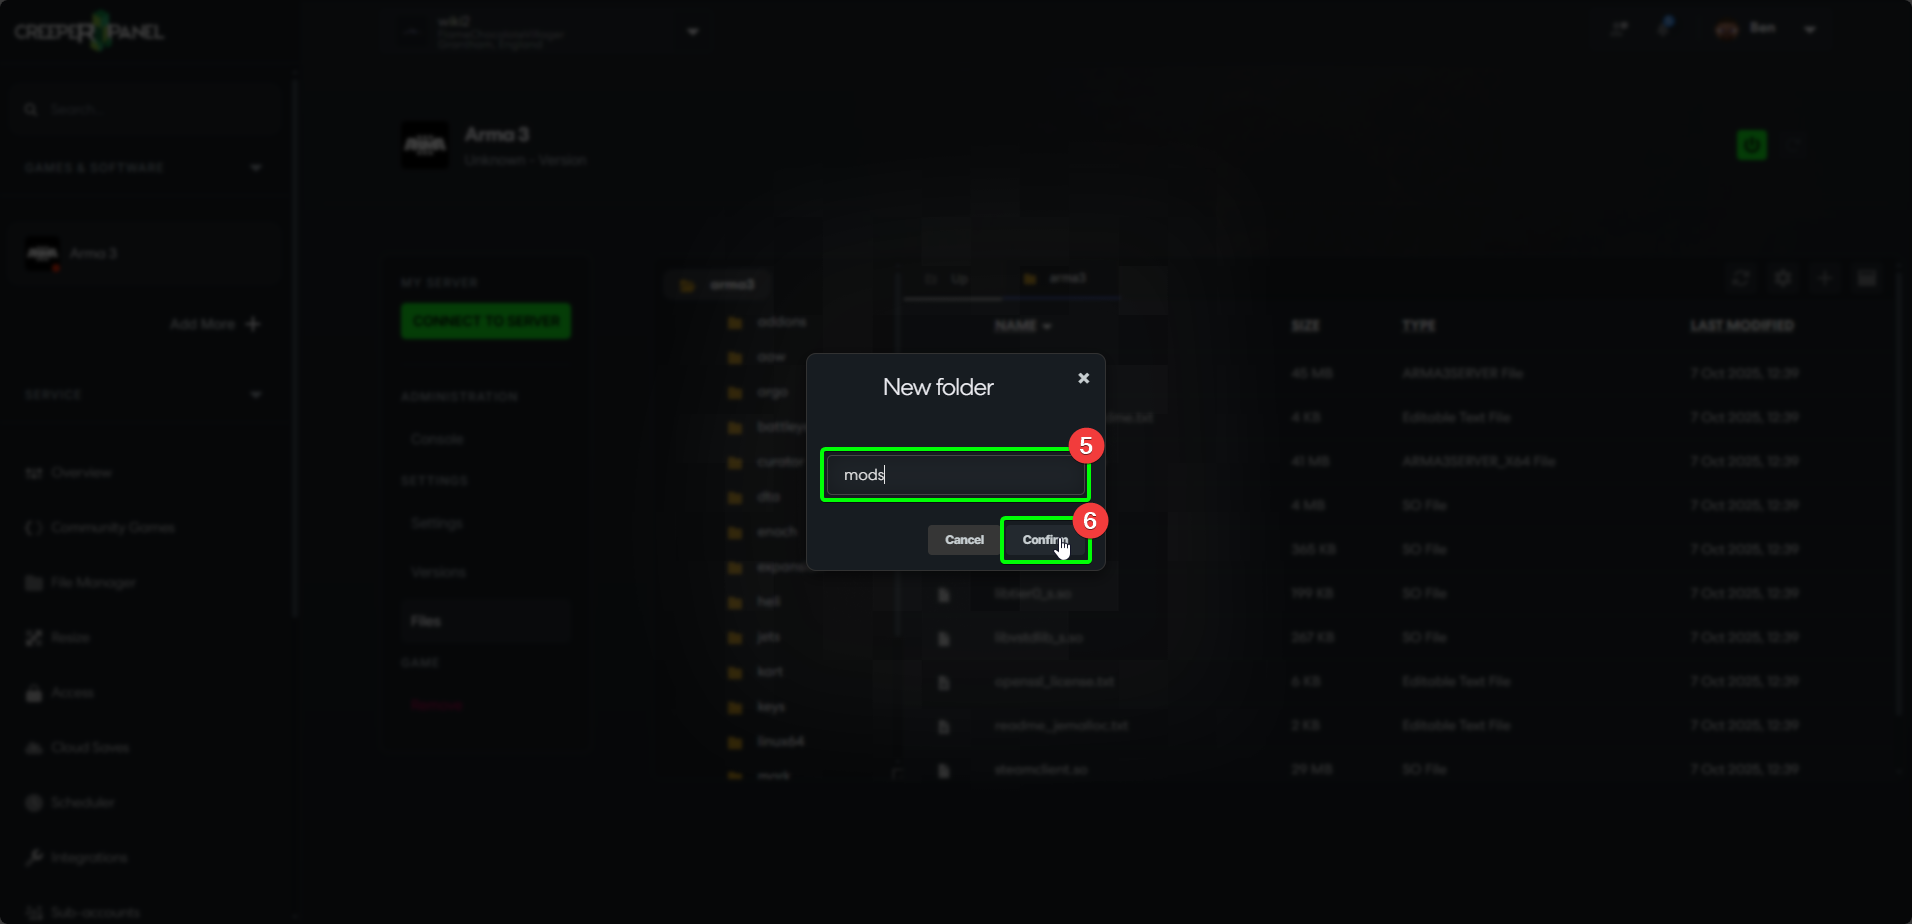
Before uploading the mods, make sure that the folders containing the mods are prefixed with @, For example: Mod 1's folder would be @Mod1, Mod 2's would be @Mod2 etc.
-
Select the mods you wish to upload from your computer.
-
Next, click and drag them into the mods folder location. If you haven't created a mods folder, they need to be added to the
arma3main folder.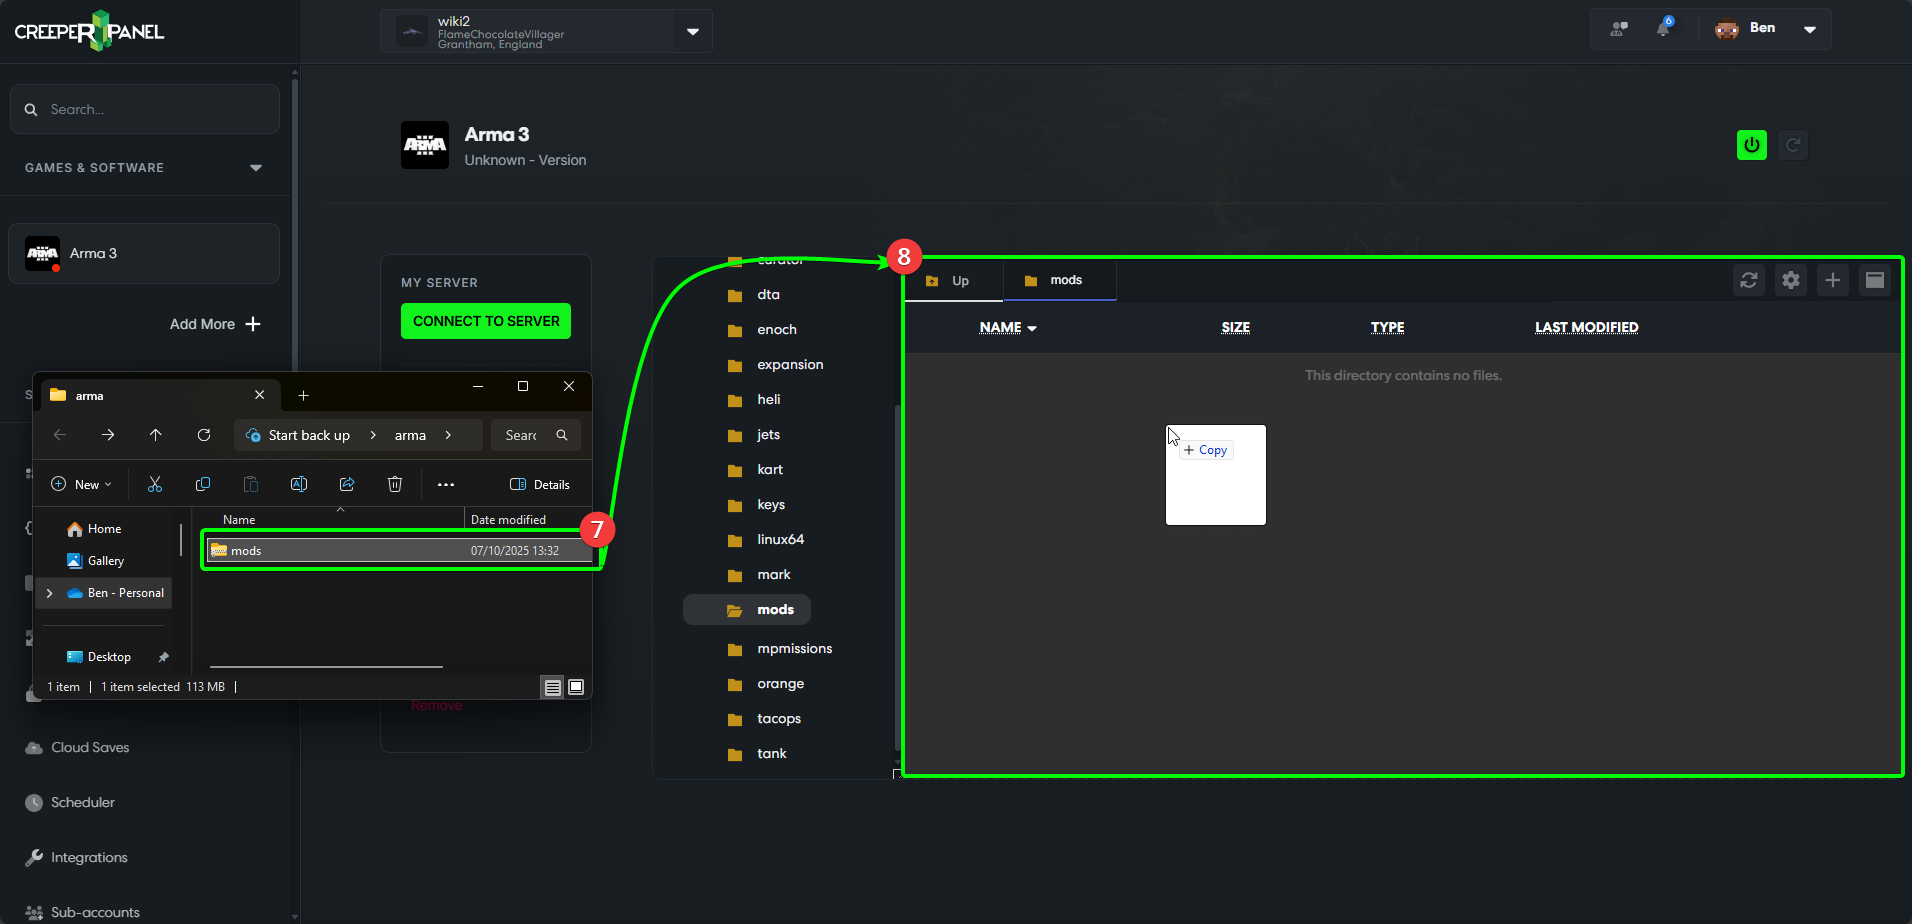
-
Now, right-click your uploaded file, then select
Extractto extract in your selected folder.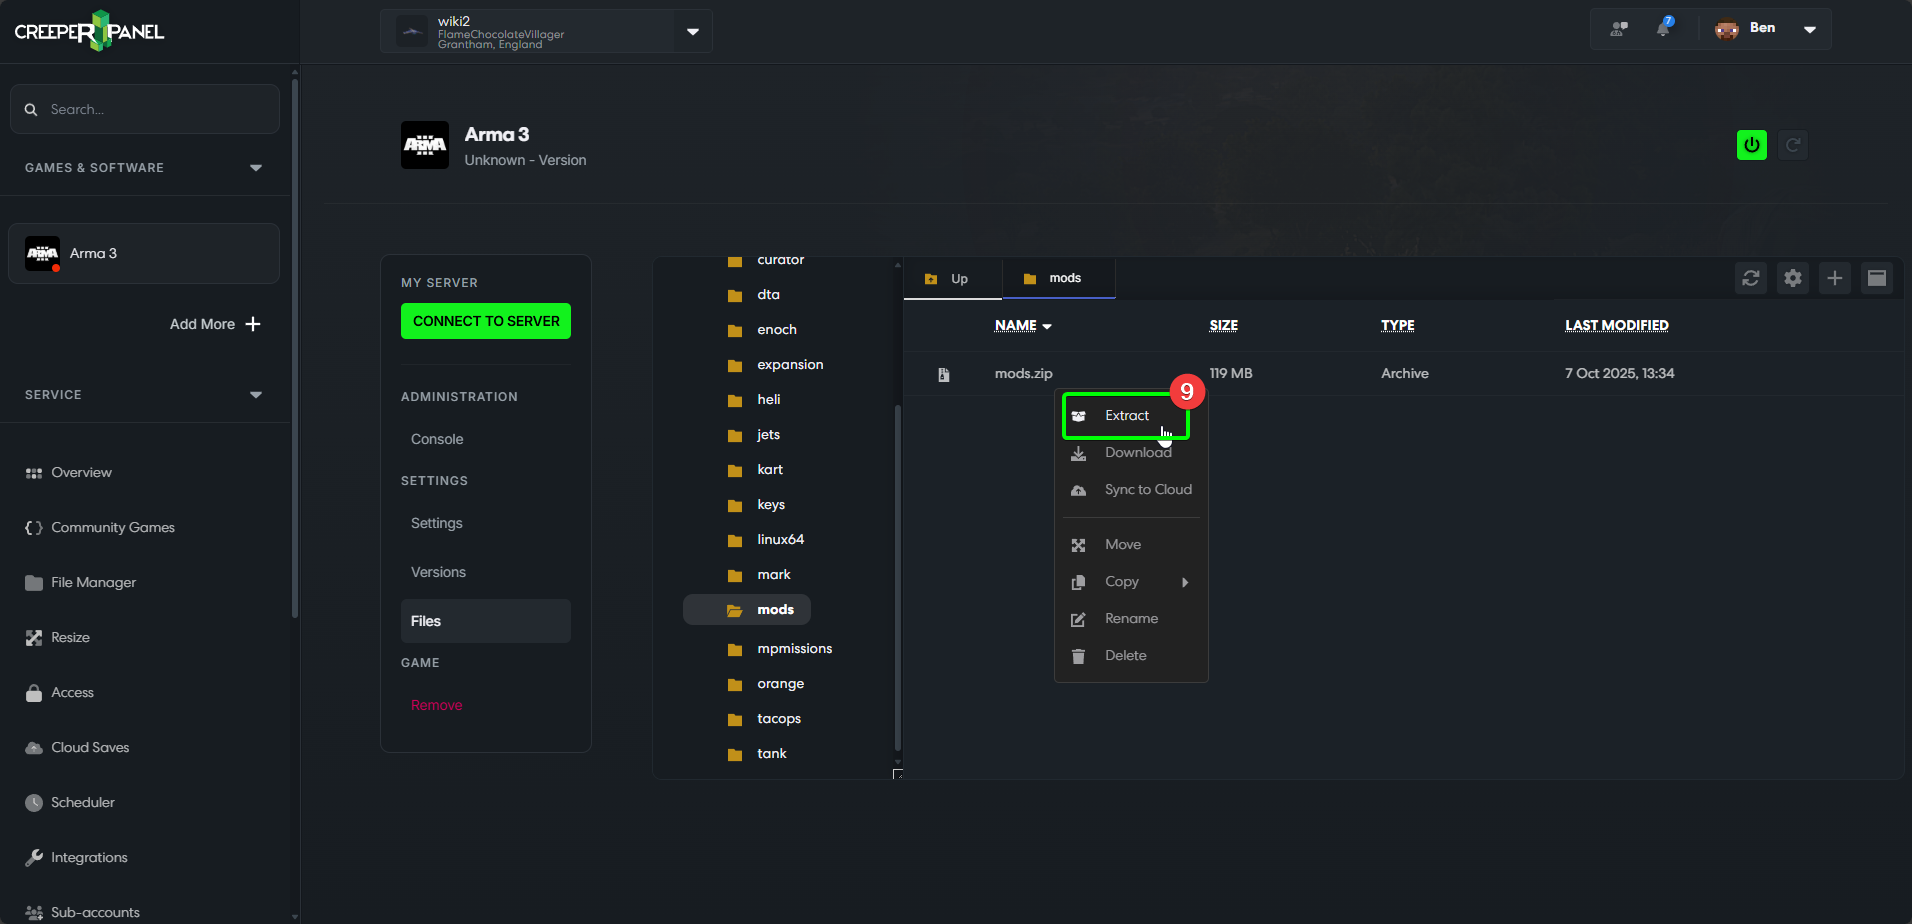
Now that your mods are extracted, we need to make sure that we instruct your server to run them on start-up. To do this, we need to create a config file. To begin:
-
Navigate back to the main directory,
arma3. -
While in the
arma3folder, select the+icon in the top right of the File Manager. -
On the next screen, select
New File.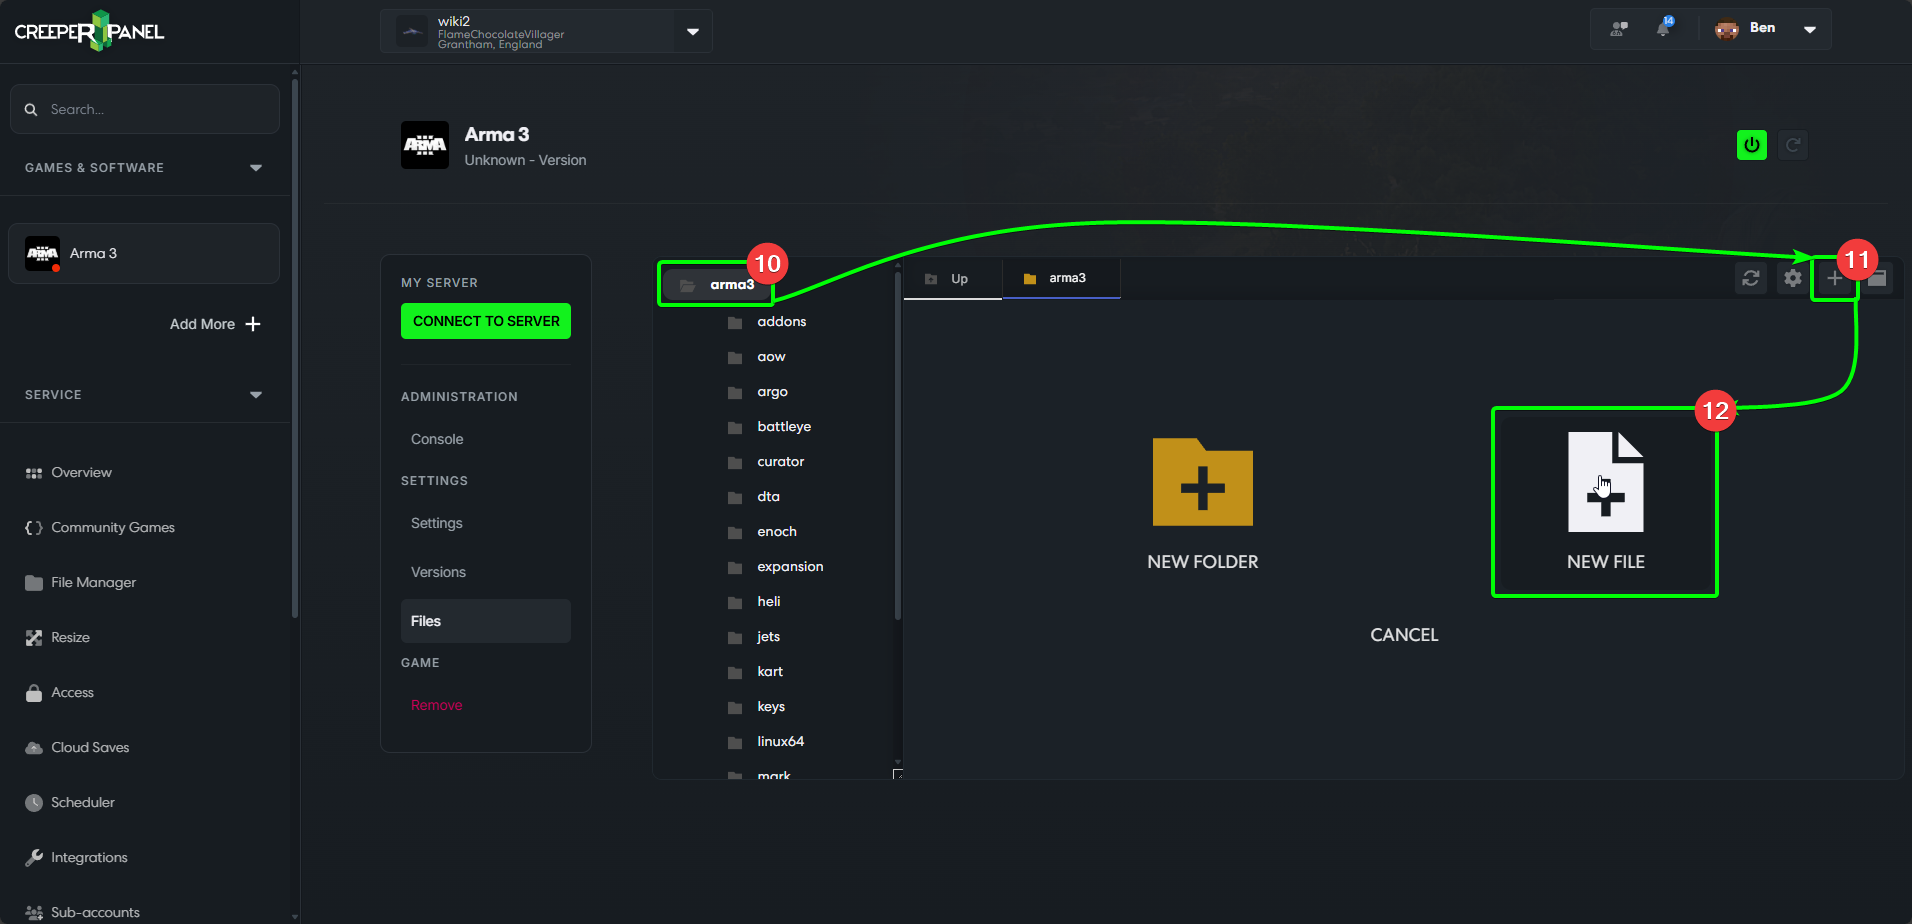
-
Name the new file you have created
arma3.config -
Select
Confirm. The Panel will automatically open the new file upon creation.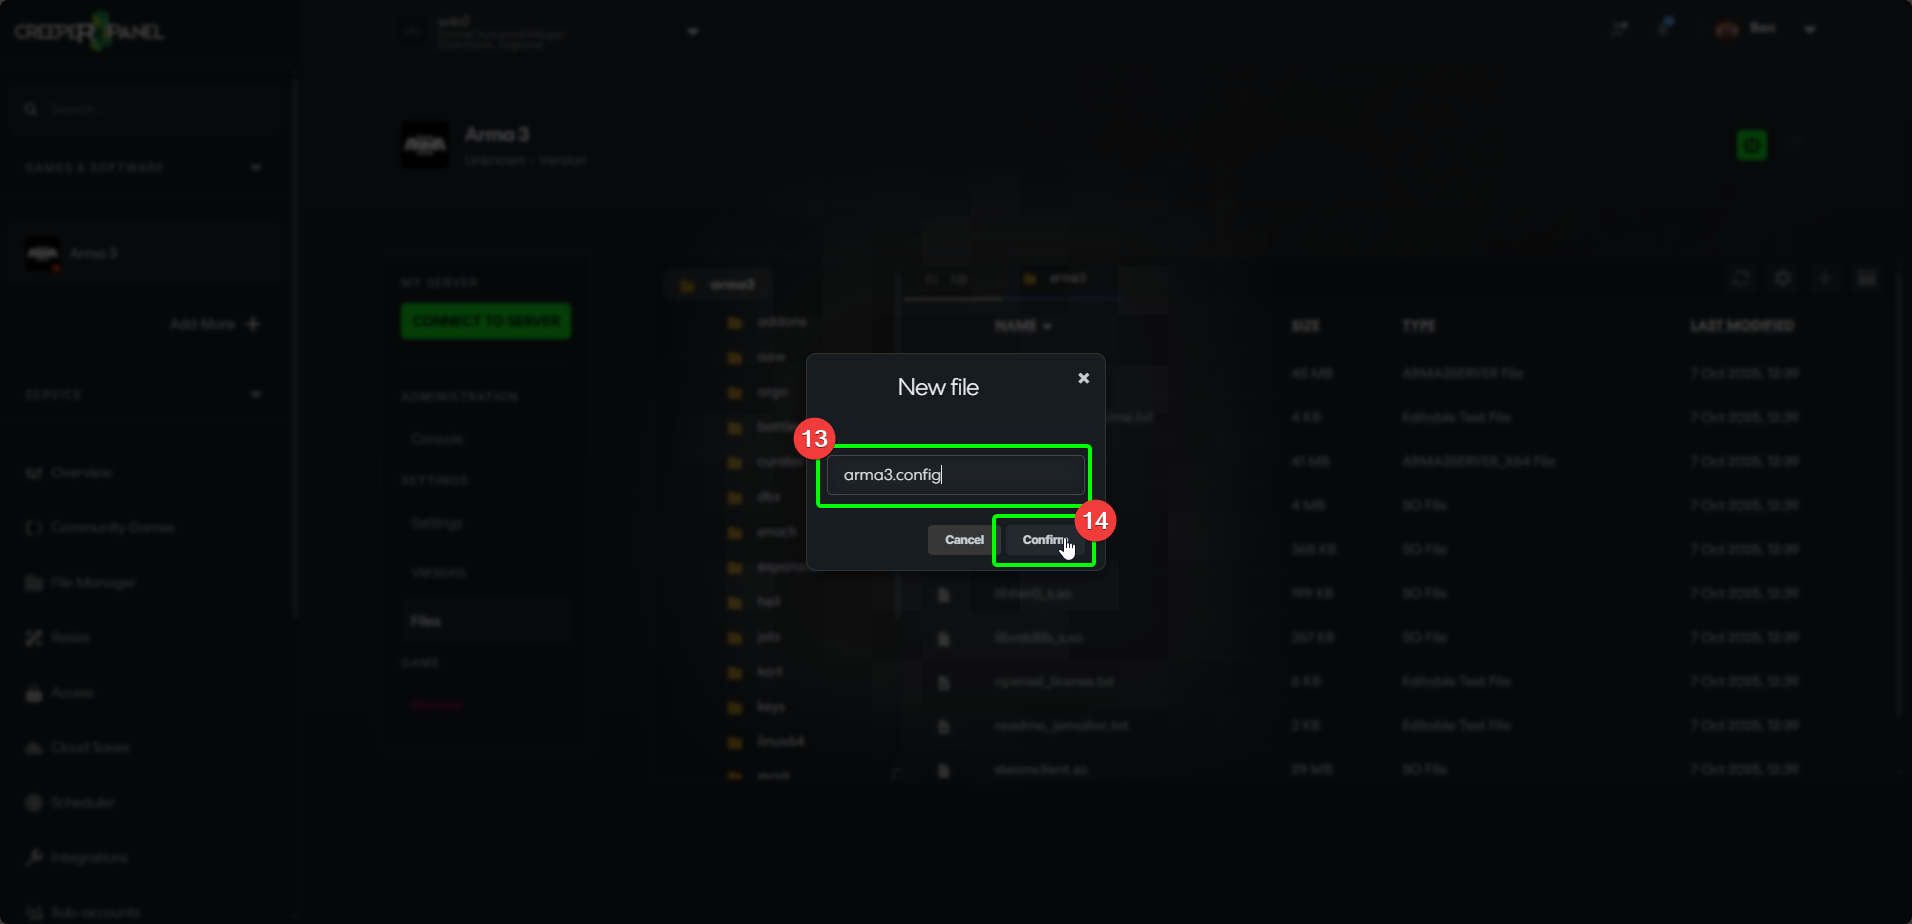
-
In the newly created file, you will need to enter some information. This will need to be presented in the same format as a JSON object. If you have not used a mods folder, it will need to look like this:
{"servermods": "@Mod1,@Mod2,@Mod3"}
If using a mods folder, it will need to be written like this instead:
{"servermods": "mods/@Mod1,mods/@Mod2,mods/@Mod3"}
- When you have finished adding your mods, select the
Saveicon in the top right of the File Manager window.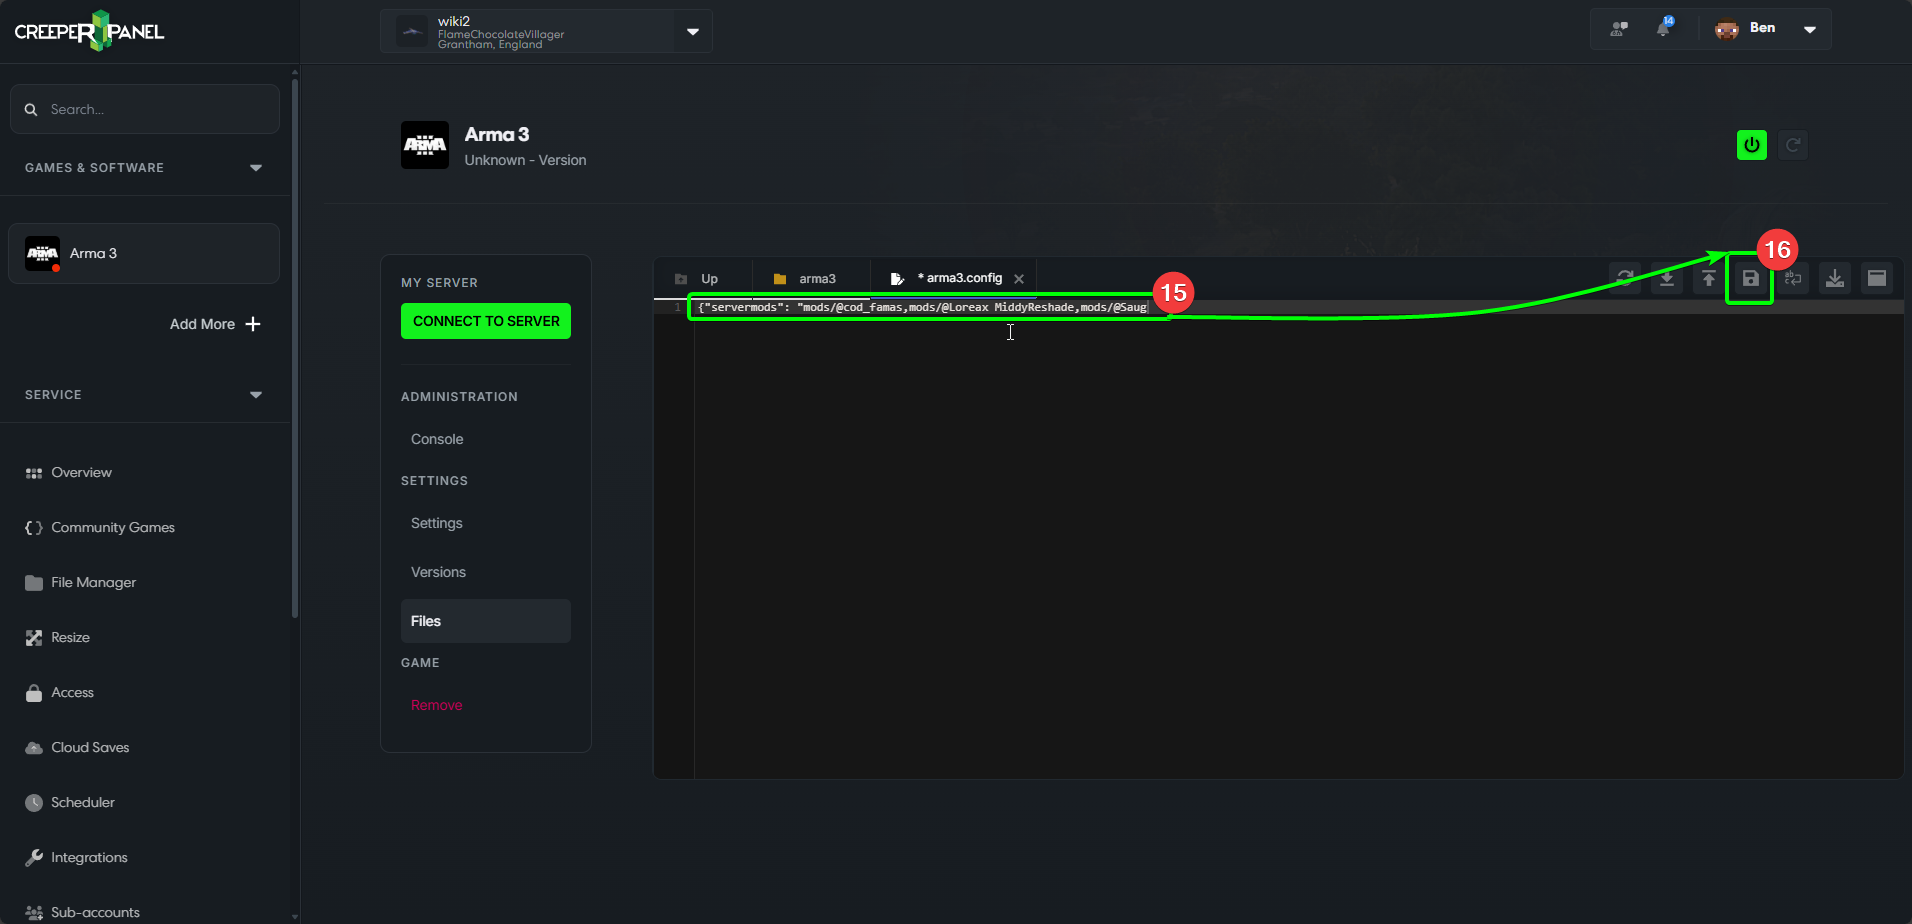
Now you've saved the config file, you should now be able to turn your server back on, and it should load the specified mods.